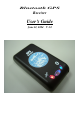
Bluetooth GPS Receiver User’s Guide June 12, 2004 V 1.
Bluetooth GPS Button & Signals LED2 Power Button LED1 Externa l Power Socket Bluetooth GPS Quick Tips After acquiring your GPS, proceed with the following steps: 1. Install battery. Fully charge battery for at least eight hours the first few uses. Low battery When LED 1 flashes green light, it signals low battery. Connect GPS to a power source for continuous operation and recharge simultaneously.
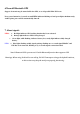
2.Turn on the GPS Press the power button for 2 seconds or until LED1 turns into red and green shifting light, and the LED 2 turns to blue flashing light. This is to activate Bluetooth pairing, it’s required only once at first use. 3. Activate Bluetooth function of your PDA / PC Prior to activating the Bluetooth function of your PDA / PC, make sure the device is equipped with Bluetooth function, and the driver software has been installed. 4.
Before going to next step, press Bluetooth GPS key for 4 seconds until LED 2 starting to flash, signaling the connecting is in progress. Click here 4.
BT_GPS **** BT_GPS Click here to select installation 4.4 Enter Pass Key "0000", Then Press “Enter” 4.
BT_GPS BT_GPS Click here Click here 4.5 4.6 At this point, Bluetooth GPS connection has been successfully established BT_GPS: SPP slave Established connection 4.7 When LED 2 flashes, it’s indicating Bluetooth GPS and the electronic map connection are in progress.
6.Turn off Bluetooth GPS Suggest electronic map be turned off before GPS, to avoid possible PDA /PC freeze. Press power button for 2 seconds or until LED1 indicator flashing red and green lights simultaneously. At that point, power will be automatically shut off. 7. About signals LED1: a. Red light indicates GPS tracking function has been activated. b. Orange light indicates GPS is being charged. c. Green light, while flashing, indicates battery low, steady light indicates fully charged battery. LED2: a.