
Installation guide

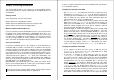


File and Printer Sharing
If you have selected to also install the file and printer sharing, you need
to fill in an userid and password. Please make certain you do not loose
this information! The option at the top is important; the name given to
system is as it shows up in your network browser. This name must be
unique!
Also assure the domain name is the same as your other eComStation
and/or Windows (Workgroup name) machines if you want to share
files and printers between all machines.
Continuing the installation
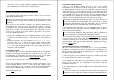
After the network settings have been confirmed, the installer will start to
copy files. This will take some time and your computer will reboot a few
times. If you are migrating your previous configuration you will be
prompted with a screen which contains two windows to check your old
config.sys and the new one. Review the proposed changes and
modify them where you think this might be required. When finsihed
press Save
then Quit. In most cases all statements from the old
config.sys are imported correctly into the new one. After this your
autoexec.bat will be treated the same way. When you have
confirmed the settings, the installer will continue to copy data to your
hard drive.
If your are upgrading a present installation and your computer remains
hanging and you have selected the Daniela IDE driver, please check
Appendix E: Troubleshooting, installation section.
Final Steps
After the installation has completed, you will see that on the next boot
WiseMachine prompts you to register your copy of eComStation. Please
do so after which your system will reboot again.
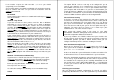
Java 1.3
You will then be asked if you would like to install Java 1.3 or not. It is
advisable to install Java 1.3 to a JFS volume for perfomance reasons. If
you do not yet have setup a JFS volume you might want to skip the
installation at this stage and use the eCSGuide at a later moment to
install Java 1.3.
Installation Finished
You have now upgraded your system to eComStation code base of
version 1.00 You will find your old desktop in a folder called Previous
Desktop. You can drag and drop applications from there to your new
desktop.
Chapter 2: Installation 13
Convert to eComStation Look and Feel
To get access to all of the bonuspak applications of eComStation, like
Lotus Smartsuite, the new look and feel of the desktop, Desktop
On-Call and much more, you need to start convert.exe from CD 3. If
you have not received your eCS GA from Mensys, please download
convert.exe from http://www.ecomstation.com
Insert CD#3 and open your drivesfolder, select your CD ROM drive
(probably letter S:) and double click on convert.exe (located in the
root of the CD). Follow the instructions on the screen. The conversion
utility requires an additional 60 MB of space on your bootdrive. When
the process has finished you will be asked to reboot.
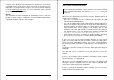
WiseMachine
When the machine has rebooted, you are once again asked to register
eComStation through Wisemachine. This is an glitch in the upgrade
process. After you succesfully registered, wait for the desktop update to
be finished.
If your registrationkey was not accepted, WiseMachine will simply exit
without notice, this may be confusing. You can try to register again by
restarting WiseMachine.
Your system will now be at the same level as when installed
directly from CD#1
Ready!
This concludes the basic installation of eComStation. Please read on in
Chapter 3 about using the eCSGuides to install additional applications,
supported hardware and other hints and tips!
14 eComStation Manual