ADCP-80-524 • Issue 1 • November 2001 PowerWorx® Type 70 Series Power Distribution Panel User Manual 17068-A Content Page INTRODUCTION . . . . . . . . . . . . . . . . . . . . . . . . . . . . . . . . . . . . . . . . . . . . . . . . . . . . . . . . . . . . . . . . . . . . . . . . . . . . . 3 Revision History. . . . . . . . . . . . . . . . . . . . . . . . . . . . . . . . . . . . . . . . . . . . . . . . . . . . . . . . . . . . . . . . . . . . . . . . 3 Trademark Information . . . . . . . . . . . . . . . .
ADCP-80-524 • Issue 1 • November 2001 1.10 Fuse Alarm Indicator . . . . . . . . . . . . . . . . . . . . . . . . . . . . . . . . . . . . . . . . . . . . . . . . . . . . . . . . . . . . . . 13 1.11 Alarm Contact Operation . . . . . . . . . . . . . . . . . . . . . . . . . . . . . . . . . . . . . . . . . . . . . . . . . . . . . . . . . . . 13 1.12 Alarm Contact Connection . . . . . . . . . . . . . . . . . . . . . . . . . . . . . . . . . . . . . . . . . . . . . . . . . . . . . . . . . . 13 1.
ADCP-80-524 • Issue 1 • November 2001 INTRODUCTION ® This manual describes the PowerWorx Type 70 Series Power Distribution Panels and provides installation, test, operation, and maintenance procedures. Two types of PowerWorx Type 70 power distribution fuse panels are available: the traditional power distribution fuse panel and the uninterrupted power distribution fuse panel. Within this manual, the fuse panels are referred to as the “traditional fuse panel” and “uninterrupted fuse panel.
ADCP-80-524 • Issue 1 • November 2001 General Safety Precautions - Caution: The fuse panel uses electrical voltage and amperage levels which, per GR-1089, may be considered an electrical hazard. Care should be exercised to assure that only qualified personnel are allowed to install, operate, maintain, or otherwise come in contact with this equipment when the panel is energized. Only insulated tools should be used on energized elements of the panel.
ADCP-80-524 • Issue 1 • November 2001 Standard Equipment Type 70 series fuse panels have two power buses (feeds). The capacity of each bus is eight fuse positions with up to 10 Amps per fuse position (within the maximum bus capacity). Each bus has Power-On and Alarm indicators on the front of the chassis and input, output, ground, and alarm contact connections on the rear of the chassis. The current capacity of each bus of the traditional power fuse panel is 65 Amps maximum (130 Amps per panel).
ADCP-80-524 • Issue 1 • November 2001 UL/CSA/CE LABEL BUS A FUSE FAILURE INDICATOR (RED LED) BUS A TYPE 70 FUSE HOLDER (8 PER BUS) VENTS BUS A POWER-ON INDICATOR (GREEN LED) BUS B FUSE FAILURE INDICATOR (RED LED) BUS B TYPE 70 FUSE HOLDER (8 PER BUS) BUS B INPUT CONNECTORS (SET SCREW BARREL TYPE SHOWN) PROTECTIVE COVER IN PLACE OVER OUTPUT POWER, GROUND, AND ALARM CONTACT CONNECTIONS BUS B POWER-ON INDICATOR (GREEN LED) UNIVERSAL MOUNTING BRACKETS (2) (INSTALLED FOR 19-IN. (48.
ADCP-80-524 • Issue 1 • November 2001 HEAT SINK (PATENT PENDING) VENTS BUS A FUSE FAILURE INDICATOR (RED LED) BUS A FUSE VALUE DESIGNATION BUS B STRIP FUSE FAILURE BUS A TYPE 70 BUS A INDICATOR FUSE HOLDER POWER-ON (RED LED) (8 PER BUS) INDICATOR (GREEN LED) BUS B FUSE VALUE DESIGNATION STRIP BUS B TYPE 70 BUS B FUSE HOLDER POWER-ON (8 PER BUS) INDICATOR (GREEN LED) PROTECTIVE COVER IN PLACE OVER INPUT POWER, OUTPUT POWER, GROUND, AND ALARM CONTACT CONNECTIONS UNIVERSAL MOUNTING BRACKETS (2) (INSTALLE
ADCP-80-524 • Issue 1 • November 2001 1 GENERAL CHARACTERISTICS AND FEATURES This section describes the general characteristics and features of the traditional and uninterrupted fuse panels. The front of a typical traditional power fuse panel is shown in Figure 3. The front of a typical uninterrupted power fuse panel is shown in Figure 4. The rear side of the traditional power fuse panel (with protective cover removed to view the optional connections) is shown in Figure 5.
ADCP-80-524 • Issue 1 • November 2001 BUS B INPUT CONNECTORS (TWO HOLE COMPRESSION LUG-STUD TYPE) (2) TO BATTERY B TO RETURN B BATTERY B OUTPUT POWER CONNECTORS (SET SCREW BARREL TERMINAL TYPE) BUS A AND BUS B ALARM CONTACT CONNECTOR (WIRE-WRAP PIN BLOCK TYPE) BATTERY A OUTPUT POWER CONNECTORS (SET SCREW BARREL TERMINAL TYPE) BUS A INPUT CONNECTORS (TWO HOLE COMPRESSION LUG-STUD TYPE) (2) BATTERY B OUTPUT RETURN CONNECTORS (SET SCREW BARREL TERMINAL TYPE) CHASSIS GROUND TERMINALS BATTERY A OUTPUT R
ADCP-80-524 • Issue 1 • November 2001 1.1 Power Buses Each fuse panel has two separate power buses (feeds). Each bus distributes the input power to the output power circuits. In each bus circuit, current flows from the input power bus, through the fuse, to the output power circuit. A typical fuse panel block diagram is shown in Figure 7. The current capacity of each bus of the traditional power fuse panel is 65 Amps maximum.
ADCP-80-524 • Issue 1 • November 2001 –24V/–48V BATTERY BATTERY A RETURN 1 2 3 4 5 6 7 8 RETURN A BUS A C NO NC POWER A LED FUSE ALARM A LED RETURN A POWER B LED FUSE ALARM B LED RETURN B BATTERY B RETURN B BATTERY C NO NC BUS B –24V/–48V SYSTEM ALARM CONNECTIONS RETURN 1 2 3 4 5 6 7 8 16758-A Figure 7. PowerWorx Type 70 Fuse Panel Block Diagram (Traditional Power Fuse Panel Shown) 1.
ADCP-80-524 • Issue 1 • November 2001 the wire to the connector. The barrel on each connector that is closest to the center of the fuse panel (barrel with a cap over it) is not used or accessed. The wire is inserted into the connector and the set screw is tightened down, compressing the wire. The set screw barrel connectors can accept up to #6 AWG copper wire. 1.5 Output Voltage The output voltage will be the same voltage as the applied input voltage when the fuse does not fail. 1.
ADCP-80-524 • Issue 1 • November 2001 1.9 Power-On Indicator A visual power-on indicator (green LED) for each power bus is mounted on the front panel of the fuse panel. A lighted LED indicates that power is applied to the bus input connectors. An unlighted LED indicates that power is not applied to the bus input connectors. The LED can easily be replaced in the field if it fails. 1.10 Fuse Alarm Indicator A visual fuse alarm indicator (red LED) is provided on the front panel for each power bus.
ADCP-80-524 • Issue 1 • November 2001 1.14 Fused Equipment Designation Card and Holder Two fuse designation cards, shown in Figure 8, and a card holder with a clear plastic cover are provided with the fuse panel. The card holder may be attached to the fuse panel, the fuse panel mounting brackets, to the rack, or a location close to the fuse panel. One of the cards may be filled out with circuit information for each of the circuits and inserted in the card holder.
ADCP-80-524 • Issue 1 • November 2001 1.17 Cooling Vent openings are provided in the top and bottom of the fuse panel. The vent openings allow convection cooling of all components without the use of fans or blowers. 1.18 Protective Cover A smoked plastic protective cover is mounted over the input power connectors, the output power connectors, the chassis ground terminals, and the external alarm contact connections.
ADCP-80-524 • Issue 1 • November 2001 10.01 IN. (25.42 CM) 11.35 IN. (28.82 CM) 17.13 IN. (43.51 CM) 19.0 IN. (48.26 CM) 18.31 IN. (46.51 CM) 1.13 IN. 1.73 IN. (2.86 CM) (4.39 CM) 16157-B Figure 11. Dimensions of Type 70 Uninterrupted Power Fuse Panel (with Mounting Brackets Attached for 19-Inch [48.26 cm] Rack Mounting) 1.20 Weight The weight of both the traditional and uninterrupted fuse panel is approximately 14 pounds (6.35 kilograms).
ADCP-80-524 • Issue 1 • November 2001 mounting brackets allow mounting with WECO 1.00-inch (2.54 cm) hole spacing or EIA 1.25inch (3.18 cm) hole spacing. The slotted mounting hole pattern in the mounting brackets compensates for vertical rack differences and allows mounting the fuse panel in either 1.75- or 2-inch (4.45 or 5.08 cm) rack spaces. 1.23 Environmental Characteristics The environmental characteristics of the PowerWorx Type 70 Series Power Distribution Fuse Panel are listed in Table 1. Table 1.
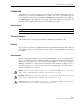
ADCP-80-524 • Issue 1 • November 2001 3 UNPACKING AND INSPECTION Unpack and inspect the various components as follows: 1. Inspect the exterior of the shipping container for evidence of handling that may have damaged the components in the container. 2. Unpack each container while carefully checking the contents for damage and verify with the packing slip. 3. File a claim with the commercial carrier and notify ADC Customer Service if damage is detected or if parts are missing.
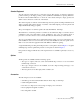
ADCP-80-524 • Issue 1 • November 2001 • Power screwdriver with Phillips head bit and slotted head bit PHILLIPS SCREW HEAD BIT 16776-A • Set of sockets and driver 16794-A • Set of open end or box end wrenches 16795-A Page 19 © 2001, ADC Telecommunications, Inc.
ADCP-80-524 • Issue 1 • November 2001 • Torque screwdriver calibrated in pound-force inches or Newton meters with Phillips head bit and slotted head bit 16797-A 4.2 Use of Screws in Installation Package Caution: When installing the fuse panel, use only the hardware supplied with the panel. Use of any other hardware could cause damage to the panel. If parts are missing, please contact ADC. Several types of screws are provided with the fuse panel.
ADCP-80-524 • Issue 1 • November 2001 PAINT CUTTING, TAPPING SCREW, PAN HEAD, COMBINATION DRIVE 3/8-IN. (9.53 mm) 12 - 24 THREAD 16592-A Figure 13. Screw for Attaching Bracket to Rack 4.2.3 Screws to Attach Protective Cover to Fuse Panel To fasten the plastic protective cover over the power connections, use the tin plate finish 6-32 pan-head screws shown in Figure 14. Four screws (two for each end) are provided. MACHINE SCREW, PAN HEAD, PHILLIPS DRIVE 3/8-IN. (9.
ADCP-80-524 • Issue 1 • November 2001 Caution: When attaching the cable management bar to the fuse panel, use only the hardware supplied with the cable management bar. Use of any other hardware could cause contact with internal parts of the fuse panel. If parts are missing, please contact ADC. Note: A fuse panel with the cable management bar attached may exceed the 12-inch (3.05 mm) overall depth objective described in GR-63 CORE, 02-14. MOUNTING BRACKET INSTALLED FOR 19-IN. (48.
ADCP-80-524 • Issue 1 • November 2001 USE 5/16-INCH (7.94 MM) 8-32 THREAD-FORMING FLAT-HEAD SCREWS TO SECURE MOUNTING BRACKETS TO PANEL 19-INCH RACK MOUNTING BRACKET INSTALLATION USE 3/8-INCH (9.53 MM) LONG 12-24 SCREWS AND #12 FLAT WASHERS TO SECURE MOUNTING BRACKETS TO RACK 23-INCH RACK MOUNTING BRACKET INSTALLATION 16965-C Figure 16. Fuse Panel Mounting Brackets 16386-B Figure 17. Rear View of Typical Type 70 Fuse Panel Installation in Equipment Rack Page 23 © 2001, ADC Telecommunications, Inc.
ADCP-80-524 • Issue 1 • November 2001 4.6 General Wiring Recommendations Route and connect ground, power, and alarm cables to the panel connectors according to local practice and the specified procedures. The connections to the fuse panel are shown in Figure 18. After routing the cables, tie them to the cable management bar (optional accessory). Replace the protective cover on the fuse panel after all the wiring connections are made and all tests are completed.
ADCP-80-524 • Issue 1 • November 2001 4.7 Chassis Ground Connection Mounting the fuse panel on a metal equipment rack using the metal mounting brackets provided with the fuse panel provides a sufficient return path to meet equipment grounding requirements. However, a separate grounding conductor is often required by local practice or local inspectors.
ADCP-80-524 • Issue 1 • November 2001 4.8 Output Power Connectors Note: Before connecting the output or input power wires, measure the resistance of each bus input connector as specified in Subsection 5.2, Resistance Test. Connect the output BATT and RTN terminals for each fuse circuit on each set of terminal strips as follows (see Figure 20): • Screw-down barrier terminal strip: Use #12 to #22 AWG wire.
ADCP-80-524 • Issue 1 • November 2001 WRAP TERMINAL BLOCK PINS USING #22 TO #26 AWG COPPER WIRE WITH INSULATION STRIPPED BACK. CONNECT TO APPROPRIATE TERMINALS OF ALARMS CONNECT TO APPROPRIATE TERMINALS OF ALARMS 16161-B Figure 21. Wire Wrap Alarm Contact Connection 4.10 Input Power Connectors Note: Before connecting the input or output power wires, measure the resistance at each bus input connector as specified in Subsection 5.2, Resistance Test.
ADCP-80-524 • Issue 1 • November 2001 • Set screw barrel connectors: Use only the barrel connectors on each connector assembly that are closest to the outside of the fuse panel. Use up to #6 AWG copper wire with insulation stripped back. Note: Do not loosen the set screws in the two barrel connectors that are closest to the center of the panel. Accessing these connectors may render the warranty void.
ADCP-80-524 • Issue 1 • November 2001 4.13 Voltage Designation Label Write the voltage used in the fuse panel on the voltage designation label (see Figure 9) and attach the label to the back of the panel. 5 TESTING Caution: This equipment employs electrical voltage and amperage levels which may be considered an electrical hazard.
ADCP-80-524 • Issue 1 • November 2001 5.5 Connection Polarity Test To verify that the input power wires are connected to the correct terminals, measure the voltage between the input return connector (RTN) and the chassis ground using a multi meter. The voltage should be less than 2.0 Vdc. If the voltage is more than 2.0 Vdc, reverse the input power wires and measure the voltage between the input return connector (RTN) and the chassis ground again to determine that the voltage is less than 2.0 Vdc. 5.
ADCP-80-524 • Issue 1 • November 2001 7.2 Cleaning If excessive dirt is found during the inspection, brush or wipe dust and dirt from the fuse panel with a soft bristle brush or soft cloth. Care should be taken not to damage the fuses or any wiring. 7.3 Adjustments No adjustments in the field are indicated or required. If a circuit is not operating properly, contact ADC Customer Assistance (see Section 8, Customer Information and Assistance). 7.
ADCP-80-524 • Issue 1 • November 2001 8 CUSTOMER INFORMATION AND ASSISTANCE PHONE: EUROPE Sales Administration: +32-2-712-65 00 Technical Assistance: +32-2-712-65 42 U.S.A. OR CANADA Sales: 1-800-366-3891 Extension 73000 Technical Assistance: 1-800-366-3891 Extension 73475 ELSEWHERE Sales Administration: +1-952-938-8080 Technical Assistance: +1-952-917-3475 SYSTEM INTEGRATION DIVISION (SID) +1-952-294-3600 WRITE: U.S.A. ADC TELECOMMUNICATIONS, INC PO BOX 1101, MINNEAPOLIS, MN 55440-1101, USA U.S.A.