AD-360X2 Mechanical/Electrical Service Procedure American Dryer Corporation 88 Currant Road Fall River, MA 02720-4781 Telephone: (508) 678-9000 / Fax: (508) 678-9447 e-mail: techsupport@amdry.com www.amdry.com 101802SRS/wmarelli ADC Part No.
Retain This Manual In A Safe Place For Future Reference American Dryer Corporation products embody advanced concepts in engineering, design, and safety. If this product is properly maintained, it will provide many years of safe, efficient, and trouble free operation. ONLY qualified technicians should service this equipment. OBSERVE ALL SAFETY PRECAUTIONS displayed on the equipment or specified in the installation manual included with the dryer.
IMPORTANT YOU MUST DISCONNECT AND LOCKOUT THE ELECTRIC SUPPLY AND THE GAS SUPPLY BEFORE ANY COVERS OR GUARDS ARE REMOVED FROM THE MACHINE TO ALLOW ACCESS FOR CLEANING, ADJUSTING, INSTALLATION, OR TESTING OF ANY EQUIPMENT PER OSHA (Occupational Safety and Health Administration) STANDARDS. FOR YOUR SAFETY DO NOT STORE OR USE GASOLINE OR OTHER FLAMMABLE VAPORS AND LIQUIDS IN THE VICINITY OF THIS OR ANY OTHER APPLIANCE. DO NOT DRY MOP HEADS IN THE DRYER. DO NOT USE DRYER IN THE PRESENCE OF DRY CLEANING FUMES.
WARNING DRYER MUST NEVER BE OPERATED WITHOUT THE LINT FILTER OR SCREEN IN PLACE, EVEN IF AN EXTERNAL LINT COLLECTION SYSTEM IS USED. IMPORTANT PLEASE OBSERVE ALL SAFETY PRECAUTIONS displayed on the equipment and specified in the installation manual included with the dryer. The wiring diagram for the dryer is located behind the left front control panel.
Table of Contents SECTION I IMPORTANT INFORMATION ............................................................................... 3 A. Safety Precautions ...................................................................................................................... 3 SECTION II ROUTINE MAINTENANCE .................................................................................... 4 A. Cleaning ..........................................................................................................
SECTION VI BCD-1 TYPE MODULE .......................................................................................... 29 A. B. C. D. Introduction .............................................................................................................................. 29 General System Information ...................................................................................................... 29 G-760 Direct Spark Ignition (DSI) Flowchart ........................................................
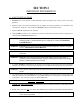
SECTION I IMPORTANT INFORMATION A. SAFETY PRECAUTIONS 1. DO NOT store or use gasoline or other flammable vapors and liquids in the vicinity of this or any other appliance. 2. Purchaser and/or user should consult the local gas supplier for proper instructions to be followed in the event the user smells gas. The instructions should be posted in a prominent location. 3. Dryer(s) must be exhausted to the outdoors. 4.
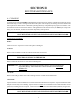
SECTION II ROUTINE MAINTENANCE A. CLEANING A program and/or schedule should be established for periodic inspection, cleaning, and removal of lint from various areas of the dryer, as well as throughout the ductwork system. The frequency of cleaning can best be determined from experience at each location. Maximum operating efficiency is dependent upon proper air circulation. The accumulation of lint can restrict this airflow.
AS REQUIRED: In cleaning and care of the cabinet, avoid using harsh abrasives. A product intended for the cleaning of appliances is recommended. B. ADJUSTMENTS SUGGESTED INTERVAL 6 MONTHS Drive belts should be examined. Cracked or seriously frayed belts should be replaced. Tighten loose drive belts when necessary, and check belt alignment. Complete operational check of control and valves.
SECTION III INSTALLATION REQUIREMENTS Installation should be performed by competent technicians in accordance with local and state codes. In the absence of these codes, the installation must conform to applicable American National Standards: ANSI Z223.1LATEST EDITION (National Fuel Gas Code) or ANSI/NFPA NO. 70-LATEST EDITION (National Electrical Code) or in Canada, the installation must conform to applicable Canadian Standards: CAN/CGA-B149.1-M91 (Natural Gas) or CAN/CGA-B149.2-M91 (Liquid Propane [L.P.
B. ELECTRICAL AND GAS REQUIREMENTS 1. Electrical Requirements It is your responsibility to have ALL electrical connections made by a properly licensed and competent electrician to assure that the electrical installation is adequate and conforms to local and state regulations or codes. In the absence of such codes, ALL electrical connections, materials, and workmanship must conform to the applicable requirements of the National Electrical Code ANSI/NFPA NO.
The dryer must be connected to the type of gas (natural or liquid propane [L.P.]) indicated on the dryer data label. If this information does not agree with the type of gas available, contact the reseller who sold the dryer or contact the ADC factory. The gas input ratings shown on the dryer data label are for elevations up to 2,000 feet (609.6 meters), unless elevation requirements of over 2,000 feet (609.6 meters) were specified at the time the dryer order was placed with the factory.
SECTION IV DESCRIPTION OF PARTS A. CONTROL PANEL The coin panel assembly consists of the coin operator, a display board, and the keyboard (touch pad) label. The coin acceptor is used to acknowledge that the proper coin has been put through the acceptor. The display board will just display the time and temperature in a readable number of letter characters. The keyboard (touch pad) label is used to input Hi, Low, or Perm Press selection for the dryer to start. B.
D. DOOR SWITCH (HINGE BLOCK) The main door switch is located behind the main door on the right hand side. When the main door is opened, the switch will also open, preventing the dryer from operating. The main door switch is a safety device and should never be disabled. E. MICROPROCESSOR ASSEMBLY The microprocessor board is the latest Phase 5 controls. It monitors the dryer functions ALL the time. Indicator light emitting diode (L.E.D.) is mounted on the board to help with servicing of the dryer. F.
H. IDLER ARM AND IMPELLOR MOUNT ASSEMBLY The idler assembly is located in the back of the dryer, which is attached to the drive motor assembly. The main purpose of the idler assembly is to reduce the speed of the motor, in turn increasing the torque of the basket (tumbler) pulley. I. DRIVE MOTOR AND IDLER PULLEY ARRANGEMENT The dryer has a different kind of drive system. There is one (1) motor pulley, one (1) drive belt and an idler arm assembly by the basket (tumbler).
K. GAS BURNER The gas burner assembly consists of two (2) burner tube orifices (the orifice has a hole in it to allow gas to flow through). The hole size varies with different elevation Btus, gas valve (which can be up for natural or liquid propane [L.P.]), and a flame-probe assembly. L. SAIL SWITCH The sail switch consists of a round damper plate on a lever arm, which acts like an actuator for a microswitch. When the air blower comes on, it draws air through the burner.
N. LINT DRAWER SWITCH The lint drawer switch is located under the basket (tumbler) on the right side. It is another added safety device that stops the operation of the dryer, when the lint drawer is opened. This device and the door switch are the two (2) safety switches designed to halt the basket (tumbler). O. LINT DRAWER The lint drawer is located under the baskets (tumblers) of each pocket.
Q. REAR BASKET (TUMBLER) DRIVE WHEELS There is a left and right basket (tumbler) drive wheel bracket assembly. This allows the basket (tumbler) to spin freely without bearings or basket (tumbler) support shaft. R. ROTATIONAL SENSOR ASSEMBLY The Rotational Sensor Assembly is located in the rear of the dryer. It consists of a magnet and a rotational switch, which is mounted to the sail switch/rotational sensor bracket. The magnetic rotational sensor switch senses the rotation of the basket (tumbler).
SECTION V SERVICE A. INTRODUCTION ALL electrical or mechanical service or repairs should be made with the electrical power to the dryer disconnected (power off). WARNING: PERSONAL INJURY COULD RESULT. The information provided in this section should not be misconstrued as a device for use by an untrained person making repairs. Service work should be performed by competent technicians in accordance with local, state, and federal codes.
5. Disconnect the keyboard (touch pad) connector from the computer board keyboard (touch pad) harness (simply pull straight out). 6. Disconnect the 9-pin main computer harness from the computer (squeeze the one [1] tab on the connector and pull straight back). 7. Disconnect the green ground wire from the computer board. 8. Remove the two (2) Phillips head screws that secure the computer to the panel. Remove the board from the panel by pulling at the corners of the board. 9.
TO REMOVE OPTIC SWITCH 1. Disconnect power to the dryer. 2. Remove top or bottom coin panel. 3. Remove optic switch from the coin acceptor (one [1] screw). 4. Unplug optic switch connector. 5. Remove optic switch from the dryer. 6. Reverse procedure for installing new optic switch. TO REPLACE MOTOR CONTACTOR 2-POLE, 24 VAC 1. Discontinue power to the dryer. 2. Remove back guard. 3. Remove ALL wires from contactor (NOTE: Make sure each wire is marked with location removed from). 4.
REPLACE BURNER TUBE ASSEMBLY (Refer to the illustration below) 1. Discontinue power to the dryer. 2. Remove the four (4) hex nuts that hold the burner hood bracket to the burner box. 3. Remove the two (2) hex nuts that hold the burner tube to the burner box. 4. Pull down on the burner tube to remove it. 5. Reassemble new burner tube (ADC PN: 141137) in reverse procedure. IMPORTANT: Make sure the gap from the ignitor to the top of the burner tube is 1/8” +/- 1/32” (3.175 mm +/- 0.79248 mm).
C. BURNER CONTROLS (GAS) The illustration below shows you the gas valve assembly and the gas chamber. TO REPLACE MAIN BURNER ORIFICE 1. Discontinue power to the dryer. 2. Remove back guard. 3. Remove screws securing gas valve bracket to the burner box, and remove the two (2) screws securing pipe bracket. 4. Move the manifold assembly to the left and hold. 5. Unscrew main burner orifice and replace. NOTE: Use extreme care when removing and replacing orifice.
TO TEST AND ADJUST GAS (WATER COLUMN [W.C.]) PRESSURE There are two (2) types of devices commonly used to measure water column pressure. They are spring/ mechanical type gauges and manometers. The spring/mechanical type gauge is not recommended because it is easily damaged and not always accurate. One (1) form of a manometer is a hydro-gauge, which simply consists of an inner and outer tube.
TO CONVERT FROM NATURAL TO LIQUID PROPANE (L.P.) GAS 1. Disconnect electrical power to the dryer. 2. Close ALL shutoff valves in dryer gas supply line. 3. Disconnect gas valve wiring. NOTE: Identify location of each wire for correct reinstallation. 4. Break union connection (nut) between union shutoff and gas valve. 5. Loosen and remove four (4) screws from pipe brackets holding the gas valve/manifold assembly to the gas valve plate. 6. Remove gas valve and manifold assembly from the dryer. 7.
TO REPLACE DIRECT SPARK IGNITION (DSI) MODULE 1. Discontinue power to the dryer. 2. Remove the back guard. 3. Remove the wires connected to the terminal strip at the bottom of the module. 4. Remove the four (4) nuts securing the module to the mounting bracket. 5. Replace module by reversing process. NOTE: Take note of where wires are for installing the new module. D.
TO REMOVE THE TEMPERATURE SENSOR OR HIGH HEAT PROTECTOR 1. High Heat Protector a. Discontinue power to dryer. b. Remove the lint drawer from the dryer. c. Remove the two (2) free spin wash nuts that is securing the temperature sensor bracket to the dryer. d. Disconnect the 4-pin connector on the temperature sensor bracket. NOTE: Be careful not to let the sensor harness that you just disconnected to fall back into the computer area. e.
E. SAIL SWITCH ASSEMBLY The sail switch is a heat circuit safety device, which controls the heat circuit only. When the dryer is operating and there is proper airflow, the sail switch damper pulls in and closes the sail switch, providing ALL the other heat related circuits are functioning properly. If an improper airflow occurs, the sail switch damper will release, and the circuit will open. IMPORTANT: UNDER NO CIRCUMSTANCES should heat circuit safety devices ever be disabled. TO REPLACE SAIL SWITCH 1.
F. FRONT PANEL AND MAIN DOOR ASSEMBLIES TO REPLACE MAIN DOOR SWITCH 1. Discontinue power to the dryer. 2. Open main door. 3. Remove the two (2) Phillips head screws holding the main door switch in place. 4. Disassemble door switch bracket by removing the two (2) nuts holding the door switch to the housing, and remove the door switch. 5. Reverse this procedure for installing new door switch. IMPORTANT: UNDER NO CIRCUMSTANCES should the door switch be disabled. TO REPLACE MAIN DOOR HINGE BLOCKS 1.
TO REPLACE FRONT PANEL 1. Discontinue power to the dryer. 2. Remove the computer panels. 3. Remove the kick trim plate. 4. Remove lint screen drawers from the dryer. 5. Remove the screws securing the front panel to the dryer. 6. Disconnect the 4-pin door switch harness connector from the lint drawer switch box, top and bottom. 7. Remove the front panel assembly from the dryer. 8. Reverse this procedure for installing the new front panel. TO REPLACE THE NYLON CATCH 1. Open the main door. 2.
TO REPLACE ROTATIONAL SENSOR SWITCH 1. Discontinue electrical power to the dryer. 2. Remove the magnetic rotational sensor switch from the bracket by loosening the nuts. 3. Depress the tabs on the rotational sensor harness plug and pull apart, then remove the sensor switch. 4. To install a new sensor switch, connect the plug of the new sensor switch to the sensor harness. 5. Place one (1) adjustment nut onto the sensor switch. 6. Place the second adjustment nut on, but DO NOT tighten.
BASKET (TUMBLER) REMOVAL 1. Disconnect power to the dryer. 2. Remove the control panels and kick trim plate. 3. Remove the front panel, and disconnect the door switches. 4. Now remove the motor separator panel if removing the top basket (tumbler). 5. Loosen the two (2) nuts on the idler tension arm. 6. Move to the rear of the dryer. Remove the retaining basket (tumbler) shoulder bolt that secures the rear teflon pad to the basket (tumbler). 7.
SECTION VI BCD-1 TYPE MODULE A. INTRODUCTION The Direct Spark Ignition (DSI) system operates at 24 VAC and is a discrete component based gas ignition control (DSI module) system, which utilizes a line frequency spark as an ignition source. Safe proof of flame is accomplished through flame rectification. The DSI module has a diagnostic light emitting diode (L.E.D.) indicating light, which simplifies troubleshooting in the event of a fault. Other Features...
The module also provides for safe proof of ignition. If a flame is not sensed by the flame-probe electrode (of the ignitor/flame-probe assembly) within a specified time frame, the module will de-energize the gas valve and the ignitor/flame-probe assembly, and go into the LOCKOUT mode. If a flame is established (sensed) but then lost (flame out due to possible air turbulence), the Direct Spark Ignition (DSI) module will wait 30-seconds then restart the ignition sequence.
IMPORTANT: THE GAP SETTING ON THE IGNITOR/FLAME-PROBE ASSEMBLY IS CRITICAL. d. The Direct Spark Ignition (DSI) 24 VAC gas valve(s) used are of the redundant type, which means the gas valve is actually two (2) gas valves in one (1); one (1) in series with the other. This is a safety feature, which provides protection against gas flow in the event of a failure of one (1) of the valves to seat properly.
C.
D. TROUBLESHOOTING The troubleshooting information provided in this manual is intended for use only by qualified service technician. Observe ALL safety precautions displayed on the equipment or specified in the installation/operator’s manual included with the dryer. IMPORTANT: UNDER NO CIRCUMSTANCES SHOULD ANY SAFETY OR HEAT CIRCUIT DEVICE EVER BE DISABLED.
DSI IGNITOR GAP FEELER GAUGE (1/8”) MULTIMETER/VOLTMETER For checking the gap between ignitor assembly ground rod and spark electrode. Available from ADC - Part No. 305410 For measuring voltage and/or amperage 1. Direct Spark Ignition (DSI) Troubleshooting Terms (Definitions) a. LOCKOUT Mode - DSI module “GREEN” light emitting diode (L.E.D.) indicator light blinks continuously. This indicates there is a system fault and most likely the fault is that the DSI module was not able to ignite the gas. b.
2) Direct Spark Ignition (DSI) module light emitting diode (L.E.D.) indicator lights “GREEN” for up to approximately 1.5-seconds (prepurge). This indicates that ALL the controls (including ALL the safety circuits) are functioning and power is being supplied to the DSI module. a) DSI module L.E.D. indicator lights “GREEN.” This indicates a normal heating cycle. This also indicates that the preliminary diagnostics of the module has confirmed that the DSI module is functional. b) DSI module L.E.D.
1) To effectively use this information or the flowcharts (on page 37, page 38, and page 39), each step must be completed in sequence, performing whatever tests are suggested. After the completion of each test, the guide will direct the service technician to the next logical step in the troubleshooting sequence based on the outcome of the previous check. 2) Components should be replaced only after each step has been completed and replacement is suggested in the flowchart.
d. Troubleshooting Flowchart - Quick Reference... First Visual Check NO SPARK AND SYSTEM DOES NOT WORK Is 24 VAC available at transformer? NO Is 24 VAC present from terminal THS2 to ground? YES NO YES Is power available at primary? NO YES Replace transformer. Are thermostats contacts and limit control contacts closed? Close contacts. Determine why voltage is not present. NO YES Check continuity of wiring to determine why voltage does not exist at THS2.
e. Troubleshooting Flowchart - Quick Reference... Second Visual Check SPARK PRESENT BUT MAIN BURNER DOES NOT COME ON Is main valve wiring securely attached to terminal M.V.3 and ground? NO Is 24 VAC present between terminals M.V.3 and ground? YES NO YES Correct Replace Johnson Control module G760/761 Check for continuity in wiring from M.V.3 to gas valve, and gas valve to GR. Determine why continuity does not exist.
f. Troubleshooting Flowchart - Quick Reference... Third Visual Check MAIN BURNER LIGHTS BUT DOES NOT STAY ON Is flame sensor cable securely attached to terminal 4? NO Does continuity exist from control to flame sensor? YES NO Correct Replace sensor cable. YES Is flame sensor corroded or is ceramic cracked? Correct or replace sensor.
3. Troubleshooting/System Detailed Diagnosis When the dryer calls for heat, 24 VAC from the step down transformer is applied to the “THS” and “GND” (ground) terminals of the Direct Spark Ignition (DSI) module. The DSI module light emitting diode (L.E.D.) indicator will light “GREEN.” The gas valve will be energized, and the spark burst will be evident (on) for approximately 8-seconds at the tip of the electrode/flame-probe assembly. Flame should now be established/ confirmed.
a) Connect water column (W.C.) test gauge (manometer) to the gas valve pressure tap (1/8” N.P.T.). b) Start the dryer...with the burner on, the correct water column reading in inches should be: Natural Gas .................................. 3.5 inches (8.7 mb) water column. Liquid Propane (L.P.) Gas ............ 10.5 inches (27.4 mb) water column. When a gas dryer is first started (during initial time of installation or start-up), it has a tendency not to ignite on the first ignition attempt.
NOTE: To reset the Direct Spark Ignition (DSI) module if it is in the LOCKOUT mode, open and close the main door, then restart the dryer. (a) To check and/or set the 1/8” gap, use a DSI Ignitor gap feeler gauge (refer to the illustration on page 41) or similar type device to determine the gap size. DO NOT USE FEELER GAUGE TO SET GAP, use it only to determine the size of the gap. If an adjustment is necessary, bend the ground rod to achieve the correct gap, then recheck the 1/8” GAP with a feeler gauge.
NOTE: To reset the Direct Spark Ignition (DSI) module if it is in the LOCKOUT mode, open and close the main door, then restart the dryer. 4) DSI Module If there is some sort of operational interference in the DSI system, the DSI module (acting as the “controller” for the system) will go into a LOCKOUT mode (where the light emitting diode [L.E.D.] will BLINK “GREEN” CONTINUOUSLY). a) Operational interference is any adverse condition (whether internal or external) to the system.
a) Primary Side This is the incoming voltage side -120 VAC, 208 VAC, 230/240 VAC - of the transformer. b) Secondary Side This is the step down side - 24 VAC - of the transformer. WARNING: 208 VAC and 230/240 VAC ARE NOT THE SAME. ALL voltage connections should be checked and confirmed according to the wiring diagram provided with the individual dryer. Any damage done to dryer components due to improper voltage connections will automatically VOID THE WARRANTY.
(e) One (1) YELLOW or ORANGE wire supplies the 24 VAC signal for the control and/ or DSI circuit. (Refer to specific wiring diagram with the dryer for connection point.) 7) Direct Spark Ignition (DSI) 24 VAC Redundant Gas Valve There are three (3) DSI 24 VAC Redundant Gas Valves in use (refer to the illustration below and on the next page. The particular redundant gas valve that is used is dependent solely on the size (model) of the dryer.
DIRECT SPARK IGNITION (DSI) SYSTEM COMPONENTS 24 VAC DIRECT SPARK IGNITION (DSI) TRANSFORMER G760 DIRECT SPARK MODULE ADC PN 128935 ADC PN 141403 46
SECTION VII TROUBLESHOOTING The information provided will help isolate the most probable components associated with the difficulty described. The experienced technician realizes that a loose connection or broken or shorted wire may be at fault where electrical components are concerned, however, not necessarily the suspected component itself. Electrical parts should always be checked for failure before returned to the factory.
IMPORTANT: The Phase 5 coin microprocessor controller (computer) has its own internal heat sensing circuit fuse protection, located on the back side of the controller. If a “dSFL” condition occurs, check to see if this fuse has blown. If it has, DO NOT replace the entire microprocessor controller (computer); replace the fuse and do so with a 1/8-amp (Slo-Blo) fuse only. NOTE: Once the microprocessor controller (computer) detects a problem in the heat circuit, it updates every 30-seconds.
NOTE: If the dryer is started (the light emitting diode [L.E.D.] display indicator dots are on) and there are no outputs (heat and/or motor output L.E.D.s are off) and the “dOOr” input L.E.D. is on, the fault is in the Phase 5 microprocessor controller (computer) itself. If the L.E.D. display indicators are on and the door L.E.D. input and motor/heat output L.E.D.
B. NO HEAT CONDITION (BLOWER IS ON) The following procedure must be performed with the microprocessor controller (computer) display in the normal operating mode, the heat indicator dot on, and the light emitting diode (L.E.D.) output light is on. Voltage is 24 VAC unless otherwise specified.
1. With the heat indicator on check for voltage at J1 connector 9-pin connector pin #8 (orange wire to ground) if 24 volt is present. 2. If no voltage (24 VAC) check for loose connection at 9-pin connector or problem may be faulty microprocessor. 3. Check for voltage (24 VAC) at J11 connector pin #3 orange wire. If no voltage, check for loose connection or bad basket (tumbler) hi-limit. If voltage is present, proceed to next step. 4.
C. NO START CONDITION Follow this test procedure, providing that the microprocessor controller (computer) is functioning where the display is in the normal operating mode and the motor indicator dot is on, and the light emitting diode (L.E.D.) motor output light is on. The voltage you should be reading is 24 VAC unless otherwise specified. 1. Check to see if “dOOr” L.E.D. input light is on. (Located on component side of the computer board.) If it’s off, refer to “dOOr” in the Troubleshooting Section. 2.
D. NO DISPLAY CONDITION NOTE: Regardless of the voltage (120-240 VAC) make sure the voltage selector switch is set to 115 VAC. 1. Check power supply. (Dryer voltage 110v, 208v, 220v) (Circuit breaker box or fuse panel) 2. Check fuse 2 (3/4-amp Slo-Blo) if blown, replace it. 3. Check for voltage at the (J5) 6-pin connector (120 VAC) pin #1 black wire and pin #2 white wire. If no voltage, check for a loose connection. 4. Check for voltage at the microprocessor pin #6 black wire and pin #3 white wire.
E. “dSFL” DISPLAY CONDITION When the display reads “dSFL” this condition indicates a fault in the microprocessor controller (computer) heat circuit. This circuit includes the microprocessor controller (computer), microprocessor temperature sensor (located in lint compartment) and wires to and from these two (2) points. 1. Check the 1/8-amp fuse on the computer board. If no continuity, replace with ADC PN: 136048. If fuse repeatedly burns out go to Step #3. 2.
F. “dOOr” DISPLAY CONDITION When the display reads “dOOr,” this indicates that there is a fault (open circuit) somewhere in the microprocessor controller’s (computer’s) door switch circuit. Include the door switch, microprocessor controller (computer) and the wires to end from these two (2) points. Before following this test procedure, check the component side of the computer to see if light emitting diode (L.E.D.) input light is on. If on and still reads door, replace computer.
SECTION VIII DATA LABEL INFORMATION A. DATA LABEL Contact American Dryer Corporation When contacting American Dryer Corporation, certain information is required to ensure proper service or parts information from ADC. This information is on the data label, which is affixed to the left side panel/wall area behind the bottom control panel. When contacting ADC, please have the model number and serial number handy. 1.
4. TYPE OF HEAT This describes the type of heat for your particular dryer: gas (either natural gas or liquid propane [L.P.] gas), electric, or steam. 5. HEAT INPUT (for GAS DRYERS) This describes the heat input in British Thermal Units per Hour (Btu/hr). 6. ORIFICE SIZE (for GAS DRYERS) Gives the number drill size used. 7. ELECTRIC SERVICE This describes the electric service for your particular model. 8. GAS MANIFOLD PRESSURE (for GAS DRYERS) This describes the manifold pressure taken at the gas valve tap.
C. LIGHT EMITTING DIODE (L.E.D.) DISPLAY CODES A ACOn Adrt AFAt AGt AtIn AtSt AUtO b bCLO bCrS bUZ CEL CLCC COIn CrCC donE dOOr dSFL FAr FILL FLS FrEE GdLY Gont Grd HICd Hot LCC LCde LOCd nbUZ nFLS Ngrd nSEn PdrY PL PLOC PP PUSH rCC rCdE SEFL SEn tFAS tInE Automatic Cycle (Slope Program Factor) Accumulative Coin Maximum Auto Dryness Time Amount For Additional Time Active Anti-Wrinkle Guard Time Accumulative Time Amount Start Automatic Mode (Patent No.
The revision number is located on the top right hand corner of the diagram. It is a six (6) digit number followed by a letter to distinguish the version dates (refer to the illustration). Your particular model will be different depending on the date of manufacturing and options available. The correct wiring diagram for your dryer is folded and placed inside of the computer area.
60
ADC 450213 1 - 08/18/03-25