
User guide


46
addVANTAGE Pro 6.2 User Guide CHAPTER 4
The Events Viewer
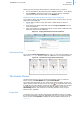
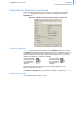
The dialog shown in Figure 54 appears.
Figure 54. View/Save dialog for Event List PDF
Notice that the file is named report.pdf by default. You can view the
document immediately by selecting Open with, or you can use Save to Disk to
save the file to the default location for your downloaded files. If you open the
PDF, then save it, it is by default saved in your Temp folder.
When you view the PDF, you’ll see that all of the events that are shown in the
panel are included.
Create an Events Viewer from a Template
If you have to create a large number of identical panels on different areas, you
can use the Events from template function and thus save yourself some work:
1. Create a panel in a single area using one of the methods described above,
then add the events you need and configure the panel’s properties.
2. Save the panel in its area. This will be used later as a template panel.
3. Right-click the selected areas where you want a copy of the Events viewer
and choose Create New Node
WindowEvents from Template. A File
Open dialog displays.
4. Navigate to the area where you saved the template panel and select it, then
click OK.
The system creates an Events panel with the same properties as the panel used
as the template in each area you selected. If an event source node does not
exist in the respective area, it won’t be included in the panel. The new panels
will borrow the name of the original panel used as the template. If a panel with
this name already exists in an area, the newly created panel will have a running
number appended, for example, Statistics (2).
Note: The term “template” is used only for better understanding the concept of
creating panels from existing panels. Any panel can be a template.
Linked Panels
You can link two panels by combining them in a single window. You can then use
the standard navigation methods to “move” both panels synchronously in time.
Note: Only Trend and Events panels can be linked.
To combine two panels, click the Link to another window button ( ) on the
toolbar of one of the panels. In the Explorer that is displayed, navigate to and
select the panel you want to link, then click OK. A new panel will be created. You
can now save the linked panel for future use, just like any other panel
(Figure 55).