
5DOF Robotic Arm Kit for Ardunio Uno R3 - Tutorial

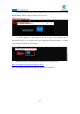
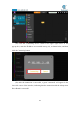

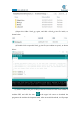
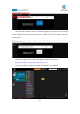
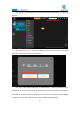
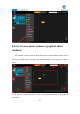
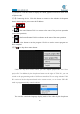
Table Of Contents
- Contents
- Components List
- Introduction of Robotic Arm
- Introduction of Adeept Arm Drive Board
- Lesson 0 Building the Arduino Development Environm
- 1.Arduino development language
- 2.Arduino program structure
- 3. The construction of the Arduino development env
- 4. Introduction of Arduino software interface
- 5.Connecting the Adeept Arm Drive Board and the co
- 6.The solution for situation that Arduino IDE cann
- 7、
- 8. Configuring the "libraries" folder of the Ardui
- Lesson 1 How to Read the Data of the Potentiometer
- Lesson 2 Controlling the Servo
- Lesson 3 Displaying Text on the OLED Screen
- Lesson 4 Saving Data with EEPROM
- Lesson 5 Servo 90 degree adjustment
- Lesson 6 How to Assemble the Robotic Arm
- Lesson 7 GUI application control mode
- Lesson 8 GwBlock graphical control mode
- Lesson 9 Potentiometer control mode
- Lesson 10 Learning mode
- Lesson 11 Processing controls robotic arm
- Lesson 12 Imitation function(Pen)
- Lesson 13 Processing controls robotic arm to write

125
(12)Click the "Connecting device" button in the upper right corner. It will show
as below:
(13) In the pop-up box, enter the IP address in step (9): 192.168.3.69. And then
click the Connecting button, as shown below:
(14) After a successful connection, as shown below, a green connected prompt
will appear in the lower left corner. It means that we have successfully connected to
the GwBlock graphical editor, with which we can realize the graphical programming
of Arduino. Later I will teach you how to use GwBlock graphical editor.