
5DOF Robotic Arm Kit for Ardunio Uno R3 - Tutorial
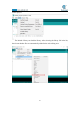
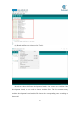
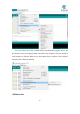
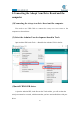
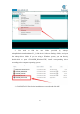
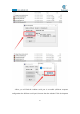
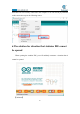
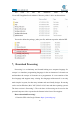
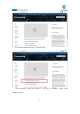
Table Of Contents
- Contents
- Components List
- Introduction of Robotic Arm
- Introduction of Adeept Arm Drive Board
- Lesson 0 Building the Arduino Development Environm
- 1.Arduino development language
- 2.Arduino program structure
- 3. The construction of the Arduino development env
- 4. Introduction of Arduino software interface
- 5.Connecting the Adeept Arm Drive Board and the co
- 6.The solution for situation that Arduino IDE cann
- 7、
- 8. Configuring the "libraries" folder of the Ardui
- Lesson 1 How to Read the Data of the Potentiometer
- Lesson 2 Controlling the Servo
- Lesson 3 Displaying Text on the OLED Screen
- Lesson 4 Saving Data with EEPROM
- Lesson 5 Servo 90 degree adjustment
- Lesson 6 How to Assemble the Robotic Arm
- Lesson 7 GUI application control mode
- Lesson 8 GwBlock graphical control mode
- Lesson 9 Potentiometer control mode
- Lesson 10 Learning mode
- Lesson 11 Processing controls robotic arm
- Lesson 12 Imitation function(Pen)
- Lesson 13 Processing controls robotic arm to write

21
Button bar includes functions of Verifying,Uploading,Building New,Opening and
Saving.
(
1
)
Verify :
Checking and compilation. This button is used to check the correctness of your
"syntax" or code. If your code has any syntax errors or undefined variables, an error
message will appear at the bottom of the IDE screen. At the same time, the line of
error code will be marked with a red background color for easy modification. But if it
is correct, you will see the message that the compilation is complete.
(2)Upload :
Download the program code to the Arduino development board. It is better to
click Verify first, and then click Upload.
(
3
)
New :
Open a new program editing window to create a new project.
(4)Open :
This button can open an existing draft file. You will use it when you need to open
a file that you have downloaded or used before.
(
5
)
Save :
Save the program file being edited.
(3)Code editing area
The code editing area is where to write program code and code comments.
(4)Console
The debug window will output information showing various compilation and
debugging results. For example, if your code is written incorrectly, you will be
prompted about what went wrong.