
Operating instructions
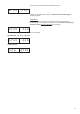
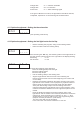

4.8 Testing the corner knives
950 123
In the right LED field the current seam length of L1 flashes.
With key “P” the corner knives are moved up and down.
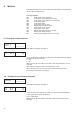
4.9 Checking the center knife activation
951 on
The center knife is switched on and off with key “F”.
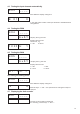
4.10 Setting the light-barrier for the flap
–
Before activating the program, swing out the folding station.
–
Place the fabric under the feeding clamp.
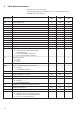
952 ____
After actuating the “OK“ key, the switching status of the light-barrier to
the flap-scanning will be shown in the right half of the display flashing.
Reflecting ® LS 1
No reflection ® LS 0
952 LS 1
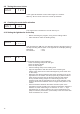
Activate the following output elements:
Lower the feeding clamps left and right
Close the folding sheets
Close the flap clamps
–
Pull the feeding clamp to the feeding area.
–
Align the light-barrier with the center of the reflecting foil.
Please check the area from the s eam beginning to the seam end
on the clamp.
–
Determine the distance between the switch actuation point of the
light-barrier to the needle. For this purpose lay a pattern made of
paper having the same size as the flap under the flap clamps.
Then push the feeding clamps from the feeding area to the
machine head until the light-barrier has no longer reflexion. Then
measure the distance between the front edge of the pattern to the
needle.
–
Enter the distance between the switch actuation point of the
light-barrier and the needle in the machine parameters. Switch the
machine off, when swithching it on strike the “P“ and “®“keys
simultaneously in order to switch over to the programming level
(400) for machine parameters (Code 2548). In the menu item 406
enter the distance in 1/10 mm.
14