
User Guide


Using Help | Contents | Index Back 231
Adobe After Effects Help 3D Compositing
Using Help | Contents | Index Back 231
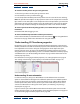
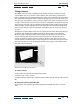
To move the anchor point in 3D space using the axes:
1 Select the layer whose anchor point you want to move.
2 In the toolbox, click the pan behind tool ( ).
3 In the Composition window, position the pointer over the center of the axes and drag.
Note: This procedure also adjusts the layer position relative to the composition so that the
layer remains in the same place in the composition that it occupied before you moved the
anchor point. To move the layer relative only to the anchor point, either move the anchor
point in the layer window or change the anchor position value in the Timeline window.
To move a layer faster when adjusting position, or to rotate the layer in 45- degree
increments:
Hold down Shift while dragging an axis.
To show a wireframe representation of the layer movement:
In the Timeline window, click the Wireframe Interactions button ( ). See “Using Wireframe
Interactions” on page 242 for more information on using this feature.
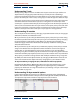
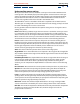
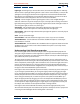
Understanding 3D Transform properties
Designating a layer as 3D increases the number of transform properties. In the Timeline
window, each of the standard 2D transform properties of Anchor Point, Position, and Scale
have adjustable Z-axis values in 3D layers. Changing these values adjusts the layer’s
position along the Z-axis. 3D layers also add Rotation Transform properties that can be
changed for each axis independently, as well as an additional Rotation Transform property
called Orientation (see “Understanding 3D rotation” on page 232 for information on the
rotation property values).
For information on changing Transform properties, see “Setting keyframes” on page 98
and “Setting and animating a layer property in the Timeline window” on page 114.
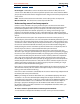
Z-axis values highlighted
Understanding 3D auto-orientation
In contrast to 2D layers, 3D layers in After Effects include additional auto-orientation
options in the Auto-Orient dialog box. The additional options that are added depend on
the layer to which auto-orientation is applied. 3D footage layers add the Orient Toward
Camera option which, when chosen, sets the layer so that it will always face the active
camera. For information on setting auto-orient options, see “Rotating a layer along a
motion path” on page 111.
Light and camera layers add the Orient Toward Point of Interest option. For more infor-
mation about this option, see “Understanding camera Transform properties” on page 237
or “Understanding Light Transform properties” on page 240.