
User Guide


103
ADOBE INCOPY CS2
User Guide
To specify the measurement units
You can set custom measurement units for the on-screen rulers and for use in palettes and dialog boxes. You can also
change these settings at any time and temporarily override the current measurement units as you enter a value.
1 Choose Edit > Preferences > Units & Increments (Windows) or InCopy > Preferences > Units & Increments
(Mac OS).
2 For Horizontal and Vertical, choose the measurement system you want to use for horizontal and vertical dimen-
sions in rulers, dialog boxes, and palettes; choose Custom, and type the number of points at which you want the ruler
to display major tick marks. Click OK.
You can also change ruler units by right-clicking (Windows) or Control-clicking (Mac OS) a ruler, and choosing the
units from the context menu.
To temporarily override the measurement units
❖ Highlight the existing value in a palette or dialog box, and type the new value, using the notation in the following
table:
To specify: Type these
Example Example
letters after
(original) (InCopy
the value:
notation)
Inches i, in, inch, or " 5 1/4 inches 5.25i
Millimeters mm 48 millimeters 48mm
Picas p 3 picas 3p
Points p (before
6 points p6, 6pt
value), pt
(after value)
Picas and p (after value) 3 picas, 6 3p6
points points
Ciceros c 5 ciceros 5c
Note: Like other graphic arts software from Adobe and other companies, InCopy uses PostScript points, which don’t
exactly correspond to traditional printer points. There are 72.27 traditional printer points in an inch, as opposed to 72
PostScript points.
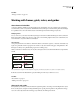
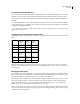
Changing the zero point
The zero point is the position at which the zeros on the horizontal and vertical rulers intersect. By default, the zero
pointisatthe topleftcornerofthe firstpageofeachspread. This meansthatthe defaultpositionofthe zero pointis
always the same relative to a spread, but may seem to vary relative to the pasteboard.
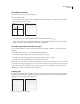
The X and Y position coordinates in the Transform palette are displayed relative to the zero point. You can move the
zero point to measure distances, to create a new reference point for measurement, or to tile oversized pages. By
default, each spread has one zero point at the upper left corner of the first page, but you can also locate it at the
binding spine, or specify that each page in a spread has its own zero point.
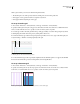
When you move the zero point, it moves to the same relative location in all spreads. For example, if you move the
zero point to the top left corner of the second page of a page spread, it will appear in that position on the second page
of all other spreads in the document.