
User Guide


208
ADOBE INCOPY CS2
User Guide
To highlight text containing custom kerning and tracking
In some instances, you’ll want to be aware of text that has custom tracking and kerning applied. If you select the
Custom Tracking/Kerning preferences option, green highlighting appears over text with custom tracking or kerning.
1 Choose Edit > Preferences > Composition (Windows) or InCopy > Preferences > Composition (Mac OS).
2 Select Custom Tracking/Kerning, and then click OK.
To adjust kerning between words only
1 With the Type tool , select a range of text.
2 Do one of the following:
Note: If a range of text is selected, you can’t manually kern the text (you can choose only Metrics, Optical, or 0). Instead,
use tracking.
• To add space between selected words, press Alt+Ctrl+\ (Windows) or Option+Command+\ (Mac OS).
• To remove space between selected words, press Alt+Ctrl+Backspace (Windows) or Option+Command+Delete
(Mac OS).
• To multiply the kerning adjustment by 100, hold down Shift as you press one of the above keyboard shortcuts.
To adjust tracking
1 Using the Type tool , select a range of characters.
2 In the Character palette, type or select a numeric value for Tracking .
Formatting characters
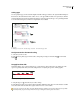
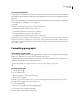
About the Character palette
The Character palette contains the basic options for formatting individual characters in your documents. Values you
enter are precise to 0.001 of a point. To view a description of each Character palette option, hold the mouse pointer
over an option until a tool tip appears.
To format characters
1 Select the Type tool
2 Do one of the following:
.
• Select a range of text you want to format.
• Click to place an insertion point. The next text you type is formatted with the settings you specify.
3 If the Character palette is not already visible, choose Type > Character to display it.
4 Specify settings as explained in the related topics.
Note: To find a list of keyboard shortcuts used to format characters, see “Keys for working with text” on page 284.