
User's Manual Part 2


AdvancedRFTechnologies,Inc. 50
6. INSTALLATION
6.1 Pre‐InstallationInspection
PleasefollowtheseproceduresbeforeinstallingADXequipment:
o Verifythenumberofpackagesreceivedagainstthepackinglist.
o Check all packages for external damage; report any external damage to the shipping carrier. If
thereisdamage,ashippingagentshouldbepresentbefore
youunpackandinspectthecontents
becausedamagecausedduringtransitistheresponsibilityoftheshippingagent.
o Open and check each package against the packing list. If any items are missing, contact ADRF
customerservice.
o Ifdamageisdiscoveredatthetimeofinstallation,contacttheshipping
agent.
o VerifytheACvoltagewith DVM (Volt meter),thenselect the either110Vor 220V AC usingthe
selection switch located at the rear of HE and RU PSU.The ADX ships with the AC selection
switchsettothe110Vposition.IncorrectACselectioncandamagetheADX
equipment.
6.2 ADXDASInstallationProcedure
6.2.1 HEInstallationProcedure
CAUTION: ADXDASHEshouldbeinstalledinsidebuildingonly.
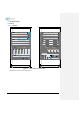
6.2.1.1 InstallingaADXDASHEinarack
TheADXHEchassismountsinastandard19”(483mm)equipmentrack.Allowclearanceof3”(76mm)atthe
frontandrear,and2”(51mm)onbothsidesforaircirculation.Notoporbottomclearanceisrequired.
Consideration:
‐
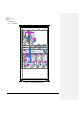
Eightmountingholesarelocatedon4cornersofADXHEtoattachittothe19”rack.TheADXHEmustbe
securelyattachedtoarackthatcansupporttheweightoftheADX.
Mountprocedure
‐ ThefollowingstepsshouldbefollowedwhilemountingtheADXHE
DetachthewallmountbracketassembledlocatedatthebaseoftheADX‐HEchassis
VerifythattheHEandMountingholesareingoodcondition
SettheADXDASHEagainstthe19”rackandsecuretheunitwithscrews
VerifythatADXHEissecurely
attached
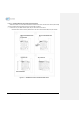
ConnecttheGNDcable
ConnecttheRFcable
ConnectthePower
ConnecttheOpticcable