
USB Instant DVD User's Guide


60 VIDEOSTUDIO USER GUIDE
Preview Files Manager
Use Preview Files Manager to free hard disk space occupied by temporary preview files
used in your project.
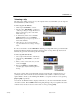
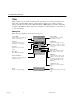
To delete temporary preview files:
1. Click Settings and Commands: Preview
Files Manager to display the Preview Files
Manager dialog box. You can also click
Preview Files Manager in the Start Step
Options Panel.
2. Select the VSP project under Project file
name where the temporary preview files you
want to remove are located and click Delete.
This removes only the temporary preview
files and not the actual VSP project.
3. Click Delete All to remove all temporary
preview files of all VSP projects.
4. Click Close.
Insert Media Files
Tip: Press [Ctrl + S] to quickly save your project from time to time. This ensures that all project settings and file links
are always updated.
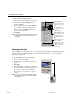
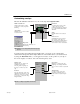
Inserting a clip into the Timeline
To add video clips to the Timeline, you can use drag and drop or browse and select, depending
on where your clips are located.
To insert a video clip into the Timeline:
• Select a clip in the Library and drag and drop
it to the Timeline. Multiple clips can be
selected by pressing [Shift] or [Ctrl].
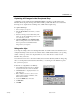
• To insert a clip from a file folder directly to
the Timeline, click Insert Media Files,
located to the left of the Timeline.
VS6-B.p65 6/4/2002, 12:23 PM60