6DIHZDWFK 3UR (1 (QWUHSUHQHXU (1 6HFXULW\ 0DQDJHU (1 6HFXULW\ 6\VWHPV 8VHU·V *XLGH Meets ADT Security Services Triple Standards Requirements: C LISTED US Standards for Security and Fire Standard for False Alarm Reduction 7 167-0495:110 California State Fire Marshal Approval K5309V3 6/02 Model SASW3000EN 1
IMPORTANT! PROPER INTRUSION PROTECTION For proper intrusion coverage, sensors should be located at every possible point of entry to a home or commercial premises. This would include any skylights that may be present, and the upper windows in a multi-level building.
7DEOH RI &RQWHQWV System Overview .................................................................................................................... 5 Introduction .......................................................................................................................... 5 System Basics ....................................................................................................................... 5 Using the Voice Message Center ......................................................
Table of C ontents Macro Key Programming & Usage................................................................................... 25 About Macro Keys............................................................................................................... 25 Example of Macro Programming ....................................................................................... 26 Using a Programmed Macro Key.......................................................................................
6\VWHP 2YHUYLHZ ,QWURGXFWLRQ Congratulations on your ownership of an ADT Partitioned Security System. You've made a wise decision in choosing it, for it represents the latest in security protection technology today, and millions of premises are protected by ADT systems. This system provides: • Three forms of protection: burglary, fire* and emergency.
\VWHP 2YHUYLHZ &RQWLQXHG Zones and Partitions • The system sensing devices have been assigned to various “zones,” which are specific areas of protection (e.g., front door, kitchen window, etc.). • Zone numbers are displayed at the touchpad when an alarm or trouble condition occurs on a sensor. • Partitions provide two independent areas of protection, with each partition containing a group of zones that can be armed and disarmed without affecting other zones or users.
6\VWHP 2YHUYLHZ &RQWLQXHG Phone Access • If included, a phone module permits you to access the system via a touch-tone phone, either on-premises or by call-in when away. • When you call in, the phone module announces system status over the telephone, and you can arm/disarm the system and perform most function commands remotely using the telephone keys. • Complete information for using these features is provided with the voice module.
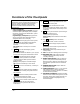
$ERXW 7KH 7RXFKSDGV *HQHUDO ,QIRUPDWLRQ Your touchpads allow you to control all system functions and feature the following: • A telephone style (digital) keypad • Liquid Crystal Display (LCD) which shows the nature and location of all occurrences • Built-in sounder which will sound during alarms and troubles. The sounder also "beeps" during certain system functions and when depressing any of the keys (to acknowledge the key press). • Backlighting of the LCD display windows.
$ERXW 7KH 7RXFKSDGV &RQWLQXHG (QJOLVK 'LVSOD\ 7RXFKSDG AWAY: All burglary zones, interior and perimeter, are armed. NO AC TEST BYPASS NOT READY CHIME BAT ALARM FIRE CHECK INSTANT AWAY STAY STAY: Perimeter burglary zones, such as protected windows and doors, are armed. INSTANT: Entry delay is turned off: Lit with STAY = Instant mode Lit with AWAY = Maximum mode BYPASS: This appears when one or more burglary protection zones have been bypassed.
)XQFWLRQV RI WKH 7RXFKSDGV NOTE: The functions printed directly on the keys indicate their primary purpose (most require entry of a security code first); the functions printed under some keys (shown in brackets in the list below) indicate an alternate function available on voice touchpads only. 9. 2. 1 OFF Disarms burglary portion of the system, silences alarms and audible trouble indicators, and clears visual display after problem's correction. [RECORD] Used to record up to a 2.5-minute message. 3.
)XQFWLRQV RI WKH 7RXFKSDGV &RQWLQXHG 1 2 3 4 20 19 18 17 1 ARMED 16 READY 3 AWAY STAY RECORD VOLUME 4 5 TEST 6 BYPASS 7 INSTANT 8 CODE 9 READY 0 PLAY 5 6 7 8 9 MESSAGE MIC 14 13 # VOICE STATUS 12 CHIME 10 FUNCTION 11 6160VADT-002-V0 15 2 OFF Custom English Display Voice Touchpad (shown without swing-down front door) IMPORTANT! • When entering codes and commands, sequential key depressions must be made within 10 seconds of one another.
(QWU\ ([LW 'HOD\V (QWU\ 'HOD\ Entry Delays give you time to disarm the system when you re-enter through the designated entrance door. You must disarm the system (simply enter your security code) before the entry delay period ends, or an alarm will occur. The touchpad beeps during the entry delay period, reminding you to disarm the system. There are two entry delays (if programmed).
(QWU\ ([LW 'HOD\V &RQWLQXHG ([LW $ODUPV Whenever you arm the system, the exit delay begins. If an entry/exit door or interior zone is faulted when the exit delay ends (e.g., exit door left open), the system sounds an alarm and starts the entry delay timer. If you disarm the system before the entry delay ends, the alarm sound stops and the message "CANCELED ALARM" or "CA" is displayed on the touchpad, along with a zone number indicating the faulted zone. No message is sent to the Customer Care Center.
&KHFNLQJ )RU 2SHQ =RQHV 8VLQJ WKH >∗@ .H\ WR 'LVSOD\ DQG $QQRXQFH 6\VWHP 6WDWXV Before arming your system, all protected doors, windows and other protection zones must be closed or bypassed, otherwise the touchpad will display a "Not Ready" message. 1. Press [∗] READY (do not enter code first) to display faulted zones. 2. Secure or bypass the zones displayed. 3. The touchpad’s READY indicator lights when all protection zones have been either closed or bypassed. 4. Arm the system as desired.
$UPLQJ WKH 6\VWHP 6WD\ 0RGH $UPV 3HULPHWHU 2QO\ (QWU\ 'HOD\ 2Q • Used when you want to arm the system with persons staying inside (or if you have pets that are moving throughout the premises). • The perimeter sensors are armed, but interior sensors are left disarmed. • Exit delay begins (you can leave through the entry/exit door, if desired). • An alarm sounds immediately if any protected perimeter window or non-entry/exit door is opened. • You may otherwise move freely within the premises.
$UPLQJ WKH 6\VWHP $UPLQJ &RPPDQGV Before arming, close all perimeter doors and windows and make sure the Ready to Arm message is displayed.
$UPLQJ WKH 6\VWHP 6LQJOH %XWWRQ $UPLQJ The “A”, “B”, “C”, and/or “D” keys on your touchpad may have been programmed for single-button arming. Note that while it will not be necessary to use a security code for arming, a security code must always be used to disarm the system. If Single-Button Arming is programmed: • A function key has been assigned to a specific type of arming: STAY mode, NightSTAY mode, AWAY mode, or STEP-ARMING (see Step-Arming paragraph).
8VLQJ WKH .H\VZLWFK 8VLQJ WKH .H\VZLWFK Your system may be equipped with a keyswitch for use when arming and disarming. Red and green lights on the keyswitch plate indicate the status of your system as follows: Green Light: Lights when the system is disarmed and ready to be armed (no open zones). If the system is disarmed and the green light is off, it indicates the system is not ready (one or more zones are open). Red Light: Lights or flashes when system is armed in AWAY or STAY mode.
'LVDUPLQJ DQG 6LOHQFLQJ $ODUPV 8VLQJ WKH >2))@ NH\ The OFF key is used to disarm the system, silence alarm and trouble sounds, and clear alarm memories. IMPORTANT: If you return and the main burglary sounder is on, DO NOT ENTER, but CONTACT THE POLICE from a nearby safe location. If you return after an alarm has occurred and the main sounder has shut itself off, the touchpad will beep rapidly upon your entering, indicating that an alarm has occurred during your absence.
%\SDVVLQJ 3URWHFWLRQ =RQHV 8VLQJ WKH %<3$66 .H\ Use this key when you want to arm your system with one or more zones intentionally unprotected. Vent Zones: Your system may have certain windows set as “vent” zones, which are automatically bypassed if left open when arming the system (you do not need to manually bypass them). However, if a vent zone window is closed after arming, it becomes protected and will cause an alarm if opened again while the system is armed.
%\SDVVLQJ 3URWHFWLRQ =RQHV 4XLFN %\SDVV If programmed, "Quick Bypass" allows you to easily bypass all open (faulted) zones without having to enter zone numbers individually. This feature is useful if, for example, you routinely leave certain windows open when arming at night. + 6 + [#] 1. (Security Code) BYPASS In a few moments, all open zones will be displayed and automatically bypassed.
&KLPH 0RGH CHIME mode alerts you to the opening of a perimeter door or window while the system is disarmed. When Chime mode is activated: • Three tones sound at the touchpad whenever a perimeter door or window is opened. • Interior zones do not produce a tone when they are faulted. • Pressing the READY key will display the open protection points. To turn Chime Mode on/off (system must be disarmed): + (Security Code) (-7%61)( 9 6)%(= 83 %61 CHIME English Display: READY The CHIME message appears when on.
9LHZLQJ &XUUHQW 'DWH DQG 7LPH 9LHZLQJ WKH &XUUHQW 'DWH DQG 7LPH The system lets you view its time and date setting. +[#] + [6] [3] (-7%61)( (Security Code) 6)%(= 83 %61 OR, press the function key (A, B, C, or D) for viewing current date and time, if programmed. A typical time/date display is shown. The display will remain on for about 30 seconds.
3DQLF .H\V 8VLQJ 3DQLF .H\V Your system may have been programmed to use special keys to manually activate emergency (panic) functions as follows: This Function Silent Alarm Sends this signal* silent alarm With This Sounding… no audible alarm or any visual display indicating that a silent alarm has been initiated. Audible Alarm audible alarm a loud, steady alarm at touchpad(s) and at any external sounders that may be connected.
0DFUR .H\ 3URJUDPPLQJ 8VDJH $ERXW 0DFUR .H\V The “A”, “B”, “C” or “D” keys can be used to automatically activate a series of commands of up to 16 keystrokes, if programmed for this function. These keystrokes, as a group, are called “macros” and are stored in the system's memory. • Typical macro functions can include: - Arming sequences: STAY, Night-STAY, INSTANT, or AWAY - Bypassing particular zone(s) - Activating relay(s) for turning on (or off) lights, fans, etc.
0DFUR .H\ 3URJUDPPLQJ 8VDJH FRQW The touchpad beeps to acknowledge your input and displays the command you entered (followed by “F”). 4. Enter the next command, followed by press/holding the “D” key for at least two seconds. The touchpad beeps and displays the keystrokes entered so far. 5. Repeat until the all the desired commands (up to 16 characters including the “F”s) have been entered. Be sure to check your keystrokes before continuing. If you made a mistake, you must start over. 6.
8VLQJ 'HYLFH &RPPDQGV $ERXW 'HYLFH &RPPDQGV Your system may be set up so that it can control certain lights or other devices. • Some devices may be automatically turned on or off by the system. • You may be able to override automatically controlled devices using the commands described below. • Some devices can be manually turned on or off using the commands described below. • See your installer for a list of devices that may be set up for your system.
3DJLQJ )HDWXUH $ERXW $XWRPDWLF 3DJLQJ Your system may be set up to automatically send alert messages to a pager as certain conditions occur in your system. • The following events can be programmed by your installer to be sent to the pagers: arming, disarming†, alarms, and trouble conditions. († reports when arming/disarming from a touchpad using a security code; auto-arming/disarming, arming with assigned button, and keyswitch arming do not send pager messages.
3DJLQJ )HDWXUH Examples of typical 7-digit pager displays follow. Ex. 1. ³ = Reporting of an alarm (911) caused by a fault on zone 4 (0004) in partition 1. Ex. 2. ³ = Reporting of a closing–system arming (102)– by user 5 (0005) in partition 2. $ERXW 0DQXDO 3DJLQJ Your system may be set up so you can manually send a message to up to four pagers. • Your installer programs the paging function key and the pager phone numbers.
6HFXULW\ &RGHV $XWKRULW\ /HYHOV $ERXW 6HFXULW\ &RGHV Your system lets you assign up to 45 different security codes for use by other users. • Only the System Master and Partition Masters can assign user codes to users. • Users are identified by 2-digit user numbers 03-49 and are pre-assigned to either partition 1 or partition 2 (users 01-02 are reserved). • Only the Installer or System Master can change the partitions to which a user is assigned.
6HFXULW\ &RGHV $XWKRULW\ /HYHOV &RQW +RZ 7R $VVLJQ 8VHU &RGHV DQG $WWULEXWHV The following lists the various command strings for adding user codes and attributes. Refer to the User Setup chart at the back of this manual for factory assignments of user attributes and to keep a record of user programming. NOTE: Partition Master codes apply only to those user numbers previously assigned (by the system master/installer) to the partition master’s partition.
$FFHVVLQJ 2WKHU 3DUWLWLRQV *272 &RPPDQG DQG 0XOWL 3DUWLWLRQ $UPLQJ $ERXW $FFHVVLQJ 3DUWLWLRQV Each touchpad is assigned a default partition for display purposes, and will show only that partition's information. • If the user is authorized, a touchpad in one partition can be used to perform system functions in the other partition by using the GOTO command. Refer to the GOTO section. • If the user is authorized, that user can arm other partitions. Refer to the MultiPartition Arming section.
$FFHVVLQJ 2WKHU 3DUWLWLRQV &RQWLQXHG 8VLQJ WKH *R7R &RPPDQG If the user is authorized, a touchpad in one partition can be used to perform system functions in the other partition by using the GOTO command. • You must use a Custom English touchpad to access another partition. • Touchpads automatically return to their original partition after 2 minutes with no touchpad activity. + [∗] + partition number (0,1,2,3) 1. (Security Code) 0 = return to touchpad’s original partition.
$FFHVVLQJ 2WKHU 3DUWLWLRQV &RQWLQXHG &RPPRQ =RQH 2SHUDWLRQ Ask your installer if a "common zone" was assigned. If so, check this box Your system may have been set up to use a common zone, which is an area shared by users of both partitions, such as a foyer or lobby. If so, please note the following: • The common zone will sound and report alarms only when both partitions are armed. If only one partition is armed, the system ignores faults on the common zone.
6FKHGXOLQJ $ERXW 6FKHGXOLQJ The system provides up to 16 end-user schedules (programmable by master/installer only), which can be used to control various types of events. • Each schedule causes a defined event to start and stop (when appropriate) at a specified time. • Schedules can be set to automatically repeat at various intervals. • Schedules can be set for random starting, if desired. &UHDWLQJ 6FKHGXOHV + [#] + [6] [4] 1. (Master Code) 2. Enter a 2-digit schedule number from 01-16.
6FKHGXOLQJ FRQWLQXHG 5. For event number “02,” enter the access group number. Otherwise, this prompt is skipped. Press [∗] to continue to the “Start” prompt below. 6. For event numbers “03-07,” enter the partition number to be armed or disarmed. 0 = arm all; 1 = partition 1; 2 = partition 2; 3 = arm common Otherwise, this prompt is skipped. Press [∗] to continue to the “Start” prompt. 7. Enter the event’s start time and days of week.
(YHQW /RJJLQJ 3URFHGXUHV $ERXW (YHQW /RJJLQJ The system records various events in a history log, which can be viewed by the master user using a Custom English Display touchpad. • The Event Log holds up to 100 events. • Events are displayed in chronological order, from most recent to oldest. • When the log is full, the oldest event is replaced by the logging of any new event. 9LHZLQJ WKH (YHQW /RJ + [#] + 1. 6 + 0 (Master Code) 2.
(YHQW /RJJLQJ 3URFHGXUHV FRQWLQXHG 7DEOH RI (YHQW /RJ &RGHV The following table lists the codes that may appear when viewing the Event Log. If the event code is preceded by an “E” (as in the example display on the previous page), it means that the event is new and ongoing; if preceded by an “R,” it means the event has been restored.
7HVWLQJ WKH 6\VWHP 7R %H &RQGXFWHG :HHNO\ $ERXW 7HVWLQJ WKH 6\VWHP Using TEST mode allows each protection point to be checked for proper operation. • The touchpad sounds a single beep every 40 seconds as a reminder that the system is in the Test mode. • Alarm messages are not sent to your Customer Care Center while Test mode is on. 1 Disarm the system and close all protected windows, doors, etc. The READY indicator light should come on if all zones are intact (i.e., all protected windows, doors, etc.
7HVWLQJ WKH 6\VWHP 7R %H &RQGXFWHG :HHNO\ 6. Test all smoke detectors, following the manufacturer's instructions. The identification of each detector should appear on the display when each is activated. If a problem is experienced with any protection point (no confirming sounds, no display), call for service immediately. When all protection points have been checked and are intact (closed), there should be no zone identification numbers displayed on the touchpad. + [1] 7.
7URXEOH &RQGLWLRQV "Check" and "Battery" Displays The word CHECK on the touchpad's display, accompanied by a "beeping" at the touchpad, indicates a trouble condition in the system. To silence the beeping for these conditions, press any key. 1. A display of "CHECK" and one or more zone numbers indicates that a problem exists with the displayed zone(s) and requires your attention. Determine if the zone(s) displayed are intact and make them so if they are not.
7URXEOH &RQGLWLRQV &RQWLQXHG Words or letters in parentheses ( ) are those that are displayed on English Display touchpads. Other Trouble Displays COMM. FAILURE (or FC) Indicates that a failure has occurred in the telephone communication portion of your system. CALL FOR SERVICE. SYSTEM LO BAT (or BAT with no zone No.) Indicates that a low system battery condition exists. Display is accompanied by "beeping"* at the touchpad.
7URXEOH &RQGLWLRQV &RQWLQXHG Other Trouble Displays (Continued) AC LOSS (or NO AC) The system is operating on battery power Busy-Standby (or dI) If this message remains displayed for more than 1 minute, system is disabled. CALL FOR SERVICE. OPEN CIRCUIT (or OC) The touchpad is not receiving signals from the control. CALL FOR SERVICE. Long Rng Trbl (or bF) If part of your system, back-up Long Range Radio communication has failed. CALL FOR SERVICE.
0DLQWDLQLQJ
)LUH $ODUP 6\VWHP ,I ,QVWDOOHG THIS SECTION APPLIES ONLY TO RESIDENTIAL SYSTEMS General Your fire alarm system (if installed) is on 24 hours a day, for continuous protection. In the event of an emergency, the strategically located smoke and heat detectors will sound their alarms and automatically send signals to your system, triggering a loud, interrupted pulsed sound* from the Touchpad(s) and any external sounders.
)LUH $ODUP 6\VWHP &RQWLQXHG THIS SECTION APPLIES ONLY TO RESIDENTIAL SYSTEMS Manually 1. Should you become aware of a fire emergency before your smoke or heat detectors sense the problem, go to your nearest touchpad and Initiating manually initiate an alarm by pressing the panic key assigned for a Fire Alarm FIRE emergency for 2 seconds. If a key pair has been assigned for fire, press both keys at the same time. See Using the Panic Keys section below for further details. 2.
)LUH $ODUP 6\VWHP &RQWLQXHG THIS SECTION APPLIES ONLY TO RESIDENTIAL SYSTEMS 1DWLRQDO )LUH 3URWHFWLRQ $VVRFLDWLRQ 5HFRPPHQGDWLRQV RQ 6PRNH 'HWHFWRUV With regard to the number and placement of smoke/heat detectors, we subscribe to the recommendations contained in the National Fire Protection Association's National Fire Alarm Code (NFPA 72) noted below.
)LUH $ODUP 6\VWHP &RQWLQXHG THIS SECTION APPLIES ONLY TO RESIDENTIAL SYSTEMS (PHUJHQF\ (YDFXDWLRQ PORCH OM ET RO OS D L E C B OM OM H RO RO AT D D B BE BE 2ND FLOOR EN CH KIT BACK DOOR M OO DR E B M OO TH DR BA E B 1ST FLOOR • • BACK • FRONT – 48 – Establish and regularly practice a plan of escape in the event of fire. The following steps are recommended by the National Fire Protection Association: 1.
4XLFN *XLGH WR %DVLF 6\VWHP )XQFWLRQV FUNCTION PROCEDURE COMMENTS Check Zones Press READY key. View faulted zones when system not ready. Arm System Enter code. Press arming key desired: (AWAY, STAY, NIGHT-STAY, INSTANT) Arms system in mode selected. Quick Arm (if programmed) Press #. Press arming key desired: (AWAY, STAY, INSTANT) Arms system in mode selected, quickly and without use of a code. Bypass Zone(s) Enter code. Press BYPASS key.
6XPPDU\ RI $XGLEOH 9LVXDO 1RWLILFDWLRQV (QJOLVK 'LVSOD\ 7RXFKSDGV SOUND CAUSE DISPLAY LOUD, INTERRUPTED* FIRE ALARM FIRE is displayed; zone number of zone in alarm is displayed. If a fire alarm is manually activated, zone number 95 will be displayed. LOUD, CONTINUOUS* Touchpad & Ext. BURGLARY/AUDIBLE EMERGENCY ALARM ALARM is displayed. Zone number of zone in alarm is also displayed. ONE SHORT BEEP (not repeated) Touchpad only a. SYSTEM DISARM b. SYSTEM ARMING ATTEMPT WITH AN OPEN ZONE. a.
6XPPDU\ RI $XGLEOH 9LVXDO 1RWLILFDWLRQV &XVWRP (QJOLVK 'LVSOD\ 7RXFKSDGV SOUND LOUD, INTERRUPTED* Touchpad & Ext. CAUSE DISPLAY FIRE ALARM. FIRE is displayed; descriptor of zone in alarm is displayed. If a fire alarm is manually activated, zone number 95 will be displayed. LOUD, CONTINUOUS* Touchpad & Ext. BURGLARY/AUDIBLE EMERGENCY ALARM. ALARM is displayed. If programmed, descriptor of zone in alarm is also displayed ONE SHORT BEEP (not repeated) Touchpad only a. SYSTEM DISARM. a.
5HJXODWRU\ 6WDWHPHQWV DQG :DUQLQJV NOTE: This is a “Grade A” Residential System RADIO FREQUENCY EMISSIONS Federal Communications Commission (FCC) Part 15 This device complies with part 15 of the FCC rules. Operation is subject to the following two conditions: (1) This device may not cause harmful interference, and (2) this device must accept any interference received, including interference that may cause undesired operation. Industry Canada This Class B digital apparatus complies with Canadian ICES-003.
5HJXODWRU\ 6WDWHPHQWV &RQWLQXHG Industrie Canada AVIS: l’étiquette d’Industrie Canada identifie le matériel homologué. Cette étiquette certifie que le matériel est conforme aux normes de protection, d’exploitation et de sécurité des réseaux de télécommunications, comme le prescrivent les documents concernant les exigences techniques relatives au matériel terminal. Le Ministère n’assure toutefois pas que le matériel fonctionnera à la satisfaction de l’utilisateur.
&KDUWV RI
&KDUWV RI
&KDUWV RI
&KDUWV RI
² 1RWHV ² – 58 –
² 1RWHV ² – 59 –
² 1RWHV ² – 60 –
² 1RWHV ² – 61 –
/,0,7$7,216 2) 7+,6 6<67(0 WARNING! THE LIMITATIONS OF THIS ALARM SYSTEM While this system is an advanced design security system, it does not offer guaranteed protection against burglary or other emergency. Any alarm system, whether commercial or residential, is subject to compromise or failure to warn for a variety of reasons. For example: • Intruders may gain access through unprotected openings or have the technical sophistication to bypass an alarm sensor or disconnect an alarm warning device.
/,0,7(' :$55$17< Terms and Conditions Applying to Sale of Equipment /LPLWHG :DUUDQW\ Any part of the system, including the wiring, installed under this Agreement which proves to be defective in material or workmanship within 90 days of the date of completion of installation will be repaired or replaced at ADT's option with a new functionally operative part.
LIMITED WARRANTY (Continued) This warranty is in lieu of all other express warranties. Any implied warranties of merchantability and fitness for a particular purpose are limited in duration to a period of 90 days from the date of completion of installation. The exclusive remedy of the customer hereunder shall be repair or replacement as stated above.