APR/30/2003 MODEL RST772A REMOTE ENGINE STARTER WITH ALARM SYSTEM OWNER’S MANUAL FCC COMPLIANCE STATEMENT: This device complies with part 15 of the FCC Rules. Operation is subject to the following two conditions: (1) This device may not cause harmful interference, and (2) this device must accept any interference received, including interference that may cause undesired operation.
APR/30/2003 TABLE OF CONTENTS: A. REMOTE TRANSMITTER OPERATION ………………………………………….………………….………. 4 B. BUTTON LOCK …………………………………………………..…………………………………….……..…. 4 C. LED DISPLAY .……………..……………………………………………………………………….……………. 5 D. CHIRP INDICATOR ..………..………………………………………………………………………………..…. 5 E. PARKING LIGHT …….……..……………………………………………………………………………..….…. 5 F. ALARM OPERATION CONDITION .………………………………………………………………………...…. 5 G. ACTIVE ARMING – ARM & LOCK .……………………………………………………………...…………….
APR/30/2003 B. THE REMOTE LCD ICONS WITH FUNCTION ……….………………………………………………….… 13 C. PROGRAMMING OF THE LCD REMOTE TRANSMITTER …………………………………………….… 14 1. Screen Lamp ON 2. Power Save Mode 3. Clear The Flash Icon and Melody Sound 4. Stop The Melody Sound. 5. Button Lock 6. Vibration / Melody Mode 7. Enable / Disable Bi Sound While Pressing Button: 8. Low Battery Indication. 9. Set Up Fixed Count Down Timer 10. Out Of The Range Check D. TIMER SETTING ……………………………….…………………………..…………………….………….… 15 1. Timer Setting.
APR/30/2003 OPERATION: A. REMOTE TRANSMITTER OPERATION: Transmitter Button System Function Lock Doors & Arm System Panic function Car Locator Press and Hold for 3 seconds. Under armed mode Arm and Delete The 2 Stage Shock Sensor. Press twice within 3 seconds Arm System and Hidden Alarm Function Press within 3 seconds + Silent Arming / Disarming Ignition in "off" position.
APR/30/2003 D. CHIRP INDICATORS: Chirp 1 chirp 2 chirps 3 chirps 4 chirps 6 chirps E. PARKING LIGHT: Function Arm Disarm Defective Reminder Disarm / Triggered Car Locator Parking light 1 flash 2 flashes 3 flashes 12 flashes Constant On Function Arm Disarm Disarm / Triggered Car Locator Under Remote Start F. ALARM OPERATING CONDITION: 1. Arming 2. Disarming 3. Trigger 4. Passive Starter Disable 5. Panic 6. Car-Jacking 7.
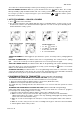
APR/30/2003 The vehicle doors will automatically lock after passive arming cycle has been completed. buttons twice, the security PASSIVE ARMING BY-PASS: While the system disarmed, Press the will respond with [1] chirp and LED will turn “ON”. The security system will remain in this temporally state for as long as you wish. To exit passive by-pass, press the transmitter will return to normal status. or button and the system I. ACTIVE DISARMING – UNLOCK & DISARM: button on the transmitter. 1. Press 2.
APR/30/2003 [4] Chirps form siren/horn, [3] flash from parking light to indicate the system was disarmed. Note 1: You must override the alarm within 60 seconds. If not, the system will automatically re-arm. EXAMPLE: To Override The System With The Password Code 83, you would; 1. Enter the vehicle and turn the ignition switch to 'ON’ position. (Alarm will sound.) 2.
APR/30/2003 Trunk/Hood Trigger Warn-away Trigger Doors Trigger Shock Sensor Trigger Ignition Trigger CLEAR THE FLASH ICON AND MELODY SOUND: While triggering the alarm the LCD screen will alert user through melody sound and flashing trigger icon, press the button 3 times within 3 seconds will clear the flash icon and stop melody sound on the LCD screen transmitter.
APR/30/2003 P. SYSTEM’S TRIGGER CHECK first, within 3 seconds press (C) button. It responds Press the transmitter with one melody sound and all trigger’s records will immediately displayed on the LCD screen. Q. SYSTEM’S STATUS CHECK When you want to check the system’s present status through the LCD screen, Press button twice, within 3 seconds press (C) button. It the transmitter responds with one melody sound, the LCD screen should be illuminated. R.
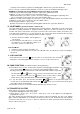
APR/30/2003 W. CHANNEL 5 TIMER CONTROL OUTPUT (See Alarm Feature III – 6 Programming.) (5) and (5) buttons at the same time to active Channel 5 function. Press the transmitter Channel 5 is user-programmable timer output. You may program the built-in timer to send a ground signal for any time duration from 1 second to 120 seconds. For instance, this timer output may be used to turn on the headlight, power window or sunroof. (Factory defaults setting at momentary output.) X.
APR/30/2003 IMPORTANT: Timer Start should be used only in open areas, Never start and run the vehicle in on enclosed space as a garage or carport. 3 hours timer start: This feature is design for an extreme cold climate usage. The system will auto start the vehicle every 3 hours, to prevent engine freezing and hard to start. A MAXIMUM OF SIX CYCLES CAN OCCUR. Daily Timer Start: The feature is very useful for the driver who wants to run the vehicle punctually at the same time next morning.
APR/30/2003 LCD REMOTE CONTROL TRANSMITTER: Note: If the system is interfered by stronger radio frequency around, sources of high voltage electric power or such Obstacles like tall buildings and so on, the transmission range may get shorter as the system uses low out put powered frequency. A. BATTERY REPLACEMENT: A 1.5V type AAA Alkaline battery powers the Remote Transmitter. When the power of the battery weakens a icon shall be displayed on the LCD screen.
APR/30/2003 Timer Control Start Engine start automatically at the same time next day or every 3-hour. Time Monitor Count Down Timer Reminder when time is up for parking Vibration Mode Remote Control vibrates when the system is triggered Driver paging Someone is paging you in front of your vehicle Low Battery You have to replace the battery of remote control. Alert Alarm You have set morning call alarm Power Save Mode Save the battery power Button Lock Disable the transmission function temporarily C.
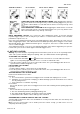
APR/30/2003 button to prevent from any inadvertent pressing of buttons by others. Press the first, within 3 seconds press and hold the ( ) button for 2 seconds to activate or icon will displayed on the LCD screen to cancel the button lock function, the show the LCD remote transmitter is on “Button Lock”. 6.
APR/30/2003 Flash / for adjusting EXIT: Press and hold the programming mode. icon and “Hours” button for 2 seconds or leave it for 10seconds, the system will exit the 1. Timer Setting: Example to AM10:30 1. Press & hold the adjusting. 2. Press the or button to decrease or increase the “Hour” digit until AM10:xx button once again then the “Minute” digit flashes for adjusting. 3. Press the 4..Press the button for 3 seconds, with two-melody sound and the “Hours” digit flashes for or 5.