
Instructions ZTH210 (RF Controller, HandheldLED Indicator, 868.42MHz) Instruction Manual
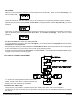

ZTH200 Operating Instructions (Version 1.26)
P/D 102406
HomePro
by ADVANCED CONTROL TECHNOLOGIES, INC.
14
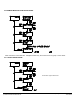
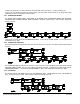
4.3.2 DELETE TIMER
When a timer is no longer needed it can be deleted using “Delete a timer” menu.
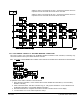
4.4 ADD THERMOSTAT
The ZTH200 will support only one (1) thermostat. If more than one (1) thermostat needs supported, then more ZTH200’s
will be required.
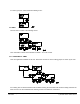
Scroll to the Setup Menu and Press OK.
Scroll to “Add Tstat To Network” and Press OK.
ZTH200 will prompt “Press Button On Unit”.
Once thermostat is added, the ZTH200 will show “Tstat Incl’d, with Support”.
This indicates that the thermostat was included into the Z-Wave network and that the ZTH200 was able to retrieve the
modes and set points the thermostat supports.
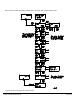
If the remote only shows “Thermostat Included” or “T’stat Incl’d, w/No Support” then the supported modes and set
points were not received from the thermostat and the ZTH200 will not allow the user to access all of the thermostat
functions. If this occurs, simply add the thermostat to the ZTH200 again until it shows “Tstat Incl’d with Support”.
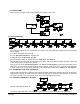
4.4.1 REQUESTING DATA FROM THERMOSTAT
After the thermostat has been included into the ZTH200, repeatedly pressing the OK button will cause the ZTH200 to
toggle between showing the actual temperature (if the thermostat supports sending actual temperature), current mode
and current set point of the mode, and fan mode (if the thermostat supports fan modes),
4.4.2 CHANGING THERMOSTAT SETTINGS
Scroll to Thermostat and Press OK.
You will see Thermostat Mode. At that point you could scroll left or right to change Set point or Fan Speed.