
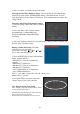
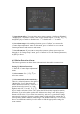
System information


48
2. Motion alarm record channel setup:
Once a motion alarm has been detected
that information can be used to trigger
other alarm conditions. In the “Motion
Alarm Handle” menu you can select one
or more channels to record based on a
camera motion alarm input. Use the
[ENTER] or [EDIT] key to enable the
flag
(“ü ”).
Note: To enable the linked recording
function the affected channels must be
enabled in the “Recording” menu. The schedule must be in an enabled time period (if
selected) and the “Rec Type” must be set to either “Motion Detection, or
Motion/Alarm.
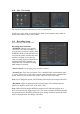
3. Motion alarm schedule: The motion schedule determines the time periods
during which motion alarms will be recognized by the DVR. Motion alarm
responses include: “On Screen Warning,” “Audible tone,” “Upload to Center” and
“Trigger Alarm Output”. You can setup 4 time periods for one day of the week.
Note: Time periods must not overlap.
4. Motion alarm handling setup: You can select one or more response methods
such as “On Screen Warning”, “Audible Warning”, “Upload to Center”,“Trigger
Alarm Output” and “Send E-mail”.
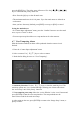
Description: If “On Screen Warning” is enabled, and a motion alarm occurs while the
DVR is in live mode, the alarmed camera will display on the monitor. If more than
one alarm is present, the alarmed cameras will sequence at a ten second rate. When
the motion alarm clears, the display returns to the previous viewing mode.
5. Save motion alarm setup: Press “Confirm” to return to the “Image Setup” menu.
In the “Image Setup” menu, press “Confirm” to save the current camera parameters.
6. Save all cameras: You can repeat steps two through eight, to setup motion
detection parameters for other cameras. Also you can copy the parameters of one
camera to any other cameras.
Note: The Motion alarm area may not be copied to other cameras.
If you want to disable the motion alarm area and motion alarm policy, select motion
alarm sensitivity as “Off”.