User Manual EKI-6340 Series 802.
Copyright The documentation and the software included with this product are copyrighted 2012 by Advantech Co., Ltd. All rights are reserved. Advantech Co., Ltd. reserves the right to make improvements in the products described in this manual at any time without notice. No part of this manual may be reproduced, copied, translated or transmitted in any form or by any means without the prior written permission of Advantech Co., Ltd. Information provided in this manual is intended to be accurate and reliable.
Declaration of Conformity FCC Class A Note: This equipment has been tested and found to comply with the limits for a Class A digital device, pursuant to part 15 of the FCC Rules. These limits are designed to provide reasonable protection against harmful interference when the equipment is operated in a commercial environment.
Warnings, Cautions and Notes Warning! Warnings indicate conditions, which if not observed, can cause personal injury! Caution! Cautions are included to help you avoid damaging hardware or losing data. e.g. There is a danger of a new battery exploding if it is incorrectly installed. Do not attempt to recharge, force open, or heat the battery. Replace the battery only with the same or equivalent type recommended by the manufacturer. Discard used batteries according to the manufacturer's instructions.
9. Position the power cord so that people cannot step on it. Do not place anything over the power cord. 10. All cautions and warnings on the equipment should be noted. 11. If the equipment is not used for a long time, disconnect it from the power source to avoid damage by transient overvoltage. 12. Never pour any liquid into an opening. This may cause fire or electrical shock. 13. Never open the equipment. For safety reasons, the equipment should be opened only by qualified service personnel. 14.
Safety Precaution - Static Electricity Follow these simple precautions to protect yourself from harm and the products from damage. To avoid electrical shock, always disconnect the power from your PC chassis before you work on it. Don't touch any components on the CPU card or other cards while the PC is on. Disconnect power before making any configuration changes. The sudden rush of power as you connect a jumper or install a card may damage sensitive electronic components.
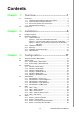
Contents Chapter Chapter Chapter 1 Overview...............................................1 1.1 1.2 Introduction ............................................................................................... 2 1.1.1 Flexible wireless backbone deployment options........................... 2 1.1.2 High-performance wireless backbone........................................... 2 1.1.3 Secure and efficient client connectivity ......................................... 2 1.1.4 EKI-6340 Series Category .....
Appendix A Specifications.................................... 41 A.1 Specifications.......................................................................................... 42 A.1.1 Standard Support........................................................................ 42 A.1.2 Physical Specifications ............................................................... 42 A.1.3 Environment................................................................................ 42 A.1.4 Interface.....................
Chapter 1 Overview 1
1.1 Introduction EKI-6340 series, EKI-6340-1, EKI-6340-2 and EKI-6340-3, are enterprise and carrier-grade 802.11n Outdoor Wireless Mesh Access Point which offer customers a robust and high performing solution for PTP/PTMP/Hot zone applications in both license-free 2.4GHz and 5GHz bands.
Highly secured self-healing & self-forming Mesh capability Ultra-fast roaming (hand-over switch time ≤20 ms) High throughput multiple hopping (≥100Mbps @10 hops) Ease of use installation utilities: antenna alignment, distance calculation and site survey tools Compliant with IEEE 802.11a/b/g/n 2x2 MIMO 11n, up to 300Mbps data rate Up to 3 radios for mesh back haul and Access Point Dual 12~48V redundant DC input power 802.
EKI-6340 Series User Manual 4
Chapter 2 Installation 2
2.1 Package Contents 1. 2. 3. 4. 5. 6. 7. EKI-6340 series Outdoor Wireless Mesh Access Point (shown in section 2.2.1) PoE Power InjectorM12 Mating assembly accessory(shown below) M12 to RJ45 Ethernet Cable ConverterM25 Cable Gland waterproof cover (shown below) Mounting Kit & Screw Set (Pole mount Kit and Wall Mount Kit) (shown below) Quick Installation Guide (not shown). Dual Band Omni Directional Antenna for 2400 - 2500 / 5150 - 5875 MHz (2.
Before installation, please read and follow the precautions to the installation: 1. Users MUST use a proper and well-installed surge protector in the outdoor installation. Otherwise, lightening surge may damage the devices. Note! Users MUST use the PoE Injector complied with EKI-6340 series. Warning! Users MUST turn off the device first before connecting the external antenna. 7 EKI-6340 Series User Manual Installation 2. Lightning DAMAGE IS NOT COVERED UNDER WARRANTY. Chapter 2 2.
2.2.1 Outdoor Mesh AP The outdoor AP unit has several antenna ports on top, one data port and one power port at the bottom. The antenna ports are N-type female connectors. The data port is used to link to the cable from the Switch or PoE injector. When the Outdoor Mesh AP and the PoE devices are connected together with the IEEE 802.3at compliant power supply, the outdoor unit is turned on and initialized. The power port is used to be supplied with 12~48 VDC electricity power.
EKI-6340-1 → 2 x N-type connectors EKI-6340-2 → 4 x N-type connectors EKI-6340-3 → 6 x N-type connectors 2.2.2 Hardware Installation 2.2.2.1 Installation of External DC Power Source The DC power port on left side of the photo is power connector port. It is a 5-pin M12 D-code connector connecting to the external power source.
Assembly Process 1. Pass power cable through Sealing nuts, gasket and clamp ring (item 2~5) 2.2.2.2 2. Solder the power pin as pin definition above. 3. Seal all connectors and fasten sealing nuts to secure IP67 waterproof function. Installation of PoE port The PoE port is an M25 cable gland connector which provides IP67 waterproof capability. This PoE port let user connect to IEEE 802.3at PoE injector or PoE switches.
Pass Ethernet cable through M25 cable gland. 3. Insert RJ45 plug into PoE port of enclosure. 4. Fasten the cable gland cover to ensure the waterproof function of PoE port. Installation 11 Chapter 2 2.
2.2.2.3 Installation of Mounting Kit The mounting kit is used to provide a good support for the outdoor unit and the flat panel antenna. Please follow the installation procedure to mount the outdoor unit and the flat panel antenna. The contents of the mounting kit are shown below.
2.2.3.1 Wall Mounting 1. Pre-install screw holes on the wall according to the related position of mounting kit. Chapter 2 2.2.3 Mounting Installation 2.
3. Fit the screw holes to the pre-installed screw on the wall and fix the unit to the wall. 2.2.3.2 Pole Mounting 1. Fasten the pole mounting kit as below to back side of EKI-6340. 2. Fasten the other pole mounting plate with screw as below so that the pole can be fixed tightly.
User should connect grounding wire to the Earth grounding connector on the enclosure to provide grounding path for EKI-6340 to minimize the impact of lightening and surge. Chapter 2 2.2.4 Installation of Earth Grounding Installation 2.2.5 LED Indication EKI-6340 Series provide easy-to-check LED status indication for customer's check. The following table introduces the LED indicator vs.
EKI-6340 Series User Manual 16
Chapter 3 Configuration 3
3.1 Access the Browser-Based Utility To access the system web user's interface, launch the web browser on your computer, and enter the device IP address in the Address field of the web browser. (The factory default IP address is 192.168.1.1.) Then press Enter. A login screen will appear. Go to the login page by Click the “Home > Login” in submenu. Login ID and password is required before accessing the system web user's interface. The default administrator's ID is admin and password is admin.
A System Setup includes device related elements, such as system time and IP setting. 3.2.1 System Setup > Basic Setup System Date: User can set the date manually System Time: User can set the time manually Time Synchronization: Time synchronization setting will decide the duration to next time synchronization. When any NTP server is available in network, user can enable the NTP and system will automatically synchronize system time with NTP server.
3.2.2 System Setup > Network Setup 3.2.2.1 IP Setup IP Assignment: System allows you to assign the device IP address dynamically from existing DHCP server or set a static IP address manually. IP Address: Once Static IP is selected, the IP Address field will allow you to set the bridge device IP address manually. This IP address of the bridge is used as the base for all of your local network settings. Subnet Mask: This is the subnet mask address for your bridge device. Set the IP subnet mask manually.
3.2.2.5 Management VLAN Management VLAN Management VLAN is a secure VLAN which divides Internet users from device IP access. Administrators can management network devices under the Management LAN network without betrayal of secrets. 21 EKI-6340 Series User Manual Configuration DHCP Server: Allows you to enable or disable the DHCP server function in system. IP Start / End: The IP Start and End Address specify the range of addresses assigned by your device when it functions as a DHCP server.
3.3 Wireless 3.3.1 Wireless > Radio Setup Wireless Band: Choose a radio frequency for signal transmission. The frequency and channel bandwidth match to selection is showed as following table: Selection Frequency Channel Band Width 802.11G 2.412GHz-2.462 GHz 20 MHz 802.11NG HT20 2.412GHz-2.462 GHz 20 MHz 802.11NG HT40 Plus 2.412GHz-2.462 GHz 40 MHz 802.11NG HT40 Minus 2.412GHz-2.462 GHz 40 MHz 802.11A 5.18 GHz- 5.32 GHz 5.50 GHz- 5.58 GHz 5.66 GHz - 5.70 GHz 5.745 GHz - 5.
Each physical radio interface supports up to 16 virtual WLAN AP (SSID) setting. User can add or delete a virtual AP by click the “+” or “-” button on top of the very right side of setting block. SSID: A service set identifier (SSID) is a name that identifies a particular 802.11 wireless LAN. A client device receives beacon messages from all access points within range advertising their SSIDs. The client device can then either manually or automatically select the network with which to associate.
“Access Point (WDS Support)” and “Wireless Station (WDS Support)” are WDS-compatible selection for EKI-6340 series to connect with third-party wireless device which support WDS for interconnection. Once the “MESH Mode” and “Mobility Mode” was applied, the MESH Setup hyperlink will be available and other 802.11 WLAN setting will be hidden. RTS: “Request to send” is the optional mechanism used by the 802.11 wireless networking protocols to reduce frame collisions introduced by the hidden node problem.
Chapter 3 3.3.3 Wireless > MESH Setup Device Type There are three types of mesh network elements in EKI-6340 series MESH infrastructure (Global setting): – MESH Gateway a MESH node connected to wired or wireless backbone will function as Mesh Gateway. – MESH Point a MESH node which relay the data transmit from a MESH node to another. – MESH Access Point a Mesh node provides data transport, monitoring and AP functionality for connecting regular 802.11 wireless clients to the network.
WLAN Mode Radios support “Access Point”, “Wireless Station”, “Access Point (WDS Support)”, “Wireless Station (WDS Support)”, “MESH Mode” and “Mobility Mode” mode to meet various network scenarios. (RF property) Frequency Band Choose a radio frequency band for signal transmission. (RF property) Antenna Number EKI-6340 series complete 802.11n 1x1 1-stream and 2x2 2stream for antenna attached. The maximum data link rate at 1-stream and 2-stream will be 130Mbps and 300Mbps.
Chapter 3 3.3.4 Wireless > Wireless Security 27 EKI-6340 Series User Manual Configuration SSID: User can choose a specific virtual AP to assign a security type of wireless link. MAC Filter: MAC filter provides “allow” or “deny” MAC table for administrator to control access of client device by inserting a MAC address of client device. When running allow mode, only the MAC address which showing on the table will be accepted for wireless connectivity.
Security: Comprehensive security settings are available on system in this menu. This includes WEP Keys and WPA+WPA2-PSK. The security settings are independent between each virtual AP interfaces. WEP: System supports 64-bit, 128-bit and 152-bit WEP key in both ASCII and HEX format. Do make sure the correct number of digits/characters and format of WEP key as shown in the table are entered. Note that in HEX format, HEX number cannot start with “0”.
Auth server IP Authentication server IP address. Auth server port Authentication server service port number. Auth server secret Authentication server share secret. Acct server IP Accounting server IP address. Acct server port Accounting server service port number. Acct server secret Accounting server share secret.
WPA+WPA2-EAP (Wireless Station) In a Wireless Station configured RF interface, the WPA+WPA2 EAP setting required certificate files saved in device. The EKI‐6340 series allows user to upload certificate file sets up to 5 in Administration > Cert. Management. 3.3.5 Wireless > WMM Setup Wi-Fi Multimedia (WMM) is a Wi-Fi Alliance interoperability certification, based on the IEEE 802.11e standard. It provides basic Quality of service (QoS) features to IEEE 802.11 networks.
Chapter 3 3.3.6 Wireless > Bandwidth Control Configuration Profile ID: There are 20 bandwidth control profiles can be configured for administration. Mode: Downstream and upstream data rates for the client devices connecting to AP can be defined here. There are two bandwidth limit types in system. Both mode (UL+DL Limit Rate) consolidates download and upload rate of each single client connection. UL/DL mode (UL/DL Limit Rate) specifies download and upload rate of client connections.
3.4 Administration EKI-6340 series provides system management in menu partition: Administration, Which includes configuration file management, password maintaining and SNMP setup. 3.4.1 Administration > System Log EKI-6340 series provide 8 system log levels for user to define, including “Emergency”, “Alert”, “Critical”, “Error”, “Warning”, “Notice”, “Informational” and “Debug”. EKI-6340 series also allows the log polling from remote log server.
Chapter 3 3.4.2 Administration > Cert. Management 3.4.3 Administration > Management Firmware Upgrade: Administrator can upload a new firmware file to device to keep system running by the latest bug fixed version of firmware. Configuration Management: Administrator can save the configuration of device to local PC by click “Backup Configuration”. Once hardware damage happened, administrator can restore a saved configuration file to a new hardware without any reconfiguration.
3.4.4 Administration > Login Password System allows administrator to change the “admin” and “user” login password in menu partition: “Login Password”. 3.4.5 Administration > SNMP Setup EKI-6340 series supports both SNMP V2 and V3. The configurable items show below: System Location: A description notes the device location. System Contact: A description notes the device maintaining information. System Name: A description notes the given name of device. 3.4.5.
EKI-6340 series provides various software utilities helping administrator to do the network status survey. 3.5.1 Utility > Ping Chapter 3 3.5 Utility Configuration Graphical display helps administrator to get the responding time changes of target IP address. Insert the remote host IP address, packet size and number in field then press Ping, system will show the results on page. The result presenting can be adjusted by different choosing of graphic scale. 3.5.
3.5.3 Utility > Fresnel Zone The First Fresnel Zone Calculator is a tool that helps you to estimate the possible obstruction from existing object between two devices before the wireless installation. An antenna angle calculation can also help you to aligning the vertical angle of the directional antenna. 3.5.
Chapter 3 3.5.4.1 Link Test A Link Test is an additional tool based on Antenna Alignment Tool active status. When you start the Antenna Alignment Tool, you may set a target throughput to active the Link Test to estimate the packet error rate. Choose a target throughput and test duration then click Start Test button. System will generate a test data transmission to calculate the packet error rate. Configuration An Rx rate shows the best data rate you can reach under the current RSSI level.
3.6 Status 3.6.1 Status > System Information System Information summarizes all the configuration and hardware information of the device.
Chapter 3 3.6.2 Status > System Status Configuration Real-time link statuses of all interfaces are shown in the menu. System Up Time: Display how long the EKI-6340 series has been operating since last boot-up. Interface Status: Indicate the interface is ENABLE or DISABLE. Link Rate: Data Link Rate here indicates the maximum availability of transmission rate, and it can be used as an indication of link quality.
In order to help user's reading of the changes, system also provide a graphic interface to trace the items' changes. Click the Graphic Display button on the top left of the page, graphic mode will show on your browser. 3.6.3 Status > Connecting Nodes Information All the connecting clients' MAC address will be displayed in Connecting Nodes Information, including signal and data rate. The result shows information only when WLAN was configured as Access Point mode.
Appendix A Specifications A
A.1 Specifications A.1.1 Standard Support Wireless – IEEE 802.11a/b/g/n compliant Ethernet – IEEE 802.11i, IEEE 802.3/802.3u/802.3ab, – IEEE 802.3at PoE, 802.1d, 802.1w, 802.1q, 802.1p Data Rates – IEEE 802.11b: 1, 2, 5.5, 11 Mbps – IEEE 802.11a, g: 6, 9, 12, 18, 24, 36, 48, 54 Mbps – IEEE 802.11n: @ 800ns (400ns) GI – 20 MHz BW – 1 Nss: 65 (72.2) Mbps maximal – 2 Nss: 130 (144.4) Mbps maximal – 40 MHz BW – 1 Nss: 135 (150) Mbps maximal – 2 Nss: 270 (300) Mbps maximal A.1.
Antenna – N-type female connector – EKI-6340-1: 2 connectors – EKI-6340-2: 4 connectors – EKI-6340-3: 6 connectors Power – M12 D-code connector LAN – M25 cable gland A.1.5 System Operation Mode Bridge/ Router/ Mesh A.1.6 Other Features DHCP Client/Server, Statistic routing table, RIP v1&v2, WMM, Multi-SSID (up to 16x ESSID for each radio), traffic limitation, IEEE 802.11h DFS, Syslog, L2 management utility, HTTP (s), Telnet, SSH, CLI, SNMP, installation utilities. A.1.
A.1.9 Certificates EMC – US FCC Part 15 Class B & C & E, Europe ETSI 301 489-1&17 Radio – ETSI 300 328, ETSI 301 893, FCC 15.247 Rail Traffic – EN50155, EN50121-1/-4 Safety – EN 60950 A.2 Radio Frequency Specification A.2.1 Transmit Power Settings (Typical Composite Power) Tolerance: +2/-2 dB 802.11a 802.11 802.11g b 802.11n 2.4GHz/ HT20 802.11n 2.4GHz/ HT40 802.11n 802.
802.11a 802.11b 802.11g Data Rate Typical/ IEE Spec Maximum (1 Rx dBm) (2 Rx dBm) Data Rate Typical IEEE Spec Maximum (1 Rx dBm) (2 Rx dBm) 6M -80 -93/-89 MCS0 -77 -89/-85 9M -79 -93/-89 MCS1 -74 -88/-84 12M -77 -92/-88 MCS2 -72 -85/-84 18M 24M -75 -90/-86 MCS3 -69 -82/-78 -72 -86/-82 MCS4 -65 -80/-76 36M -68 -83/-79 MCS5 -61 76/-72 48M -64 -79/-75 MCS6 -60 -74/-70 54M -63 -77/-73 5.5M -79 -94/-90 11M -75 -90/-86 6M -81 -94/-90 802.11a/n HT40 802.
www.advantech.com Please verify specifications before quoting. This guide is intended for reference purposes only. All product specifications are subject to change without notice. No part of this publication may be reproduced in any form or by any means, electronic, photocopying, recording or otherwise, without prior written permission of the publisher. All brand and product names are trademarks or registered trademarks of their respective companies. © Advantech Co., Ltd.