HMI-640S 486-based panel PC with 6.
Copyright notice This document is copyrighted 2000 by Advantech Co., Ltd. All rights are reserved. Advantech Co., Ltd. reserves the right to make improvements to the products described in this manual at any time without notice. No part of this manual may be reproduced, copied, translated or transmitted in any form or by any means without the prior written permission of Advantech Co., Ltd. Information provided in this manual is intended to be accurate and reliable. However, Advantech Co.
FCC Class A notes This equipment has been tested with a class A computing device and has been found to comply with part 15 of FCC Rules. Operation in a residential area may cause unacceptable interference to radio and TV receptions requiring the operator to take whatever steps are necessary to correct the interference.
Safety Instructions 1. Read these safety instructions carefully. 2. Keep this installation reference guide for later reference. 3. Disconnect this equipment from any AC outlet before cleaning. Do not use liquid or spray detergents for cleaning. Use a damp cloth. 4. For pluggable equipment, the power outlet must be installed near the equipment and must be easily accessible. 5. Keep this equipment away from humidity. 6. Put this equipment on a reliable surface during installation.
Wichtige Sicherheishinweise 1. Bitte lesen sie Sich diese Hinweise sorgfältig durch. 2. Heben Sie diese Anleitung für den späteren Gebrauch auf. 3. Vor jedem Reinigen ist das Gerät vom Stromnetz zu trennen. Verwenden Sie Keine Flüssig-oder Aerosolreiniger. Am besten dient ein angefeuchtetes Tuch zur Reinigung. 4. Die NetzanschluBsteckdose soll nahe dem Gerät angebracht und leicht zugänglich sein. 5. Das Gerät ist vor Feuchtigkeit zu schützen. 6.
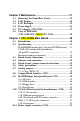
Contents Chapter 1 General Information ..................................... 1 1.1 1.2 1.3 1.4 1.5 1.6 1.7 Introduction ....................................................................... 2 Specifications .................................................................... 2 General ................................................................................. 2 Standard functions (CPC-2245N) ........................................ 2 Ethernet interface .............................................
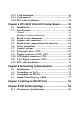
Chapter 3 Maintenance ................................................ 21 3.1 3.2 3.3 3.4 3.5 3.6 Removing the Front/Rear Panel .................................. 22 LCD Display .................................................................... 24 LCD Backlight ................................................................ 25 Power Supply ................................................................... 26 I/O Adapter (CPC-2900) ...............................................
4.12 Card installation ............................................................. 56 4.13 Card removal .................................................................. 57 4.14 FPC cable installation .................................................... 58 Chapter 5 CPC-2520 VGA/LCD Control Board ........... 59 5.1 5.2 Introduction ..................................................................... 60 Specifications .................................................................. 61 General .......
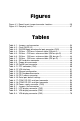
Figures Figure 4-1: Board layout: jumper/connector locations ................................. 35 Figure 4-2: Damping resistor ....................................................................... 47 Tables Table Table Table Table Table Table Table Table Table Table Table Table Table Table Table Table Table Table Table Table Table Table Table 4-1: Jumpers and connectors ........................................................... 34 4-2: Clear CMOS (J2) ...................................................
CHAPTER General Information This chapter gives background information on the HMI-640S.
1.1 Introduction The HMI-640S meets all of the requirements necessary to serve as an industrial operator interface. This panel PC provides an all-in-one 486 PC platform with 6.0" STN color LCD display, on-board VGA, two COM ports (one RS-232, one RS-232/422/485), one removable CompactFlash adapter, an external 16-bit PC/104 expansion slot and a touchscreen. The heart of the HMI-640S is a general-purpose miniature computer that is suitable for a variety of applications.
• RAM: 16MB EDO RAM on board • IDE hard disk drive interface: Supports up to two Enhanced IDE devices, auto-detect BIOS • Multi-mode parallel port: Configured to LPT1, LPT2, LPT3 or disabled. Supports SPP/EPP/ECP; D-SUB 25-pin connector (on I/O module) • Serial ports: One serial RS-232 port, one serial RS-232/422/485 port (configurable by DIP switches; please refer to Appendix B). • PS/2 keyboard/mouse connector: Mini-DIN keyboard connector • Watchdog timer: Generates a system reset at a fixed 1.
Ethernet interface • Chipset: Realtek RTL8139A 10/100 Base-T controller • Network (LAN): Novell NE1000/2000 compatible. Supports both boot ROM function and software drivers SVGA/Flat panel interface (CPC-2520) • Chipset: C&T 69000 • Display memory: 2 MB SDRAM embedded • Hardware Windows acceleration: 32-bit graphic engine.
Touchscreen • Type: Resistive • Resolution: 1024 x 1024 • Light transmission: 75% • Software driver:HMI-640S supports both DOS and Windows CE • Lifetime: More than 3 million touches 1.3 LCD Specifications M o d el H M I- 6 4 0 S D is p la y t y p e S T N c o lo r L C D M a x . c o lo r s o r g r a y s c a le s S iz e L C D 2 5 6 c o lo r s 6 .
1.4 I/O Arrangement The I/O arrangement of the HMI-640S is shown below: c b d a e j a. IDE connector b. PC/104 slot c. PS/2 keyboard and mouse connector d. Serial COM2 port e. Serial COM1 port Note: 6 i h g f f. Ethernet port g. Parallel port h. 24 VDC input connector & chassis GND i. LCD contrast j. Slide power switch Serial port COM2 can be configured to operate in RS-232, RS-422 or RS-485 mode. This is set by DIP switches on the upper side of the back cover.
PS/2 Keyboard (Market) PS/2 Mouse (Advantech) Industrial PC Data Acquisition Module HMI-640S Ethernet COM Port HMI-640S (Advantech) (Advantech) (Advantech) SSD Adapter (IDE) PC/104 + Cover (Advantech) Power Supply Adapter (24 VDC) (Advantech) 1.
1.6 Dimensions The HMI-640S can be placed on a shelf or a table, or mounted onto a panel.
1.7 Mounting If you want to panel mount your HMI-640S, use the four brackets that are included within your package. First, fit the HMI-640S body onto the cutout panel and hold it temporarily in place with your hands. Then, insert each bracket into the four keyholes on both sides of the HMI-640S rear case, and use appropriate screws to fix the HMI-640S body on the cutout panel.
10 HMI-640S User's Manual
CHAPTER 2 System Setup This chapter explains how to set up the HMI640S hardware.
2.1 General The HMI-640S compact profile panel PC can simultaneously monitor and sample the data from several traditional PLC controllers. It takes full advantage of a wide range of available software programs, and its upgrade can be performed both quickly and easily with the replacement of various optional modules. The HMI-640S is easily customizable to fulfill your needs. The power supply and I/O adapter are all readily accessible by removing the front or rear panel.
2.3 Initial Setup The HMI-640S offers an easy setup feature: It takes merely 3 easy steps for your initial setup before use. Simply take out the HMI-640S from it's package and follow the steps below for a quick initial setup: Step 1: Insert CompactFlash memory card (with Windows CE and/or specific application software inside) into the appropriate bus slot. Step 2: Connect the power adapter cord to HMI-640S and plug the other end of the cord into the power outlet.
2.3 Installing a CompactFlash Memory Card Installing a CompactFlash adapter 1. Verify that the power source to the HMI-640S has been properly disconnected. 2. Insert the CompactFlash adapter frimly but gently into the IDEcompatible slot as shown in the picture below. 3. Make sure your CompactFlash memory card is inserted properly into place.
Installing a 2.5" HDD HMI-640S is designed as a HDD-less platform of a high reliability. However, if a HDD should be used, its installation procedure is described as follows: 1. Verify that the power source to the HMI-640S has been properly disconnected. 2. Connect the HDD via a cable to the IDE-compatible slot on the HMI-640S. Make sure that you have inserted the cable connector properly into the slot.
2.4 Connecting the Power Adapter Before connecting the power adapter to your HMI-640S, you must first attach the Power Terminal Block onto the 24 VDC power receptable located beneath the HMI-640S. After the Power Terminal Block has been attached, you can then connect the power adapter to the Power Terminal Block to provide power supplies to your HMI-640S. To connect the power adapter: 1. Identify each wire of the power adapter cord (you must first make sure which is +, - or GND specifically). 2.
2.5 Installing a PC/104 Module The HMI-640S's PC/104 connector gives you the flexibility to attach to the PC/104 expansion modules, which perform same functions as traditional plug-in expansion cards. Using these modules might save you space and valuable slots. To install a PC/104 module: 1. Verify that the power source to the HMI-640S has been properly disconnected. 2. Detach the metal cover on the rear panel. 3.
82.6 88.9 95.9 90.8 90.8 5.1 5.1 0 5.1 85.1 0 PC/104 module dimensions (mm ±5 %) 18 HMI-640S User's Manual 90.
2.6 First System Boot After you have properly installed the CompactFlash memory card preinstalled with Windows CE or even with specific application software , all you have to do is simply plug in the power and the system is ready for the first boot. Power up for the first time Please follow the steps below to perform your first system boot : 1. Turn on the power switch. Meanwhile, the Power LED on the front panel will light up. 2. The Windows CE operating system starts to boot from the CompactFlash memory.
2.7 Exploded Diagram The following exploded diagram is provided to help with assembly or disassembly of the HMI-640S.
CHAPTER 3 Maintenance The HMI-640S is of a modular design so that it is convenient for users to maintain or service its internal components. This chapter will describe the disassembling process for the machine.
The HMI-640S is of a modular design so that it is convenient for users to maintain or service its internal components. This chapter will describe the disassembling process for the machine. The Service CD bundled in the HMI-640S package provides even more details for your reference. 3.1 Removing the Front/Rear Panel You need only to remove the front panel of your HMI-640S to replace its LCD or backlight. To remove the front panel, first verify the power source to the HMI-640S has been disconnected.
You need only to remove the rear panel to replace the DRAM, power supply, I/O adapter, and certain components. To remove the rear panel, first verify that the power source to the HMI-640S has been disconnected. Then remove the six screws on the rear panel and pull it away from the HMI-640S main body.
3.2 LCD Display The LCD display rarely needs replacing during normal life span of the HMI-640S. Howerver, if you should need to replace the LCD display, please follow the procedure below: 1. Verify that the power source to the HMI-640S has been disconnected. 2. Open the front panel. (See Section 3.1.) 3. Remove the LCD from the steel chassis by first removing the four screws. 4. Disconnect the cable from the LCD (marked "A" in the diagram below) and the LCD inverter (marked "B").
3.3 LCD Backlight To replace the backlight: 1. Verify that the power source to the HMI-640S has been disconnected. 2. Open the front panel. (See Section 3.1.) 3. Remove the LCD from the steel chassis. 4. Disconnect the cables from the LCD and the LCD inverter. 5. Remove the screw that attaches the LCD backlight to the LCD display. Pull the backlight out horizontally. 6. To insert the backlight and reassemble the unit, just reverse the steps of the above procedure. Warning: The backlight is fragile.
3.4 Power Supply To repair or replace the power supply: 1. Verify that the power source to the HMI-640S has been disconnected. 2. Open the rear cover. (See Section 3.1) 3. Remove the four screws attaching the power supply to the CPU board. 4. Disconnect the cable from the power supply. 5. Replace the power supply and reassemble. Warning: Shut off power to the HMI-640S before attempting to repair the power supply. Simply switch off the power and unplug the unit.
3.5 I/O Adapter (CPC-2900) To replace or service the I/O adapter, follow these steps: 1. Verify that the power source to the HMI-640S has been disconnected. 2. Remove the rear cover. (See Section 3.1.) 3. Remove the screw which attaches the I/O adapter to the Carrier Board. 4. Replace the I/O adapter and reassemble the HMI-640S.
3.6 Core of HMI-640S (CPC-2520/CPC-2245N/ CPC-2430) The core of HMI-640S consists of CPC-2520 VGA/LCD control board, CPC-2245N main board and CPC-2430 carrier board. After removing power supply and I/O board as mentioned in previous sections, you can disassemble the other boards by the following steps: 1. Take off the riser board as you remove the power supply. 2. Take off the CPC-2900 I/O board as mentioned in last section. 3.
CHAPTER 4 CPC-2245N Main Board This chapter provides: • Background information such as card specification and board layout of CPC2245N. • The installation procedures for CPC2245N hardware, including instructions on setting jumpers and connecting peripherals, switches and indicators. Be sure to read all safety precautions before you begin the installation procedure.
4.1 Introduction Advantech’s new mini biscuit PC, the CPC-2245N, is truly an all-in one 486 processor-based single board computer. It comes equipped with 16 MB DRAM on board, an SVGA interface which supports CRT monitors with up to 4 MB display memory, a 10/100Base-T Ethernet interface, and a CompactFlash solid state-disk socket.
4.2 Specifications • CPU: STPC Client, 66 MHz • On-card cache: 8 KB • BIOS: 256 KB Flash BIOS • Chipset: STPC Client • Super I/O chipset: Winbond W83977F • RAM memory: 16 MB EDO RAM on board • Solid state disk: Supports one CompactFlash card as an emulated HDD • Watchdog timer: 1.6 sec. intervals ISA/IDE/FDD/parallel port (144-pin SODIMM socket) • I/O expansion: 16-bit AT-bus • Enhanced IDE hard disk drive interface: Supports up to two hard disk drives.
VGA/LAN/serial port/keyboard/mouse (40-pin FPC connector) • VGA with 64-bit windows accelerator -Display memory: 4 MB share memory architecture (UMA structure) -Display resolution: 1280 x 1024 @ 64 K colors, 1024 x 768 @ 16 M colors -Automatically disables internal VGA if an external add-in VGA is plugged into the system • 10/100Base-T Ethernet interface -Chipset: RTL-8139A PCI local bus Ethernet controller -Ethernet interface: IEEE 802.
4.
4.4 Jumpers and connectors On-board connectors link to external devices such as hard disk drives, keyboards, floppy drives, and so on. In addition, the board has jumpers for configuring your board for specific applications. The table below lists the function of each of the board’s jumpers and connectors. Later sections in this chapter give detailed information on each jumper setting, and instructions for connecting external devices to your card.
4.
4.6 36 Safety precautions Warning! Always completely disconnect the power cord from your chassis whenever you are working on it. Do not make connections while the power is on because sensitive electronic components can be damaged by the sudden rush of power. Only experienced electronics personnel should open the PC chassis. Caution! Always ground yourself to remove any static charge before touching the CPU card. Modern electronic devices are very sensitive to static electric charges.
4.7 Setting jumpers You may configure your card to match the needs of your application by setting jumpers. A jumper is the simplest kind of electrical switch. It consists of two metal pins and a small metal clip (often protected by a plastic cover) that slides over the pins to connect them. To "close" a jumper, you connect the pins with the clip. To "open” a jumper, you remove the clip. Sometimes a jumper will have three pins, labeled 1, 2 and 3.
4.7.1 Clear CMOS (J2) This jumper is used to erase CMOS data and reset system BIOS information. The procedure for clearing CMOS is: 1. Turn off the system. 2. Short pin 2 and pin 3. 3. Turn on the system. The CMOS is now cleared. 4. Turn off the system. Short pin 1 and pin 2. 5. Turn on the system. The BIOS is now reset to its default setting. Table 4-2: Clear CMOS (J2) Function Protect* Clear CMOS 1-2 Closed Open 2-3 Open Closed * default setting 4.
4.9 ISA/IDE/floppy drive/parallel port (CN3) The CPC-2245N provides a +5 V 16-bit ISA bus, one IDE channel (support two IDE devices), one parallel interface and one floppy interface (support two floppy drives). All these are provided via a 144-pin SODIMM gold finger (CN3), which can be plugged into a DODIMM socket on the user's system board. Users can choose suitable positions on their system board for their HDD, FDD or parallel connectors.
Table 4-3: ISA/IDE/floppy drive/parallel port connector (CN3) Pin 1 2 3 4 5 6 7 8 9 10 11 12 13 14 15 16 17 18 19 20 21 22 23 24 25 26 27 28 29 30 31 32 33 34 35 40 Signal +5 V ZW SA18 SA19 +5 V +5 V +5 V TC GND GND GND GND GND GND GND GND IRQ6 IRQ5 IRQ4 SA10 SA9 SA14 SA17 SA12 IRQ12 SYSCLK DRQ3 OSC (14 MHz) DRQ1 DRQ0 HDACK HDIOW LA17 LA19 LA22 HMI-640S User's Manual Bus POWER ISA ISA ISA POWER POWER POWER ISA POWER POWER POWER POWER POWER POWER POWER POWER ISA ISA ISA ISA ISA ISA ISA ISA ISA ISA ISA IS
36 37 38 39 40 41 42 43 44 45 46 47 48 49 50 51 52 53 54 55 56 57 58 59 60 61 62 63 64 65 66 67 68 69 70 71 72 SA0 LA23 SA2 SA6 HDD0 HDD8 HDD2 HDD1 HDD6 HDD10 HDD7 HDD14 HDD13 SD8 SD10 SD11 SD9 SD14 SD13 SD12 BALE SD15 SMEMR SBHE MEMR IOCS16 IOCHCK REFRESH ACK PE PD6 PD4 PD2 PD0 STROBE INIT SLCTIN ISA ISA ISA ISA IDE IDE IDE IDE IDE IDE IDE IDE IDE ISA ISA ISA ISA ISA ISA ISA ISA ISA ISA ISA ISA ISA ISA ISA PRT PRT PRT PRT PRT PRT PRT PRT PRT 108 109 110 111 112 113 114 115 116 117 118 119 120 121 122 12
4.9.
Table 4-5: ISA bus - CN3 cross reference table (ISA bus pin B) ISA bus Pin B1 B2 B3 B4 B5 B6 B7 B8 B9 B10 B11 B12 B13 B14 B15 B16 B17 B18 B19 B20 B21 B22 B23 B24 B25 B26 B27 B28 B29 B30 B31 Signal GND RSTDRV +5 V IRQ9 -5 V DRQ2 -12 V 0 WS +12 V GND SMEMW SMEMR IOW IOR DACK3 DRQ3 DACK1 DRQ1 REFRESH CLK IRQ7 IRQ6 IRQ5 IRQ4 IRQ3 DACK2 T/C BALE +5 V OSC GND CN3 Pin 9 75 1 89 99 2 10 133 58 135 131 81 27 83 29 63 26 88 17 18 19 76 82 8 56 73 28 11 Signal GND RSTDRV +5 V IRQ9 DRQ2 ZW GND SMEMW SMEMR IOW IOR DA
Table 4-6: ISA bus - CN3 cross reference table (ISA bus pin C) ISA bus Pin C1 C2 C3 C4 C5 C6 C7 C8 C9 C10 C11 C12 C13 C14 C15 C16 C17 C18 44 Signal SBHE LA23 LA22 LA21 LA20 LA19 LA18 LA17 MEMR MEMW SD8 SD9 SD10 SD11 SD12 SD13 SD14 SD15 HMI-640S User's Manual CN3 Pin 59 37 35 108 106 34 107 33 60 130 49 52 50 51 55 54 53 57 Signal SBHE LA23 LA22 LA21 LA20 LA19 LA18 LA17 MEMR MEMW SD8 SD9 SD10 SD11 SD12 SD13 SD14 SD15
Table 4-7: ISA bus - CN3 cross reference table (IDE pin D) ISA bus Pin D1 D2 D3 D4 D5 D6 D7 D8 D9 D10 D11 D12 D13 D14 D15 D16 D17 D18 Signal MEMCS16 I/OCS16 IRQ10 IRQ11 IRQ12 IRQ15 IRQ14 DACK0 DRQ0 DACK5 DRQ5 DACK6 DRQ6 DACK7 DRQ7 +5 V MASTER GND CN3 Pin 134 61 90 91 25 97 98 84 30 80 100 79 101 78 102 5 132 12 Signal MEMCS16 IOCS16 IRQ10 IRQ11 IRQ12 IRQ15 IRQ14 DACK0 DRQ0 DACK5 DRQ5 DACK6 DRQ6 DACK7 DRQ7 +5 V MASTER GND Chapter 4 CPC-2245N Main Borad 45
4.9.2 IDE interface Users can attach two IDE devices to the IDE channel, one drive must be set as the master and another as the slave. You may do this by setting the jumpers on the drives. Refer to the documentation that came with your drive for more information. A jumper diagram usually appears on the top side of a hard disk drive.
Note : IDE pin 28 must pull 470 ohms resistor to GND. Note : 33 ohms damping resistors is recommended to connect near IDE connector. Please refer to Fig. 2-2 below.
4.9.3 Floppy drive Users can attach up to two floppy disk drives to the CPC-2245N via a SODIMM socket. The CPC-2245N supports any combination of 5.25" (360 KB / 1.2 MB) and/or 3.5" (720 KB / 1.44/2.88 MB) drives. The following table lists the pin assignments for the floppy disk connector: Table 4-9: Floppy drive connector FDD connctr.
4.9.4 Parallel port The parallel port is normally used to connect the CPU card to a printer through a DB25 connector. The CPC-2245N includes an onboard parallel port, accessed through a SO. DIMM golden finger. The parallel port is designated as LPT1 and can be disabled or changed to LPT2 or LPT3 in the BIOS setup manual.
4.10 VGA/LAN/serial ports/keyboard/ mouse (CN4) The CPC-2245N provides a VGA interface, a 10/100 Base-T Ethernet, two RS-232 serial ports, one keyboard and one PS2 mouse through a 40-pins FPC connector (CN4). User can design their FPC cable for connecting CPC-2245N's FPC connector to user's system board. User can choose suitable position to layout VGA, LAN, COM port, Keyboard and mouse connector on user's system board.
4.10.1 VGA interface The VGA connector is a 15-pin D-SUB connector. Users can follow a transfer table to layout these VGA signals to a standard 15-pin D-SUB connector.
4.10.2 Ethernet configuration The CPC-2245N is equipped with a high performance 32-bit PCI-bus Fast Ethernet interface that are fully compliant with IEEE 802.3u 10/100Base-T specifications. Ethernet connector is a RJ-45 jack. User can follow a transfer table to connect Ethernet signals to a standard RJ-45 connector. Table 4-13: Ethernet configuration RJ-45 Pin 1 3 5 7 Signal TD+ RD+ NC NC CN4 Pin 36 39 - Signal TPT+ TPR+ - RJ-45 Pin 2 4 6 8 Signal TD NC RDNC CN4 Pin 35 38 - Signal TPTTPR- 4.10.
Table 4-14: PS/2 keyboard connector PS/2 Keyboard Pin Signal 1 KB_Data 2 NC 3 GND CN4 Pin Signal 31 KBDT 34 GND PS/2 Keyboard Pin Signal 4 Vcc 5 KBCLK 6 NC CN4 Pin 29 32 - Signal KBVCC KBCK - CN4 Pin 29 33 - Signal KBVCC MSCK - Table 4-15: PS/2 mouse connector PS/2 Mouse Pin Signal 1 MDATA 2 NC 3 GND CN4 Pin Signal 30 MSDT 34 GND PS/2 Mouse Pin Signal 4 Vcc 5 MCLK 6 NC 4.10.4 Serial ports The CPC-2245N offers two serial ports: COM1 and COM2, both in RS- 232.
Table 4-16: Serial port default settings Port COM1 COM2 Address 3F8, 2F8, 3E8, 2E8 3F8, 2F8, 3E8, 2E8 Default 3F8/IRQ4 2F8/IRQ3 The following table shows the pin assignments for the card's RS-232 port: 5 1 6 9 Table 4-17: COM1 RS-232 serial port connector RS-232 Pin Signal 1 DCD 2 RX 3 TX 4 DTR 5 GND CN4 Pin 18 19 17 16 37 Signal CD1 RX1 TX1 DTR1 GND RS-232 Pin Signal 6 DSR 7 RTS 8 CTS 9 RI CN4 Pin 20 15 14 13 Signal DSR1 RTS1 CTS1 RI1 Table 4-18: COM2 RS-232 serial port connector RS-232 Pin Sig
4.11 Power supply connector (CN5) In single board computer without carrier applications, user may connect a power directly to the CPC-2245N board through CN5.
4.
4.
4.
CHAPTER 5 CPC-2520 VGA/LCD Control Board This chapter provides: • Background information such as card specification and board layout of CPC2520. • The installation procedures for CPC2520 hardware, including instructions on setting jumpers and connecting peripherals, switches and indicators. Be sure to read all safety precautions before you begin the installation procedure.
5.1 Introduction The CPC-2520 is an extension VGA/LCD module for the CPC-2245 mini biscuit PC. The CPC-2520 uses a C&T 69000 chipset for its PCI/SVGA controller. It supports many popular LCD, EL, and gas plasma flat panel displays and conventional analog CRT monitors. The 69000 VGA BIOS supports monochrome LCD, EL, color TFT and STN LCD flat panel displays.
5.2 Specifications General • Flat panel VGA interface • Chipset: C&T 69000 VGA controller with Windows accelerator • Display memory: 2 MB SDRAM in built-in chip • Display output: 50-pin FPC connector for flat panel interface 12-pin FPC connector for VGA interface • Display type: Supports CRT and flat panel (TFT, DSTN, and mono) displays.
5.
5.4 Jumpers and connectors On-board connectors link to external devices such as hard disk drives, keyboards, or floppy drives, etc. In addition, the board has jumpers for configuring your board for specific applications. The table below lists the function of each of the board's jumpers and connectors. Later sections in this chapter give detailed information on each jumper setting, and gives instructions for connecting external devices to your card.
5.
5.6 Safety precautions Warning! Always completely disconnect the power cord from your chassis whenever you are working on it. Do not make connections while the power is on because sensitive electronic components can be damaged by the sudden rush of power. Only experienced electronics personnel should open the PC chassis. Caution! Always ground yourself to remove any static charge before touching the CPU card. Modern electronic devices are very sensitive to static electric charges.
5.7 Jumper settings You configure your card to match the needs of your application by setting jumpers. A jumper is the simplest kind of electric switch. It consists of two metal pins and a small metal clip (often protected by a plastic cover) that slides over the pins to connect them. To close a jumper you connect the pins with the clip. To open a jumper you remove the clip. Sometimes a jumper will have three pins, labeled 1, 2 and 3. In this case you would connect either pins 1 and 2 or 2 and 3.
5.8 LCD panel select (SW1) Panel # 1 2 3 4 5 6 7 8 9 10 11 12 13 14 15 16 5.
5.10 LCD display connector (CN2) LCD display connector on CPC-2520 is a 50-pin FPC connector. The CPC-2520 supports up to 36 bits LCD panel.
5.11 VGA display connector (CN3) VGA display connector on CPC-2520 is a 12-pin FPC connector, these VGA signals can be connected to client's system board through a FPC cable. Client can design this cable by referring to Cable layout diagram in chapter of design guide. Table 5-3: VGA display connector (CN3) Pin 1 2 3 4 5 6 7 8 9 10 11 12 Note: Signal GND +5V +5V GND H SYNC DDC1 V SYNC DDC0 BLUE RED GREEN GND The model number of the CN3 socket is IL-FPR-12S-HFC (JAE Co., Ltd.
The VGA connector is a 15-pin D-SUB connector. User can follow a transfer table to layout these VGA signals to a standard 15-pin D-SUB connector.
5.
72 HMI-640S User's Manual
CHAPTER 6 Networking Communication This chapter describes the ways to get your HMI-640S connected to the host PC.
6.1 Introduction The HMI-640S is designed as a networking gadget that readily connect itself to the host PC either via existing LAN or a RS-232 interface. Its network capability makes it nothing less than a powerful platform for any application that demands networking communication or remote file transfer. The following sections will guide you through the networking steps for HMI-640. 6.
4. Use a twisted-pair UTP or STP cable (category 3, 4, 5) to connect the HMI-640S through its RJ-45 port to a hub (or a switch) within the Ethernet LAN, to which your host PC is also connected to. 5. Assign valid IP addresses for your HMI-640S and host PC. If you are joining an existing Intranet, ask your network administrator for valid IP addresses. If your are using a DHCP server on the network, you have just no need to assign IP addresses yourself.
Note: To verify that your HMI-640S has joined the network and is properly connected with your host PC, just try to access your host PC through the Windows CE Explorer by typing //host_name_of_host_PC in the address bar. Press Enter to search for the host PC. If the connection is successful, you can see the network shares that is available from the host PC. Or you can simply "ping" your HMI-640S from your host PC to make sure TCP/IP is working. (e.g.
Note: Be sure to power off the HMI-640S before you connect or disconnect any cable. 3. Power up your HMI-640S and after the system boot has completed, try access Start/Programs/Communication/Remote Networking properties sheet. 4. Click Make New Connection to pop up a dialog box and choose Direct Connection. 5. Double-click the New Connection icon to connect to the PC. 6.
78 HMI-640S User's Manual
APPENDIX A Cabling for RS-232 Port The HMI-640S is equipped with a watchdog timer that resets the CPU if processing comes to a standstill for any reason. This feature ensures system reliability in industrial stand-alone or unmanned environments.
HMI-640S is shipped together with a serial cable (NULL modem cable) for customers to make a direct connection between it and the host PC. Note that off-the-shelf NULL modem cables may not be wired correctly.
25-pin NULL Modem Cable: Remoet host serial port connector Calling system serial port connector Signal 2 3 Transmit Data 3 2 Receive Data 4 5 Request to Send 5 4 Clear to Send 6, 8 20 Data Set Ready and Carrier Detec 7 7 Signal Ground 20 6, 8 Data Terminal Ready Appendix A Cabling for RS-232 Port 81
82 HMI-640S User's Manual
APPENDIX B DIP Switch Settings • Touchscreen Specifications • Installation • Running the Setup Program • Removing the Touchscreen Driver • Touchscreen Driver Application Interface (API)
B.1 Touchscreen Specifications The touchscreen is a 4-wire analog resistive type. It is constructed of one glass sheet overlayed with two layers of PET. The PET layers are coated with ITO and are separated by printed spacers. The touchscreen is designed to be activated by the pressure of any stylus.