
- Audiovox Car Video System User Manual

5
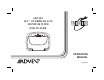
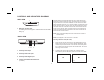
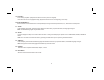
SIDE VIEW
1. DVD Disc insertion Slot
For loading and removing discs. Insert the disc with the label
facing up.
1
123
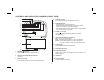
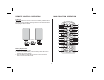
BACK VIEW
1. Auxiliary Video Input
2. Auxiliary Audio Left Input
3. Auxiliary Audio Right Input
4. Infrared Transmitter/Remote Sensor
(Location)
4
CONTROLS AND INDICATORS DIAGRAM
T
press
6353.
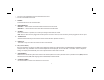
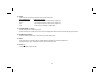
he ADV10A has an option that allows the user to select from two IR
transmit and receive codes (M1 or M2). This feature can be used when
using two ADV10As in the same installation or if the vehicle has a RSA
(Rear Seat Audio) that uses an “A” channel headset. The ADV10A comes
factory set to M1. When in the M1 mode, the unit will respond to remote
commands when M1 is selected on the remote control and will transmit
audio on the A channel. When in the M2 mode, the unit will respond to
remote commands when M2 is selected on the remote control and will
transmit audio on the B channel.
Use 2-channel IR headphones set to CH B when the monitor is
set to M2 mode.
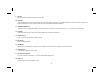
M1 will appear on the screen for 4~5 seconds.
1. Power ON the unit and wait until M1 on the OSD appears. M1 will
appear on the screen for 4~5 seconds. After M1 disappears, within
10 seconds press the M1 button on the remote control, then
the TV button and continue to press code number 6353. The screen
will change from M1 to M2.
2. To change the monitor code from M2 to M1, repeat the above
instruction but press the M2 button, then the TV button, then
Note:
Note:
Selecting a Monitor Code (M1 or M2)
FMM 88.3MHz
M2
DVD
IRT ON
FMM 88.3MHz
M1
DVD
IRT ON