Adyen Magento extension User manual Date: Apr 22, 2014 Filename: Adyen Magento Extension V2.0.0.odt Version: 2.0.0 Reference: Adyen Magento Extension V2.0.0 Copyright © Adyen B.V.
Adyen Magento extension - manual Version control Extension versions 2.0.0 Document date Apr 22, 2014 Version log 2.0.0 rewrite for version 2.0.0, added integration overview 1.0.0.8 rewrite version to version of the plugin 0.6 rewrite for extension version 1.0.0.8 0.5 rewrite for extension version 1.0.0.7 0.4 rewrite 0.3 added new chapter Features 0.2 added screenshots, added HPP, CC and ELV Supported Magento versions Community: 1.5.0.1, 1.6.0,1.7.x,1.8.0.x Enterprise: 1.11, 1.12, 1.
Table of Contents Version control.................................................................................................................................................................................................2 Preface.................................................................................................................................................................................................................4 Installation.....................................................
Preface This document is intended to assist anyone using the Adyen Magento extension version 2.0.0. Installation 1. Unzip or use package management of Magento to install the extension: http://www.magentocommerce.com/magento-connect/adyen-payment.html 2.
Multi-shop configuration To enable a multishop setup, you have to add the following rules to your .htaccess file: RewriteCond %{HTTP_HOST} ^(.*)WEBSHOPURL RewriteRule ^ - [E=MAGE_RUN_CODE:shopcode] where WEBSHOPURL has to be replaced by your webshop url, and shopcode by the code that you have set in the Store View (System → Manage Store → Store view Name). READ/WRITE Access Ensure read and write access is enabled on the following directories: • Copyright © Adyen B.V.
Logging The extension logs a lot of information in the magento/var/log/ directory. If you want to enable this you have to turn on the log in Magento (System → Configuration → Developer → Log Settings) Copyright © Adyen B.V.
Integration overview This section provides an overview of the steps which are needed to integrate with Adyen. This has to be considered as the basic integration. It takes full advantage of the great possibilities and flexibility of our Hosted Payment Page (HPP) to accept payments. More advanced features (e.g. Refunds and API payments) require additional steps, which are covered in separate sections in this manual. Please also take a look at the tutorial video, available on our Support site: http://support.
Configuration Magento backend Go to: System → Configuration → Sales → Payment Methods → Adyen Default Settings Copyright © Adyen B.V.
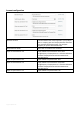
Adyen Default Settings Interface configuration Accepted currency Select at least one currency for which Magento should present the Adyen Payment Method (use CTRL+ to select multiple currencies) Country Code ISO (optional) To force the Adyen Platform to take a specific country code for your shoppers. Leave empty to let Adyen decide this based on the IP address. Language locale (optional) To force the Adyen Platform to take a specific Language setting.
Account configuration Merchant account The MerchantAccount name supplied to you by Adyen. Note: a company gets one CompanyAccount and could have multiple MerchantAccounts, you configure Magento per specific MerchantAccount. Test/Production Mode Select Test or Production environment. Adyen ws username for test Adyen webservice username for TEST, often “ws@Company.”. Note the difference between CompanyAccount and MerchantAccount described above.
Workflow configuration New order status Select the order status a new order should get in Magento when ordered with the Adyen Payment Method Order status authorised payment (Optional) Select the order status an order should get in Magento when an AUTHORISATION or CAPTURE notification event is received from Adyen. Order status pre-authorised payment (Optional) Select the order status an order should get in Magento when an AUTHORISATION Notification event is NOT received from Adyen immediately.
Notification configuration Mail update (Invoice Mail) Whether to send email to Shopper when invoice is created Mail update Whether to send an order update email to Shopper when notifications are received Notification User name A self-made user name to authorise the notifications from the Adyen Platform. Note: this user name should also be known at Adyen's back-office, see section Notification settings Notification Password A self-made password to authorise the notifications from the Adyen Platform.
Adyen Hosted Payment Pages settings Menu: System → Configuration → Sales → Payment Methods → Adyen Hpp Main configuration Enabled Select 'Yes' to enable the Adyen HPP method (Hosted Payment Pages) Title Title shown at front-end where Shopper can select by which method he/she wants to pay if you have also enabled other Payment Methods then Adyen HPP. Skin Code At the back-office of Adyen you can upload several skins, each skin gets a skin code.
Single Page. Select the one you want. Days for Delivery The number of days your shop needs to deliver the goods or services. This is used for Risk calculation, Charge-back defence and is by default shown to the shopper at the end of the payment. Leave payment method selection on HPP Defines whether HPP payment methods can already be chosen within Magento checkout. See “Payment Method selection” below.
Payment to applicable countries Should Magento present the Adyen Payment Method to shoppers from all countries or only to shoppers from specific countries (selected below) Payment to Specific countries If chosen 'specific' above, select here the specific countries to which the Adyen payment method should be presented (use CTRL+ to select multiple countries) Copyright © Adyen B.V.
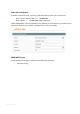
Adyen POS settings Menu: System → Configuration → Sales → Payment Methods → Adyen Pos POS makes it possible to pay with the Adyen Shuttle through the IOS and Android app. Make sure the website in IOS is running on Safari and Android is running on Chrome. The browser must accept pop-ups, otherwise it is not possible to redirect to the Adyen app. Enabled Select 'Yes' to enable Adyen Openinvoice as a separate Payment Method next to or in place of the HPP (Openinvoice can also be used with the HPP method).
Adyen OpenInvoice settings Menu: System → Configuration → Sales → Payment Methods → Adyen Openinvoice Before you can use OpenInvoice you have to setup the OpenInvoice settings in the back-office of Adyen. See section OpenInvoice settings Enabled Select 'Yes' to enable Adyen Openinvoice as a separate Payment Method next to or in place of the HPP (Openinvoice can also be used with the HPP method).
Adyen Credit Card settings Menu: System → Configuration → Sales → Payment Methods → Adyen CC Important: this functionality has to be enabled on your Adyen Company Account. Please contact support at https://support.adyen.com/ to request this change. Enabled Select 'Yes' to enable Credit Card payments via Adyen as a separate Payment Method next to or in place of the HPP (Credit cards can also be used with the HPP method).
compliant. Client-Side Encryption Public Key The Public Key is tied to the WebService user you have set under Account Configuration. It is available in the Adyen Backoffice: Settings → User. If no key has been generated yet, you will see an option to “Generate” the key first. Note: use the unformatted version.
Adyen ELV (Elektronisches Lastschrift Verfahren) settings Menu: System → Configuration → Sales → Payment Methods → Adyen ELV Enabled Select 'Yes' to enable Adyen ELV as a separate Payment Method next to or in place of the HPP (ELV can also be used with the HPP method).
Adyen Boleto settings Menu: System → Configuration → Sales → Payment Methods → Adyen Boleto Enabled Select 'Yes' to enable Boleto payments via Adyen as a separate Payment Method next to or in place of the HPP (Boleto can also be used with the HPP method). Title Title shown in front-end when this payment method is enabled Boleto Types Select Boleto types to offer at front-end. Note: select at least one.
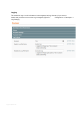
Configuration Adyen back-office At the Back-office of Adyen two things need to be configured: 1. the HMAC key in the skin (set in the Magento configuration before) 2. the Notification service (username and password also set in the Magento configuration before) Create a skin Skins can be managed on the Adyen test Backoffice. A skin defines how the Hosted Payment Page looks like, and makes it possible to adopt the styling of your Magento webshop.
Skin code The code to be used in Adyen Hosted Payment Pages settings Description To distinguish different skins for yourself you might provide a description. Result URL for Test The URL with which the Adyen Platform redirects the Shopper to Magento, take the magento shop url plus '/adyen/process/success'. Continue-to URL for Test Leave empty HMAC Key for Test The HMAC entered at the Magento configuration, section Adyen Hosted Payment Pages settings.
Notification settings Menu: Settings → Notifications URL The URL to which the Adyen Platform sends the notifications to. e.g. http://your-domain.com/adyen/process/ins (HTTP POST) or http://www.your-domain.com/adyen/process/soap (SOAP) (where www.your-domain.com is your Magento shop URL) Active Checked Method Choose your preferred way of the communication for the notifications, both operate the same but the URL and the method should correspond.
Test Notification It's important to test the notification before making transactions. You can test the notification by setting the Method to HTTP POST and use the correct url that is described above. If the result is [Accepted] the notifications are working. If you want to use SOAP, assure the HTTP POST method returns [Accepted] before switching to SOAP. If the result is not [accepted] you will see a error message. Above this error message you will see the reason why it is not working.
OpenInvoice settings Menu: Settings → Server Communication Add new server communication and choose for OpenInvoice Retrieve Details. URL The URL to which the Adyen Platform retreives extra details of the order http://your-domain.com/adyen/process/openinvoice (where www.your-domain.com is your Magento shop URL) Active Checked Method Choose your preferred way of the communication for the notifications, both operate the same but the URL and the method should correspond.
Features Backoffice linking From the backoffice of Magento it is possible to click through directly to the backoffice of Adyen. On the order detail page in Magento the link to Adyen is available in the Payment Information block. By clicking on the Adyen PSP reference a new window will open with the Adyen back-end page. If not logged in at the Adyen back-end you will prompted to login first. Refund support Refund is supported both ways.
3-D secure payments The processing of 3-D secure (Verified by VISA / Mastercard SecureCodeTM) payments is supported. Important: Your processing account needs to be configured by Adyen to support 3-D secure. If you would like to be configured to support 3-D Secure please request this through Adyen Support at https://support.adyen.com/ Frequently Asked Questions Notifications are not received Check if your PHP installation runs in CGI mode. If so, see “CGI mode” in this manual for more information.