E4105-7 User manual Oven
Contents Thank you for choosing one of our high-quality products. To ensure optimal and regular performance of your appliance please read this instruction manual carefully. It will enable you to navigate all processes perfectly and most efficiently. To refer to this manual any time you need to, we recommend you to keep it in a safe place. And please pass it to any future owner of the appliance. We wish you much joy with your new appliance.
Safety information 3 Children and vulnerable people safety • This appliance can be used by children aged from 8 years and above and persons with reduced physical, sensory or mental capabilities or lack of experience and knowledge if they have been given supervision or instruction concerning use of the appliance in safe way and understand the hazards involved. Children shall not play with the appliance. • Keep all packaging away from children. There is the risk of suffocation or physical injury.
Safety information • • • • Always use a correctly installed shockproof socket. Do not use multi-way plugs, connectors and extension cables. There is the risk of fire. Do not replace or change the mains cable. Contact the service centre. Make sure not to squash or cause damage to the mains plug (if applicable) and cable behind the appliance. • Do not pull the mains cable to disconnect the appliance. Always pull the mains plug – if applicable. Use • The appliance is only for domestic use.
Safety information 5 • Be careful when you remove the door from the appliance. The door is heavy! • Do not clean catalytic enamel (if applicable). Risk of fire • Open the door carefully. The use of ingredients with alcohol can cause a mixture of alcohol and air. There is the risk of fire. • Do not let sparks or open flames come near the appliance when you open the door.
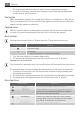
Product description PRODUCT DESCRIPTION General overview 2 3 4 5 6 7 2 1 8 9 10 11 12 1 2 3 4 5 6 7 8 9 10 11 12 Control panel Cooking zone indicators Power indicator Control knob for oven functions Display Control knob for temperature Temperature indicator Control knobs for cooking zones Heating element Oven lamp Fan and rear wall heating element Bottom heat Oven accessories • Flat baking tray For cakes and biscuits.
Daily use 7 • Grilling set Grilling Set contains deep roasting pan and inlay grid. Use inlay grid only with deep roasting pan. • Rack For cookware, cake tins, roasts and grilled foods. • Rack frame To put flat baking tray or deep roasting pan on it. Oven steam outlet The steam from the oven gets out through the outlet in the back left corner of the cooking surface (see the Description of the appliance in hob user manual). DAILY USE WARNING! Refer to "Safety information" chapter.
Daily use The temperature indicator comes on while the oven temperature increases. 3. To switch off the oven, turn the oven functions control knob and the temperature control knob to the Off position. Cooling fan When the appliance operates, the cooling fan switches on automatically to keep the surfaces of the appliance cool. If you switch off the appliance, the cooling fan continues to operate until the appliance cools down.
Daily use Oven function BASE HEAT DEFROST SINGLE GRILL 9 Application To bake cakes with crispy or crusty bases and to preserve food To defrost frozen food. To grill flat food in the middle of the grill and to toast. DUAL GRILL To grill flat food in large quantities and to toast. ROTITHERM To roast larger joints of meat or poultry on one level. Also to gratinate and brown.
Daily use To roast larger pieces of meat or poultry on one level: 1. Put the inlay grid in the deep roasting pan. The supports of the inlay grid must point up. 2. Put the deep roasting pan in the appliance, on the necessary shelf position level. To grill flat dishes in large quantities and to toast: 1. Put the inlay grid in the deep roasting pan. The supports of the inlay grid point down. 2. Put the deep roasting pan in the appliance, on the necessary shelf position level.
Helpful hints and tips 11 2. Push the Selection button again and again until necessary function indicator flashes. 3. To set the time for Minute minder , Duration or End , use " + " or " - " button. The related function indicator comes on. When the time period is completed, the function indicator flashes and an acoustic signal sounds for 2 minutes. With the functions Duration and End the oven stops automatically. 4. Push any button to stop the signal. 5.
Helpful hints and tips Heat setting Use to: Time Hints 2-3 Simmer rice and milkbased dishes, heat- 25-50 ing up ready-cooked meals min Add at least twice as much liquid as rice, stir milk dishes part way through 3-4 Steam vegetables, fish, meat 20-45 min Add a few tablespoons of liquid 4-5 Steam potatoes 20-60 min Use max.
Helpful hints and tips 13 Baking on one oven level - Baking in tins Type of baking Oven function Level Temperature (°C) Time (h:min) Ring cake or brioche TRUE FAN 1 150 - 160 0:50 - 1:10 Madeira cake/Fruit cakes TRUE FAN 1 140 - 160 1:10 - 1:30 Sponge cake TRUE FAN 1 140 0:25 - 0:40 Sponge cake CONVENTIONAL 1 160 0:25 - 0:40 Flan base - short pastry 1) TRUE FAN 3 170-180 0:10 - 0:25 Flan base - sponge mixture TRUE FAN 3 150 - 170 0:20 - 0:25 CONVENTIONAL 1 170 - 190 0
Helpful hints and tips Type of baking Level Temperature (°C) Time (h:min) CONVENTIONAL 3 170 0:35 - 0:50 Fruit flans made with short pastry TRUE FAN 3 160 - 170 0:40 - 1:20 Yeast cakes with delicate toppings (e.g.
Helpful hints and tips Type of baking Dry streusel cake True fan 2 levels True fan 3 levels Temperature (°C) 1/3 --- 140 - 160 15 Time (h:min) 0:30 - 0:60 1) Pre-heat oven Baking on more than one level - Biscuits/small cakes/pastries/rolls True fan 2 levels True fan 3 levels Temperature (°C) Time (h:min) Short pastry biscuits 1/3 1 / 3 /5 150 - 160 0:15 - 0:35 Viennese whirls 1/3 1 / 3 /5 140 0:20 - 0:60 Biscuits made with sponge mixture 1/3 --- 160 - 170 0:25 - 0:40 Biscuits m
Helpful hints and tips Baking results Possible cause Remedy Cake does not brown equally No equal mixture Put the mixture equally on the baking tray Cake does not cook in the baking time set Temperature too low Use a slightly higher oven temperature setting Fan baking table To see which oven function you must use please refer to the oven functions list in Daily use chapter.
Helpful hints and tips Dish Oven function 17 Shelf level Temperature °C Time Hr : Min Sweet bakes CONVENTIONAL 1 180-200 0:40-0:60 Fish bakes CONVENTIONAL 1 180-200 0:30-1:00 ROTITHERM 1 160-170 0:30-1:00 Stuffed vegetables 1) preheat the oven Ready meals Food to be cooked Chips1) Oven function ROTITHERM Shelf level Temperature °C Time 3 200-220 refer to instructions of the manufacturer 1) Comment: Turn chips 2 or 3 times during cooking Roasting Roasting dishes • Use heat-resis
Helpful hints and tips Type of meat Quantity Oven function Shelf level Temperature °C Time (h:min) - rare1) for each cm of thickness ROTITHERM 1 190 - 200 0:05 - 0:06 - medium for each cm of thickness ROTITHERM 1 180 - 190 0:06 - 0:08 - well done for each cm of thickness ROTITHERM 1 170 - 180 0:08 - 0:10 Shelf level Temperature °C Time (h:min) 1) preheat the oven Pork Type of meat Quantity Oven function Shoulder, neck, ham joint 1 - 1.
Helpful hints and tips 19 Poultry Type of meat Quantity Oven function Shelf level Temperature °C Time (h:min) Poultry portions 200 - 250 g each ROTITHERM 1 200 - 220 0:35 - 0:50 Half chicken 400 - 500 g each ROTITHERM 1 190 - 210 0:35 - 0:50 chicken, poulard 1 - 1,5 kg ROTITHERM 1 190 - 210 0:45 - 1:15 Duck 1.5 - 2 kg ROTITHERM 1 180 - 200 1:15 - 1:45 Goose 3.5 - 5 kg ROTITHERM 1 160 - 180 2:30 - 3:30 Turkey 2.5 - 3.
Helpful hints and tips Food to grill Toast with topping Shelf level 3 Time 1st side 2nd side 6 - 8 mins. ------- 1) Do not pre-heat Preserving • • • • • • • Only use usual preserving jars of the same dimension. Do not use jars with twist-off or bayonet type lids and metal tins. Use the first shelf level from the bottom. Use the baking tray. You can put six 1-litre jars maximum on it. Fill all the jars to the same level and close them correctly.
Helpful hints and tips 21 To see which oven function you must use please refer to the oven functions list in Daily use chapter.
Care and cleaning Dish Defrosting time (mins) Further defrosting time (mins) Comments 80-100 10-15 Cream can also be whipped when still slightly frozen in places 60 60 ------- Cream, 2 x 200g Gateau, 1400g Information on acrylamides Important! According to the newest scientific knowledge, if you brown food (specially the one which contains starch), acrylamides can pose a health risk. Thus, we recommend that you cook at the lowest temperatures and do not brown food too much.
Care and cleaning 23 Folding down the heating element 1. Hold the heating element with the two hands at the front 2. Pull it forwards against the spring pressure and out along the support on both sides. 3. The heating element folds down. The oven ceiling is ready to clean. Install the heating element in opposite sequence. Install the heating element correctly on the two sides above the support on the inner wall of the oven.
What to do if… Oven door glass The oven door have panels of glass one behind the other. Be careful with the glass, it can break. Removing the oven door glass 1. Remove the oven door and put on a soft, level surface. Handle must point the floor. 2. Press the door trim at both sides to release it. 3. Push the side facing towards the door handle. Remove it from right and left side. 4. Lift the glass slightly. Hold for the edge and remove one after the other from the guide.
Environment concerns Problem Possible cause 25 Remedy The oven does not heat up The necessary settings are not set Control the settings The oven does not heat up The fuse in the fuse box is released Control the fuse. If the fuse is released more than one time, refer to a qualified electrician.
892946066-A-052010 www.aeg-electrolux.