
User Guide


10 electronic display controls / using your appliance frost free refrigeration
frost free refrigeration using your appliance 11
This section tells you how to make the most of the many useful
features of your new refrigerator.
Crisper bin
Use the crisper bin to store
vegetables, fruit or smallgoods.
Change the humidity by sliding the
humidity control.
Store vegetables in the crisper bin and remember to set
the humidity control to more humid (closed).
Store fruit and smallgoods in the crisper bin and
remember to set the humidity control to less
humid (open).
1. Empty food from the drawer.
2. Remove the crisper bin(s) by pulling forward, then up
and forward again.
3. Remove the crisper shelf by lifting the catches on the
underside of the shelf and pulling the shelf forward.
caution
Never store solvents or flammable materials like nail polish
remover or lighter fluid inside your refrigerator. They will affect
the life of the plastic components and may taint stored food.
Your refrigerator is fitted with door storage bins. These bins
adjust to meet different storage needs. All the door bins are
completely removable for cleaning. If you want to remove
or adjust a bin, lift it over the support lugs on the inner door
panel. To replace, push the bin down over the support lugs
to lock it in place.
Use the dairy compartment to store foods like butter,
margarine and cheeses. The compartment is slightly
warmer than the rest of the refrigerator compartment, while
the lid provides protection against odours.
Your appliance is fitted with a
catalysing deodoriser to assist
with the removal of food odours
inside your appliance.
Odours are removed by
adsorption through the filter
by the normal operation of the
appliance. Keeping food covered and wrapping food with
plastic wrap will also help to reduce the
odours inside your appliance.
Catch
Humidity control
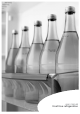
Modula bottle caddy
The Modula bottle caddy is made of anodised aluminium.
They are used to store various types of bottles like wine or
beer. Bottles should be stored with the bottom end towards
the back of the refrigerator. The fridge arrives with three
combined caddies, but they can be separated if desired.
Bottle twist holder operation (where fitted)
The bottle twist holder is used to prevent bottles from falling
over. The bottle twist holder consists of two parts, a sliding
front, and a rotating retainer ring.
The bottle twist holder can be used in two positions:
• Horizontal
When the bottle twist holder ring is horizontal, any item
that fits within the ring can simply be placed inside it.
• Vertical
When the bottle twist holder ring is vertical, it is possible
to simply slide the bottle twist holder along the bottle
retainer bar until it is pushed up against a bottle.
Note:
The bottle should be constrained on the other side by either
the end of the bin or other adjacent bottles.
To use, remove the tray, fill with
water and place back in the
freezer. Once ice has formed
(approximately 3 hours) simply
twist the knob at the front
clockwise until the ice drops
into the bin below.
side of the freezer as follows:
1. Remove the ice bin and ice cube tray. If the ice tray
assembly is frozen to the carriage, simply squeeze the
tray and shelf together to break the ice.
2. Before you remove the ice carriage, remember to
disengage it from the glass shelf (as shown), as it may
result in damage to the assembly.
3. Remove the centre runner by disengaging it at the front
of the shelf, and removing it from the rear.
4. Ret the runner in to the rear of the shelf on the right
hand side and then engage the front (as shown)
5. Fit the carriage by sliding it into the runners until the
front of the carriage engages
with the shelf.
6. Ret the ice tray and ice bin.
Slide away glass shelf
This shelf can be used either as a full
depth shelf or when tall items need to be stored at the front
of the appliance it can be collapsed to half its original depth.
1. Pull the front half of the shelf forward.
2. Then, from the underside, lift the front half of the shelf
by raising the rear edge over the recessed hook detail.
3. Pull the shelf forward and allow the rear to drop into the
side channels.
4. Push the front shelf backwards (3,4) until it reaches the
rear stops.
The shelf can be repositioned
within the appliance unit by
pulling the whole assembly
out until the side panels are
free to pivot down, then
pivoting the rear of the shelf
until the shelf is free from the
liner runners. The shelf can
then be positioned in any of
the runners – this is a very
useful feature if your appliance
door happens to have limited
access.
Insert into the slot at
the rear of the shelf
Then engage
into the front
of the shelf
Hook detail
Using your appliance
mount freezer (BM) model
1. Select the refrigerator control (top knob).
2. Rotate the knob clockwise to set colder.
3. Rotate the knob anti-clockwise to set less cold.
freezer (BM) model
1. Select the freezer control (bottom knob).
2. Rotate the knob clockwise to set colder.
3. Rotate the knob anti-clockwise to set less cold.