KM9800E User manual Electric built-in oven
Dear Customer Thank you for choosing one of our high-quality products. With this appliance you will experience the perfect combination of functional design and cutting edge technology. Convince yourself that our appliances are engineered to deliver the best performance and control - indeed we are setting the highest standards of excellence. In addition to this you find environmental and energy saving aspects as an integral part of our products.
Contents 3 315910613-00-062008 Contents Operating instructions 5 Safety information Electrical safety Children's safety Safety during use Microwave How to avoid damage to the appliance Do not use the appliance 5 5 5 6 6 8 9 Description of product General view Control panel Oven layout Accessories Oven 10 10 11 11 12 Before using for the first time Setting and changing the time Cleaning for the first time Getting to know the appliance 12 12 13 14 Operating the oven The electronic oven controls Ove
Contents Other functions Child safety device Button Beep Automatic switch-off 32 32 32 33 Uses, Tables and Tips Single economy grill Grilling Table Microwave Information about operation Suitable cookware and materials Microwave Cooking Table Combi-Function Table Tips for the microwave Test dishes in accordance with IEC 60705 Programmes 33 33 34 34 34 35 37 40 42 42 43 Cleaning and care The outside of the appliance Oven interior Accessories Side rails Removing the side rails Replacing the side rails O
Safety information 5 Customer Care 56 For Customer Service in The Republic of Ireland please contact us at the address below: 57 European Guarantee 57 www.electrolux.com 58 Subject to change without notice Operating instructions Safety information Important safety instructions! Read carefully and keep for future use! Electrical safety • This appliance must only be connected by a qualified installation engineer. • In the event of a fault or damage to the appliance: Take the fuses out or switch off.
Safety information • This appliance is fitted with a child safety device. Safety during use • This appliance should be used only for normal domestic cooking, roasting and baking of food. • Be careful if connecting electrical appliances to sockets near to this appliance. Electrical leads must not be caught under the hot oven door. • Warning: Risk of burns! The interior surfaces of the oven become very hot during use.
Safety information 7 • When heating liquids always put a coffee spoon or a glass rod in the container to avoid boiling delay. With boiling delay the boiling temperature is reached without the typical steam bubbles rising. If the container is shaken even slightly the liquid can suddenly boil over or spray violently. Risk of burns! • Prick food with "skin" or "peel", such as potatoes, tomatoes, sausages, with a fork several times before cooking so that the food does not burst.
Safety information How to avoid damage to the appliance • Do not line the oven with aluminium foil and do not place a baking tray or saucepan etc. on the floor, as otherwise the oven enamel will be damaged by the heat build-up. • Fruit juices dripping from the baking tray will leave stains, which you will not be able to remove. For very moist cakes, use a deep tray. • Do not put any strain on the oven door when open. • Never pour water directly into the oven when it is hot.
Safety information Do not use the appliance ... for cooking eggs in their shells (with fried eggs, pierce the yolks first) and snails, as otherwise these burst. Cooking oil (fondue, deep frying) and drinks with high alcohol content: Spontaneous ignition! Risk of explosion! ... for heating tightly closed containers, e. g. tins, bottles, screw top jars. ... for drying animals, textiles, grain pillows and gel cushions and other flammable materials: Risk of fire! ...
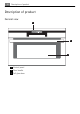
Description of product Description of product General view 1 2 3 1 Control panel 2 Door handle 3 Full glass door
Description of product Control panel 1 2 1 Oven displays 2 Oven functions buttons Oven layout 1 2 6 3 3 2 4 1 5 1 Grill element 11
Before using for the first time 2 3 4 5 6 Microwave generator Light in the oven Glass base, removable Side rails, removable Oven levels Accessories Oven Oven shelf For cookware, cake tins, roasts and grilling food. Crunch plate Before using for the first time Setting and changing the time The oven only operates when the time has been set. When the appliance has been connected to the electrical supply or when there has been a power cut, the symbol for the time automatically flashes. 1.
Before using for the first time 2. Using the or current time. 13 button, set the After approx. 5 seconds, the flashing stops and the clock displays the time set. The appliance is now ready to use. The time can only be modified, if the child safety device is deactivated, none of the clock functions Countdown , Cook Time or End Time and none of the oven functions are set. Cleaning for the first time Before you use the oven for the first time, you should clean it thoroughly.
Operating the oven Getting to know the appliance The appliance can be operated in test mode to test or demonstrate all operating steps. The oven does not heat up. Test mode Switching on 1. Switch off the appliance using the Stop button. 2. Press and hold the Baking/Roasting Programmes buttons and at the same time until a signal sounds and "d" lights up in the display. Switching test mode off 1. Switch off the appliance using the Stop button. 2.
Operating the oven 3 4 5 6 7 8 15 Temperature/Time/Microwave Power Weight display Time functions Length of operation Thermometer symbol Baking/Roasting Programmes Oven functions The control panel 1 2 7 1 2 3 4 5 6 7 3 6 4 5 Start button Microwave button button +/Stop button / Restore settings Clock functions Baking/Roasting Programmes Grill Function button General instructions • Always confirm the selected function with the Start button .
Operating the oven • If the oven door is opened during operation, the function stops. After closing the door continue with the Start button . If the Start button is not started within 30 seconds, the appliance switches itself off. • The oven light is switched on as soon as an oven function is started or the oven door is opened. The oven light goes off after 10 minutes when the door is open and the appliance switched off. • Stop operation with the Stop button, continue operation with the Start button .
Operating the oven 17 Thermometer symbol • The slowly rising thermometer symbol indicates how far the oven has heated up. • When the selected temperature is reached, a signal sounds. Switching the oven off To switch the oven off, press the Stop button repeatedly until only the time and any residual heat is displayed. Cooling fan The fan switches on automatically to keep the appliance surfaces cool.
Operating the oven 2. By repeatedly pressing the Microwave button, set the desired microwave power. – The settings options are in 100 Watt steps from 1,000 Watt to 100 Watt. – Repeatedly pressing the Microwave button makes the power display begin again at 1,000 Watt. 3. Using the or button, set the desired cook time. The symbol for Cook Time flashes. – The cooking times can be set as follows: – from 0 to 2 min. in 5 second steps, – from 2 to 5 min. in 10 second steps, – from 5 to 10 min.
Operating the oven 19 – While the time counts down, using the clock functions buttons and the cooking time can be increased or reduced. When the time has elapsed, a signal sounds for 2 minutes. The microwave switches itself off. The symbol for Cook Time flashes and the time display appears. To turn off the signal: Press any button. Combi Function You will find a selection of dishes in the chapter "Uses, Tables and Tips: Combi Function. 1. Switch off the appliance using the Stop button, if necessary. 2.
Operating the oven – The cooking times can be set as follows: – from 0 to 2 min. in 5 second steps, – from 2 to 5 min. in 10 second steps, – from 5 to 10 min. in 20 second steps, – from 10 to 20 min. in 30 second steps, – from 20 min. onwards in 1 minute steps. The maximum length of operation that can be set is 59 min. 6. When the Start button is pressed, the time set begins to count down. Oven and microwave are on. The symbol for Cook Time lights up.
Operating the oven 21 2. Press the Start button repeatedly until the desired period of operation appears. The appliance switches itself on at maximum microwave power. – Each press of the button adds 30 seconds to the cooking time displayed. Maximum 7 min. at maximum microwave power. – While the time counts down, using the clock functions buttons and the cooking time can be increased or reduced. – By repeatedly pressing the Microwave button , the microwave power can be changed.
Operating the oven Microwave Power 600 Watt 500 Watt 400 Watt 300 Watt 200 Watt 100 Watt Suitable for • • • • Defrosting and heating frozen meals Heating one-plate meals Simmering stews Cooking egg dishes • • • • • • Continuing to cook meals Cooking delicate foodstuffs Heating baby food Simmering rice Heating delicate foods Melting cheese • • • • • Defrosting meat, fish, bread Defrosting cheese, cream, butter Defrosting fruit and cakes (gateaux) Raising yeast dough Warming up cold dishes and dr
Operating the oven 23 Additional functions Microwave Programmes For this function, use the pre-set programmes (see section "Uses, Tables and Tips: Programmes). Selecting a programme 1. Switch off the appliance using the Stop button, if necessary. 2. By repeatedly pressing the Baking/ Roasting Programmes button, select the desired programme (P 1 to P10). – In the display the preset weight "gr" is displayed. The symbol for Cook Time flashes. Weight = Cook Time 3.
Operating the oven With some programmes, after the time has elapsed a Keep Warm function is started. A signal sounds and "HH" lights up in the display. After the Keep Warm function has ended, a signal sounds for 2 minutes. The microwave switches itself off. The symbol for Cook Time flashes and the time display appears. To turn off the signal: Press any button. Memory function The Memory function can be used to save one setting which is used very frequently. 1.
Operating the oven 25 Clock functions 2 1 3 4 5 6 1 Clock functions 2 Clock displays 3 Time 4 Cook Time/End Time/Operating Time 5 Clock functions 6 Selector buttons Countdown To set a countdown. When it has counted down, a signal sounds. This function has no effect on the operation of the microwave and oven. Microwave Cook Time min For setting how long the microwave is to operate. Cook Time To set how long the oven is to operate. End Time For setting when the oven is to switch itself off again.
Operating the oven General instructions • After a clock function has been selected, the corresponding symbol flashes for about 5 seconds. During this period, the desired times can be set or modified using the or button. • When the desired time has been set, the symbol continues to flash for approx. 5 seconds. After this the symbol lights up. The set Countdown begins to count down. • The time set for Cook Time and End Time begins to count down after the selected function starts. Countdown 1.
Operating the oven After approx. 5 seconds the display shows the time remaining. The symbol for Countdown lights up. When the time has elapsed, a signal sounds for 2 minutes. "0.00" lights up and the symbol for Countdown flashes. To turn off the signal: Press any button. Microwave Cook Time min. 1. Select microwave function and set power by repeatedly pressing the Microwave button . 2. Using the or button set the desired cooking time. The symbol for Cook Time flashes.
Operating the oven 3. When the Start button is pressed, the time set begins to count down. The symbol for Cook Time lights up. By repeatedly pressing the clock functions button the current time can be found out. While the time counts down, using the and buttons the cooking time can be increased or reduced. When the time has elapsed, a signal sounds for 2 minutes. The microwave switches itself off. "0.00" is displayed and the symbol for Cook Time flashes. To turn off the signal: Press any button.
Operating the oven 4. When the Start button is pressed, the time set begins to count down. The symbol for Cook Time lights up. By repeatedly pressing the clock functions button the current time can be found out. When the time has elapsed, a signal sounds for 2 minutes. The oven switches itself off. "0.00" is displayed and the symbol for Cook Time flashes. To turn off the signal: Press any button. End Time 1. Select oven function and using the or button select the temperature. 2.
Operating the oven The symbols for End Time and Cook Time light up. The oven switches itself on automatically. By repeatedly pressing the clock functions button the current time can be found out. When the time has elapsed, a signal sounds for 2 minutes. The oven switches itself off. "0.00" is displayed and the symbols for End Time and Cook Time flash To turn off the signal: Press any button.
Operating the oven 3. Using the End Time function , set the time at which the dish is to be ready, e. g. at 14:05. The symbols for Cook Time and End Time light up. The oven switches itself on automatically at the time calculated, e. g. at 13:05. When the set cook time has elapsed, a signal sounds for 2 minutes and the oven switches itself off, e. g. at 14:05.
Operating the oven Other functions Child safety device As soon as the child safety device is activated, it is no longer possible to operate the oven. Switching on the child safety device 1. Switch off the appliance using the Stop button, if necessary. An oven function must not be selected. 2. Press and hold the Baking/Roasting Programme buttons and at the same time, until SAFE appears in the display. The child safety device is now activated. Switching off the child safety device 1.
Uses, Tables and Tips 33 1. Switch off the appliance using the Stop button, if necessary. 2. Press and hold the and buttons at the same time, until a signal sounds (approx. 2 seconds). The button beep is now switched off. Switching on button beep Press and hold the and buttons at the same time, until a signal sounds (approx. 2 seconds). The button beep is switched on again.
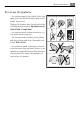
Uses, Tables and Tips • Grilling is particularly suitable for flat pieces of meat or fish. Grilling Table Food to be grilled Oven level Cooking times 1st side 2nd side Rissoles 3 12-15 min. 9-12 min. Pork fillet 2 10-12 min. 6-10 min. Sausages 3 12-16 min. 8-10 min. Fillet steaks, veal steaks 3 12-15 min. 8-12 min. Fillet of beef, roast beef (approx. 1 kg) 2 10-12 min. 10-12 min. Toast 1) 3 6-8 min. 3-5 min. Toast with topping 2 8-10 min.
Uses, Tables and Tips 35 Defrosting meat, poultry, fish • Place the frozen, unwrapped food on a small upturned plate with a container underneath or on a defrosting rack or plastic sieve so that the defrosting liquid can run off. • Turn the food after half the defrosting time. If possible, divide and then remove pieces that have started to defrost. Defrosting butter, portions of gateau, quark • Do not defrost completely in the appliance, but leave to defrost at room temperature.
Uses, Tables and Tips Cookware/Material Microwave Defrosting Heating Cooking Single economy grill oven Cardboard, paper X -- -- -- Clingfilm X -- -- -- X X -- Roasting dishes made of metal, e. g. enamel, -cast iron -- -- X -- -- -- X -- -- -- X X X -- X X X Roasting film with microwave safe closure 3 X 3) Baking tins, black lacquer or silicon-coated 3) Baking tray Browning cookware, e. g.
Uses, Tables and Tips 37 Microwave Cooking Table Defrosting Dish Microwave Size (g) Power (Watts) Cook Time min. Standing time (min.).
Uses, Tables and Tips Defrosting Dish Microwave Size (g) Power (Watts) Cook Time min. Standing time (min.).
Uses, Tables and Tips 39 Defrosting Dish Microwave Size (g) Power (Watts) Cook Time min. Standing time (min.).
Uses, Tables and Tips Cooking Dish Microwave Size (g) Power (Watts) Cook Time min. Standing time min. Things to note Fish fillets 500 500 6-8 --- Cook covered, turn container several times during cooking Vegetables, short cooking time, fresh 1) 500 600 12-16 --- Add approx. 50 ml water, cook covered, stir halfway through Vegetables, short cooking time, frozen 1) 500 600 14-18 --- Add approx.
Uses, Tables and Tips Dish Baking/ roasting dishes Oven funct. Temp. in °C Microwave Watt Oven level Time in min. 41 Things to note Potato gratin Ovenproof 1000 g glassware on oven shelf + 200 300 2 40 10 min. standing time Neck of roast Ovenproof pork 1100 g glassware on oven shelf + 200 300 1 70 Turn once halfway through 10 min. standing time Sweet Tart(CH) Crunch plate on glass base, preheat with pastry max. 5 min.
Uses, Tables and Tips The cooking times and temperatures are guidelines only and depend upon the type and qualities of the foodstuffs. Tips for the microwave Result Remedy You cannot find details for the amount of Look for a similar food. Increase or shorten the length food prepared. of the cooking times according to the following rule: Double the amount = almost double the time Half the amount = half the time The food has got too dry. Set shorter cooking time or select lower microwave power.
Uses, Tables and Tips 43 Programmes The appliance has 10 programmed functions, which can be selected one after the other using the Baking/Roasting Programmes button. For settings, see section Additional Functions: Microwave Programmes. Programme Function Recipe Weight Time according to presetting Keep Warm function "HH" Presetting min. max. Poultry 1,000 g 100 g 1,500 g 19 min. 40 sec. No P2 Meat 800 g 100 g 1,500 g 17 min. 36 sec. No P3 Fish 1,000 g 100 g 1,500 g 15 min.
Cleaning and care Programme P 10 Function Recipe Fish Weight Presetting min. max. 1,000 g 100 g 1,000 g Time according to presetting 21 min. 40 sec. Keep Warm function "HH" Yes Cleaning and care WARNING! For cleaning, the appliance must be switched off and cooled down. WARNING! For safety reasons, do not clean the appliance with steam jet or high-pressure cleaning equipment! CAUTION! Do not use any scouring agents, sharp cleaning tools or scourers.
Cleaning and care 45 Remove stubborn dirt with special oven cleaners. When using oven sprays, please follow the manufacturer's instructions exactly! Accessories Wash up all insertable parts (oven shelf, baking tray, side rails, etc.) after each use and dry well. For easier cleaning, leave to soak for a while. Side rails The left and right-hand side rails can be removed from the oven, so that the side walls of the oven can be cleaned.
Cleaning and care Replacing the side rails To insert rails, re-insert them into the mounts and lower them. Oven lighting WARNING! Risk of electric shock! Before replacing the oven light bulb: • Switching the oven off! • Take the fuses out of the fuse box or switch off. To protect the oven light bulb and the glass cover, lay a cloth on the floor of the oven. Replacing the side oven light bulb/Cleaning the glass cover 1. Take out the side rails on the left. 2.
If something is wrong… 47 If something is wrong… Problem The oven is not heating up Possible cause Remedy The oven has not been switched on Switch the oven on The clock has not been set Set the current time on the clock The required settings have not been made Check the settings The oven's automatic switch-off has been triggered See Automatic switch-off The child safety device is activated. Switching off the child safety device The fuse in the house's electrical Check fuse.
Electrical Connection Electrical Connection The oven is designed to be connected to 230-240V~(50Hz) electricity supply. The oven has an easily accessible terminal block which is marked as follows: Letter L - Live terminal Letter N - Neutral terminal - Earth terminal CAUTION! This oven must be earthed! The cable used to connect the oven to the electrical supply must comply to the specifications given below. For UK use only Connection via Min.
To prevent risk of injury, damaged connection cables must be replaced by our Customer Care Department or a designated specialist Safety information for the installation engineer • The electrical installation is provided with a device to enable the appliance to be cut off from the mains with with a minimum 3 mm all-pole contact separation. Suitable separation devices include e. g. cut-outs, fuses (screw fuses are to be taken out of the holder), RCDs and contactors.
1b 592 380-383 380 20 13 min. 560 388 375 min.
1c 592 380-383 20 13 388 375 380 388 380 min. 550 min.
3 90 0 4 20 2x3,5x25 13
Disposal Disposal The symbol on the product or on its packaging indicates that this product may not be treated as household waste. Instead it should be taken to the appropriate collection point for the recycling of electrical and electronic equipment. By ensuring this product is disposed of correctly, you will help prevent potential negative consequences for the environment and human health, which could otherwise be caused by inappropriate waste handling of this product.
Guarantee/Customer Service 55 So that you have the necessary reference numbers from your appliance at hand, we recommend that you write them in here: Model description: ........................................ PNC: ........................................ S-No: ........................................
Guarantee/Customer Service Service and Spare Parts In the event of your appliance requiring service, or if you wish to purchase spare parts, please contact your local Service Force Centre by telephoning 0870 5 929 929 Your telephone call will be automatically routed to the Service Force Centre covering your postcode area. For the address of your local Service Force Centre and further information about Service Force, please visit the website at www.serviceforce.co.
European Guarantee 57 For Customer Service in The Republic of Ireland please contact us at the address below: Electrolux Group (Irl) Ltd Long Mile Road, Dublin 12, Republic of Ireland Tel: +353 (0)1 4090751 Email: service.eid@electrolux.ie European Guarantee This appliance is guaranteed by Electrolux in each of the countries listed at the back of this user manual, for the period specified in the appliance guarantee or otherwise by law.
www.electrolux.com www.electrolux.com Albania +35 5 4 261 450 Rr. Pjeter Bogdani Nr. 7 Tirane Belgique/België/Belgien +32 2 363 04 44 Bergensesteenweg 719, 1502 Lembeek Česká republika +420 2 61 12 61 12 Budějovická 3, Praha 4, 140 21 Danmark +45 70 11 74 00 Sjællandsgade 2, 7000 Fredericia Deutschland +49 180 32 26 622 Muggenhofer Str. 135, 90429 Nürnberg Eesti +37 2 66 50 030 Pärnu mnt. 153, 11624 Tallinn España +34 902 11 63 88 Carretera M-300, Km.
Norge +47 81 5 30 222 Risløkkvn. 2 , 0508 Oslo Österreich +43 18 66 400 Herziggasse 9, 1230 Wien Polska +48 22 43 47 300 ul. Kolejowa 5/7, Warsza‐ wa Portugal +35 12 14 40 39 39 Quinta da Fonte - Edificio Gonçalves Zarco - Q 35 -2774-518 Paço de Arcos Romania +40 21 451 20 30 Str.
892 943 036 - A - 062009 www.electrolux.