LAVAMAT LAVALOGIC 1620 Waschautomat Benutzerinformation
Sehr geehrte Kundin, sehr geehrter Kunde, lesen Sie bitte diese Benutzerinformation sorgfältig durch und bewahren Sie sie zum späteren Nachschlagen auf. Geben Sie diese Benutzerinformation an eventuelle Nachbesitzer des Gerätes weiter. 1 3 2 2 Folgende Symbole werden im Text verwendet: Sicherheitshinweise Warnung! Hinweise, die Ihrer persönlichen Sicherheit dienen. Achtung! Hinweise, die zur Vermeidung von Schäden am Gerät dienen.
Inhalt Gebrauchsanweisung. . . . . . . . . . . . . . . . . . . . . . . . . . . . . . . . . . . . . . . 5 Sicherheit. . . . . . . . . . . . . . . . . . . . . . . . . . . . . . . . . . . . . . . . . . . . . . . . . . . . . . 5 Entsorgung . . . . . . . . . . . . . . . . . . . . . . . . . . . . . . . . . . . . . . . . . . . . . . . . . . . . 6 Das erste Einschalten – Sprache einstellen . . . . . . . . . . . . . . . . . . . . . . . . 7 Gerätebeschreibung. . . . . . . . . . . . . . . . . . . . . . . . . .
Extras einstellen . . . . . . . . . . . . . . . . . . . . . . . . . . . . . . . . . . . . . . . . . . . . . . . . MEMORY . . . . . . . . . . . . . . . . . . . . . . . . . . . . . . . . . . . . . . . . . . . . . . . . . . . . . . . Programmeinstellung speichern . . . . . . . . . . . . . . . . . . . . . . . . . . . . . . . . . Gespeicherte Programmeinstellung löschen . . . . . . . . . . . . . . . . . . . . . . . SPÜLEN+, LOCKERSCHLEUDERN . . . . . . . . . . . . . . . . . . . . . . . . . . . . . . . . . . .
Gebrauchsanweisung 1 Sicherheit Vor der ersten Inbetriebnahme • Beachten Sie die „Aufstell- und Anschlussanweisung“. • Bei Geräteanlieferung in Wintermonaten mit Minustemperaturen: Waschautomat vor Inbetriebnahme für 24 Stunden bei Raumtemperatur lagern. Bestimmungsgemäße Verwendung • Der Waschautomat ist nur zum Waschen haushaltsüblicher Wäsche im Haushalt bestimmt. • Umbauten oder Veränderungen am Waschautomaten sind nicht zulässig.
bei Festanschluss – LS-Schalter im Sicherungskasten ausschalten bzw. Schraubsicherung ganz herausdrehen. • Bei Betriebspausen das Gerät vom Stromnetz trennen und Wasserhahn schließen. • Netzstecker nie am Kabel aus der Steckdose ziehen, sondern am Stecker. • Vielfachstecker, Kupplungen und Verlängerungskabel dürfen nicht verwendet werden. Brandgefahr durch Überhitzung! • Den Waschautomaten nicht mit einem Wasserstrahl abspritzen.
Das erste Einschalten – Sprache einstellen Nach dem ersten Einschalten des Gerätes sollten Sie unbedingt die Sprache einstellen, in der die Anzeigen im Display erscheinen sollen. 1. Drehknopf drücken. Das Gerät ist eingeschaltet. Im Display erscheinen die zur Auswahl stehenden Sprachen. Werksseitig ist die Sprache Deutsch voreingestellt. Achtung: Wenn das Display keine Sprachen anzeigt, wurde das Gerät schon einmal eingeschaltet.
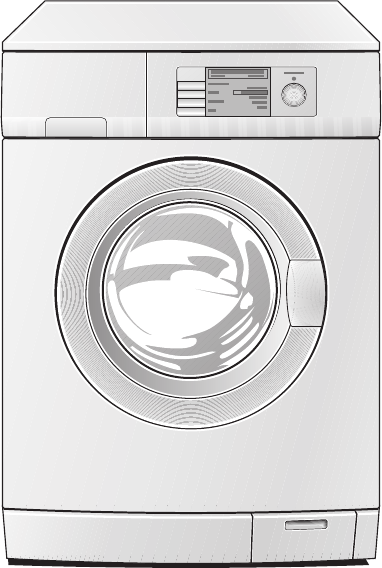
Gerätebeschreibung Bedienfeld mit Display Schublade für Wasch- und Pflegemittel Typschild (hinter Einfülltür) Einfülltür Drei Schraubfüße höhenverstellbar; hinten links: Automatikfuß Klappe vor Laugenpumpe Bedienfeld mit Display BUNT-PFLEGEL. 60°C 1600 U/MIN START 60° Tasten 1600 OPTIONEN 10:17-12:16 î BUNT-PFLEGEL.) ENERGIESPAREN KOCHWÄSCHE FEINWÄSCHE WOLLE Drehknopf Display Anzeigen im Display Informationsfeld zeigt Programm, Temperatur und Schleuderdrehzahl an BUNT-PFLEGEL.
Grundzüge der Bedienung Drehknopf Ein-/Ausschalten Durch Drücken des Drehknopfes schalten Sie das Gerät ein bzw. aus. Markieren Durch Drehen des Drehknopfes markieren Sie die Einträge rechts im Display. WOLLE 40°C 1200 U/MIN START 40° 1200 OPTIONEN 10:17-10:54 î BUNT-PFLEGEL. ENERGIESPAREN KOCHWÄSCHE FEINWÄSCHE WOLLE ) Einstellungen löschen Falls Sie versehentlich vorgenommene Einstellungen wieder löschen möchten, schalten Sie das Gerät mit dem Drehknopf aus und wieder ein.
Programmübersicht SEIDE SPÜLSTOPP 2kg 1000/800/600/400 WOLLE (Handwäsche) 40, 30, KALT 1200 3kg 1400 FEINWÄSCHE 40, 30, 20 1600 6kg VORWÄSCHE KOCHWÄSCHE 95 FLECKEN 6kg SENSITIV ENERGIESPAREN 3) START SPÄTER 6kg EXTRA KURZ BUNT-PFLEGELEICHT 60, 50, 40, 30, 20 Schleuderdrehzahl KURZ Programm max.
Anwendung/Eigenschaften Pflegesymbole1) Universalprogramm für bunte und pflegeleichte Wäsche aus Baumwolle/Leinen sowie für pflegeleichte Mischgewebe und Synthetics. Das Programm passt sich automatisch an die unterschiedlichen Gewebearten und Füllmengen an. Bei reiner Beladung mit pflegeleichter Wäsche nur 3kg einfüllen. IKN JM Energie- und wassersparendes Programm bei 60°C für leicht bis normal verschmutzte Koch-/Buntwäsche aus Baumwolle/Leinen.
1000/800/600/400 • • • SCHLEUDERN 6kg • • • • • STÄRKEN 6kg • • • • • • 1) Ein 10-Liter-Eimer fasst etwa 2,5 kg Trockenwäsche (Baumwolle) SPÜLSTOPP 1200 3kg 1400 1600 VORWÄSCHE FLECKEN SENSITIV STARTSPÄTER EXTRA KURZ SCHONSCHLEUDERN PUMPEN 12 Schleuderdrehzahl ZEIT SPAREN KURZ Programm max.
Anwendung/Eigenschaften Abpumpen und schonendes Schleudern nach einem Spülstopp bzw. separates schonendes Schleudern von handgewaschender Feinwäsche, Wolle, Seide. Abpumpen und Schleudern, z.B. nach Spülstopp, bzw. separates Schleudern von handgewaschener Koch-/Bunt- und pflegeleichter Wäsche. Separates Stärken, Weichspülen, Formspülen, Imprägnieren von feuchter Wäsche. Pflegesymbole1) IKN QLH JMO JMO Abpumpen des Wassers nach einem Spülstopp.
Vor dem ersten Waschen Uhrzeit einstellen Damit die aktuelle Uhrzeit und das Programmende korrekt angezeigt werden, bitte die Anzeige im Display überprüfen und gegebenenfalls die aktuelle Uhrzeit einstellen (siehe „Extras einstellen: Uhrzeit“). Vorreinigung durchführen Vor dem ersten Waschen einen Waschgang ohne Wäsche durchführen (Programm BUNT-PFLEGEL. 60°, Option ZEITSPAREN/EXTRA KURZ, ca. 1/4 Messbecher Waschpulver). Dadurch werden fertigungsbedingte Rückstände an Trommel und Laugenbehälter entfernt.
Waschgang durchführen Gerät einschalten 3 Drehknopf drücken. Das Gerät ist eingeschaltet. Achten Sie vor dem Einschalten darauf, dass die Trommel leer ist. Nur so wird die Wäsche anschließend vom Beladungssensor vollständig erfasst. Programm einstellen 1. Gewünschtes Programm markieren, z.B. FEINWÄSCHE. FEINWÄSCHE 40°C 1200 U/MIN 11:25-12:36 î START 40° 1200 OPTIONEN BUNT-PFLEGEL. ENERGIESPAREN KOCHWÄSCHE FEINWÄSCHE) WOLLE Temperatur ändern 2.
Optionen wählen Zum vorher gewählten Programm können Sie verschiedene Optionen wählen. Es werden nur Optionen angeboten, die mit dem angewählten Programm kombinierbar sind. ZEITSPAREN START SPÄTER SENSITIV FLECKEN VORWÄSCHE Verkürztes Programm für leichter verschmutzte Wäsche. Der Start eines Programms kann in Schritten von 30 Minuten bis max. 20 Stunden aufgeschoben werden. Erhöhte Spülwirkung durch zusätzlichen Spülgang bei gleichzeitiger Gewebeschonung (verringerter Trommelbewegung).
START SPÄTER 1. Taste OPTIONEN drücken. 2. Mit Dehknopf START SPÄTER markieren. 3. Taste ANWÄHLEN drücken. 4. Mit Drehknopf die Uhrzeit FEINWÄSCHE 30°C 1000 U/MIN 11:25-14:06 einstellen, zu der das Proè gramm beendet sein soll. PROGRAMM ENDE ANWÄHLEN 5. Taste ANWÄHLEN drücken. 14:06 H:MIN ( ZURÜCK Im Informationsfeld ändert sich die Uhrzeit des Programmendes. 6. Taste START drücken. START SPÄTER abbrechen: Taste START erneut drücken. Das Programm startet sofort. SENSITIV/FLECKEN/VORWÄSCHE 1.
Einfülltür öffnen/Wäsche einfüllen 1. Einfülltür öffnen: am Griff der Einfülltür ziehen. 2. Wäsche auseinanderfalten und locker einfüllen. Große und kleine Teile mischen. Achtung! Keine Wäsche zwischen Einfülltür und Gummidichtung einklemmen. 3. Einfülltür fest zudrücken. Anzeige BELADUNG/DOSIERUNG 3 3 18 FEINWÄSCHE 30°C Wenn während der Pro1000 U/MIN 11:25-12:36 grammeinstellung oder beim § § Einfüllen der Wäsche einige ##################======] Sekunden lang keine EinstelMAX.
Wasch-/Pflegemittel einfüllen Achtung! Nur Wasch-/Pflegemittel verwenden, die für HaushaltsWaschautomaten geeignet sind. Wasch-/Pflegemittel nach den Angaben der Wasch-/Pflegemittelhersteller dosieren. Hinweise auf den Verpackungen beachten. Die Dosierung ist abhängig: – von der Verschmutzung der Wäsche, – von der Wäschemenge – vom Härtebereich des Leitungswassers. Ab Wasserhärtebereich 2 (=mittel) sollte Wasserenthärter verwendet werden.
Programm starten 1. Kontrollieren, ob Wasserhahn geöffnet ist. 2. Taste START drücken. Das Programm wird gestartet. FEINWÄSCHE 30°C 1000 U/MIN 11:25-12:36 î START 30° 1000 OPTIONEN BUNT-PFLEGEL. ENERGIESPAREN KOCHWÄSCHE FEINWÄSCHE) WOLLE Ablauf des Programms Während des ProgrammFEINWÄSCHE 30°C 1000 U/MIN 11:25-12:36 ablaufs zeigt das Display § PAUSE unter anderem: HAUPTWÄSCHE – den jeweils aktuellen ###############=========] Programmschritt, z.B.
Waschgang beendet/Wäsche entnehmen Am Ende des Programms erscheint BITTE WÄSCHE ENTNEHMEN im Display. Sobald das Symbol §erscheint, kann die Einfülltür geöffnet werden. 1. Einfülltür am Griff öffnen. 2. Wäsche entnehmen. 3. Gerät ausschalten. Wenn Spülstopp gewählt war: 1. Taste START drücken. FEINWÄSCHE 30°C SPÜLSTOPP 11:25-11:28 § START SPÜLSTOPP ###################### SPÜLST. Das Display wechselt automatisch auf die erste Programmseite.
Extras einstellen Unabhängig vom jeweiligen Programm können Sie verschiedene Grundeinstellungen wählen. Diese bleiben dauerhaft eingestellt, bis sie wieder abgewählt werden. MEMORY 1, 2, 3, 4 Häufig verwendete Programmeinstellungen können gespeichert werden. Die gespeicherte Programmeinstellung kann dann wie ein normales Programm angewählt werden. Insgesamt stehen vier Speicherplätze zur Verfügung.
4. Option SENSITIV markieren. 5. Taste ANWÄHLEN drücken. Im Display erscheint das Symbol . BUNT-PFLEGEL. 40°C 1200 U/MIN 10:17-12:16 ç START ZEITSPAREN START SPÄTER SENSITIV) FLECKEN VORWÄSCHE ANWÄHLEN ZURÜCK 6. Taste EXTRAS drücken. EXTRAS MEMORY ist markiert: 7. Taste ANWÄHLEN drücken. EXTRAS ì ANWÄHLEN ZURÜCK MEMORY 1 ist markiert: 8. Taste SICHERN drücken. Die Programmeinstellung ist als M1: BUNT-PFLEGEL. gespeichert. 9. Anschließend Taste ZURÜCK 3x drücken. MEMORY( SPÜLEN+ LOCKERSCHLEUD.
SPÜLEN+, LOCKERSCHLEUDERN 1. Taste OPTIONEN drücken. 2. Taste EXTRAS drücken. 3. Mit Drehknopf gewünschtes Extra markieren, z.B. SPÜLEN+. 4. Taste ANWÄHLEN drücken. Im Display erscheint das Symbol . 5. Taste ZURÜCK 2x drücken. EXTRAS ì ANWÄHLEN ZURÜCK MEMORY SPÜLEN +) LOCKERSCHLEUD. SPRACHE SPRACHE 1. Taste OPTIONEN drücken. 2. Taste EXTRAS drücken. 3. Mit Drehknopf SPRACHE markieren. 4. Taste ANWÄHLEN drücken. 5. Mit Drehknopf gewünschte Sprache markieren, z.B. ENGLISH. 6.
LAUTSTÄRKE 1. Taste OPTIONEN drücken. 2. Taste EXTRAS drücken. 3. Mit Drehknopf LAUTSTÄRKE markieren. 4. Taste ANWÄHLEN drücken. 5. Mit Dehknopf AUS, NORMAL bzw. LAUT markieren. 6. Taste ANWÄHLEN drücken. 7. Taste ZURÜCK 3x drücken. EXTRAS LAUTSTÄRKE é ANWÄHLEN ZURÜCK AUS§§§ NORMAL!) LAUT§§§ Kindersicherung Bei eingestellter Kindersicherung kann die Einfülltür nicht mehr geschlossen werden.
Reinigen und Pflegen Achtung! Keine Möbelpflegemittel oder aggressive Reinigungsmittel zur Reinigung des Gerätes benutzen. Bedienblende und Gehäuse mit einem feuchten Tuch abwischen. Waschmittelschublade Die Waschmittelschublade sollte regelmäßig gereinigt werden. 1. Waschmittelschublade mit kräftigem Ruck entnehmen. 2. Weichspülereinsatz aus dem mittleren Fach herausnehmen. 3. Alle Teile mit Wasser reinigen. 4. Weichspülereinsatz bis zum Anschlag aufstecken, so dass er fest sitzt. 5.
Was tun, wenn… Kleine Störungen selbst beheben Falls während des Betriebes eine der folgenden Fehlermeldungen im Display angezeigt wird: – ACHTUNG (E41)/BITTE TÜR SCHLIESSEN – ACHTUNG ERROR CODE (E11)/BITTE WASSERHAHN ÖFFNEN – ACHTUNG ERROR CODE (E21)/BITTE WASSERABLAUF ÜBERPRÜFEN sehen Sie bitte in nachstehender Tabelle nach. Nach Behebung des Fehlers Taste START drücken. Erscheint im Display ACHTUNG/BITTE KUNDENDIENST RUFEN sowie ein Fehlercode (z.B. E..): Gerät aus- und wieder einschalten.
Problem Mögliche Ursache Transportsicherung nicht entfernt. Waschautomat vibriert Schraubfüße nicht korrekt während des Betriebs eingestellt. oder steht unruhig. Nur sehr wenig Wäsche in der Trommel (z.B. nur ein Bademantel). Abhilfe Transportsicherung entfernen. Füße laut Aufstell- und Anschlussanweisung justieren. Funktion ist dadurch nicht beeinträchtigt. Verschraubung am Zulaufschlauch ist undicht. Zulaufschlauch festschrauben. Ablaufschlauch ist undicht. Ablaufschlauch erneuern.
Problem Es läuft kein Wasser ein. Im Display erscheint ACHTUNG ERROR CODE (E11)/ BITTE WASSERHAHN ÖFFNEN. Wäsche ist nicht gut geschleudert, in der Trommel ist noch Restwasser sichtbar. Im Display erscheint ACHTUNG ERROR CODE (E21)/BITTE WASSERABLAUF ÜBERPRÜFEN. Mögliche Ursache Abhilfe Wasserhahn geschlossen. Wasserhahn öffnen. Sieb in der Verschraubung des Zulaufschlauchs verstopft. Wasserhahn schließen. Schlauch abschrauben, Sieb herausnehmen und reinigen. Wasserhahn verkalkt oder defekt.
Notentleerung durchführen 1 Warnung! Waschautomat vor Notentleerung ausschalten und den Netzstecker aus der Steckdose ziehen! Warnung! Die Waschlauge, die aus dem Notentleerungsschlauch ausläuft, kann heiß sein. Verbrühungsgefahr! Vor einer Notentleerung Waschlauge abkühlen lassen! 1. Sockelklappe aufklappen und abziehen. 2. Notentleerungsschlauch herausnehmen. 3. Flaches Auffanggefäß unterstellen. Anschließend Verschlussstopfen durch Drehen gegen den Uhrzeigersinn lösen und herausziehen. 4.
Laugenpumpe 1 Die Laugenpumpe ist wartungsfrei. Das Öffnen des Pumpendeckels ist nur im Störungsfall erforderlich, wenn kein Wasser mehr abgepumpt wird, z. B. bei blockiertem Pumpenrad. Bitte vor dem Einfüllen der Wäsche immer sicherstellen, dass sich keine Fremdkörper in den Taschen oder zwischen der Wäsche befinden. Büroklammern, Nägel etc., die eventuell mit der Wäsche in den Waschautomaten gelangt sind, bleiben im Pumpengehäuse (Fremdkörperfalle, die das Pumpenrad schützt) liegen.
Technische Daten 5 Dieses Gerät entspricht den folgenden EG-Richtlinien: – 73/23/EWG vom 19.02.1973 Niederspannungs-Richtlinie – 89/336/EWG vom 03.05.1989 EMV-Richtlinie einschließlich Änderungs-Richtlinie 92/31/EWG – 93/68/EWG vom 22.07.1993 CE-Kennzeichnungs-Richtlinie Höhe x Breite x Tiefe 850 x 598 x 640mm Tiefe bei geöffneter Einfülltür 1017 mm Höhenverstellbarkeit ca. +10/-5mm Füllmenge (programmabhängig) max.
Aufstell- und Anschlussanweisung 1 Sicherheitshinweise für die Installation • Dieser Waschautomat ist nicht unterbaufähig. • Vor Inbetriebnahme das Gerät auf Transportschäden überprüfen. Ein beschädigtes Gerät auf keinen Fall anschließen. Wenden Sie sich im Schadensfall an Ihren Lieferanten. • Vor Inbetriebnahme müssen alle Teile der Transportsicherung entfernt sein. Andernfalls kann es beim Schleudern zu Schäden am Gerät oder an benachbarten Möbeln kommen.
Aufstellung des Gerätes Gerät transportieren 1 Warnung! Der Waschautomat hat ein hohes Gewicht. Verletzungsgefahr! Vorsicht beim Anheben. • Das Gerät nicht auf die Vorderfront und nicht auf die rechte Seite (von vorne gesehen) legen. Elektrische Bauteile können nass werden. • Gerät niemals ohne Transportsicherung transportieren. Transportsicherung erst am Aufstellort entfernen! Transport ohne Transportsicherung kann zu Schäden am Gerät führen.
3 Spezialschlüssel A und Verschlusskappen B (2 Stück) und C (1 Stück) liegen dem Gerät bei. 3. Schraube D inkl. Druckfeder mit Spezialschlüssel A entfernen. 4. Verschlusskappe C gemäß Abbildung umstülpen. 5. Loch mit Verschlusskappe C verschließen. 6. Zwei Schrauben E mit Spezialschlüssel A herausschrauben. 7. Vier Schrauben F mit Spezialschlüssel A herausschrauben. 8. Transportschiene G abnehmen. 9. Die vier Schrauben F wieder einschrauben. 10. Die zwei großen Löcher mit Verschlusskappen B verschließen.
Wenn das Gerät auf einem Sockel stehen soll: Damit das Gerät sicher auf dem Sockel steht, müssen Standbleche*) montiert werden, in die das Gerät eingestellt wird. Wenn das Gerät auf schwingenden Böden stehen soll, z. B. Holzbalkenböden mit Dielenbrettern: Gerät möglichst in einer Ecke des Raumes aufstellen. 1. Eine wasserbeständige Holzplatte (mindestens 15 mm dick) auf mindestens 2 Fußbodenbalken festschrauben. 2. Standbleche*) auf die Holzplatte montieren, in die das Gerät eingestellt wird.
Elektrischer Anschluss Angaben über Netzspannung, Stromart und die erforderliche Absicherung sind dem Typschild zu entnehmen. Das Typschild ist im Bereich der Einfüllöffnung angebracht. Wasseranschluss Achtung! • Dieses Gerät darf nicht an Warmwasser angeschlossen werden! • Beim Anschluss nur neue Schlauchsätze verwenden! • Gerät nur an die Trinkwasserleitung anschließen. Regen- oder Brauchwasser nur dann verwenden, wenn es die Anforderungen nach DIN1986 und DIN1988 erfüllt.
Wasserzulauf 3 Mitgeliefert wird ein Druckschlauch von 1,5m Länge. Wird ein längerer Zulaufschlauch benötigt, sind ausschließlich Originalschläuche zu verwenden. Der Kundendienst hält Schlauchsätze in verschiedenen Längen bereit. Dichtringe sind entweder in den Kunststoffmuttern der Schlauchverschraubung eingelegt oder im Beipack enthalten. Keine anderen Dichtungen verwenden! Achtung! Alle Schlauchverschraubungen nur von Hand anziehen. 1.
Wasserablauf Der Höhenunterschied zwischen Standfläche und Wasserabfluss darf höchstens 1 Meter betragen. Zur Verlängerung dürfen nur Originalschläuche verwendet werden. (Max. 3 m auf dem Fußboden verlegt und dann bis 80 cm hoch). Der Kundendienst führt Ablaufschläuche in verschiedenen Längen. Wasserablauf in einen Siphon Die Verbindungsstelle Tülle/Siphon mit einer Schlauchschelle (im Fachhandel erhältlich) sichern. 1 Wasserablauf in ein Waschbecken/Badewanne Achtung! – Kleine Becken sind nicht geeignet.
Garantiebedingungen Belgien Unsere Geräte werden mit größter Sorgfalt hergestellt. Trotzdem kann es einmal zu einem Defekt kommen. Unser Kundendienst übernimmt auf Anfrage gerne die Reparatur, und zwar sowohl während des Garantiezeitraums als auch danach. So ist gewährleistet, dass ein Defekt nicht zu einer Verkürzung der Lebensdauer des Geräts führt. Die vorliegenden Garantiebedingungen beruhen auf der Richtlinie der Europäischen Union 99/44/ EG sowie den Bestimmungen des Bürgerlichen Gesetzbuches.
14. Auf Reparaturen gewähren wir eine Garantie von 12 Monaten, unter Beschränkung auf das Wiederauftreten desselben Defekts. 15. Mit Ausnahme der Fälle, in denen eine Haftung gesetzlich vorgeschrieben ist, wird durch die vorliegenden Garantiebedingungen jede durch den Kunden u.U. geforderte Entschädigung für über das Gerät hinausgehende Schäden ausgeschlossen. Im Falle der gesetzlich niedergelegten Haftung erfolgt maximal eine Entschädigung in Höhe des Kaufpreises des Geräts.
Kundendienststellen Belgien Adresse Electrolux Home Products Belgium ELECTROLUX SERVICE Bergensesteenweg 719 1502 Lembeek E-mail: consumer.services@electrolux.be 42 Consumer services Telefon 02/363.04.44 Telefax 02/363.04.00 02/363.04.
Service Bei technischen Störungen prüfen Sie bitte zunächst, ob Sie mit Hilfe der Gebrauchsanweisung (Kapitel „Was tun, wenn...“) das Problem selbst beheben können. Wenn Sie das Problem nicht beheben konnten, wenden Sie sich bitte an den Kundendienst oder einen unserer Service-Partner. Um Ihnen schnell helfen zu können, benötigen wir folgende Angaben: – Modellbezeichnung – Produkt-Nummer (PNC) – Serien-Nummer (S-No.
From the Electrolux Group. The world´s No.1 choice. Die Electrolux-Gruppe ist der weltweit größte Hersteller von gas- und strombetriebenen Geräten für die Küche, zum Reinigen und für Forst und Garten. Jedes Jahr verkauft die Electrolux-Gruppe in über 150 Ländern der Erde über 55 Millionen Produkte (Kühlschränke, Herde, Waschmaschinen, Staubsauger, Motorsägen und Rasenmäher) mit einem Wert von rund 14 Mrd. USD. AEG Hausgeräte GmbH Postfach 1036 D-90327 Nürnberg http://www.aeg.hausgeraete.