AG-22D-EU COVER 14/11/2005 13:55 Page A MC1761E Mikrowellengerät Four à micro-ondes Forno a microonde Microwave oven Gebrauchsanweisung Notice d’utilisation Libretto Istruzioni Operating instructions D F I UK PERFEKT IN FORM UND FUNKTION
1. AG-22D-EU German 14/11/2005 13:52 Page B Sehr geehrte Kundin, sehr geehrter Kunde, Wir bedanken uns für den Kauf dieses Mikowellengerätes und das damit der Marke AEG-Electrolux entgegengebrachte Vertrauen. Zur Nutzung aller Vorteile dieses Gerätes lesen Sie bitte die Gebrauchsanweisung sorgfältig durch. Danach bewahren Sie diese bitte zum Nachlesen gut auf. Ihr neues Mikowellengerät belohnt Sie für diese kleine Mühe mit einer tadellosen Leistung. Ferner vermeiden Sie unnötige Servicekosten.
1. AG-22D-EU German 14/11/2005 13:52 Page 1 D Inhalt Wichtige Sicherheitshinweise . . . . . . . . . . . . . . . . . . . . . . . . . . . . . . . . . . . . . . . . . . . . . . . . . .2 - 4 Gerät & Zubehör . . . . . . . . . . . . . . . . . . . . . . . . . . . . . . . . . . . . . . . . . . . . . . . . . . . . . . . . . . . . . . . .5 Bedienblende . . . . . . . . . . . . . . . . . . . . . . . . . . . . . . . . . . . . . . . . . . . . . . . . . . . . . . . . . . . . . . . . . . .6 Vor Inbetriebnahme . . . .
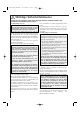
1. AG-22D-EU German 14/11/2005 13:52 Page 2 Wichtige Sicherheitshinweise WICHTIG FÜR IHRE SICHERHEIT: LESEN SIE DIE FOLGENDEN HINWEISE AUFMERKSAM DURCH, UND BEWAHREN SIE DIE BEDIENUNGSANLEITUNG AUF. Zur Vermeidung von Feuer Mikrowellengeräte sollten während des Betriebs nicht unbeaufsichtigt gelassen werden. Zu hohe Leistungsstufen oder zu lange Garzeiten können das Gargut überhitzen und Feuer verursachen.
1. AG-22D-EU German 14/11/2005 13:52 Page 3 D Wichtige Sicherheitshinweise Zur Vermeidung von elektrischem Schlag Unter keinen Umständen sollte das äußere Gehäuse entfernt werden. Niemals Flüssigkeiten in die Öffnungen der Türsicherheitsverriegelung oder Lüftungsöffnungen kommen lassen oder Gegenstände in diese Öffnungen stecken.
1. AG-22D-EU German 14/11/2005 13:52 Page 4 Wichtige Sicherheitshinweise Sonstige Hinweise Niemals das Gerät auf irgendeine Weise verändern. Dieses Gerät ist nur für den Hausgebrauch vorgesehen und darf nur zum Garen von Lebensmitteln verwendet werden. Es eignet sich nicht für gewerbliche Zwecke oder den Gebrauch in einem Labor. Zur Vermeidung von Fehlfunktionen und Beschädigungen dieses Gerätes Das Gerät niemals leer in Betrieb nehmen.
1. AG-22D-EU German 14/11/2005 13:52 Page 5 D Gerät & Zubehör 1 2 3 4 8 7 6 5 9 1. Gerätefront 2. Innenbeleuchtung 3. Bedienblende 4. Türöffnungs-Taste 5. Spritzschutz für den Hohlleiter 6. Garraum 7. Antrieb 8. Türdichtungen und Dichtungsoberlächen 9. Befestigungspunkte (4 Stellen) 10. Lüftungsöffnungen 11. Gehäuse 12. Geräterückseite 13. Netzkabel-Träger 14.
1. AG-22D-EU German 14/11/2005 13:52 Page 6 Bedienblende 1 2 1 Anzeigefeld 2 Symbolen Die Anzeige über dem Symbol blinkt oder leuchtet auf. Wenn eine Anzeige blinkt, die entsprechende Taste (mit demselben Symbol) drücken oder den erforderlichen Bedienungsschritt durchführen.
1. AG-22D-EU German 14/11/2005 13:53 Page 7 D Vor Inbetriebnahme Das Gerät an eine Steckdose anschließen. 1. Die Anzeige beginnt zu blinken. Benutzung der STOP-Taste 1. Löschen eines Eingabefehlers beim Programmieren. 2. Vorübergehendes Unterbrechen des laufenden Betriebes. 3. Löschen eines Programms während des laufenden Betriebes durch zweimaliges Drücken. 2. Die STOP-Taste drücken. Anzeige prüfen. x1 Die Uhr gemäß der nachstehenden Anleitung einstellen.
1. AG-22D-EU German 14/11/2005 13:53 Page 8 Was sind Mikrowellen? Mikrowellen werden im Mikrowellengerät vom Magnetron erzeugt und versetzen die Wassermoleküle im Lebensmittel in Schwingungen. Durch die verursachte Reibung entsteht Wärme, die dafür sorgt, dass die Speisen aufgetaut, erhitzt oder gegart werden. Das Geeignete Geschirr Glas und glas-keramik Bratbeutel Hitzebeständiges Glasgeschirr ist sehr gut geeignet. Der Garvorgang kann von allen Seiten beobachtet werden.
1. AG-22D-EU German 14/11/2005 13:53 Page 9 D Das Geeignete Geschirr Geschirr-eignungstest Wenn Sie nicht sicher sind, ob Ihr Geschirr mikrowellengeeignet ist, führen Sie folgenden Test durch: Das Geschirr in das Gerät stellen. Ein Glasgefäß mit 150 ml Wasser gefüllt auf oder neben das Geschirr stellen. Das Gerät 1 bis 2 Minuten bei 800 W Leistung betreiben. Wenn das Geschirr kühl oder handwarm bleibt, ist es geeignet. Diesen Test nicht für Kunststoffgeschirr durchführen. Es könnte schmelzen.
1. AG-22D-EU German 14/11/2005 13:53 Page 10 Tipps & Techniken Abdecken Wenden Durch Abdecken bleibt die Feuchtigkeit im Lebensmittel erhalten und die Garzeit verkürzt sich. Zum Abdecken einen Deckel, Mikrowellenfolie oder eine Abdeckhaube verwenden. Speisen, die eine Kruste erhalten sollen, z.B. Braten oder Hähnchen, nicht abdecken. Es gilt die Regel, was im konventionellen Herd abgedeckt wird, sollte auch im Mikrowellengerät abgedeckt werden.
1. AG-22D-EU German 14/11/2005 13:53 Page 11 D Tipps & Techniken ERHITZEN Abdecken • Fertiggerichte in Aluminiumbehältern sollten herausgenommen und auf einem Teller oder in einer Schüssel erhitzt werden. • Speisen mit Mikrowellenfolie, Teller oder Abdeckhaube (im Handel erhältlich) abdecken, damit die Oberfläche nicht austrocknet. Getränke müssen nicht abgedeckt werden. • Bei fest verschlossenen Gefäßen die Deckel entfernen.
1. AG-22D-EU German 14/11/2005 13:53 Page 12 Tipps & Techniken GAREN VON FRISCHEM GEMÜSE • Achten Sie beim Kauf von Gemüse darauf, dass die Stücke möglichst gleichmäßig sind. Dies ist vor allem dann wichtig, wenn Sie das Gemüse im Stück garen möchten (z.B. Pellkartoffeln). • Gemüse vor der Zubereitung waschen, putzen und dann erst die erforderliche Menge für das Rezept abwiegen und zerkleinern. • Würzen Sie wie gewohnt, aber salzen Sie in der Regel erst nach dem Garen.
1. AG-22D-EU German 14/11/2005 13:53 Page 13 D Hinweis zur Leistungseinstellung Für den manuellen Betrieb stehen 5 verschiedene Leistungsstufen zur Auswahl. Zur Wahl der Mikrowellenleistung sollten Sie sich an den Angaben in dem nachfolgenden Rezepte-Ratgeber orientieren. Generell gelten folgende Empfehlungen: 800 W Für schnelles Garen oder Erwärmen, z.B. für Suppen, Eintöpfe, Dosengerichte, heiße Getränke, Gemüse, Fisch usw.
1. AG-22D-EU German 14/11/2005 13:53 Page 14 Andere nützliche Funktionen 1. GAREN MIT VERSCHIEDENEN GARFOLGEN Eine Folge von (maximal) 3 Stufen kann programmiert werden. Beispiel: Garen: 5 Minuten bei 800 W Leistung 16 Minuten bei 240 W Leistung (Stufe 1) (Stufe 2) STUFE 1 1. Geben Sie durch Drehen des ZEITSCHALTUHR/GEWICHT-Knopfs im Uhrzeigersinn die gewünschte Garzeit ein. 2. Die gewünschte Leistung durch einmaliges Drücken der MIKROWELLENLEISTUNGSSTUFEN-Taste wählen. x1 STUFE 2 3.
1. AG-22D-EU German 14/11/2005 13:53 Page 15 D Andere nützliche Funktionen 2. SCHNELLKOCHFUNKTION Mit der START/QUICK-Taste können Sie die folgenden Funktionen bedienen: a. Direktstart Sie können sofort 30 Sekunden lang mit einer Leistung von 800 W kochen, wenn Sie die START/QUICK-Taste drücken. HINWEIS: Um einen Missbrauch durch Kinder zu verhindern, kann die START/QUICK-Taste nur 3 Minute nach dem vorausgehenden Bedienungsschritt, d. h. Schließen der Tür oder Drücken der STOP-Taste, betätigt werden.
1. AG-22D-EU German 14/11/2005 13:53 Page 16 Automatik-Betrieb Die AUTOMATIK Funktion berechnet automatisch die richtige Betriebsart und Garzeit. Sie können unter 7 GAR-AUTOMATIKMenüs und 5 AUFTAU-AUTOMATIK-Menüs auswählen. Folgendes müssen Sie bei der Verwendung dieser Automatikfunktion beachten: 1. Drücken Sie die AUTOMATIKPROGRAMME-Taste einmal, die Anzeige entspricht dann der Abbildung. Das Menü wird gewählt durch Drücken der AUTOMATIK-Taste, bis die gewünschte Menünummer angezeigt wird.
1. AG-22D-EU German 14/11/2005 13:53 Page 17 D Automatik-Tabelle GARAUTOMATIK TASTE AC-1 Garen Tiefkühl-Gemüse • Pro 100 g 1 EL Wasser und etwas Salz zufügen. (Für Pilze ist kein zusätzliches Wasser erforderlich). • Mit einem Deckel abdecken. • Wenn das akustische Signal ertönt und das Gerät stoppt, umrühren und wieder abdecken. • Nach dem Garen ca. 2 Minuten stehen lassen. HINWEIS: Kompakt gefrorenes Gemüse im manuellen Betrieb garen. AC-2 Garen Frisches Gemüse 0,1 - 0,6 kg (100 g) (Ausgangstemp.
1. AG-22D-EU German 14/11/2005 13:53 Page 18 Automatik-Tabelle GARAUTOMATIK TASTE MENGE (Gewichtseinheit) / GESCHIRR AC-5 Garen Salzkartoffeln, Pellkartoffeln 0,1 - 0,8 kg (100 g) (Ausgangstemp. 20° C) Schüssel mit Deckel Salzkartoffeln: Die Kartoffeln schälen und in gleichgroße Stücke schneiden. Pellkartoffeln: Kartoffeln von etwa gleicher Größe auswählen und waschen. • Die Salzkartoffeln oder Pellkartoffeln in eine Schüssel geben. • Die erforderliche Menge Wasser (ca.
1. AG-22D-EU German 14/11/2005 13:53 Page 19 D Automatik-Tabelle TASTE AUFTAUAUTOMATIK MENGE (Gewichtseinheit) / GESCHIRR Ad-3 Auftauen Geflügel 0,9 - 1,5 kg (100 g) (Ausgangstemp. -18° C) flachen Teller (Siehe HINWEIS unten) • Die Geflügel auf einem flachen Teller in die Mitte des Drehtellers stellen. • Wenn das akustische Signal ertönt, die Geflügel wenden, neu anordnen und ggf. trennen. Decken Sie dünne Teile und warme Stellen mit kleinen Aluminiumstücken ab.
1.
1.
1.
1. AG-22D-EU German 14/11/2005 13:53 Page 23 D Rezepte Camemberttoast 11/2-21/2 Gesamtgarzeit: ca. Minuten Geschirr: Flacher Teller Zutaten 4 Scheiben Toastbrot 2 EL Butter oder Margarine (20 g) 150 g Camembert 4 TL Preiselbeerkonfitüre Cayennepfeffer Züricher Geschnetzeltes Gesamtgarzeit: ca.
1. AG-22D-EU German 14/11/2005 13:53 Page 24 Rezepte Schmorfleisch mit grünen Bohnen Gesamtgarzeit: ca. 20-24 Minuten Geschirr: Flache, ovale Auflaufform mit Deckel (ca. 26 cm lang) Zutaten 1-2 Tomaten (100 g) 400 g Lammfleisch, ohne Knochen 1 TL Butter oder Margarine zum Einfetten der Form 1 Zwiebel (50 g), fein gehackt 1 Knoblauchzehe, zerdrückt Salz, Pfeffer & Zucker 250 g Grüne Bohnen aus der Dose Seezungenfilets für 2 Portionen Gesamtgarzeit: ca.
1. AG-22D-EU German 14/11/2005 13:53 Page 25 D Rezepte Gefüllte Kartoffeln Gesamtgarzeit: ca. 12-16 Minuten Geschirr: Schüssel mit Deckel (2 l Inhalt) Porzellanteller Zutaten 4 mittelgroße Kartoffeln (400 g) 100 ml Wasser 60 g Schinken, fein gewürfelt 1/2 Zwiebel (25 g), fein gehackt 75-100 ml Milch 2 EL geriebener Parmesankäse (20 g) Salz & Pfeffer 2 EL geriebener Emmentaler Käse Beerengrütze mit Vanillesauce Gesamtgarzeit: ca.
1. AG-22D-EU German 14/11/2005 13:53 Page 26 Reinigung und Pflege VORSICHT: ZUR REINIGUNG DÜRFEN KEINESFALLS KOMMERZIELLE OFENREINIGER, DAMPFREINIGER, SCHEUERMITTEL, SCHARFE REINIGUNGSMITTEL, NATRIUMHYDROXID ENTHALTENDE REINIGUNGSMITTEL ODER SCHEUERSCHWÄMME VERWENDET WERDEN. DIES GILT FÜR ALLE TEILE DES GERÄTS. SÄUBERN SIE DIE MIKROWELLE IN REGELMÄßIGEN ABSTÄNDEN UND ENTFERNEN SIE ALLE MÖGLICHEN ESSENSRESTE.
1. AG-22D-EU German 14/11/2005 13:53 Page 27 D Kundendienst Sehr geehrter Kunde, der Werkskundendienst von AEG-ELECTROLUX Hausgeräte ist ezentral organisiert. Damit bieten wir Ihnen überall einen zuverlässigen Service. Unter der für Sie kostengünstigen Rufnummer 0180 322 66 22 (EUR 0.09 /Minute) können Sie im Bedarfsfall einen unserer Spezialisten oder Service-Partner anfordern. Ihre Ersatzteil-Bestellung geben Sie bitte unter der zentralen Rufnummer 0180 5 00 10 76 auf. (EUR 0.
1. AG-22D-EU German 14/11/2005 13:53 Page 28 Garantiebedingungen Der Endabnehmer dieses Gerätes (Verbraucher) hat bei einem Kauf dieses Gerätes von einem Unternehmer (Händler) in Deutschland im Rahmen der Vorschriften über den Verbrauchsgüterkauf gesetzliche Rechte, die durch diese Garantie nicht eingeschränkt werden. Diese Garantie räumt dem Verbraucher also zusätzliche Rechte ein.
1. AG-22D-EU German 14/11/2005 13:53 Page 29 D Kundendienst & Ersatzteile Sollte das Gerät nicht richtig funktionieren, vor dem Anruf beim örtlichen Kundendienstzentrum folgende Punkte überprüfen: Wenn der Ofen nicht einsetzt: • Prüfen, ob das Gerät richtig angeschlossen ist. • Prüfen, ob der Ofenstecker richtig eingesteckt ist. • Gegebenenfalls die Stöpselsicherung durch eine andere der gleichen Stärke austauschen und prüfen, ob der Stecker richtig verkabelt wurde.
1. AG-22D-EU German 14/11/2005 13:53 Page 30 Garantiebedingungen Unsere Geräte werden mit größter Sorgfalt hergestellt. Trotzdem kann es einmal zu einem Defekt kommen. Unser Kundendienst übernimmt auf Anfrage gerne die Reparatur, und zwar sowohl während des Garantiezeitraums als auch danach. So ist gewährleistet, dass ein Defekt nicht zu einer Verkürzung der Lebensdauer des Geräts führt.
1. AG-22D-EU German 14/11/2005 13:53 Page 31 D Technische Daten Stromversorgung Sicherung/Sicherungsautomat Leistungsaufnahme: Leistungsabgabe: Mikrowellenfrequenz Außenabmessungen Garraumabmessungen Garrauminhalt Drehteller Gewicht Garraumlampe : 230 V, 50 Hz, Einphasenstrom : Mindestens 10 A Mikrowelle : 1,2 kW Mikrowelle : 800 W (IEC 60705) : 2450 MHz * (Gruppe 2 / Klasse B) : 592 mm (B) x 370 mm (H) x 316 mm (T) : 285 mm (B) x 202 mm (H) x 298 mm (T) ** : 17 Liter ** : ø 272 mm : ca.
1. AG-22D-EU German 14/11/2005 13:53 Page 32 Aufstellanweisungen INSTALLIEREN DES GERÄTES 1. Entfernen Sie die gesamte Verpackung und überprüfen Sie das Gerät auf eventuelle Beschädigungen. 2. Die Standardausführung dieses Herdes ist passend für einen Einbauschrank von 360 mm Höhe ausgelegt. Wenn der Herd in einen 350mm hohen Schrank eingebaut werden soll:Schrauben Sie die 4 Füße an der Unterseite des Herdes ab. Es sind 3 hohe und ein niedriger Fuß.
1. AG-22D-EU German 14/11/2005 13:53 Page 33 D Aufstellanweisungen NETZANSCHLUSS • Darauf achten, dass die Netzsteckdose leicht erreichbar ist, damit der Stecker im Notfall schnell abgezogen werden kann. (A) • Steckdose nicht hinter dem Schrank anordnen. • Die beste Stelle ist über dem Schrank, vgl. (A). Erfolgt kein Anschluss des Netzkabels zur Stelle (A), ist es vom Kabelträger (vgl. Abb., Pos. 13, auf Seite 5) abzunehmen und unter dem Gerät entlang zu führen.
2. AG-22D-EU French 14/11/2005 13:53 Page 34 Lors de sa fabrication, cet appareil a été construit selon des normes. directives at/ou décrets pour une utilisation sur le territoire français. Pour la sécurité des biens et des personnes ainsi que pour le respect de l’environnement, vous devez d’abord lire impérativement les préconisations suivantes avant toute utilisation de votre appareil.
2. AG-22D-EU French 14/11/2005 13:53 Page 35 F Sommaire Avertissements importants de sécurité . . . . . . . . . . . . . . . . . . . . . . . . . . . . . . . . . . . . . . . . .36 - 38 Four et accessoires . . . . . . . . . . . . . . . . . . . . . . . . . . . . . . . . . . . . . . . . . . . . . . . . . . . . . . . . . . . . . .39 Bandeau de commande . . . . . . . . . . . . . . . . . . . . . . . . . . . . . . . . . . . . . . . . . . . . . . . . . . . . . . . . .40 Avant la mise en service . . . . . . . . .
2. AG-22D-EU French 14/11/2005 13:53 Page 36 Avertissements importants de sécurité AVERTISSEMENTS DE SECURITE IMPORTANTES: LES LIRE ATTENTIVEMENT ET LES CONSERVER SOIGNEUSEMENT POUR CONSULTATIONS ULTERIEURES. Pour éviter tout danger d’incendie. Vous devez surveiller le four lorsqu’il est en fonctionnement. Un niveau de puissance trop élevé, ou un temps de cuisson trop long, peuvent entraîner une augmentation de la température des aliments conduisant à leur enflammation.
2. AG-22D-EU French 14/11/2005 13:53 Page 37 F Avertissements importants de sécurité Si la lampe du four grille, adressez-vous au revendeur ou à un service après vente AEG-Electrolux. Si le cordon d’alimentation de cet appareil est endommagé, faites-le remplacer par un professionnel qualifié. Les interrupteurs de verrouillage de sécurité incorporés empêchent le four à micro-ondes de fonctionner lorsque la porte est ouverte.
2. AG-22D-EU French 14/11/2005 13:53 Page 38 Avertissements importants de sécurité Si vous utilisez un plat brunisseur ou un plat en matière autochauffante, interposez une protection contre la chaleur (par exemple, un plat en porcelaine) de manière à ne pas endommager le plateau tournant et le pied du plateau. Le temps de préchauffage précisé dans le guide de recette ne doit pas être dépassé. Assurez-vous que la porte est bien fermée, que ses surfaces sont propres.
2. AG-22D-EU French 14/11/2005 13:53 Page 39 F Four et accessoires 1 2 3 4 8 7 6 5 9 1. Encadrement avant 2. Eclairage du four 3. Bandeau de commande 4. Touche ouverture de la porte 5. Cadre du répartiteur d'ondes 6. Cavité du four 7. Entraînement 8. Cadre d’ouverture de la porte 9. Points de fixation (x4) 10. Ouvertures de ventilation 11. Enveloppe extérieure 12. Compartiment arrière 13. Cordon d'alimentation clip de support 14.
2. AG-22D-EU French 14/11/2005 13:53 Page 40 Bandeau de commande 1 2 1 Affichage numérique 2 Symboles L’indicateur correspondant clignotera ou s’allumera juste au-dessus du symbole, en fonction de l’instruction. Lorsqu’un indicateur clignote, appuyez sur la touche correspondante (marquée du même symbole) ou effectuez l’action nécessaire.
2. AG-22D-EU French 14/11/2005 13:53 Page 41 F Avant la mise en service Utilisation de la touche STOP. Branchez la prise. 1. L’affichage indique: 2. Appuyez sur la touche STOP, l’affichage indique: Utilisez la touche STOP pour: 1. Effacer une erreur durant la programmation du four. 2. Interrompre momentanément la cuisson. 3. Arrêter un programme de cuisson (dans en ce cas, appuyez deux fois sur cette touche). x1 Réglez l’horloge comme suit.
2. AG-22D-EU French 14/11/2005 13:53 Page 42 Que sont les micro-ondes? Dans le micro-ondes, les ondes sont générées par le magnéton et font vibrer les molécules d’eau des aliments. La friction qui en résulte dégage de la chaleur qui décongèle, réchauffe ou cuit les aliments. Bien choisir la vaisselle Verre et verre céramique Film plastique pour micro-ondes La vaisselle en verre résistant à la chaleur est tout à fait adaptée à une utilisation dans le micro-ondes.
2. AG-22D-EU French 14/11/2005 13:53 Page 43 F Bien choisir la vaisselle Les barquettes en aluminium doivent par exemple être au moins aux 2/3 ou aux 3/4 pleins. Il est conseillé de mettre les mets dans de la vaisselle appropriée à l’utilisation dans un micro-ondes. Si l’on utilise des plats en aluminium ou toute autre vaisselle métallique, il faut respecter un écart minimum d’approximativement 2 cm entre le plat et les parois du four qui pourraient être endommagées par la formation d’étincelles.
2. AG-22D-EU French 14/11/2005 13:53 Page 44 Conseils Récipients ronds et ovales Comment disposer les mets ? Les aliments cuisent plus uniformément dans des récipients ronds et ovales que dans des récipients rectangulaires : l’énergie des micro-ondes se concentre dans les angles et peut y entraîner une cuisson exagérée. Placez plusieurs portions individuelles (ramequins, tasses ou pommes de terre en robe des champs) en cercle sur le plateau tournant.
2. AG-22D-EU French 14/11/2005 13:53 Page 45 F Conseils Réchauffage Couvrir • Retirez les plats cuisinés de leur barquette en aluminium et réchauffez les dans un plat ou dans une terrine. • Enlevez le couvercle des récipients hermétiquement fermés. • Couvrez les mets avec une feuille de plastique cuisine résistant à la chaleur, avec une assiette, un plat ou un couvercle spécial (disponibles dans le commerce) afin que la surface ne sèche pas. Ne couvrez pas les boissons.
2. AG-22D-EU French 14/11/2005 13:53 Page 46 Conseils CUISSON DE LEGUMES FRAIS CUISSON DE VIANDES,DE POISSONS ET DE VOLAILLES • Dans la mesure du possible, achetez des légumes de la même taille. Ceci est important surtout si vous voulez cuire les légumes entiers (p.ex. pommes de terre en robe des champs). • Lavez les légumes et nettoyez-les avant de peser la quantité nécessaire à la recette et de les couper en petits morceaux.
2. AG-22D-EU French 14/11/2005 13:53 Page 47 F Niveaux de puissance du micro-ondes Vous avez le choix entre 5 niveaux de puissance. Consultez les indications fournies dans les recettes pour déterminer le niveau de puissance à utiliser. D’une manière genérale, nous vous conseillons de procéder comme suit. 800 W Pour une cuisson rapide ou pour réchauffer un plat (par ex. soupes, ragoûts, conserves, boissons chaudes, légumes, poisson, etc.).
2. AG-22D-EU French 14/11/2005 13:53 Page 48 Autres fonctions pratiques 1. CUISSON A SEQUENCES MULTIPLES Il est possible de saisir un maximum de 3 séquences, comprenant le temps et mode de cuisson normale. Exemple: Pour cuire: 5 minutes à la puissance 800 W (Etape 1) 16 minutes à la puissance 240 W (Etape 2) ETAPE 1 1. Entrez le temps de cuisson souhaité en tournant le bouton rotatif MINUTEUR/POIDS. 2.
2. AG-22D-EU French 14/11/2005 13:53 Page 49 F Autres fonctions pratiques 2. FONCTION CUISSON RAPIDE La touche START/QUICK vous permet d’utiliser les deux fonctions suivantes: a. Démarrage direct Vous pouvez commencer directement la cuisson micro-ondes à la puissance 800 W pendant 30 secondes en appuyant sur la touche START/QUICK.
2. AG-22D-EU French 14/11/2005 13:53 Page 50 Fonctionnement automatique Le fonction AUTOMATIQUE calcule automatiquement le mode et le temps de cuisson corrects. Vous disposez de 7 programmes de CUISSON AUTOMATIQUE et 5 programmes de DÉCONGÉLATION AUTOMATIQUE. Ce que vous devez savoir lors de l’utilisation de cette fonction: 1. Appuyez une fois sur la touche PROGRAMMES AUTOMATIQUE pour faire apparaître l’affichage suivant.
2. AG-22D-EU French 14/11/2005 13:53 Page 51 F Tableaux de programmes automatiques TOUCHE x1 CUISSON AUTOMATIQUE QUANTITÉ / USTENSILES AC-1 Cuisson Légumes surgelés e.g. Choux de Bruxelles, haricots verts, petits pois, jardinière de légumes, brocolis 0,1 - 0,6 kg (100 g) (Temp. initiale -18° C) Bol et couvercle • Ajoutez 1 cuillère à soupe d’eau par 100 g et une pointe de sel. (Pour les champignons, il n’est pas nécessaire d’ajouter de l’eau). • Mettez un couvercle.
2. AG-22D-EU French 14/11/2005 13:53 Page 52 Tableaux de programmes automatiques TOUCHE x6 CUISSON AUTOMATIQUE AC-6 Cuisson Filet de poisson en sauce AC-7 Cuisson Gratin x7 TOUCHE x8 x9 x10 52 QUANTITÉ / USTENSILES PROCÉDURE 0,4 - 1,2 kg* (100 g) (Temp. initiale 20° C) Plat à gratin et plastique micro-ondes • Voir recettes pour le “Filet de Poisson en Sauce” à la pages 53 - 54. 0,5 - 1,5 kg* (100 g) (Temp.
2. AG-22D-EU French 14/11/2005 13:53 Page 53 F Tableaux de programmes automatiques TOUCHE DÉCONGÉLATION QUANTITÉ / USTENSILES AUTOMATIQUE Ad-4 Décongélation Gâteau 0,1 - 1,4 kg (100 g) (Temp. initiale -18° C) Plat • Retirez l’emballage du gâteau. • Placez directement sur le plateau tournant ou sur un plat au centre du plateau tournant.
2.
2.
2. AG-22D-EU French 14/11/2005 13:53 Page 56 Tableaux de cuisson TABLEAU: CUISSON DE VIANDES, DE POISSONS, DE VOLAILLES ET DES LEGUMES FRAIS Viande, volaille et légumes Rôtis (p.ex.
2. AG-22D-EU French 14/11/2005 13:53 Page 57 F Recettes Toast au camembert 11/2-21/2 Temps de cuisson total: env. minutes Vaisselle: assiette plate Ingrédients 4 tranches de pain de mie (80 g) 2 CS de beurre ou de margarine (20 g) 150 g de camembert 4 CC de confiture d’airelles rouges (40 g) poivre de Cayenne Emincé de veau à la zurichoise Temps de cuisson total: app.
2. AG-22D-EU French 14/11/2005 13:53 Page 58 Recettes Agneau braisé aux haricots verts Temps de cuisson total: app.
2. AG-22D-EU French 14/11/2005 13:53 Page 59 F Recettes Pommes de terre farcies Temps de cuisson total: app. 12 - 16 minutes Vaisselle: terrine à couvercle (2 litre) assiette en porcelaine Ingrédients 4 pommes de terre de taille moyenne (400 g) 100 ml d’eau 60 g de jambon 1/2 oignon (25 g) haché menu 75-100 ml de lait 2 CS de parmesan râpé (20 g) sel et poivre 2 CS d’emmental râpé (20 g) Gelée de fruits rouges à la sauce à la vanille Temps de cuisson total: app.
2. AG-22D-EU French 14/11/2005 13:53 Page 60 Entretien et nettoyage Ne procédez au nettoyage qu’après avoir débranché l’appareil. ATTENTION: N’UTILISEZ PAS DE DÉCAPE FOURS VENDUS DANS LE COMMERCE OU DE PRODUITS ABRASIFS OU AGRESSIFS, OU DE PRODUITS QUI CONTIENNENT DE LA SOUDE CAUSTIQUE, OU DE TAMPONS ABRASIFS SUR UNE PARTIE QUELCONQUE DE VOTRE FOUR À MICRO-ONDES. VEILLEZ À CE QUE LE COUVERCLE DE GUIDE D’ONDES ET LES ACCESSOIRES SOIENT CONSTAMMENT PROPRES.
2. AG-22D-EU French 14/11/2005 13:53 Page 61 F Que faire si... ... le four micro-ondes ne fonctionne pas correctement ? Vérifiez - que les fusibles de la boîte à fusibles n’ont pas sauté, - qu’il n’y a pas de coupure de courant. - Si les fusibles continuent de sauter, faites appel à un électricien qualifié. ... le mode micro-ondes ne fonctionne pas ? Vérifiez - que la porte est bien fermée, - que les joints de la porte et leurs surfaces sont propres, - que la touche START/QUICK a été enfoncée ...
2. AG-22D-EU French 14/11/2005 13:53 Page 62 Service après-vente et pièces de rechange (Belgique) Si l’appareil ne fonctionne pas correctement, effectuez d’abord les vérifications suivantes avant de contacter le service après-vente local. Si le four ne démarre pas : • Vérifiez si l’appareil est branché correctement. • Vérifiez si la prise est correctement enfoncée.
2. AG-22D-EU French 14/11/2005 13:53 Page 63 F Déclaration de conditions de garantie (Belgique) Nos appareils sont produits avec le plus grand soin. Malgré cela, un défaut peut toujours se présenter. Notre service clientèle se chargera de réparer ceci sur demande, pendant ou après la période de garantie. La durée de vie de l’appareil n’en sera pas pour autant amputée.
2. AG-22D-EU French 14/11/2005 13:53 Page 64 Fiche technique Tension d’alimentation Fusible/disjoncteur de protection Consommation électrique: Puissance: Fréquence des micro-ondes Dimensions extérieures Dimensions intérieures Capacité Plateau tournant Poids Eclairage de four : 230 V, 50 Hz, monophasé : Minimum 10 A Micro-ondes : 1.
2. AG-22D-EU French 14/11/2005 13:53 Page 65 F Installation INSTALLATION DE L'APPAREIL 1. Retirez tout l’emballage et contrôlez soigneusement pour détecter les traces de détérioration possibles. 2. Ce four est conçu pour s’adapter de façon standard dans un élément de cuisine de 360 mm de haut. Pour l’installation dans un élément de 350 mm de haut : dévissez et retirez les quatre pieds de la partie inférieure du four. Il y a 3 pieds longs et un pied court.
2. AG-22D-EU French 14/11/2005 13:53 Page 66 Installation RELIER L'APPAREIL À L'ALIMENTATION D'ÉNERGIE • La prise électrique doit être facile d'accès pour que l'appareil puisse être débranché rapidement en cas d'urgence. (A) • La prise ne doit pas se trouver derrière le meuble. • La meilleure position est au-dessus du meuble, comme illustré au point (A).
2. AG-22D-EU French 14/11/2005 13:53 Page 67 F Electrolux Home Products France S.A.S. au capital de 67 500 000 € - 552 042 285 RCS SENLIS AEG-ELECTROLUX Pour tenir nos engagements, nous écoutons les Consommateurs Info Conso Electrolux est le lien privilégié entre la marque et ses Consommateurs. Il assure en permanence une double mission : satisfaire au mieux vos exigences et tirer parti de cette proximité pour améliorer sans cesse les produits que nous vous proposons.
3. AG-22D-EU Italian 14/11/2005 13:54 Page 68 Egregio Cliente, Desideriamo ringraziarla per aver acquistato un forno a microonde AEGElectrolux e per la fiducia accordata alla nostra azienda. Prima di utilizzare il suo forno a microonde AEG-Electrolux per la prima volta, la preghiamo di leggere attentamente il libretto di istruzioni.
3. AG-22D-EU Italian 14/11/2005 13:54 Page 69 I Indice Norme di Sicurezza . . . . . . . . . . . . . . . . . . . . . . . . . . . . . . . . . . . . . . . . . . . . . . . . . . . . . . . .70 - 72 Forno e accessori . . . . . . . . . . . . . . . . . . . . . . . . . . . . . . . . . . . . . . . . . . . . . . . . . . . . . . . . . . . . . . .73 Pannello di controllo . . . . . . . . . . . . . . . . . . . . . . . . . . . . . . . . . . . . . . . . . . . . . . . . . . . . . . . . . . . .
3. AG-22D-EU Italian 14/11/2005 13:54 Page 70 Norme di sicurezza IMPORTANTE: ISTRUZIONI PER LA SICUREZZA PERSONALE DA LEGGERE ATTENTAMENTE E CONSERVARE PER OGNI RIFERIMENTO FUTURO. Per evitare pericolo d'incendi Il forno a microonde non deve rimanere incostudito durante il funzionamento. I livelli di potenza troppo alti o i tempi di cottura troppo lunghi possono surriscaldare il cibo e causare un incendio.
3. AG-22D-EU Italian 14/11/2005 13:54 Page 71 I Norme di sicurezza Non immergete il cavo di alimentazione o la sua spina nell’acqua od altro liquido. Tenete il cavo di alimentazione lontano da superfici riscaldate, compresa la parte posteriore del forno. Non cercate di sostituire da soli la lampadina del forno, e non fatela sostituire se non da personale autorizzato. Se la lampadina si guasta, rivolgetevi al rivenditore o ad un tecnico di servizio AEG-Electrolux autorizzato.
3. AG-22D-EU Italian 14/11/2005 13:54 Page 72 Norme di sicurezza Per evitare difetti di funzionamento o danni al forno: Mai mettere in funzione il forno vuoto. Usando un piatto per rosolare i cibi, o del materiale autoriscaldante, mettete sempre sotto di esso del materiale isolante resistente al calore, come un piatto di porcellana, per evitare danni al piatto girevole e al sostegno rotante. Non dovete inoltre superare il tempo di preriscaldamento specificato nelle istruzioni del piatto.
3. AG-22D-EU Italian 14/11/2005 13:54 Page 73 I Forno e accessori 1 2 3 4 8 7 6 5 9 1. Cornice 2. Luce del forno 3. Pannello di controllo 4. Pulsante apertura sportello 5. Coperchio guida onde 6. Cavità del forno 7. Perno del piatto rotante 8. Guarnizioni e superfici di tenuta sportello 9. Punti di fissaggio (4 punti) 10. Apperture di ventilazione 11. Copertura esterna 12. Struttura posteriore 13. Portacavo 14.
3. AG-22D-EU Italian 14/11/2005 13:54 Page 74 Pannello di controllo 1 2 1 Display digitale 2 Indicatori A seconda dell'istruzione, di volta in volta lampeggia o si accende l'indicatore che si trova al di sopra del relativo simbolo. Quando un indicatore lampeggia, premere il pulsante corrispondente (su cui è riportato lo stesso simbolo) oppure eseguire l'operazione richiesta.
3. AG-22D-EU Italian 14/11/2005 13:54 Page 75 I Prima di usare il forno Collegare il forno. 1. Il display del forno lampeggia: 2. Premere il pulsante di STOP; sul display apparirà: Il pulsante di STOP serve per: 1. Cancellare un errore durante la programmazione. 2. Fermare temporaneamente il forno a microonde durante la cottura. 3. Premendo il pulsante due volte, cancellare un programma durante la cottura. x1 Per impostare l'orologio, seguire la procedura indicata qui di seguito.
3. AG-22D-EU Italian 14/11/2005 13:54 Page 76 Che cosa sono le microonde? Nei forni a microonde le microonde prodotte da un cosiddetto "magnetron" fanno oscillare le molecole d'acqua presenti negli alimenti. Tale moto oscillatorio provoca un attrito tra le molecole con conseguente generazione di calore sufficiente per scongelare, riscaldare o cuocere le vivande.
3. AG-22D-EU Italian 14/11/2005 13:54 Page 77 I Suggerimenti e consigli Impostazione dei tempi Piccole e grosse quantità I tempi necessari per lo scongelamento, il riscaldamento o la cottura sono di regola molto minori di quelli richiesti per esempio con una cucina o un forno convenzionali. Pertanto è importante che nell'esecuzione delle ricette ci si attenga scrupolosamente ai tempi indicati, impostando preferibilmente tempi più brevi che più lunghi.
3. AG-22D-EU Italian 14/11/2005 13:54 Page 78 Suggerimenti e consigli Rivoltamento Espedienti per la doratura I cibi di media grandezza, come per esempio gli hamburger e le bistecche, vanno rivoltati durante la cottura almeno una volta, al fine di ridurne il tempo di cottura. Anche nel caso di arrosti di carne o di pollo sarà necessario rivoltarli per evitare che la parte rivolta verso l'alto si secchi.
3. AG-22D-EU Italian 14/11/2005 13:54 Page 79 I Suggerimenti e consigli Mescolare e girare le vivande durante lo scongelamento Quasi tutti i cibi devono essere girati o mescolati durante lo scongelamento. Se vi sono pezzi attaccati l'uno all'altro dal ghiaccio, sarà bene separarli appena possibile cambiandone poi la posizione. Le pietanze in piccole quantità o di dimensioni ridotte richiedono meno tempo per scongelare.
3. AG-22D-EU Italian 14/11/2005 13:54 Page 80 Livello di potenza delle microonde Questo forno dispone di 5 livelli di potenza. Per selezionare il livello di potenza desiderato per la cottura, seguire le indicazioni riportate nella sezione delle ricette. Le impostazioni di solito consigliate sono: 800 W Utilizzato per una cottura rapida o per riscaldare le vivande (ad esempio minestre, casseruole, cibi in scatola, bevande calde, verdure, pesce, ecc.).
3. AG-22D-EU Italian 14/11/2005 13:54 Page 81 I Altre funzioni utili 1. COTTURA IN SEQUENZA MULTIPLA E’ possibile impostare fino a un massimo di 3 sequenze di modalità e tempo di cottura manuale. Esempio: Per cuocere: 5 minuti con potenza 800 W (Fase 1) 16 minuti con potenza 240 W (Fase 2) FASE 1 1. Impostare il tempo di cottura desiderato ruotando in senso orario la manopola TEMPO/PESO. 2. Selezionare la modalità di cottura desiderata premendo una volta il pulsante LIVELLO DI POTENZA. x1 FASE 2 3.
3. AG-22D-EU Italian 14/11/2005 13:54 Page 82 Altre funzioni utili 2. FUNZIONE COTTURA RAPIDA Il pulsante START/QUICK consente di attivare le due funzioni seguenti: a. Accensione diretta Si può avviare direttamente la cottura al livello di potenza microonde di 800 W per 30 secondi premendo il pulsante START/QUICK.
3. AG-22D-EU Italian 14/11/2005 13:54 Page 83 I Funzioni automatica Il funzioni AUTOMATICA definisce automaticamente l'esatta modalità di cottura ed il tempo necessario. Con COTTURA AUTOMATICA si ha la possibilità di scegliere tra 7 menu diversi e SCONGELARE AUTOMATICA si ha la possibilità di scegliere tra 5 menu diversi. Quando si usa questa funzione è necessario tenere presente quanto segue: 1. Premere una volta il pulsante AUTOMATICA: il display appare come mostrato.
3. AG-22D-EU Italian 14/11/2005 13:54 Page 84 Tabelle di automatica PULSANTE x1 QUANTITÀ (Unità di incremento) / UTENSILI AC-1 Cottura Verdure surgelate 0,1 - 0,6 kg (100 g) (Temp. iniziale -18° C) Ciotola e coperchio • Aggiungere un cucchiaio di acqua ogni 100 g. (Per i funghi non è necessario aggiungere acqua). • Coprire con un coperchio. • Quando il forno si blocca e viene emesso un segnale acustico, girare e rimettere il coperchio. • A fine cottura, lasciare riposare per 1 o 2 minuti.
3. AG-22D-EU Italian 14/11/2005 13:54 Page 85 I Tabelle di automatica PULSANTE x5 x6 COTTURA AUTOMATICA Nu. x8 x9 PROCEDIMENTO Patate lesse: pelare le patate e tagliarle a pezzi di grandezza simile. Patate con la buccia: scegliere patate di grandezza simile e lavarle. • Mettere le patate pelate o con la buccia in un ciatola. • Aggiungere la quantità di acqua necessaria (per 100 g) circa due cucchiai e un pizzico di sale. • Coprire con un coperchio.
3. AG-22D-EU Italian 14/11/2005 13:54 Page 86 Tabelle di automatica PULSANTE x10 x11 x12 AUTO SCONGELAZIONE QUANTITÀ (Unità di incremento) / UTENSILI PROCEDIMENTO Ad-3 Scongelare 0,9 - 1,5 kg (100 g) (Temp. iniziale -18° C) Pollame (Vedere nota più avanti) • Collocare un piatto rovesciato sul piatto rotante e disporvi sopra il pollame con il petto rivolto verso il basso. • Quando il forno si blocca e viene emesso un segnale acustico, girare la carne.
3.
3. AG-22D-EU Italian 14/11/2005 13:54 Page 88 Schede Cottura ABBREVIAZIONI USATE NELLE RICETTE CM = cucchiaio da minestra CU = cucchiaino Ta. = tazza kg = chilogrammo g = grammo l = litro ml = millilitro cm = centimetro min.
3.
3.
3.
3.
3. AG-22D-EU Italian 14/11/2005 13:54 Page 93 I Manutenzione e pulizia ATTENZIONE: NON UTILIZZARE SU NESSUNA PARTE DEL FORNO DETERGENTI PER FORNI COMMERCIALI, GETTI A VAPORE, ABRASIVI, DETERGENTI RUVIDI O CHE CONTENGONO IDROSSIDO DI SODIO NÉ SPUGNE ABRASIVE. PULISCA IL FORNO A INTERVALLI NORMALI E RIMUOVA TUTTI I GIACIMENTI DELL'ALIMENTO. Se il forno non viene mantenuto pulito, la superficie potrebbe deteriorarsi compromettendo la durata dell'apparecchio e comportando possibili situazioni di rischio.
3. AG-22D-EU Italian 14/11/2005 13:54 Page 94 Condizioni di garanzia Certificato di garanzia del produttore verso il consumatore. Durata: 3 anni Le seguenti condizioni, relative alla Garanzia, si attivano a partire dalla data di consegna dell'apparecchiatura ed hanno una durata di 36 mesi (tale certificato è valido per gli acquisti effettuati dal 1° giugno 2002).
3. AG-22D-EU Italian 14/11/2005 13:54 Page 95 I Condizioni di garanzia 3. Estensione territoriale della garanzia Questa Apparecchiatura è stata costruita per essere venduta e utilizzata sul territorio italiano (inclusi Città del Vaticano e Repubblica di S. Marino) e, di conseguenza, la presente Garanzia del Produttore viene assicurata da AEG-Electrolux su tutto il territorio italiano (inclusi Città del Vaticano e Repubblica di S. Marino) attraverso la propria rete di Assistenza Tecnica.
3. AG-22D-EU Italian 14/11/2005 13:54 Page 96 Elenco Centri Assistenza Tecnica PIEMONTE ALESSANDRIA ASTI BIELLA CUNEO/CASTELLETTO STURA TORINO TORINO/IVREA TORINO/PINEROLO VERCELLI VALLE D'AOSTA AOSTA LOMBARDIA BERGAMO BRESCIA COMO/CERMENATE CREMONA/BOSCO EX PARMIGIANO MANTOVA MILANO MILANO MILANO/CUSANO MILANINO MILANO/SESTO S.
3. AG-22D-EU Italian 14/11/2005 13:54 Page 97 I Elenco Centri Assistenza Tecnica EMILIA ROMAGNA BOLOGNA BOLOGNA BOLOGNA BOLOGNA BOLOGNA/IMOLA BOLOGNA/RASTIGNANO PIANORO FERRARA FORLI'/CESENA MODENA/CARPI PARMA PIACENZA RAVENNA TOSCANA AREZZO FIRENZE FIRENZE/EMPOLI GROSSETO GROSSETO/FOLLONICA LIVORNO LIVORNO/CECINA LIVORNO/PORTOFERRAIO LUCCA LUCCA/VIAREGGIO MASSA CARRARA PISA PISTOIA PRATO SIENA SIENA/POGGIBONSI UMBRIA PERUGIA/PONTE S.
3.
3.
3. AG-22D-EU Italian 14/11/2005 13:54 Page 100 Installazione INSTALLAZIONE DELL'ELETTRODOMESTICO 1. Rimuovere l'imballo e verificare l'eventuale presenza di danni sull'apparecchio. 2. Questo forno è progettato per essere inserito, in versione standard, all'interno di una colonna forno alta 360 mm. Nel caso si debba inserirlo in una colonna forno alta 350 mm: Svitare e rimuovere i 4 piedini dal fondo del forno. Sono presenti 3 piedini alti e 1 piedino basso.
3. AG-22D-EU Italian 14/11/2005 13:54 Page 101 I Installazione COLLEGARE L'APPARECCHIO ALLA RETE • La presa elettrica deve essere facilmente accessibile per consentire il rapido scollegamento dell'unità in caso di emergenza. (A) • La presa non deve essere posizionata dietro la colonna forno. • La posizione migliore è sopra la colonna forno, vedi (A).
4. AG-22D-EU English 14/11/2005 13:54 Page 102 Dear Customer, Thank you for buying an AEG-Electrolux microwave oven and putting your trust in the AEG-Electrolux brand name. Before using your AEG-Electrolux microwave oven for the first time, please read the instruction book thoroughly. This will enable you to take advantage of all the features that the appliance offers. It will also ensure trouble-free operation and minimize unnecessary service calls.
4. AG-22D-EU English 14/11/2005 13:54 Page 103 UK Contents Important safety instructions . . . . . . . . . . . . . . . . . . . . . . . . . . . . . . . . . . . . . . . . . . . . . .104 - 105 Oven & accessories . . . . . . . . . . . . . . . . . . . . . . . . . . . . . . . . . . . . . . . . . . . . . . . . . . . . . . . . . . . .106 Control panel . . . . . . . . . . . . . . . . . . . . . . . . . . . . . . . . . . . . . . . . . . . . . . . . . . . . . . . . . . . . . . . . .107 Before operation . . . . . .
4. AG-22D-EU English 14/11/2005 13:54 Page 104 Important safety instructions IMPORTANT SAFETY INSTRUCTIONS: READ CAREFULLY AND KEEP FOR FUTURE REFERENCE To avoid the danger of fire. The microwave oven should not be left unattended during operation. Power levels that are too high, or cooking times that are too long, may overheat foods resulting in a fire. The electrical outlet must be readily accessible so that the unit can be unplugged easily in an emergency.
4. AG-22D-EU English 14/11/2005 13:54 Page 105 UK Important safety instructions To avoid the possibility of explosion and sudden boiling: WARNING: Liquids and other foods must not be heated in sealed containers since they are liable to explode. Never use sealed containers. Remove seals and lids before use. Sealed containers can explode due to a build up of pressure even after the oven has been turned off. Take care when microwaving liquids. Use a widemouthed container to allow bubbles to escape.
4. AG-22D-EU English 14/11/2005 13:54 Page 106 Oven & accessories 1 2 3 4 8 7 6 5 9 1. 2. 3. 4. 5. 6. 7. 8. 9. 10. 11. 12. 13. 14.
4. AG-22D-EU English 14/11/2005 13:54 Page 107 UK Control panel 1 2 1 Digital Display 2 Indicators The appropriate indicator will flash or light up, just above each symbol according to the instruction. When an indicator is flashing, press the appropriate button (having the same symbol) or carry out the necessary operation.
4. AG-22D-EU English 14/11/2005 13:54 Page 108 Before operation Using the Stop button Plug in the oven. 1. The oven display will flash: 2. Touch the STOP button the display will show: Use the STOP button to: 1. Erase a mistake during programming. 2. Stop the oven temporarily during cooking. 3. Cancel a programme during cooking, touch twice. x1 To set the clock, see below. Setting the clock There are two setting modes: 12 hour clock and 24 hour clock. 1.
4. AG-22D-EU English 14/11/2005 13:54 Page 109 UK What are microwaves? Microwaves are generated in the microwave oven by a magnetron and cause the water molecules in the food to oscillate. Heat is generated by the friction which is caused, with the result that the food is thawed, heated or cooked. Suitable ovenware Glass & ceramic glass Browning dish Heat-resistant glass utensils are very suitable. The cooking process can be observed from all sides. They must not, however, contain any metal (e.g.
4. AG-22D-EU English 14/11/2005 13:54 Page 110 Tips & advice Time settings Large & small quantities In general the thawing, heating and cooking times are significantly shorter than when using a conventional cooker or oven. For this reason you should adhere to the recommended times given in this book. It is better to set the times too short, rather than too long. Test the food after it has been cooked. It is better to have to cook something for a little longer than to overcook it.
4. AG-22D-EU English 14/11/2005 13:54 Page 111 UK Tips & advice Browning agents After more than 15 minutes cooking time food acquires a brownness, although this is not comparable to the deep brownness and crispness obtained through conventional cooking. In order to obtain an appetising brown colour you can use browning agents. For the most part they simultaneously act as seasoning agents.
4. AG-22D-EU English 14/11/2005 13:54 Page 112 Tips & advice Turning/stirring Almost all foods have to be turned or stirred from time to time. As early as possible, separate parts which are stuck together and rearrange them. Small amounts... defrost more quickly and evenly than larger ones. We recommend that you freeze portions which are as small as possible. By so doing you will be able to prepare whole menus quickly and easily.
4. AG-22D-EU English 14/11/2005 13:54 Page 113 UK Microwave power levels Your oven has 5 power levels. To choose the power level for cooking, follow the advice given in the recipe section. Generally the following recommendations apply: 800 W used for fast cooking or reheating e.g. soup, casseroles, canned food, hot beverages, vegetables, fish, etc.
4. AG-22D-EU English 14/11/2005 13:54 Page 114 Other convenient functions 1. MULTIPLE SEQUENCE COOKING A maximum of 3 sequences can be input, consisting of manual cooking time and mode. Example: To cook: 5 minutes on 800 W power (Stage 1) 16 minutes on 240 W power (Stage 2) STAGE 1 1. Enter the desired cooking time by rotating TIMER/WEIGHT knob. 2. Choose the desired power level by pressing the MICROWAVE POWER LEVEL button once. x1 STAGE 2 3. Enter desired time by rotating TIMER/WEIGHT knob. 4.
4. AG-22D-EU English 14/11/2005 13:54 Page 115 UK Other convenient functions 2. QUICK COOK FUNCTION The START/QUICK button allows you to operate the two following functions: a. Direct start You can directly start cooking on 800 W microwave power level for 30 seconds by pressing the START/QUICK button. NOTE: To avoid the misuse by children the START/QUICK button can be used only within 3 minutes after preceding operation, i.e., closing the door, pressing the STOP button or cooking completion. b.
4. AG-22D-EU English 14/11/2005 13:54 Page 116 Automatic operation The AUTOMATIC function automatically works out the correct cooking mode and cooking time. You can choose from 7 AUTOCOOK menus and 5 AUTO DEFROST menus. What you need to know when using this automatic function: 1. Press the AUTOMATIC PROGRAMMES button once, the display will appear as shown. The menu can be chosen by pressing the AUTOMATIC PROGRAMMES button until the desired menu number is displayed.
4. AG-22D-EU English 14/11/2005 13:54 Page 117 UK Automatic charts BUTTON x1 AUTOCOOK NO. WEIGHT (Increasing Unit) / UTENSILS AC-1 Cook 0,1 - 0,6 kg (100 g) Frozen Vegetables (initial temp -18° C) e.g.
4. AG-22D-EU English 14/11/2005 13:54 Page 118 Automatic charts BUTTON AUTO DEFROST NO. WEIGHT(Increasing Unit) / UTENSILS Ad-1 Defrost Steak and Chops 0,2 - 0,8 kg (100 g) (initial temp -18° C) (See note below) • Place the food in a flan dish in the centre of the turntable. • When the audible signal sounds, turn the food over, rearrange and separate. Shield thin parts and warm spots with small pieces of aluminium foil.
4. AG-22D-EU English 14/11/2005 13:54 Page 119 UK Recipes for automatic AC-6 & AC-7 FISH FILLET WITH SAUCE (AC-6) Fish fillet with piquant sauce Ingredients 0,4 kg 0,8 kg 1,2 kg 140 g 40 g 4g 12 g 1 tsp 280 g 80 g 8g 24 g 1-2 tsp 420 g 120 g 12 g 36 g 2 tsp 200 g 400 g 600 g Preparation 1. Mix ingredients for the sauce. 2. Place the fish fillet in a round gratin dish with the canned tomatoes (drained) thin ends toward the centre and sprinkle with salt. corn 3.
4. AG-22D-EU English 14/11/2005 13:54 Page 120 Cooking charts ABBREVIATIONS USED tbsp = tablespoon tsp = teaspoon Cup = cupful KG = kilogram g = gram l = litre ml = millilitre cm = centimetre min = minutes TABLE: HEATING FOOD AND DRINK Food / Drink Coffee, Milk, Water, 1 cup 1 cup 1 cup 6 cups 1 bowl Platters (Vegetables, meat and trimmings) Soup / Stew Vegetables Quantity Power -g/ml- -Setting150 800 W 150 800 W 150 800 W 900 800 W 1000 800 W 400 800 W Time -Minapprox.1 approx.
4.
4. AG-22D-EU English 14/11/2005 13:54 Page 122 Recipes Camembert toast Total cooking time: approx. 11/2-21/2 minutes Utensils: Ingredients 4 slices of bread for toasting 2 tbsp butter or margarine (20 g) 150 g camembert 4 tsp cranberry jelly cayenne pepper Zürich veal in cream Total cooking time: approx. 11-15 minutes Utensils: Dish with lid (2 l capacity) Ingredients 600 g veal fillet 1 tbsp butter or margarine 1 onion (50 g), finely chopped 100 ml white wine seasoned gravy browning, for approx.
4. AG-22D-EU English 14/11/2005 13:54 Page 123 UK Recipes Braised lamb with green beans Total cooking time: approx. 20-24 minutes Utensils: Shallow, oval soufflé mould with lid (about 26 cm long) Ingredients 1-2 tomatoes (100 g) 400 g lamb, boned 1 tsp butter or margarine for greasing the bowl 1 onion (50 g), finely chopped 1 clove garlic, crushed salt & pepper sugar 250 g tinned green beans Sole fillets Total cooking time: approx.
4.
4. AG-22D-EU English 14/11/2005 13:54 Page 125 UK Care & cleaning CAUTION: DO NOT USE COMMERCIAL OVEN CLEANERS, STEAM CLEANERS, ABRASIVE, HARSH CLEANERS, ANY THAT CONTAIN SODIUM HYDROXIDE OR SCOURING PADS ON ANY PART OF YOUR MICROWAVE OVEN. CLEAN THE OVEN AT REGULAR INTERVALS AND REMOVE ANY FOOD DEPOSITS. Failure to maintain the oven in a clean condition could lead to a deterioration of the surface that could adversely affect the life of the appliance and possibly result in a hazardous situation.
4. AG-22D-EU English 14/11/2005 13:54 Page 126 Service & spare parts If you wish to purchase spare parts or require an engineer, contact your local authorised service agent. The telephone number can be obtained from the operator.
4. AG-22D-EU English 14/11/2005 13:54 Page 127 UK Specifications AC Line Voltage Distribution line fuse/circuit breaker AC Power required: Output power: Microwave Frequency Outside Dimensions Cavity Dimensions Oven Capacity Turntable Weight Oven lamp * : 230 V, 50 Hz, single phase : Minimum 10 A Microwave : 1.2 kW Microwave : 800 W (IEC 60705) : 2450 MHz * (Group 2 / Class B) : 592 mm (W) x 370 mm (H) x 316 mm (D) : 285 mm (W) x 202 mm (H) x 298 mm (D) ** : 17 litres ** : ø 272 mm, glass : approx.
4. AG-22D-EU English 14/11/2005 13:54 Page 128 Installation INSTALLING THE APPLIANCE 1. Remove all packaging and check carefully for any signs of damage. 2. This oven is designed to fit into a 360mm high cupboard as standard. When fitting into a 350mm high cupboard:Unscrew and remove the 4 feet from the bottom of the oven. There are 3 tall feet and 1 short foot. Replace the 3 tall feet with those provided in the accessory pack. Do not replace the short foot. 3.
4. AG-22D-EU English 14/11/2005 13:54 Page 129 UK Installation CONNECTING THE APPLIANCE TO THE POWER SUPPLY • The electrical outlet should be readily accessible so that the unit can be unplugged easily in an emergency. (A) • The socket should not be positioned behind the cupboard. • The best position is above the cupboard, see (A). When not connecting the power supply cord to position (A) it should be removed from the support clip (see diagram, item 13, on page 106) and routed under the oven.
AG-22D-EU COVER 14/11/2005 13:55 Page 130 From the Electrolux Group. The World’s No.1 choice. The Electrolux group is the world’s largest producer of powered appliances for the kitchen, cleaning and outdoor use. More than 55 million Electrolux Group products (such as refrigerators, cookers, washing machines, vacuum cleaners, chain saws and lawn mowers) are sold each year to a value of approx. USD 14 billion in more than 150 countries around the world.