SANTO 72390-6 KA Gebruiksanwijzing Benutzerinformation Manual de instrucciones User manual Koelautomaat Kühlschrank Frigorífico Fridge
Geachte mevrouw, heer Hartelijk dank voor het kiezen van een van onze kwaliteitsproducten. U heeft een goede keuze gemaakt. Zo kunt u dankzij de combinatie van functioneel design en hoogwaardige technologie rekenen op optimale prestaties en bedieningsgemak. En onze zorg voor het milieu, komt o.a. tot uitdrukking in het energiebesparend functioneren van dit apparaat. Om er zeker van te zijn dat uw apparaat optimaal en onberispelijk presteert, dient u deze gebruiksaanwijzing aandachtig door te lezen.
Inhoud Veiligheid . . . . . . . . . . . . . . . . . . . . . . . . . . . . . . . . . . . . . . . . . . . . . . .4 Weggooien . . . . . . . . . . . . . . . . . . . . . . . . . . . . . . . . . . . . . . . . . . . . . .5 Informatie over de verpakking van het apparaat . . . . . . . . . . . . . . . . . .5 Weggooien van oude apparaten . . . . . . . . . . . . . . . . . . . . . . . . . . . . . . . .5 Transportbescherming verwijderen . . . . . . . . . . . . . . . . . . . . . . . . . . .6 Opstellen . . . . . . . . . .
Veiligheid De veiligheid van onze koelapparaten voldoet aan de Europese en Nederlandse normen. Desondanks zien wij ons genoodzaakt u met de volgende veiligheidsaanwijzingen vertrouwd te maken: Reglementaire toepassing • Het koelapparaat is voor huishoudelijk gebruik bestemd. Het is geschikt voor het koelen. Als het apparaat voor andere doeleinden gebruikt wordt kan de fabrikant geen verantwoording nemen voor eventuele schaden.
persoon instructies hebben gekregen over het gebruik. Laat kinderen niet zonder toezicht in de buurt van het apparaat.. Bij dagelijks gebruik • Containers met brandbare gassen of vloeistoffen kunnen lek raken door de inwerking van koude. Explosiegevaar! Leg geen containers met brandbare stoffen zoals bijv. spraybussen, aanstekers, navullingen van aanstekers etc. in het koelapparaat. • Geen elektrische apparaten (bijv. elektrische ijsmachines, mixers etc.) in het koelapparaat gebruiken.
eventuele snap- of grendelsloten verwijderen of kapotmaken. Hierdoor wordt voorkomen dat spelende kinderen in het apparaat opgesloten worden (verstikkingsgevaar!) of in andere levensgevaarlijke situaties terechtkomen. Aanwijzingen voor het weggooien: • Het apparaat mag niet bij het huis- of grofvuil gezet worden. • Het koelvloeistofcircuit, in het bijzonder de warmtewisselaar aan de achterkant, mag niet beschadigd worden.
Opstellen Opstelplaats Het apparaat in een goed geventileerde en droge ruimte neerzetten. De omgevingstemperatuur heeft invloed op het stroomverbruik. Het apparaat daarom – niet aan directe straling van de zon blootstellen; – niet bij radiatoren, naast een kachel of andere warmtebronnen plaatsen; – alleen op een plaats neerzetten waarvan de omgevingstemperatuur overeenkomt met de klimaatklasse waarvoor het apparaat is ontworpen.
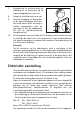
Muur-afstandhouders In het apparaat vindt u twee afstandsstukken die geplaatst moeten worden zoals aangegeven op de afbeelding. Draai de schroeven los steek de afstandhouder onder de schroefkop en draai de schroeven weer vast. Overzetten van het deurscharnier 1. 2. 3. 4. 5. 6. 8 Het deurscharnier kan van rechts (stand waarin het wordt afgeleverd) naar links overgezet worden als dat voor de opstelplaats nodig is.
7. Verwijder van het ventilatierooster de afdekking (e) en breng deze op de tegenoverliggende kant weer aan. 8. 9. Breng het ventilatierooster weer aan. Draai de handgreep los. Breng deze op de tegenoverliggende kant weer aan na de pennen m.b.v. een tang te hebben opengestoken. Sluit de openingen af met de afdekpennen die met de gebruiksaanwijzing meegeleverd zijn. Zet het apparaat weer op z'n plek, zet het waterpas, wacht minstens een uur en steek dan de stekker weer in het stopcontact.
Voor ingebruikname • Het interieur van het apparaat en alle accessoires schoonmaken voor het eerste gebruik (zie Hoofdstuk “Reiniging en onderhoud”). Bedienings- en controle-inrichting A A. B. C. D. E. F.
Temperatuurindicatie • • De temperatuurindicatie kan meerdere soorten informatie aangeven. Bij normaal gebruik wordt de temperatuur aangegeven die op dat moment in de koelruimte heerst (WERKELIJKE temperatuur). Tijdens de temperatuurinstelling wordt knipperend de op dat moment ingestelde koelruimte temperatuur aangegeven (GEWENSTE temperatuur) WAARSCHUWING UIT toets Met de toets WAARSCHUWING UIT kan het akoestische waarschuwingssignaal uitgeschakeld worden, bijv.
Deuralarm Als de deur langer dan 5 minuten open blijft staan, begint de rode waarschuwingslamp te knipperen en klinkt het alarmsignaal. Als u voor het opbergen of indelen van levensmiddelen in de koelkast meer tijd nodig hebt, kunt u het waarschuwingssignaal uitschakelen door toets WAARSCHUWING UIT in te drukken. De rode waarschuwingslamp gaat uit als de deur gesloten wordt.
Interieur Legvlakken Naargelang het model is het apparaat voorzien van glazen legvlakken. Het legvlak van glas boven de groente- en fruitbakken moet altijd op die plaats blijven liggen, opdat groente en fruit langer vers blijven. D338 De overige legvlakken zijn in hoogte verstelbaar: Daartoe het legvlak zover naar voren trekken tot het naar boven of onderen bewogen kan worden en eruit gehaald kan worden. Om de legvlakken op een andere hoogte te zetten in omgekeerde volgorde te werk gaan.
Schap voor snel afkoelen Het ondiepe schap voor snel afkoelen kan in een van de bovenste gleuven geplaatst worden. Voor de best mogelijke werking moet de schap in de tweede gleuf van boven worden gezet. Flessen- en blikjeshouder De flessen- en blikjeshouder is zijdelings verplaatsbaar zodat het mogelijk is de blikjes en flessen flexibel voor het rooster te plaat-sen. Om de zijdelingse verplaatsing van de houder te vergemakkelijken, moet u de houder naar achteren drukken.
Installatie van koolfilter Bij levering van het koolfilter zit het in een plastic zakje om de levensduur van het filter te garanderen. Het filter moet achter het rooster worden geplaatst voordat de koelkast aangezet wordt. Het rooster wordt geopend door en de klep naar buiten te draaien. Het koolfilter wordt daarna in de gleuf geplaatst die aan de achterkant, zie afbeelding. De filters moeten zorgvuldig behandeld worden zodat er geen schilfers van het oppervlak loskomen.
Koelen van levensmiddelen Voor een optimaal gebruik van de koelruimte adviseren wij u de volgende eenvoudige regels in acht te nemen: • Plaats geen warme of dampende spijzen of dranken in de koelruimte; • dek vooral sterk geurend voedsel af of verpak het; • plaats de levensmiddelen zo, dat de lucht vrij eromheen kan circuleren. Enkele belangrijke tips: Vlees (alle soorten): wordt in plastic zakjes op de glazen plaat boven de groentelade geplaatst. Bewaar vlees niet langer dan één of twee dagen.
Ontdooien van het apparaat Het ontdooien van de koelruimte Als de compressor loopt vormt zich op de achterwand van de koelruimte een rijplaag. Deze laag wordt automatisch verwijderd, wanneer de compressor stilstaat. Het dooiwater wordt in een gootje in de achterwand van de koelruimte opgevangen en via een afvoeropening naar een verzamelbak boven de compressor gevoerd, alwaar het verdampt. Apparaat uitzetten 1. 2. 3. 4. 5. Voor het uitzetten toets ON/OFF indrukken.
1. 2. 3. 4. 5. 6. 7. Dergelijke substanties niet in contact brengen met apparaatonderdelen. • Geen schurende schoonmaakmiddelen gebruiken. Koel– en diepvriesartikelen er uit halen. Diepvriesartikelen in meerdere lagen kranten verpakken. Alles afgedekt op een koele plaats leggen. Vriesvak voor het schoonmaken ontdooien (zie hoofdstuk “Ontdooien”). Apparaat uitzetten en de stekker uit het stopcontact halen of de zekering in de huisinstallatie uitschakelen.
Wat te doen als ... Hulp bij storingen Het kan bij een storing om kleine defecten gaan die u zelf aan de hand van de volgende aanwijzingen kunt oplossen. Voer zelf geen verdere werkzaamheden uit als de volgende informatie in concrete gevallen niet verder helpt. Waarschuwing! Reparaties aan het koelapparaat mogen alleen door geschoold personeel uitgevoerd worden. Door ondeskundige reparaties kunnen grote gevaren ontstaan voor de gebruiker. Wend u bij reparatie tot onze service-afdeling.
Storing Mogelijke oorzaken Oplossing Apparaat staat niet recht. Stelvoetjes bijstellen. Apparaat komt tegen de muur of tegen andere voorwerpen Apparaat iets wegtrekken. aan. Ongewone geluiden. Een onderdeel, bijv. een leiding, aan de achterkant van het Dit onderdeel voorzichtig apparaat komt tegen een ander wegbuigen. onderdeel van het apparaat aan of tegen de muur. Na het wijzigen van de Dit is normaal, het betreft temperatuurinstelling start de geen storing. compressor niet direct.
Doel, normen, richtlijnen Het koelapparaat is voor huishoudelijk gebruik bestemd en is met inachtneming van de voor deze apparaten geldende normen gemaakt. Bij de fabricage zijn speciaal die maatregelen genomen die vereist zijn volgens de Duitse wet op de veiligheid van apparaten (GSG), volgens de Duitse voorschriften ter voorkoming van ongevallen bij koudeinstallaties (VBG 20) en volgens de bepalingen van de vereniging van Duitse elektotechnici (VDE). De koudecirculatie is op dichtheid getest.
Verehrter Kunde! Vielen Dank, dass Sie sich für eines unserer Qualitätsprodukte entschieden haben. Dieses Gerät bietet Ihnen eine perfekte Synthese aus funktionellem Design und wegweisender Spitzentechnologie. Überzeugen Sie sich selbst von dem Entwicklungsvorsprung unserer Produkte, die bei Leistungsfähigkeit und Bedienung eine absolute Spitzenposition einnehmen.
Inhalt Sicherheit . . . . . . . . . . . . . . . . . . . . . . . . . . . . . . . . . . . . . . . . . . . . . .24 Entsorgung . . . . . . . . . . . . . . . . . . . . . . . . . . . . . . . . . . . . . . . . . . . . 25 Information zur Geräteverpackung . . . . . . . . . . . . . . . . . . . . . . . . . . . . .25 Entsorgung von Altgeräten . . . . . . . . . . . . . . . . . . . . . . . . . . . . . . . . . . .25 Transportschutz entfernen . . . . . . . . . . . . . . . . . . . . . . . . . . . . . . . . 26 Aufstellen . .
Sicherheit Die Sicherheit unserer Kältegeräte entspricht den anerkannten Regeln der Technik und dem Gerätesicherheitsgesetz. Dennoch sehen wir uns veranlaßt, Sie mit folgenden Sicherheitshinweisen vertraut zu machen: Bestimmungsgemäße Verwendung • Das Kältegerät ist für die Verwendung im Haushalt bestimmt. Es eignet sich zum Kühlen von Lebensmitteln sowie zur Eisbereitung. Wird das Gerät zweckentfremdet oder falsch bedient, kann vom Hersteller keine Haftung für eventuelle Schäden übernommen werden.
Im Alltagsbetrieb • Behälter mit brennbaren Gasen oder Flüssigkeiten können durch Kälteeinwirkung undicht werden. Explosionsgefahr! Lagern Sie keine Behälter mit brennbaren Stoffen, wie z.B. Spraydosen, FeuerzeugNachfüllkartuschen etc. im Kältegerät. • Keine Elektrogeräte (z. B. elektrische Eismaschinen, Rührgeräte etc.) im Kältegerät betreiben. • Vor Reinigungsarbeiten das Gerät grundsätzlich abschalten und den Netzstecker ziehen oder Sicherung in der Wohnung abschalten bzw. herausdrehen.
Entsorgungshinweise: • Das Gerät darf nicht mit dem Haus- oder Sperrmüll entsorgt werden. • Der Kältemittelkreislauf, insbesondere der Wärmetauscher an der Geräterückseite, darf nicht beschädigt werden. • Das Symbol auf dem Produkt oder seiner Verpackung weist darauf hin, dass dieses Produkt nicht als normaler Haushaltsabfall zu behandeln ist, sondern an einem Sammelpunkt für das Recycling von elektrischen und elektronischen Geräten abgegeben werden muss.
Klimaklasse für Umgebungstemperatur von SN +10 bis +32 °C N +16 bis +32 °C ST +18 bis +38 °C T +18 bis +43 °C Iist die Aufstellung neben einer Wärmequelle unvermeidbar, sind folgende seitliche Mindestabstände einzuhalten: – zu Elektroherden 3 cm; – zu Öl- und Kohleherden 30 cm. Können diese Abstände nicht eingehalten werden, ist eine Wärmeschutzplatte zwischen Herd und Kältegerät erforderlich.
Türanschlag wechseln 1. 2. 3. 4. 5. 6. 7. 8. 28 Der Türanschlag kann von rechts (Lieferzustand) nach links gewechselt werden, falls der Aufstellort dies erfordert. Warnung! Während des Türanschlagwechsels darf das Gerät nicht am Stromnetz angeschlossen sein. Vorher Netzstecker ziehen. Die folgenden Handlungsschritte sollten unter Mithilfe einer zweiten Person zum Anhalten der Türe durchgeführt werden. Legen Sie das Gerät auf die Geräterückseite. Sockelblende nach vorn abziehen.
9. Türgriff abnehmen und auf gegenüberliegender Seite befestigen. Mit einem Senkstift die Plastikstöpsel auf der gegenüberliegenden Seite des Türgriffs durchlöchern. Mit den im Beipack enthaltenen Plastikstöpseln die freigebliebenen Löcher abdecken. Gerät in Position bringen, ausrichten und ans Stromnetz anschließen. Falls Sie den Türanschlagwechsel nicht selbst durchführen möchten, verständigen Sie bitte den Kundendienst.
Bedienungs- und Kontrolleinrichtung A A. B. C. D. E. F. BC D E F ON/OFF Taste Taste zur Temperatureinstellung (wärmer) Temperaturanzeige Taste zur Temperatureinstellung (kälter) COOLMATIC Taste mit Anzeige für eingeschaltete COOLMATIC Funktion (gelb) Taste WARNUNG AUS mit roter Warnanzeige Tasten zur Temperatureinstellung • • • Die Temperatureinstellung erfolgt durch die Tasten B und D. Die Tasten stehen in Verbindung mit der Temperaturanzeige.
Kühlraum vorhanden ist (IST-Temperatur). • Während der Temperatureinstellung wird blinkend die im Moment eingestellte Kühlraumtemperatur angezeigt (SOLL-Temperatur). Taste WARNUNG AUS Mit der Taste WARNUNG AUS kann das akustische Warn-signal abgestellt werden, z. B. die „Offene Tür“-Warnung beim längeren Ein- oder Umräumen von Kühlgut. Inbetriebnahme - Temperatur einstellen 1. 2. 3. 4. 5. Netzstecker in die Steckdose stecken. Taste ON/OFF (A) drücken.
ursprünglich eingestellte SOLL-Temperatur ist dann wieder maßgebend. und die Temperaturanzeige zeigt die momentane Kühlraumtemperatur. 2. Durch erneutes Drücken der Taste COOLMATIC kann die COOLMATICFunktion jederzeit manuell beendet werden. Die gelbe Anzeige erlischt. Schnellkühl-Funktion Die Schnellkühl-Funktion kann zum schnellen Abkühlen von Getränken in Dosen oder Flaschen auf der Schnellkühl-Ablage oder von größeren Mengen zimmerwarmer Lebensmittel verwendet werden.
"Offene Tür"-Warnung Bleibt die Kühlschranktür länger als 5 Minuten geöffnet, blinkt die rote Warnanzeige und ein Warnton ertönt. Falls Sie zum Ein- oder Umräumen des Kühlguts mehr Zeit benötigen, können Sie den Warnton abschalten, indem Sie die Taste WARNUNG AUS drücken. Die rote Warnanzeige erlischt beim Schließen der Tür. Innenausstattung Abstellflächen Die Abstellfläche aus Glas über den Obst- und Gemüseschalen muß immer in dieser Stellung verbleiben, damit Obst und Gemüse länger frisch bleiben.
Schnellkühl-Ablage Die Schnellkühl-Ablage kann in verschiedene Führungen eingesetzt werden. Für eine optimale Funktion sollte sie in der zweiten Führung von oben eingesetzt sein. Flaschen- und Dosenhalter Der Flaschen- und Dosenhalter ist seitlich verschiebbar, wodurch eine flexiblere Platzierung von Flaschen und Dosen vor dem Kühlgebläse möglich ist. Beim seitlichen Verschieben den Halter gleichzeitig auch nach vorn drükken. Zum Kühlen großer Flaschen die Flaschenhalterung aufklappen.
Einsetzen des Kohlefilters Um die optimale Funktion zu erhalten, sollte der Kohlefilter bei normaler Anwendung einmal pro Jahr ausgewechselt werden. Neue Kohlefilter sind bei Ihrem Händler erhältlich. Der Filter ist hinter dem Gitter angebracht und ist durch Öffnen der Klappe zu erreichen. Das Gitter wird geöffnet die Klappe nach aussen dreht. Der Kohlefilter wird dann aus der Schiene gezogen, in der er läuft.
Richtig lagern Um die Lebensmittel möglichst lange frisch zu halten, beachten Sie bitte folgendes: • Keine warmen Speisen oder Flüssigkeiten in den Kühlschrank einstellen. • Die Lebensmittel sollten abgedeckt oder eingewickelt werden. • Die Lebensmittel müssen so eingelagert werden, daß die Luft frei zirkulieren kann. Nachstehend einige praktische Ratschläge: Fleisch (alle Sorten) in Plastikfolie einpacken und auf die Glasplatte, die sich über der Gemüseschale (über den Gemüseschalen) befindet, legen.
Abtauen Kühlraum Die sich auf dem Verdampfer des Kühlschrankes bildende Reifschicht taut jedesmal in den Stillstandzeiten des Kompressors von selbst ab. Das Tauwasser läuft durch eine Rinne in eine Plastikschale auf der Rückseite D037 des Gerätes und verdunstet dort. Wir empfehlen, das in der Mitte der Abtauwasserrinne des Kühlraumes befindliche Ablaufloch für das Abtauwasser regelmäßig zu reinigen, um zu vermeiden, daß das Abtauwasser auf Lebens-mittel tropft.
1. 2. 3. 4. 5. 6. 7. Achtung! • Ätherische Öle und organische Lösungsmittel können Kunststoffteile angreifen, z. B. – Saft von Zitronen- oder Apfelsinenschalen; – Buttersäure; – Reinigungsmittel, die Essigsäure enthalten. Solche Substanzen nicht mit den Geräteteilen in Kontakt bringen. • Keine scheuernden Reinigungsmittel verwenden. Kühl- und Tiefkühlgut herausnehmen. Tiefkühlgut in mehrere Lagen Zeitungspapier einpacken. Alles abgedeckt an einem kühlen Ort lagen.
Was tun, wenn ... Abhilfe bei Störungen Möglicherweise handelt es sich bei einer Störung nur um einen kleinen Fehler, den Sie anhand nachfolgender Hinweise selbst beheben können. Führen Sie keine weiteren Arbeiten selbst aus, wenn nachstehende Informationen im konkreten Fall nicht weiterhelfen. Warnung! Reparaturen am Kältegerät dürfen nur von Fachkräften durchgeführt werden. Durch unsachgemäße Reparaturen können erhebliche Gefahren für den Benutzer entstehen.
Störung Ungewöhnliche Geräusche. Nach Änderung der Temperatureinstellung läuf der Kompressor nicht sofort an. Wasser am Kühlraumboden oder auf Abstellflächen. Mögliche Ursache Abhilfe Gerät steht nicht gerade. Verstellfüße nachjustieren. Gerät hat Kontakt mit der Wand oder mit anderen Gegenständen. Ein Teil, z. B. ein Rohr, an der Geräterückseite berührt ein anderes Geräteteil oder die Wand. Dies ist normal, es liegt keine Störung vor. Gerät etwas wegrücken. Tauwasser-Ablaufloch ist verstopft.
Gracias por elegir uno de nuestros productos de alta calidad. Con este aparato podrá experimentar la perfecta combinación entre el diseño funcional y la tecnología más avanzada. Convénzase de que nuestros electrodomésticos están diseñados para ofrecer el mejor rendimiento y control - En efecto, hemos estableciendo los más altos niveles de excelencia (calidad) Además de esto podrá comprobar que el respeto medioambiental y el ahorro de energía son aspecto integrales de nuestros productos.
Indice Seguridad. . . . . . . . . . . . . . . . . . . . . . . . . . . . . . . . . . . . . . . . . . . . . .43 Eliminación . . . . . . . . . . . . . . . . . . . . . . . . . . . . . . . . . . . . . . . . . . . .45 Información sobre el embalaje del aparato . . . . . . . . . . . . . . . . . . . . . .45 Desguace de los aparatos viejos . . . . . . . . . . . . . . . . . . . . . . . . . . . . . . .45 Quitar el seguro para el transporte . . . . . . . . . . . . . . . . . . . . . . . . .46 Fixadores para prateleiras .
Seguridad La seguridad de nuestros aparatos cumple los reglamentos técnicos aprobados y la ley de seguridad de los aparatos. No obstante esto, consideramos oportuno facilitar vuestra familiaridad con las siguientes advertencias: Utilización conforme a la finalidad prevista • El aparato frigorífico es apto para una utilización doméstica. Es apto para enfriar, congelar y sobrecongelar productos alimentarios y para preparar helados. Es apto para congelar y conservar productos alimentarios y helados.
niños puedan quedar encerrados en el aparato mientras juegan (¡Peligro de sofocación!) y se evita que puedan encontrarse en otras situaciones peligrosas para su vida. • Este aparato no está pensado para ser utilizado por personas (incluidos los niños) con capacidades físicas, sensoriales o mentales reducidas, o que no tengan experiencia y conocimiento, a menos que una persona responsable de su seguridad les supervise o les ofrezca instrucción en el uso del aparato.
Eliminación Información sobre el embalaje del aparato Todos los materiales de producción utilizados ¡son tolerados por el ambiente! Se pueden tirar tranquilamente a la basura o pueden ser incinerados en las plantas para basuras urbanas. En cuanto a los materiales de producción: Los materiales sintéticos también se pueden reciclar y vienen marcados como sigue: >PE< para el polietileno, por ej. en el envoltorio exterior y en las bolsas internas. >PS< para el poliestireno expandido, por ej.
Quitar el seguro para el transporte El aparato y los accesorios internos están protegidos para el transporte. • Quitar las cintas adhesivas situadas en los lados de la puerta • Quitar todas las cintas adhesivas y los elementos de bloqueo de dentro del aparato. Fixadores para prateleiras O seu aparelho é equipado com fixadores para prateleiras que permitem de bloquear as prateleiras durante o transporte.
Instalación Lugar de instalación Es preciso colocar el aparato en un sitio bien ventilado y seco. La temperatura ambiente influye mucho sobre el consumo de corriente. Por tanto el aparato no debería: – quedar expuesto directamente a los rayos del sol; – ser puesto al lado de elementos caloríficos, de un horno o de otras fuentes de calor similares; – mientras que debería ser colocado en un sitio en que la temperatura ambiente se corresponda con la clase climática para la cual ha sido construido.
Distanciadores posteriores En el interior del electrodoméstico hay dos distanciadores que deberán ser montados como se muestra en la figura. Aflojar los tornillos, introducir el distanciador debajo de la cabeza del tornillo y volver a atornillar. Cambio de las bisagras de la puerta El sentido de apertura de la puerta se puede cambiar para que se abra hacia la derecha (ajuste de fábrica) o hacia la izquierda si la instalación lo requiere.
7) 8) 9) 10) puerta (A). Quite la cubierta de la rejilla de ventilación (e) e instálela en el lado contrario. Vuelva a montar la rejilla de ventilación. Desatornille el tirador e instálelo en el lado contrario una vez que haya perforado los tacos con un taladro. Tape los orificios que han quedado abiertos con los tacos que se suministran en el paquete de documentación. Coloque el electrodoméstico en su posición, nivélelo y espere al menos una hora antes de conectarlo de nuevo a la toma de corriente.
Conexión eléctrica Para efectuar la conexión eléctrica es necesario utilizar una toma de corriente con contacto de protección, instalada conforme a las prescripciones vigentes. El fusible eléctrico debe ser por lo menos de 10 Amperios. Si una vez instalado el aparato no fuese posible acceder a la toma (para eventualmente desenchufar el aparato), es necesario tomar las medidas adecuadas para garantizar la desconexión del aparato de la red eléctrica (por ej.
Panel de mando A BC D E F A Tecla ON / OFF B Tecla „+“ (MÁS CALOR) C Indicación de temperatura D Tecla „-“ (MÁS FRÍO). E COOLMATIC Tecla, Indicación función COOLMATIC (amarillo) F Tecla ALARMA DESCONECTADA, piloto de alarma (rojo) Teclas para la selección de temperaturas La temperatura se regula mediante las teclas „+“ (MÁS CALOR) y „-“ (MÁS FRÍO). Las teclas guardan relación con el indicador de temperaturas.
Indicador de la temperatura El indicador de la temperatura puede visualizar varias informaciones. • Durante el servicio normal, la temperatura indicada es la que reina actualmente en el compartimento frigorífico (temperatura EFECTIVA); el indicador de la temperatura permanece encendido. • Durante el ajuste de la temperatura aparece parpadeando la temperatura preseleccionada (temperatura NOMINAL).
3. Si usted no vuelve a apretar las teclas una vez seleccionada la temperatura, el indicador recuperará su función previa a los pocos instantes (unos 5 segundos) para indicar otra vez la temperatura NOMINAL reinante en en refrigerador . La indicación cambia de números intermitentes a fijos Indicación: Al cambiarse el ajuste, el compresor no arranca en seguida si está activo el sistema de descongelamiento automático.
activado y la indicación HOLIDAY encendida. ¡Atención! No dejar alimentos en el compartimento frigorífico mien-tras el aparato esté conmutado para vacaciones. La temperatura durante la conmutación para vacaciones se mantiene más o menos a +14° C, la cual es muy alta para los alimentos. Para volver a conmutar el frigorífico al modo normal, vaya pulsando la tecla “+” hasta que dejen de aparecer palabras en pantalla.
Alarme de puerta abierta Si la puerta permanece abierta durante más de 5 minutos, la lámpara de aviso roja comenzará a parpadear y una alarma sonará. Si le va a tomar más tiempo acomodar o reacomodar los productos alimenticios en cualquiera de la cámara, puede silenciar la señal acústica oprimiendo el pulsador ALARMA DESCONECTADA. La lámpara de aviso roja se apagará cuando la puerta sea cerrada. Desconexión 1. Para desconectar el aparato , mantener pulsada la tecla ON/OFF.
Acessorios internos Posicionamento das prateleiras • A prateleira inteira em cima das gavetas de verdura/fruta deve permanecer sempre nesta posição para manter mais frescas a verdura e a fruta no tempo. As outras prateleiras são reguláveis na altura: • Para tal, puxar a prateleira para a frente até que seja possível deslocála para cima ou para baixo e retirála. • A introdução em outra altura é efetuada em sentido contrário.
Estante de refrigeración rapida El estante de refrigeración rapida menos profundo puede ser colocado en alguna de los carriles superiores. Para mantener un buen funcionamiento, el estante debe ser colocado en el segundo carril contando desde arriba hacia abajo. Sostenedor de botellas y latas El sostenedor de botellas y latas se puede mover horizontalmente, permi-tiendo así flexibilidad en el acomodo de botellas y latas frente a la rejilla.
Instalación de filtro de carbono Al ser entregado, el filtro de carbono es colocado en un envoltorio de plástico para asegurar la su utilidad prolongada. Debe ser colocado detrás de la rejilla antes de que el refrigerador sea puesto en funcionamiento. Se abre la rejilla al presionar y haciendo girar el portillo hacia afuera. El filtro de carbono se coloca entonces en el carril que se encuentra en el parte trasera del portillo. Véase la imagen.
Refrigeración de los alimentos y de las bebidas Para utilizar de la mejor manera la sección frigorífico es necesario: • no poner en la cámara alimentos calientes ni líquidos en evaporación; • tapar o envolver los alimentos, en particular si tienen aromas; • colocar los alimentos de manera que el aire pueda circular libremente alrededor de ellos. Carne (de todas las clases): hay que envolverla en bolsas de plástico y ponerla sobre el vidrio, encima del cajón de la verdura.
Descongelación Frigorífico En la pared trasera de la sección frigorífico, se forma un capa de escarcha durante el funcionamiento del compresor, que es eliminada automáticamente durante las pausas de funcionamiento del compresor. El agua generada por la descongelación, a través de un encauzador situado en la parte trasera de la sección frigorífico, por un agujero de desagüe es recogida en una bandeja situada encima del compresor, donde evapora por efecto del calor generador por el propio compresor.
1. 2. 3. 4. 6. 7. • El aparato debe estar completamente seco antes de ponerlo de nuevo en servicio. ¡Atención! • Aceites esenciales y sustancias solventes orgánicas pueden atacar los elementos en material sintético, por ej. – zumo de limón o cortezas de naranja; – mantequilla ácida; – sustancias detergentes que contengan ácido acético. Evitar el contacto entre los elementos del aparato y dichas sustancias. • No utilizar nunca sustancias detergentes abrasivas. Quitar los alimentos.
frigorífico. • Mantener constantemente limpio el condensador situado en la parte trasera del aparato. Qué hacer si... Remedios en caso de inconvenientes Probablemente se trata de un avería leve que podéis eliminar por cuenta vuestra, siguiendo estas instrucciones, sin tener que dirigiros al servicio técnico. No tenéis que efectuar ninguna otra operación si las aquí presentadas no bastan para solucionar el caso indicado.
Inconveniente Causas posibles El aparato no está a nivel Remedio Actuar sobre las patas regulables El aparato está en contacto con la pared o con otros Alejar ligeramente el aparato objetos Ruido insólito Un componente instalado en la parte trasera del aparato, Eventualmente doblarlo con por ej.
Servicio técnico Si el inconveniente no se logra solucionar con estar instrucciones, dirigiros a vuestro revendedor autorizado o a nuestro servicio técnico. Las direcciones y números de teléfono los encontráis en el folleto adjunto de “Condiciones de garantía / Direcciones de los centros de asistencia”. Disponer de las piezas de repuesto adecuadas permite ahorrar tiempo. Por tanto os rogamos que indiquéis los datos siguientes de vuestro aparato: • Descripción del modelo • Número de producción (N.
Dear Customer Thank you for choosing one of our high-quality products. With this appliance you will experience the perfect combination of functional design and cutting edge technology. Convince yourself that our appliances are engineered to deliver the best performance and control - indeed we are setting the highest standards of excellence. In addition to this you find environmental and energy saving aspects as an integral part of our products.
Contents Safety . . . . . . . . . . . . . . . . . . . . . . . . . . . . . . . . . . . . . . . . . . . . . . . . .67 Disposal . . . . . . . . . . . . . . . . . . . . . . . . . . . . . . . . . . . . . . . . . . . . . . .68 Appliance Packaging Information . . . . . . . . . . . . . . . . . . . . . . . . . . . . .68 Disposal of old Appliances . . . . . . . . . . . . . . . . . . . . . . . . . . . . . . . .68 Remove transport safeguard . . . . . . . . . . . . . . . . . . . . . . . . . . . . . . .69 Installation .
Safety The safety aspects of our refrigerators/freezers comply with accepted technical standards and the German Appliance Safety Law. Nevertheless, we consider it our obligation to make you aware of the following safety information: Intended use • The refrigerator is intended for use in the home. It is suitable for the cooling food. If the appliance is used for purposes other than those intended or used incorrectly, no liability can be accepted by the manufacturer for any damage that may be caused.
Daily Operation • Do not operate any electrical appliances in the refrigerator/freezer (e.g. electric ice cream makers, mixers etc.). • Before cleaning the appliance, always switch off the appliance and unplug it, or pull the house fuse or switch off the circuit breaker. • When unplugging always pull the plug from the mains socket, do not pull on the cable. In case of malfunction • If the a malfunction occurs on the appliance, please look first in the "What to do if ..." section of these instructions.
• The symbol on the product or on its packaging indicates that this product may not be treated as household waste. Instead it shall be handed over to the applicable collection point for the recycling of electrical and electronic equipment. By ensuring this product is disposed of correctly, you will help prevent potential negative consequences for the environment and human health, which could otherwise be caused by inappropriate waste handling of this product.
Climate classification for an ambient temperature of SN +10 bis +32 °C N +16 bis +32 °C ST +18 bis +38 °C T +18 bis +43 °C Fit the rear spacers contained in the appliance to ensure even dissipation of heat genereted during operation. Proceed in the sequence illustrated by the figures. 10 mm Rear spacers 10 mm For safety reasons, minimum ventilationmust be as shown Fig. Attention: keep ventilation openings clear of obstruction; 100 mm Your appliance needs air NP007 Rehingeing the door 1.
3. 4. 5. 6. 7. 8. 9. Remove the door. Unscrew the pin of the bottom hinge (f) and refit it on the opposite side. Unscrew the pin of the upper hinge (d) and refit it on the opposite side. Insert the door in the upper hinge and refit the upper hinges (A). Pay attention that the border of the doors are parallel to the top border, otherwise adjust the position of the lower hinge of the door (A). Remove from the ventilation grille the cover (e) and refit it on the opposite side. Refit ventilation grille.
Electrical connection Before initial start-up, refer to the appliance rating plate to ascertain if supply voltage and current values correspond with those of the mains at the installation location. e.g.: AC 230 ... 240 V 50 Hz or 230 ... 240 V~ 50 Hz (i.e. 230 to 240 volts alternating current, 50 Hertz) The rating plate is inside the appliance on the left. A correctly installed, earthed socket is required for the electrical supply. The supply must have a fuse rating of at least 10 Amps.
Temperature setting buttons • • The temperature is adjusted using the „B“ and „D“ buttons. These buttons are connected to the temperature display. The temperature display is switched over from the display of the ACTUAL temperature (Temperature display is illuminated) to the display of the DESIRED temperature (Temperature display flashes) by pressing one of the two buttons, „B“ or „D“ . Each time one of the two buttons is pressed again the DESIRED temperature is adjusted by 1 °C.
5. is adjusted by 1 °C. From a food safety point of view +5 °C should be considered sufficiently cold for storing food in the fridge. Once the required temperature has been set, after a short period (approx. 5 sec.) the temperature display will change and again indicate the current ACTUAL temperature inside the fridge. The display will change from flashing to continuous illumination.
"Open Door"-Warning If the fridge door is left open for longer than 5 minutes the red warning display will flash and an acoustic warning tone will sound. If you need more time to load or rearrange refrigerated foods, you can switch off the warning tone by pressing the ALARM OFF button. The red warning display will go off when the door is closed. Holiday Mode In the holiday mode the temperature for the refrigerator is approximately +15 °C.
Interior Accessories Storage shelves • You should always slide one of the full size glass storage shelf into the lowest set of guides, above the fruit and the vegetable containers, and keep it in this position. • The height of the storage shelves can be adjusted: • To do this pull the storage shelf forward until it can be swivelledupwards or downwards and removed. • Please do the same in reverse to insert the shelf at a different height.
Quick Chill Shelf The quick chill shelf can be placed in the upper groove. Bottle- and Can Holder The side of the bottle- and can holder is moveable to enable a more flexible placement of cans and bottles in front of the grid. To alow the holder to be moved easier when moving sideways, press the shelf backwards. The bottle support can be pulled out when chilling larger bottles. Dismantling of the Bottle- and Can Holder Take out the quick chill shelf with holder from the cabinet.
Installation of the carbon filter On delivery the carbon filter is placed in a plastic bag to secure the length of the carbon filter life. The filter should be placed behind the grill before the cabinet is turned on. The cover can be opened by turning the cover outward. 1 The carbon filter is then mounted in the slot found in the back, see the illustration. The filter should be handled carefully so fragments don´t loosen from the surface.
Warning: this appliance is sold in France. In accordance with regulations valid in this country it must be provided with a special device (see figure) placed in the lower compartment of the fridge, to indicate the coldest zone of it. Fresh food refrigeration To obtain the best performance: • do not store warm food or evaporating liquide in the refrigeator • do cover or wrap the food, particularly if it has a strong flavour. • Position food so that air can circuiate freely round it.
Switching off the appliance 1. To switch off, press the ON/OFF button. The fridge will switch off. The temperature display will go off. 1. 2. 3. 4. 5. The appliance is only completely disconnected from the electricity supply when the power plug has been removed from the power outlet. Note: The appliance cannot be switched on or off if unplugged, or if there is no power being supplied to it.
1. 2. 3. 4. 5. 6. 7. Do not allow such substances to come into contact with appliance parts. • Do not use any abrasive cleansers. Remove frozen food and the food from the refrigerator. Wrap frozen food in several layers of newspaper. Store it in a cool place, well covered. Defrost the freezer compartment prior to cleaning (see "Defrosting" section). Switch the appliance off and remove the plug from the mains, or switch off or turn out the circuit breaker or fuse.
What to do if ... Correcting Malfunctions A malfunction may be caused by only a minor fault that you can rectify yourself using the following instructions. Do not perform any other work on the appliance if the following information does not provide assistance in your specific case. Warning! Repairs to refrigerators/freezers may only be performed by qualified service engineers. Improper repairs can give rise to significant hazards for the user.
Malfunction Possible Cause Appliance is not level. Remedy Readjust the feet. The appliance is touching the Move the appliance slightly. wall or other objects. Unusual noises. Water on the floor or on storage shelves. A component, e.g. a pipe, on If necessary, carefully bend the rear of the appliance is the component out of the touching another part of the way. appliance or the wall. Water drain hole is blocked. See the "Cleaning and Care" section. Changing the light bulb 1. 2. 3. 4. 5. 6.
2223 421-06-00-05022010 Subject to change without notice Con reserva de modificaciones Änderungen vorbehalten Wijzigingen voorbehouden www.electrolux.com www.aeg-electrolux.nl www.aeg-electrolux.com.