INSTRUCTION BOOK 130 FF-m 1 SA GB 949600687
Congratulations from AEG Dear Customer, Congratulations with your new Hob. It is important that you become familiar with the functions and features of the Hob. You should therefore read these operating instructions as they will help you get the most out of your new Hob. Pay extra attention to sections marked . These are warning texts to help you avoid accidents. Keep the operating instructions.
Table of contents Contents Page no For the user Congrafulations from AEG ......................................................................... 2 Important to know ....................................................................................... 4 Description of the product ......................................................................... 7 How to use .................................................................................................... 8 Fryer .............................
Important to know the cleaning agents used. The hob unit is intended for ordinary household cooking purposes. Any other use can result in damage to the unit as well as personal injury. The appliance is not intended for use by young children or infirm persons without supervision. During use Please read the warranty. During deep-fat frying, sauteèing, melting of butter, etc., one must always remain near the unit, due to the danger of fire.
frying receptacle. The filter dome must face upwards when in position. That the safety rules in the instructions have not been complied with. That repair has been made by others than an authorised service technician. The unoriginal spare parts have been used. That the damage is caused by transport at a later date, for instance during removal or resale. That the damage is caused by any form of use contrary to common sense. Installation The electrical installation must be made by a certified electrician.
Please keep childeren out of reach!! Rember that the heating elements and the frying oil remain searing hot for a long period after you have turned off the appliance. Never pour water into hot frying-oil. If the frying oil catches fire, turn off the extractor hood. Suffocate the fire by covering it with the lid, a pan, baking tray or similar object. Never try to put out the fire with water. Steel cover The cover supplied may only be used on this model.
Description of the product Steel cover Frying basket Max. oil level MIN Min.
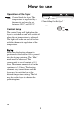
How to use Operation of the fryer Control knob for fryer. The temperature is regulated by a thermostat and may be set between 120˚C and 190˚C. Controllamp for the Kontrolleuchte für fryer die Friteuse 190˚ Control lamp 170˚ The control lamp will light when the fryer is switched on and will switch off when the set temperature is achieved. The light will come on and off in line with the thermostat regulation of the temperature. Frying Make sure the heating element is positioned at the bottom.
Overheating protection Overheating protection during any overheating of the oil at the fryer will switch the inserted overheating protection off the friteuse. Customer service for the remedy of the disturbance contacts. Steel lid for the fryer When using the combi-grill as a fryer you can place the steel lid on top of the frying container, it will shorten the preheating time.
Maintenance and cleaning The heating elements and the oil will stay hot long time after the fryer has been shut off. Do never pour water into the hot oil as the water explosiverly will start boiling Taking off the panel You can take the panel off, which makes it easier to clean the surface. What to do: 1. Hold the panel as shown in the diagram 2. Lift the panel straight up 3. Clean the top surface as shown under “cleaning the steel surface” Beware of the two pegs, which are sharp 4.
Stainless steel surfaces Perform daily cleaning with a slightly damp cloth. For more severe soiling, use a liquid scouring cream. Always clean the steel in the direction of the steel finish. To ensure that the steel retains its shine, it is recommended that you use a polishing agent for stainless steel on a regular basis. Always polish in the direction of the steel finish (cross-wise). Never use steel wool, metal sponges or other abrasive cleaning agents.
Draining of the oil 1. Remove the safety shield from the drain cock. 2. Place a bowl under the drain cock. Make sure the bowl is large enough to hold the oil in the container. 3. Open the drain cock and let the oil run into the bowl. 4. Close the drain cock. Closed The frying container The drain cock must closed. 1. Remove the metal filter and wash it in warm soap water. 2. Pour warm water with washing-up liquid in the container. You can leave the heating element down when cleaning the container.
Technical date Element voltage 220 V Electrical connections 220 AV, 1 phase, neutral + earth Total power comsumption 1830 W This unit is labelled to indicate conformity with the lowvoltage directive ( 73/23/EEC ) and the EMC directive ( 89/336/EEC ).
Mounting The hob unit can be mounted in any type of kitchen with a table surface whose thickness is between 28 mm and 40 mm. Minmum distance to any shelf underneath shall be 245 mm + room enough for a bowl that can take at least 4 litres. Fixing Unscrew the fixing brackets just enough so they may be turmed. Fasten the brackets to the worktop with a screw driver. Cut-out measurements One rectangular hole is sawn out for the hob combination chosen.
Mounting of attachment fitting on the sides of the hob If the appliance is mounted in a 270 X 490 mm cutout, or if for other reasons there is no room for the side attachments, these should be removed before the appliance is set into the worktop. Set the appliance into the worktop and then raise it enough to expose the screws in the sides. Remove the screws. Mount the attachment fittings so that they interlock with the frame (See illustration).
The units externally measured length 145 mm: Cooker hood 290 mm: Two-burner ceramic-top electric hob Two-burner gas hob Grill Fryer Combi grill 580 mm: Four-zone ceramic-top electric hob Four-burner gas hob 725 mm: Four-zone ceramic-top electric hob 16
Electrical installation The electrical installation must only be made by a certified electrician. The electrical installation must be made according to prevailing regulations for heavy current installations and comply with local public regulations. No attempt must be made to tamper with the electrical parts of the unit. The hob is supplied with a 1,5 metre power cable without plug and is to be connected to an external relay with a contact separation off at least 3mm in each pole.
Before calling service Check to see whether a fuse has blown. Check to see whether the relay is switched off. by an alternative service organisation, approved by the distributor. Only spare parts delivered by the distributor may be used. Spare parts and service are the domain of our service network. If the problem is not with the fuse or relay, do not attempt to correct it yourself. Instead, contact our service network all repairs must be performed by our service personnel.
Tips on frying Select the desired temperature and wait for the fryer lamp to go out. The oil is now at the desired temperature. NB!! Remember that moist foodstuff should be dried before frying (ie. seafood, vegetables, fruit, fish). After frying the basket is lifted out and carefully shaken to remove excess oil (the basket may be hung on the fixing bracket in order to let the oil run off further). In the table the approximate times are given for frying, which may serve as a guide.
Foods Amount Temperature Time min. French fries, deep frozen French fries, deep frozen French fries, fresh 500 gr. 100 gr. 500 gr. Poato chips, fresh 500 gr Pooato croquettes, deep frozen 500 gr. 1/4 chicken Turkey steak Fish fingers, deep frozen Fillet of plaice, deep frozen Calamari rings, deep frozen Schnitzel Camenbert Parsley Dumplings Jam doughnuts Banana fritters Vegetable fritters 2*250 gr. 2*250 gr. 300 gr. 300 gr. 300 gr. 200 gr. 4 x ½ pkt 4 4 2 500 gr.
Food residue left in the oil must be removed before the fryer is used again because of fire risk! If you should want to use both the grill and the fryer, for instance to make a beef steak with french fries, the following method may be used: side and switch on the fryer. After a few minutes the oil is once again hot enough and the chips may be fried until they are crispy. Dinner is now ready to be served.. 1.
325 88-6041 Rev.