COMPETENCE 40036VI Elektro-Standherd Aufstell- und Gebrauchsanweisung
Sehr geehrte Kundin, sehr geehrter Kunde, lesen Sie bitte diese Gebrauchsanweisung sorgfältig durch und bewahren Sie sie zum späteren Nachschlagen auf. Geben Sie diese Gebrauchsanweisung an eventuelle Nachbesitzer des Gerätes weiter. 1 3 2 2 Folgende Symbole werden im Text verwendet: Sicherheitshinweise Warnung! Hinweise, die Ihrer persönlichen Sicherheit dienen. Achtung! Hinweise, die zur Vermeidung von Schäden am Gerät dienen.
Inhalt Gebrauchsanweisung. . . . . . . . . . . . . . . . . . . . . . . . . . . . . . . . . . . . . . . 5 Sicherheitshinweise . . . . . . . . . . . . . . . . . . . . . . . . . . . . . . . . . . . . . . . . . . . . . 5 Entsorgung . . . . . . . . . . . . . . . . . . . . . . . . . . . . . . . . . . . . . . . . . . . . . . . . . . . . 8 Gerätebeschreibung. . . . . . . . . . . . . . . . . . . . . . . . . . . . . . . . . . . . . . . . . . . . . Gesamtansicht . . . . . . . . . . . . . . . . . . . . . . . . .
Reinigung und Pflege . . . . . . . . . . . . . . . . . . . . . . . . . . . . . . . . . . . . . . . . . . . Gerät von außen . . . . . . . . . . . . . . . . . . . . . . . . . . . . . . . . . . . . . . . . . . . . . . . . Kochfeld . . . . . . . . . . . . . . . . . . . . . . . . . . . . . . . . . . . . . . . . . . . . . . . . . . . . . . . Rahmen des Kochfeldes. . . . . . . . . . . . . . . . . . . . . . . . . . . . . . . . . . . . . . . . . . . Backofeninnenraum. . . . . . . . . . . . . . . . . . . . . . . . .
Gebrauchsanweisung 1 Sicherheitshinweise 5 Dieses Gerät entspricht den folgenden EG-Richtlinien: – 73/23/EWG vom 19.02.1973 Niederspannungs-Richtlinie – 89/336/EWG vom 03.05.1989 EMV-Richtlinie einschließlich Änderungs-Richtlinie 92/31/EWG – 93/68/EWG vom 22.07.1993 CE-Kennzeichnungs-Richtlinie Elektrische Sicherheit • Das Gerät darf nur durch einen konzessionierten Fachmann angeschlossen werden. • Bei Störungen am Gerät oder Schäden an der Glaskeramik (Brüche, Sprünge bzw.
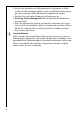
3 6 • Vorsicht bei Anschluss von Elektrogeräten an Steckdosen in Gerätenähe. Anschlussleitungen dürfen nicht an heiße Kochstellen gelangen oder unter der heißen Backofentür eingeklemmt werden. • Schalten Sie nach jedem Gebrauch die Kochzonen aus. • Warnung: Verbrennungsgefahr! Bei Betrieb wird der Backofeninnenraum heiß. • Wenn Sie alkoholische Zutaten im Backofen verwenden, kann eventuell ein leicht entzündliches Alkohol-Luftgemisch entstehen. Öffnen Sie die Tür in diesem Fall vorsichtig.
So vermeiden Sie Schäden am Gerät • Verwenden Sie das Kochfeld nicht als Arbeits- oder Abstellfläche. • Betreiben Sie die Kochzonen nicht mit leerem oder ohne Kochgeschirr. • Achten Sie darauf, dass keine säurehaltigen Flüssigkeiten, z. B. Essig, Zitrone oder kalklösende Mittel, auf den Rahmen des Kochfeldes gelangen, da sonst matte Stellen entstehen. • Spitze und harte Gegenstände, die auf die Kochfäche fallen, können sie beschädigen.
Entsorgung 2 2 1 8 Verpackungsmaterial Die Verpackungsmaterialien sind umweltverträglich und wiederverwertbar. Die Kunststoffteile sind gekennzeichnet, z. B. >PE<, >PS< etc. Entsorgen Sie die Verpackungsmaterialien entsprechend ihrer Kennzeichnung bei den kommunalen Entsorgungsstellen in den dafür vorgesehenen Sammelbehältern. Altgerät Entsorgen Sie Ihr ausgedientes Gerät nach den an Ihrem Wohnort gültigen Entsorgungsrichtlinien.
Gerätebeschreibung Gesamtansicht Bedienblende Türgriff Vollglastür Geschirrwagen 9
Bedienblende Betriebs-Kontrolllampe Temperatur-Kontrolllampe Temperatur-Wahl Backofen-Funktionen Kochstellen-Schalter Kochfeld Einkreis-Kochzone 1200W Zweikreis-Kochzone 2200W 10 Backofen-Dampfaustritt RestwärmeAnzeigen Bräterzone 2300W Einkreis-Kochzone 1200W
Ausstattung Backofen Oberhitze und Grillheizkörper Backofenbeleuchtung Einsatzebenen Fettfilter Rückwandheizkörper Ventilator Unterhitze Einschubgitter, herausnehmbar Zubehör Backofen Kombi-Rost Für Geschirr, Kuchenformen, Braten und Grillstücke Backblech Für Kuchen und Plätzchen Fettpfanne Für Braten bzw. als Auffangblech für Fett.
Vor dem ersten Gebrauch Erstes Reinigen 1 3 Bevor Sie das Gerät das erste Mal benutzen, sollten Sie es gründlich reinigen. Das Glaskeramik-Kochfeld feucht abwischen. Achtung: Benutzen Sie keine scharfen, scheuernden Reinigungsmittel! Die Oberfläche könnte beschädigt werden. Verwenden Sie bei Metallfronten handelsübliche Pflegemittel. 1. Schalter Backofen-Funktionen auf Beleuchtung stellen. 2. Alle Zubehörteile und Einschubgitter entnehmen und mit warmer Spülmittellauge reinigen. 3.
Bedienung des Kochfeldes 3 Beim Einschalten der Kochzone kann diese kurz summen. Das ist eine Eigenart aller Glaskeramikkochzonen und beeinträchtigt weder Funktion noch Lebensdauer des Gerätes. Kochstufen • In den Bereichen 1 - 9 können Sie die Kochstufen einstellen. • Zwischenstellungen sind in den Bereichen 2 - 7 möglich. 2 1 = kleinste Leistung 9 = höchste Leistung = Zuschaltung Zweikreis Schalten Sie die Kochzone ca. 5-10 Minuten vor dem Kochende aus, um die Restwärme zu nutzen.
Kochstufe einstellen 1. Kochstufe wählen. 2. Zur Beendigung des Kochvorgangs in die Aus-Position zurückdrehen. Zweikreis-/Bräter-Kochzone zuschalten 1 3 Der Schalter für die Zweikreis- oder Bräter-Kochzone wird nach rechts eingeschaltet und darf nicht über den Anschlag hinausgedreht werden! 1. Schalter für Zweikreis-/Bräter-Kochzone nach rechts drehen. Weiter drehen über Position 9 und einen leichten Widerstand hinaus auf das Symbol , bis zu einem deutlich spürbaren Anschlag. 2.
Bedienen des Backofens Backofen ein- und ausschalten Betriebs-Kontrolllampe Temperatur-Kontrolllampe Temperatur-Wahl Backofen-Funktionen 1. Drehen Sie den Schalter Backofen-Funktionen auf die gewünschte Funktion. 2. Drehen Sie den Schalter Temperatur-Wahl auf die gewünschte Temperatur. Die Betriebs-Kontrolllampe leuchtet, solange der Backofen in Betrieb ist. Die Temperatur-Kontrolllampe leuchtet, solange der Backofen aufheizt. 3.
Backofen-Funktionen Für den Backofen stehen Ihnen folgende Funktionen zur Verfügung: Backofen-Funktion 16 Heizelement/ Ventilator Anwendung Beleuchtung Mit dieser Funktion können Sie --den Backofeninnenraum, z. B. zum Reinigen, beleuchten. Heißluft Zum Backen auf bis zu zwei Ebe- Oberhitze, Unternen. hitze, Ventilator Die Backofentemperaturen 20-40 °C niedriger einstellen als bei Ober-/Unterhitze. Multi-Heißluft Zum Backen auf bis zu drei Ebe- Rückwandheiznen gleichzeitig.
Rost, Blech und Fettpfanne einsetzen Der Rost ist rechts und links mit zwei Führungsstäben ausgestattet, die immer nach unten weisen müssen. Rost einsetzen: Rost so einsetzen, dass die beiden Führungsstäbe nach unten zeigen. Auf den Backauszugschienen den Rost so einsetzen, dass die beiden Bohrungen in die Haltebolzen der Backauszugschienen greifen. Backblech, Fettpfanne einsetzen: Bleche so einsetzen, dass die Kippsicherung nach hinten weist.
Fettfilter einsetzen/herausnehmen Den Fettfilter nur beim Braten einsetzen, um den Rückwandheizkörper vor Fettspritzern zu schützen. Fettfilter einsetzen Fettfilter am Griff fassen und die beiden Halterungen von oben nach unten in die Öffnung an der Backofenrückwand (Ventilatoröffnung) einsetzen. Fettfilter herausnehmen Fettfilter am Griff fassen und nach oben aushängen.
Anwendung, Tabellen, Tipps Kochgeschirr • Gutes Kochgeschirr erkennen Sie am Topfboden. Der Boden sollte so dick und plan wie möglich sein. • Achten Sie beim Neukauf von Töpfen und Pfannen auf den BodenDurchmesser. Hersteller geben oft den oberen Durchmesser des Geschirrrandes an. • Geschirr mit Aluminium- oder Kupferböden kann metallische Verfärbungen auf der Glaskeramikfläche hinterlassen, die nur schwer oder gar nicht mehr zu entfernen sind.
Kochtabelle Die Angaben in folgender Tabelle sind Richtgrößen. Kochstufe Garvorgang 0 Nachwärme, Aus-Stellung nach Bedarf Abdecken Schmelzen Sauce hollandaise, Schmelzen von Butter, Schokolade, Gelatine 5-25 Min. Zwischendurch umrühren Stocken Schaumomelett, Eierstich 10-40 Min. Mit Deckel garen 2-3 Quellen Quellen von Reis und Milchgerichten Erhitzen von Fertiggerichten Mindestens doppelte Menge Flüssigkeit zum 25-50 Min.
Backen Backofen-Funktion: Heißluft Unterhitze , Multi-Heißluft oder Ober-/ Backformen • Für Ober-/Unterhitze eignen sich Formen aus dunklem Metall und beschichtete Formen. • Für Heißluft bzw. Multi-Heißluft sind auch helle Metallformen geeignet. Einsatzebenen • Backen mit Ober-/Unterhitze und Heißluft ist auf einer Ebene möglich. • Mit Multi-Heißluft können Sie auf bis zu 3 Backblechen gleichzeitig backen: 1 Backblech: z. B. Einsatzebene 3 1 Backform: z. B. Einsatzebene 1 2 Backbleche: z. B.
3 2 22 Allgemeine Hinweise • Blech mit der Abschrägung nach vorne einsetzen! • Sie können mit Ober-/Unterhitze oder Heißluft auch zwei Formen gleichzeitig nebeneinander auf dem Rost backen. Die Backzeit verlängert sich nur unwesentlich. Bei Verwendung von Tiefkühlkost können sich beim Garvorgang die eingesetzten Bleche verziehen. Dies ist auf den großen Temperaturunterschied zwischen Tiefgefrorenem und Backofentemperatur zurückzuführen. Nach dem Abkühlen der Bleche hebt sich die Verformung wieder auf.
Backtabelle Art des Gebäcks Backofenfunktion Einsatzebene Temperatur °C Zeit Std.: Min.
Art des Gebäcks Backofenfunktion Pizza (mit viel Belag)2 Ober-/Unterhitze Einsatzebene Temperatur °C Zeit Std.: Min.
Backen auf mehreren Einsatzebenen Heißluft Art des Gebäcks MultiHeißluft Einsatzebene von unten Temperatur ºC Zeit Std.: Min.
Tipps zum Backen Backergebnis Mögliche Ursache Abhilfe Der Kuchen ist unten zu hell Falsche Einschubhöhe Kuchen tiefer einschieben Der Kuchen fällt zusammen (wird klitschig, spundig, Wasserstreifen) Zu hohe Backtemperatur Backtemperatur etwas niedriger einstellen Zu kurze Backzeit Backzeit verlängern Backzeiten können nicht durch eine höhere Backtemperatur verkürzt werden Zu viel Flüssigkeit im Teig Weniger Flüssigkeit verwenden.
Tabelle Aufläufe und Überbackenes Gericht Backofen-Funktion Einsatz- Temperatur Zeit ebene °C Std.: Min.
Braten Backofen-Funktion: Ober-/Unterhitze oder Infrabraten Beim Braten Fettfilter einsetzen! Bratgeschirr • Zum Braten ist jedes hitzebeständige Geschirr geeignet (Herstellerangaben beachten!). • Große Braten können Sie direkt im Auffangblech oder auf dem Rost mit untergesetztem Auffangblech braten. • Alle mageren Fleischarten empfehlen wir im Bratentopf mit Deckel zu braten. So bleibt das Fleisch saftiger. • Alle Fleischarten, die eine Kruste bekommen sollen, können Sie im Bratentopf ohne Deckel braten.
Fleischart Menge Backofenfunktion Einsatzebene Temperatur °C Zeit Std.: Min.
Flächengrillen 1 3 Backofen-Funktion: Grill oder Großflächengrill maximaler Temperatureinstellung mit Achtung: Grillen immer bei geschlossener Backofentür. • Den leeren Backofen mit den Grill-Funktionen immer 5 Minuten vorheizen! • Zum Grillen Rost und Auffangblech gemeinsam benutzen. • Die Grillzeiten sind Richtwerte. • Grillen eignet sich besonders für flache Fleisch- und Fischstücke. Grilltabelle Grillgut Einsatzebene 1. Seite 2. Seite Frikadellen 4 8-10 Min. 6-8 Min.
Auftauen Backofen-Funktion: Auftauen (ohne Temperatureinstellung) • Ausgepackte Speisen auf einem Teller auf den Rost stellen. • Zum Abdecken keine Teller oder Schüsseln verwenden, da diese die Auftauzeit erheblich verlängern. • Zum Auftauen den Rost in die 1. Ebene von unten einsetzen. Auftautabelle Gericht Auftauzeit Min. Nachtauzeit Min.
Einkochen Backofen-Funktion: Unterhitze • Zum Einkochen nur handelsübliche Gläser gleicher Größe verwenden. • Gläser mit Twist-Off- oder Bajonettverschluss und Metalldosen sind ungeeignet. • Zum Einkochen die 1. Einsatzebene von unten verwenden. • Verwenden Sie zum Einkochen das Blech. Darauf haben bis zu sechs Gläser mit je einem Liter Inhalt Platz. • Die Gläser sollten alle gleich hoch gefüllt und zugeklammert sein. • Stellen Sie die Gläser so in das Backblech, dass sie sich gegenseitig nicht berühren.
Reinigung und Pflege 1 Warnung: Zur Reinigung muss das Gerät ausgeschaltet und abgekühlt sein. Warnung: Die Reinigung des Gerätes mit einem Dampfstrahl- oder Hochdruckreiniger ist aus Sicherheitsgründen verboten! Achtung: Verwenden Sie keine Scheuermittel, scharfen Reinigungsmittel oder scheuernden Gegenstände. Gerät von außen • Die Frontseite des Gerätes mit einem weichen Tuch und warmer Spüllauge abwischen. • Bei Metallfronten verwenden Sie handelsübliche Pflegemittel.
Festklebende Verschmutzungen 3 1. Zur Entfernung von übergekochten Speisen oder festgeklebten Spritzern einen Reinigungsschaber benutzen. 2. Den Reinigungsschaber schräg zur Glaskeramikfläche ansetzen. 3. Verschmutzungen mit gleitender Klinge entfernen. Reinigungsschaber und Glaskeramikreiniger erhalten Sie im Fachhandel. 1 Spezielle Verschmutzungen 1.
Backofeninnenraum 3 Reinigen Sie das Gerät nach jedem Gebrauch. Verschmutzungen lassen sich so am leichtesten entfernen und brennen erst gar nicht fest. 1. Zur Reinigung die Backofen-Beleuchtung einschalten. 2. Den Backofen nach jeder Benutzung mit Spülmittellauge auswischen und trocknen. 1 Hartnäckige Verschmutzungen mit speziellen Backofenreinigern entfernen.
Einschubgitter Zur Reinigung der Seitenwände lassen sich die Einschubgitter auf der linken und rechten Seite im Backofen abnehmen. Einschubgitter abnehmen Gitter zuerst vorne von der Backofenwand wegziehen und dann hinten aushängen. 1 1 36 Einschubgitter einsetzen Achten Sie beim Einbau der Gitter darauf, dass die Haltebolzen der Backauszugschienen nach vorne weisen! Zum Einbau Gitter zuerst hinten wieder einhängen und dann vorne anlegen und andrücken.
Backofenbeleuchtung 1 3 Warnung: Stromschlaggefahr! Vor dem Austausch der Backofenlampe: – Backofen ausschalten! – Sicherungen am Sicherungskasten herausdrehen bzw. ausschalten. Zum Schutz der Backofenlampe und der Glasabdeckung ein Tuch auf den Boden des Backofens legen. Backofenlampe austauschen/ Glasabdeckung reinigen 1. Glasabdeckung durch Drehen nach links abnehmen und reinigen. 2. Falls erforderlich: Backofen-Beleuchtung 25 Watt, 230 V, 300 °C, hitzebeständig, austauschen. 3.
Backofendecke Zur leichteren Reinigung der Backofendecke kann der obere Heizkörper abgeklappt werden. 1 Heizkörper abklappen Warnung: Heizkörper nur abklappen, wenn der Backofen ausgeschaltet ist und keine Verbrennungsgefahr mehr besteht! 1. Seitliche Einschubgitter abnehmen. 2. Den Heizkörper vorne anfassen und über die Prägung an der Backofeninnenwand hinaus nach vorne ziehen. 3. Der Heizkörper klappt nun nach unten.
Backofentür Zum Reinigen lässt sich die Backofentür Ihres Gerätes aushängen. Backofentür aushängen 1. Backofen-Tür vollständig öffnen. 2. Messingfarbenen Klemmhebel an beiden Türscharnieren ganz aufklappen. 3. Backofentür mit beiden Händen an den Seiten anfassen und über den Widerstand hinaus etwa 3/4 schließen. 4. Tür vom Backofen wegziehen (Vorsicht: Schwer!). 5. Tür mit der Außenseite nach unten auf eine weiche, ebene Unterlage ablegen, beispielsweise auf eine Decke, um Kratzer zu vermeiden.
Backofen-Türglas 1 1 Die Backofen-Tür ist mit zwei hintereinander angebrachten Glasscheiben ausgestattet. Die innere Scheibe ist zur Reinigung abnehmbar. Warnung: Führen Sie die folgenden Schritte grundsätzlich nur an der ausgehängten Backofen-Tür aus! Im eingehängten Zustand könnte die Tür beim Wegnehmen der Verglasung durch die Gewichtserleichterung hochschnellen und Sie gefährden. Achtung: Bei Gewalteinwirkung, vor allem auf die Kanten der Frontscheibe, kann das Glas brechen. Türglas ausbauen 1.
Geschirrwagen Der Geschirrwagen unterhalb des Backofens lässt sich zur leichteren Reinigung herausnehmen. Geschirrwagen herausnehmen / wieder einsetzen 1. Geschirrwagen so weit wie möglich aus dem Herd herausziehen. 2. Geschirrwagen etwas anheben, so dass er schräg nach oben aus der Wagenführung gehoben werden kann. 3. Beim Wiedereinsetzen darauf achten, dass die mittlere Führung des Geschirrwagens in die mittlere Führungsschiene einrastet. 4. Geschirrwagen in die Waagerechte absenken und einschieben.
Was tun, wenn ... Störung Mögliche Ursache Abhilfe Die Kochzonen funktionie- Die entsprechende Kochzo- Kochzone einschalten ren nicht ne ist nicht eingeschaltet Die Sicherung in der Haus- Sicherung überprüfen installation (Sicherungskasten) hat ausgelöst Der Backofen heizt nicht auf Der Backofen ist nicht ein- Backofen einschalten geschaltet Die erforderlichen Einstellungen sind nicht erfolgt Einstellungen nachprüfen Die Sicherung in der Haus- Sicherung überprüfen.
Aufstellanweisung 1 Achtung! Montage und Anschluss des neuen Gerätes dürfen nur durch einen konzessionierten Fachmann vorgenommen werden. Beachten Sie bitte diesen Hinweis, da sonst bei auftretenden Schäden der Garantieanspruch entfällt. Aufstellen • Bei den das Gerät umgebenden Möbeln müssen Furniere oder Kunststoffbeläge mit hitzebeständigem Kleber (100°C) verarbeitet sein. Sind Kunststoffbeläge oder Kleber nicht genügend temperaturbeständig, so kann sich der Belag verformen oder lösen.
1 Sicherheitshinweise für den Installateur • In der elektrischen Installation ist eine Einrichtung vorzusehen, die es ermöglicht, das Gerät mit einer Kontaktöffnungsweite von mind. 3 mm allpolig vom Netz zu trennen. Als geeignete Trennvorrichtungen gelten z. B. LS-Schalter, Sicherungen (Schraubsicherungen sind aus der Fassung herauszunehmen), FISchalter und Schütze. • Vermeiden Sie die Montage des Gerätes direkt neben Türen und unter Fenstern.
Service Wenn Sie einmal unsere Hilfe benötigen, erreichen Sie uns in Deutschland wie folgt: Bei Fragen zu Bedienung oder Einsatz Ihres Gerätes Wenden Sie sich an den AEG-Direct Info Service: Telefon: 0180 555 4 555 (0,12 Euro/Min)** Internet: www.aeg-hausgeraete.de Bei technischen Störungen Prüfen Sie bitte zunächst, ob Sie mit Hilfe der Gebrauchsanweisung (Kapitel „Was tun, wenn...“) das Problem selbst beheben können.
From the Electrolux Group. The world´s No.1 choice. Die Electrolux-Gruppe ist der weltweit größte Hersteller von gas- und strombetriebenen Geräten für die Küche, zum Reinigen und für Forst und Garten. Jedes Jahr verkauft die Electrolux-Gruppe in über 150 Ländern der Erde über 55 Millionen Produkte (Kühlschränke, Herde, Waschmaschinen, Staubsauger, Motorsägen und Rasenmäher) mit einem Wert von rund 14 Mrd. USD. AEG Hausgeräte GmbH Postfach 1036 D-90327 Nürnberg http://www.aeg.hausgeraete.