COMPETENCE 43005VD Liesi - Spis Käyttöohje - Bruksanvisning
Sisällys Innehåll Sisällys Turvallisuus………………………………… Liesi …………………………………. Pakkauksen purkaminen………… Varusteet ………………………… Turvavarusteet ……………………….. Kaatumiseste……………………….. Keittotason suoja (lisävaruste) …………………….. Luukun salpa………………………. Ennen lieden käyttöönottoa………….. Yleistä …………………….. Puhdista varusteet………………… Kellon asettaminen aikaan……... Polta uunin suojarasva………….… Toimintopaneeli………………………… Merkkivalolamput ………………… Keraaminen taso………………………..
Turvallisuus Turvallisuus Liedet kehittyvät ja uudessä liedessäsi on uusia toimintoja ja ominaisuuksia. Lue sen vuoksi ohjeet huolellisesti ja tutustu uuden lietesi käyttöön ja sen toimintoihin. Liesi on tarkoitettu normaaliin kotitalouskäyttöön. Säilytä käyttöohje myös mahdollista seuraavaa omistajaa varten. Ota yhteyttä, jos sinulla on kysyttävää lieden ominaisuuksista tai sen toiminnasta. Yhteydenottotiedot löydät kohdasta ”Huolto”.
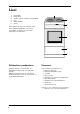
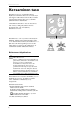
Liesi Liesi 1. 2. 3. 4. 5. 6. 1 Höyryaukko Lämpöalueet Toimintopaneeli, vääntimet ja näyttöikkuna Uuni Säilytyslaatikko Jalusta 2 3 Lieden takaosassa on pyörät, jotka helpottavat lieden siirtämistä puhdistuksen yhteydessä. Avaa luukku, nosta liettä varovasti uunin yläreunasta ja vedä liesi ulos. 4 5 6 Pakkauksen purkaminen Varusteet Tarkista, että liesi on virheetön. Ilmoita mahdollisista kuljetusvaurioista välittömästi myyjälle. Pakkaus on kierrätyskelpoinen.
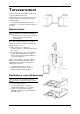
Turvavarusteet Turvavarusteet Varmista, että lieden molemmilla puolilla on 40 cm leveä laskutila (KATSO KUVA). Vaihtoehtoisesti liesi voidaan asentaa siten, että toisella puolella on seinä tai kaappi ja toisella puolella laskutila. Liesi täyttää lapsiturvallisuutta koskevat vaatimukset, jos seuraavat varusteet/toiminnot on asennettu: Kaatumiseste Huomioi liettä asennettaessa, että kaatumiseste on asennettava paikalleen.
Turvavarusteet Luukun salpa Luukun salvan eli lapsilukon ansiosta lasten on vaikeampi avata uunin luukkua. Avataksesi luukun, nosta salpaa samalla kun vedät luukkua itseäsi kohden. Salpa estää luukun avaamisen, mutta luukun ympärille ja ohjauspaneelin ja luukun väliin jää pienet raot, joihin etenkin pienet lapset voivat työntää sormensa ja polttaa itsensä.
Toimintopaneeli Polta uunin suojarasva Pidä lapsia silmällä! Uuni tulee erittäin kuumaksi. Ennen kuin käytät uunia ensimmäistä kertaa, se tulee kuumentaa tyhjänä. Toimi seuraavasti: 1. Valitse (ylä/alalämpö) ja korkein lämpötila. Uunin luukun pitää olla kiinni. 2. Tuuleta keittiö. Katkaise virta uunista, kun käry ja savuaminen on loppunut. 3. Puhdista uuni, luukku ja kannattimet lämpimällä vedellä ja käsitiskiaineella. Pyyhi kuivaksi.
Keraaminen taso Keraaminen taso Keraamisessa tasossa on neljä lämpöaluetta. Kytkiessäsi virran keittoalueeseen, se loistaa tietyn ajan riippuen valitsemastasi tehosta. Myös suurinta tehoa käytettäessä keittoalue syttyy ja sammuu ylikuumenemisen välttämiseksi. Jokaisella keittoalueella on oma varoitusvalonsa. Valo loistaa jos lämpötila ylittää noin 55°C riippumatta siitä, onko virta kytketty keittoalueeseen vai ei. Keraaminen taso on kova ja sileä.
Keraaminen taso Kuinka valita oikea teho? Ajan myötä opit valitsemaan sopivan vääntimen asennon valmistettavan ruoan, ruokamäärän ja keittoastian mukaan. Seuraavana muutamia ohjeita tehon valitsemiseksi: Keittäminen Voit käyttää korkeinta tehoa kiehauttamiseen ja sen jälkeen asettaa alemman tehon ruoan kypsentämiseen ja hauduttamiseen. Veden kiehumisääni ja vesikuplien koko auttavat valitsemaan oikean tehoalueen: MIETO TEHO: Melkein äänetön kiehuminen, hieman poreileva vesi.
Keraaminen taso Keittoastian valinta Liesi, jossa on keraaminen keittotaso, asettaa keittoastioille suurempia vaatimuksia kuin valurautalevyillä varustettu liesi. Seuraavat asiat ovat tärkeitä: • Tarkista keittoastian pohja. Kupera pohja pyörii keraamisella tasolla ja lämmön siirtyminen on huonoa. • Alumiinilla on hyvä lämmönjohtokyky, mutta saattaa jättää tasolle hopeanvärisiä tahroja. Tahrat poistetaan lieden mukana toimitetulla erikoispuhdistusaineella.
Keraaminen taso Keittotason puhdistaminen Estääksesi tason vahngoittumisen, poista heti, tason vielä ollessa kuuma, kaapimella tasolle ylikiehuneet runsaasti sokeria sisältävät keitokset (esim. marmeladi), samoin sulanut muovi ja folio. JOS TASO ON HYVIN LIKAINEN, MENETTELE SEURAAVASTI: 1. Poista tahrat yms. kaapimella (katso kuva). 2. Käytä lieden mukana toimitettua puhdistusainetta, kun keittoalueiden varoitusvalot ovat sammuneet.
Uuni Uuni Uunissa on irrotettavat uunikannattimet, joissa on neljä kannatintasoa. Uunin toiminnot Kaikissa toiminnoissa merkkivalo palaa kuumennusvaiheessa ja sammuu, kun haluttu lämpötila on saavutettu (syttyy ja sammuu, kun termostaatti kytkee ja katkaisee). Valitaksesi uunitoiminnon, käännä uunin toimintoväännintä myötäpäivään haluamasi toiminnon kohdalle (katso alla). UUNISSA ON SEURAAVAT TOIMINNOT: Valaistus Uunin valaistus syttyy automaattisesti aina, kun valitset toimintoja.
Uuni Kellon painikkeet PAINIKKEIDEN SYMBOLIT: Hälytysajastin Uunin toiminta-aika Päättymisaika Käsivalintainen käyttötila Vähennä Lisää SYMBOLIT NÄYTTÖIKKUNASSA: Automaattitoiminnon symboli – näkyy AUTO näyttöikkunassa, kun uuni on ohjelmoitu automaattitoiminnolle. Keittoastian symboli – näkyy, kun ohjelma on toiminnassa. Hälytysajastimen symboli Hälytysajastin Voit asettaa ajan 1 minuutin ja 23 tunnin 59 minuutin väliltä. 1. Paina painiketta . Näytössä näkyy 0:00.
Uuni 4. Asetetun toiminta-ajan kuluttua symboli sammuu ja "AUTO" vilkkuu, symboli äänimerkki kuuluu. 5. Paina painiketta kytkeäksesi äänimerkin pois toiminnasta ja asettaaksesi uunin käsivalintaiseen käyttötilaan. "AUTO" symboli symboli sammuvat. ja 6. NOLLAA VÄÄNTIMET. Uunin päättymisajan asetus Tällä toiminnolla asetat ajan, jolloin haluat uunin kytkeytyvän pois toiminnasta. Voit käyttää tätä toimintoa kun: • olet poissa hetken aikaa etkä halua ruoan kypsyvän liikaa.
Uuni Uunin toiminta-ajan sekä päättymisajan asetus Haluatko ruoan olevan valmiina, kun tulet kotiin? Aseta ruoka uuniin ja aseta PÄÄTTYMISAIKA ja aika, jonka haluat uunin olevan toiminnassa eli UUNIN TOIMINTA-AIKA. Uunin pisin toiminta-aika on 10 tuntia. TEE SEURAAVASTI: 1. Aseta valmistettava ruoka uuniin ja kytke uuni toimintaan kääntämällä uunin toimintoväännin ja lämpötilanvalitsin haluamasi toiminnon kohdalle. ja aseta haluamasi 2. Paina painiketta kypsennysaika (esim 35 min.) painikkeiden avulla.
Uuni Hyödyllisiä ohjeita Älä koskaan aseta alumiinifoliota, leivinpeltiä tai uunipannua suoraan uunin pohjalle. Mikäli uunin alalämmön siirtyminen estetään, uunin pohjan emali saattaa vaurioitua ylikuumenemisesta. Uuni kuumenee käytössä. PIDÄ LAPSIA SILMÄLLÄ. Pelti voi vääntyä lämpötilan vaihtumisen yhteydessä ja/tai jos se on täytetty epätasaisesti esimerkiksi pizzalla. Pelti palautuu jäähtyessään alkuperäiseen muotoonsa.
Uuni Paistaminen Uunissa paistaminen on vaivatonta ja kätevää sekä YLÄ-/ALALÄMMÖLLÄ että KIERTOILMALLA Naudanliha kuten paahto- ja sisäpaisti ovat maukkaimpia, jos ne valmistetaan 125ºC:een lämmössä, vaikka se viekin enemmän aikaa. Valitse uuninkestävä vuoka, johon liha juuri mahtuu, niin paistoliemi ei kuivu. Joulukinkusta valuu paistettaessa yleensä paljon nestettä. Käytä sen vuoksi suurta paistovatia tai uuniritilää ja sen alla uunipannua. Laita pannulle tilkka vettä, joka estää rasvan kiinnipalamisen.
Uuni Paistotaulukko Paistin sisälämpötila Porsaanliha Naudanliha Kana Hanhi Lammas Riista 75-80°C 70-80°C 80-85°C 85-90°C 75-80°C 70-75°C Annetut lämpötilat ovat suuntaa-antavia. POISKYTKEYTYMINEN Kun valittu lämpötila on saavutettu, kuuluu äänimerkki ja uuni kytkeytyy pois toiminnasta. 1. Paina mitä tahansa painiketta kytkeäksesi äänimerkin pois toiminnasta. 2. Irrota paistolämpömittari vastakkeesta ja ota paisti pois uunista. HUOM! Uuni ja paistolämpömittari ovat kuumia. 3.
Uuni Kiertoilmagrilli Tällä toiminnolla ruoka kypsyy nopeasti ja ruskistuu enemmän kuin tavallisella grillitoiminnolla. Grillivastus antaa ruoalle kauniin värin samalla kun puhallin kierrättää kuumaa ilmaa lämmittäen ruoan. Sopii mainiosti “korkeiden” ruokien, esim. joulukinkun kuorrutukseen, jonka pitää ruskistua joka puolelta.
Uuni Puhdistus ja huolto Puhdista uuni säännöllisesti. Rasva ja muut ruoantähteet saattavat aiheuttaa palonvaaran. Varmista ennen puhdistusta, että kaikki vääntimet ovat nolla-asennossa ja että laite on kunnolla jäähtynyt. Puhdistusaineet Tarkista, että käyttämäsi puhdistusaine soveltuu uuninpuhdistamiseen. ÄLÄ käytä valkaisuainetta sisältäviä puhdistusaineita, koska ne saattavat vahingoittaa pinnoitetta. Laitteen puhdistus höyrysuihkupuhdistimella on kielletty. Vältä hankausaineiden käyttöä.
Uuni Kiertoilmapuhallin Puhdista rasvasuodatin säännöllisesti. 1. Tarkista, että kaikki vääntimet ovat 0asennossa ja että uuni on jäähtynyt. 2. Irrota rasvasuodatin paikaltaan nostamalla sitä pidikkeestä ylöspäin. 3. Puhdista rasvasuodatin kuumalla vedellä ja käsitiskiaineella, voit myös pestä suodattimen astianpesukoneessa 65° pesuohjelmalla. 4. Aseta rasvasuodatin takaisin paikalleen uunin takaseinämässä olevaan aukkoon (kiertoilmapuhaltimen eteen). Uunivarusteet 1.
Uuni Grillivastus Uunin katon puhdistuksen helpottamiseksi grillivastusta voidaan taittaa alaspäin. Varoitus: Varmista, että kaikki vääntimet ovat nolla-asennossa ja että uuni on täysin jäähtynyt ennen työn aloittamista! Grillivastuksen taittaminen alaspäin 1. Poista uunikannattimet uunista. 2. Tartu kiinni grillivastuksen etuosasta ja irrota se kiinnittimistään vetämällä itseäsi kohden. 3. Kuumennusvastus kääntyy alaspäin.
Uuni Uunin luukku Uunin luukku voidaan irrottaa puhdistusta varten. Uunin luukun irrottaminen 1. Avaa uunin luukku kokonaan. 2. Käännä molemmissa saranoissa olevat lukitusvivut täysin auki (1). 3. Sulje luukku 3/4 verran vastuksesta huolimatta (2). 4. Tartu kiinni molemmin käsin luukun reunoista. Nosta luukkua ylöspäin (varo: painava!) ja vedä luukku pois uunista (3). Uunin luukun kiinnittäminen paikalleen 1. Tartu kiinni molemmin käsin luukun reunoista kahvapuolelta. 2. Pidä luukkua n. 60°:een kulmassa. 3.
Asennus Asennus Lieden asennuksen ja korjaukset saa suorittaa vain asennusoikeudet omaava huoltoliike tai henkilö. Liesi on painava. Reunat ja kulmat, joihin sinun ei yleensä tarvitse koskea, saattavat olla teräviä. KÄYTÄ KÄSINEITÄ liettä siirrettäessä. Tarkista ennen lieden asennusta, että sen mitat ovat keittiökalusteiden mukaiset. Mittaa työpöydän korkeus lattiasta tason yläreunaan ja jalustan syvyys seinästä jalustan reunaan (katso kuva).
Asennus 5. Muuttaaksesi lieden korkeutta, irrota ruuvi C (1 ruuvi) sokkelin takaa keskeltä. Irrota sivulta ruuvit D (4 ruuvia, KATSO KUVA). 6. Aseta sokkeli haluttuun korkeuteen, 90, 88 tai 85 cm (KATSO KUVA). 7. Kiinnitä ruuvit C ja D. Asennus vaakasuoraan Lieden on oltava vaakasuorassa, jotta esim. rasva leviäisi tasaisesti paistinpannun pohjalle. Tarkista vaakasuoruus asettamalla vesivaaka tai vedellä täytetty paistinpannu keraamiselle tasolle.
Huolto Huolto Lieden korjaukset saa suorittaa vain asennusoikeudet omaava huoltoliike tai henkilö. Puutteellisesti suoritettu työ saattaa heikentää lieden toimintaa ja aiheuttaa henkilö- ja/tai omaisuusvahinkoja. Joitakin yksinkertaisia toimenpiteitä saa ja voi itse tehdä, mikäli liesi ei toimi moitteettomasti, katso sivut 30 ja 31. Takuu Tuotteen takuuaika voidaan ilmoittaa erikseen. Ellei takuuaikaa ole erikseen määritelty, noudatetaan vallitsevaa lainsäädäntöä ja kansallisia määräyksiä.
Tekniset tiedot Tekniset tiedot Oikeudet muutoksiin pidätetään. Tämä laite täyttää EN:n asettamat määräykset 89/336/EEC ja 73/23/EEC IEC luokka:Y.
Taulukot Taulukot Leivontataulukko Kannatintaso alhaalta Lämpötila °C lukien Wienerleivät Pienet kakut 160-1801) 2 1) 170-190 1) 20-25 25-35 Kannatintaso alhaalta Lämpötila °C lukien 2/3/4 1/3 Aika, min.
Taulukot Paistaminen Kannatintaso alhaalta lukien °C Aika, min. Kannatintaso alhaalta lukien °C Aika, min. Broileri 2 195-205 60-70 2 170-190 45-50 Broilerin puolikas 3 195-205 30+30 - - - Paahtokylki 3 195-205 100-105 2 160-180 45-50 Grillaustaulukko Kannatintaso alhaalta lukien °C Kuorrutettu voileipä 3 Broilerin puolikas Paahtokylki Aika, min.
Neuvoja ja vinkkejä käytännön ongelmiin Neuvoja ja vinkkejä käytännön ongelmiin Ongelma Syy Toimenpiteet Ruoka-/vehnäleivät, pehmeät kakut eivät nouse. Jos uunin lämpötila on liian alhainen, leivonnainen nousee ensin ja sen jälkeen laskee ja jää litteäksi. Vertaa valittua lämpötilaa taulukon tai reseptin suosituksiin. Ruoka-/vehnäleipätaikina ei ole kohonnut oikein. Liian pitkä kohotus leivonnan jälkeen jättää leivonnaiset litteiksi.
Neuvoja ja vinkkejä Neuvoja ja vinkkejä Älä tee liedelle mitään, mikä voisi aiheuttaa henkilövahinkoja tai vaurioittaa tuotetta. Seuraavassa on lueteltu neuvoja ja vinkkejä, joilla saat itse yrittää ratkaista ongelmat. Mikäli vika ei korjaannu, ota yhteys valtuutettuun huoltoliikkeeseen. Ongelma Syy/Toimenpide Liesi ei saa virtaa Tarkista, että: • SULAKE/SULAKKEET ovat ehjät • mahd.
Säkerhet Säkerhet Utvecklingen av spisar går framåt. Du kan inte alltid använda din nya spis som den gamla. Läs därför noga igenom anvisningarna och bekanta dig med din nya spis och dess funktioner. Spisen är avsedd för normal hushållsanvändning. Tänk på att spara bruksanvisningen, som måste finnas om spisen säljs eller överlåts på annan person. Hör gärna av dig till oss om du har några synpunkter eller frågor om spisen och dess användning. Adress och telefonnummer finns under kapitel “Service”.
Spisen Spisen 1 1. Löstagbar imkåpa 2. Häll med värmezoner 3. Manöverpanel med vred och informationsfönstret 4. Ugn 5. Förvaringslåda 6. Sockel 2 3 Spisen har hjul baktill för att underlätta förflyttning vid städning. Öppna luckan, lyft försiktigt i överkant och dra sedan ut spisen. 4 5 6 Uppackning Tillbehören Kontrollera att spisen är felfri och utan skador. Transportskador anmäler du omedelbart till återförsäljaren – kontakta dem. Emballaget kan återvinnas.
Säkerhetsutrustningen Säkerhetsutrustningen Se till att det finns avställningsytor, minst 40 cm breda, på båda sidor om spisen (SE BILD). En av bänkarna kan ersättas av en vägg eller ett högskåp. Barnsäkerheten ökar om du dessutom ser till att följande är monterat/i funktion: Tippskyddet Vid installation av spisen måste även tippskyddet monteras. Tippskyddet måste vara monterat, för att hindra spisen från att tippa vid onormal belastning. Tippskyddet fungerar endast när spisen är inskjuten på plats.
Säkerhetsutrustningen Luckspärren Luckspärren gör det svårare för barn att öppna luckan. När du ska öppna luckan tryck ner spärren och dra ut luckan. Luckspärren hindrar öppningen av ugnsluckan. Det finns ändå smala utrymme omkring luckan samt mellan kontrollpanelen och luckan. Särskilt små barn kan sticka in fingrarna i dessa och få brännskador. Före första användning Rengöring av spisen Spisen rengör du enklast med hjälp av en ren trasa, varmt vatten och lite handdiskmedel direkt efter användning.
Manöverpanelen Bränn av ugnen Håll barn under uppsikt! Spisen blir mycket varm. Innan du använder ugnen för första gången, måste du bränna av den. Kontrollera, att ugnen är tom. Gör så här: 1. Sätt på över/undervärme samt maximal temperatur. Ugnsluckan skall vara stängd. 2. Vädra i köket. Stäng av ugnen när lukt och rökutveckling upphört. 3. Torka av ugn, lucka och stegar med varmt vatten och handdiskmedel. Torka torrt.
Glaskeramikhällen Glaskeramikhällen Glaskeramikhällen har fyra värmezoner. När du sätter på en zon lyser den i olika långa perioder beroende på vilket läge du valt på vredet. Även på den högsta inställningen slocknar zonen ibland, då för att förhindra överhettningen. Värmevarnaren har fyra lampor, en för varje zon. Lampan lyser om zonen är varmare än ca 55°C även efter att den är avstängd. Värmevarnaren lampor Keramiken i hällen tål värme, kyla och temperaturchocker, men är känsligt för slag.
Glaskeramikhällen Du får pröva dig fram till det läge och den värmezon som passar dig och dina kärl bäst beroende av vad du ska tillaga. Här följer en liten vägledning: Kokning Vanligtvis kokar du upp på högsta läget för att sedan vidarekoka på en lägre inställning. Ljudet eller storleken på “vattenbubblorna” kan hjälpa dig att välja rätt läge: Sjudande vatten. Lämpligt för vidarekokning av ris, fisk, samt grönsaker som t.ex. sockerärter och broccoli. SVAG VÄRME: MEDEL VÄRME: Småkokande vatten.
Glaskeramikhällen Val av kastrull/stekpanna En spis med glaskeramikhäll ställer store krav på dina kärl än en spis med plattor. Tänk på att: • Kontrollera kärlens bottnar. Kärl med konvex botten (buktar utåt), snurrar lätt på glaskeramikhällen och ger dålig värmekontakt. • Aluminium har god värmeledningsförmåga, men kan lämna silverliknande fläckar på hällen. Fläckar tar du bort med rengöringsmedel lämpligt för keramikhällar (medföljer inte spisen).
Glaskeramikhällen Rengöring av hällen Du måste genast (medan hällen ännu är het) med rakbladsskrapan ta bort socker och överkok med högt sockerinnehåll t.ex. marmelad, samt smält plast och folie för att inte skada hällen. GÖR SÅ HÄR OM HÄLLEN ÄR MYCKET SMUTSIG: 1. Ta bort fläckar med rakbladskrapan (se nedan). 2. Använd ett lämpligt rengöringsmedel för keramikhällar när värmevarnaren slocknat. Skaka flaskan och spruta ut ett par smala strängar på hällen. Gnid rent med en fuktig trasa eller hushållspapper.
Ugnen Ugnen Ugnen har löstagbara ugnsstegar med fyra falser. Vilken falsnivå som är lämplig att använda för olika funktioner och temperaturer, kan du se i tabellerna för bakning och matlagning i slutet av bruksanvisningen. Ugnens funktioner För samtliga funktioner gäller att den gula kontrollampan på manöverpanelen lyser under uppvärmning och slocknar vid uppnådd temperatur (tänds och släcks när termostaten slår till och från).
Ugnen Klockans knappar KNAPPARNAS SYMBOLER: Signalur Ugnstid Sluttid Manuell funktion MINUS för tid och temperatur PLUS för tid och temperatur SYMBOLER I INFORMATIONSFÖNSTRET: AUTO Auto-symbol – visas när ugnen har programmerat för automatik funktion. Kokkärlssymbol – visas när programmet är i gång. Signalursymbol Signaluret Du kan med hjälp av signaluret ställa in tid från 1 minut upp till 23 tim och 59 min. 1. Tryck på . Tiden visas 0:00.
Ugnen 4. När inställd ugnstid är uppnådd blinkar släcks och en symbolen "AUTO" , symbolen signal hörs. 5. Tryck på för att stänga av signalen och för att sätta ugnen till manuell funktion. släcks. Symbolerna "AUTO" och 6. NOLLSTÄLL VREDEN. Sluttid Här ställer du in den tid du vill att ugnen ska stängas av. Denna är en bra funktion om du: • behöver gå ifrån en stund och är rädd att maten/baket ska förstöras under tiden. • vill utnyttja eftervärmen och spara energi.
Ugnen Ugnstid och sluttid Vill du att maten ska vara färdig när du kommer hem? Sätt då in maten i ugnen och stall in SLUTTIDEN plus den tid du vill att ugnen ska vara på, dvs. UGNSTIDEN. Maximal ungstid är 10 timmar. GÖR SÅ HÄR: 1. Placera den mat som ska tillagas i ugnen och sätt på ugnen genom att vrida funktionsvredet och termostatvredet till önskade lägen. 2. Tryck på och stall in önskad tillagninstid (t.ex 35 min) med hjälp av och . Symbolen "AUTO" syns i informationsfönstret. 3.
Ugnen Praktisk användning Placera aldrig aluminiumfolie, långpanna eller plåt direkt på ungsbotten. Hindras undervärmen kan emaljen skadas på grund av överhettning. Ugnen blir varm under användning, HÅLL BARN UNDER UPPSIKT. Vid temperaturväxlingar och/eller ojämn placering av t.ex. pizza på en plåt finns det risk att den slår sig (blir skev). Plåten återgår till sin ursprungliga form när den kallnar.
Ugnen Stekning Att steak i ugn är bekvämt och praktiskt bade i ÖVER/UNDERVÄRME och VARMLUFT. Stekar av nötkött, som rostbiff och innanlår, blir saftigast om det tillagas i 125ºC, men tar lite längre tid än vid högre ugnstemperatur. Välj en ugnsäker form med låg kant där steken précis får plats, så undviker du att skyn torkar in. Vid ugnsbakning av julskinka bildas det ofta mycket spad. Använd därför ett stort stekfat eller ugnsgallret och därunder en långpanna.
Ugnen Stekning tabell Gris Nöt Kyckling Gås Lamm Vilt Inre temperatur 75-80°C 70-80°C 80-85°C 85-90°C 75-80°C 70-75°C Temperaturer ovan är riktgivande. När önskad temperatur i köttet är uppnådd ljuder en signal och ugnen stängs av. 1. Tryck knappen vad som hälst för att stänga av signalen. 2. Lossa stektermometern från uttaget i ugnen och ta ut steken. OBS! Ugn och stektermometer är varma. 3. Sätt tillbaka täckknappen när ugnen svalnat. Ugnen fungerar igen först när stektermometern är borttagen.
Ugnen Pizza funktion Bottenelementet tillger direkt värme för pizzabotten, piråger och paj. Medan fläkten forsäkrar luftens cirkulation och stekning av fyllningen. För bästa resultat, använd de lägre falserna. Snabbstart (Gratinering) Utmärkt vid färgsättning av gratänger och varma smörgåsar. Den här funktionen kan du även använda för snabbuppvärmning av ugnen till inställd temperatur. När ugnen kommit upp i den valda temperaturen väljer du önskad funktion.
Ugnen GÖR SÅ HÄR OM UGNEN ÄR MYCKET SMUTSIG: 1. Spill eller överkok som sitter fast, lossar du men t.ex. en stekspade. 2. Stryk med en svamp ut såpa i ugnen. 3. Stäng luckan. Sätt ugnen på 100°C och över/undervärme i ca 10 minuter. 4. När ugnen svalnat tvättas den med rent vatten, ev. kan du behöva gnida försiktigt med tvålull. Torka torrt. Varmluftsfläkten Rengör fläkten regelbunden. 1. Nollställ samtliga vred före rengöring. Kontrollera, att ugnen är svalnat innan du börjar. 2.
Ugnen Grillelement För enklare rengöring av ugnens innertak är ugnen utrustad med ett fällbart grillelement. Varning: Nollställ samtliga vred före rengöring. Kontrollera, att ugnen har svalnat innan du börjar. Fäll ned grillelement 1. Ta ut ugnstegarna från ugnen. 2. Ta tag i grillelementets främre del och drag ut det från fästen mot dig. 3. Fäll ned element. Viktig: Pressa inte grillelement för kraftigt nedåt! Grillelement kan skadas. Sätt tillbaks grillelement 1. Lyft upp elementet försiktigt. 2.
Ugnen Ugnslucka Det går att ta bort ugnluckan för att kunna rengöra den. Demontering av ugnsluckan 1. Öppna ugnsluckan helt och hållet. 2. Fäll upp spärren på båda gångjärnen (1) helt och hållet. 3. Stäng ugnsluckan till ungefär ¾, alltså förbi motståndet (2). 4. Ta tag i luckan med båda händerna på sidorna. Dra luckan ut (varning: den är tung!) från ugnen (3). Montering av ugnsluckan 1. Ta tag i luckan med båda händerna från hantagssidan sett. 2. Håll luckan i cirka 60° vinkel. 3.
Installation Installation Ingrepp i spisen ska utföras av BEHÖRIG FACKMAN. Spisen är tung. Kanter och horn, som du vanligtvis inte kommer i kontakt med, kan vara vassa. ANVÄND HANDSKAR vid förflytting av spisen. Stämmer spisens mått överens med övrig köksinredning? Mät arbersbänkens höjd från golvet till bänkens ovansida och sockeldjupet från väggen till sockelns framkant (SE BILD).
Installation 5. För att ändra spisens höjden, skruva ur skruven C (1 skruv) sockelns bak mitten. Skruva ur skruvar D (4 skruvar, SE BILD). 6. Haka fast sockeln till önskad höjd, 90, 88 or 85 cm (SE BILD). 7. Skruva åter skruvarna C och D. Nivåjustering Spisen måste stå plant för att t.ex. fettet ska fördelar sig jämnt i stekpannan. Om du vill kontrollera att spisen står plant placerar du ett vattenpass på hällramen, först på ramens vänstra eller högra sida därefter på dess framsida.
Service Konsumentköp EHL Reklamation Vid försäljning till konsument i Sverige gäller den svenska konsumentlagstiftningen. Kom ihåg att spara kvittot för eventuell reklamation. Konsumentkontakt Har du frågor angående produktens funktion eller användning ber vi dig att kontakta vår konsumentkontakt på tel. 0771-11 44 77 eller via e-mail på vår hemsida www.aeg-hem.
Tekniska uppgifter Tekniska uppgifter Med reservation för ändringar. Denna apparat uppfyller kraven i EGdirektiv 89/336/EEC och 73/23/EEC IEC klass:Y.
Tabeller Tabeller Bakning Ställning på falsen Temperatur °C Wienerbröd 3 160-1801) 20-25 Småa kakor 2 170-1901) 25-35 Längder/kranser 2 215-235 1) Tårtbotten 2 170-1901) Tid min.
Tabeller Matlagnings Tabell Ställning på falsen °C Tid min. Ställning på falsen °C Tid min. Kyckling 2 195-205 60-70 2 170-190 45-50 Kyckling, halvor 3 195-205 30+30 - - - Revbensspjäll 3 195-205 100-105 2 160-180 45-50 Grillning Tabell Ställning på falsen °C Tid min. Ställning på falsen °C Tid min.
Praktiska råd och tips Praktiska råd och tips Problem Orsak Åtgärd Mat/vetebröd, mjuka kakor blir platta. För låg temperatur i ugnen gör att bakverket jäser upp och sedan sjunker ner och blir platt. Kontrollera inställd temperatur mot recommendation i tabell eller recept. Mat/vetebrödsdegar har inte jäst rätt. För lång jäsning efter utbakning ger ett platt resultat. Mat/vetebrödsdegar ska jäsa dragfritt i rumstemperatur. Vid ett lätt tryck på degen ska fördjupningen gå tillbaka.
Problem och åtgärder Problem och åtgärder Gör aldrig ingrepp i spisen som kan skada person eller produkt. Här nedan får du förslag på vad du själv får och kan göra vid problem. Om du behöver hjälp – kontakta service. Problem Orsak/Åtgärd Spisen får ingen ström Kontrollera följande: • att SÄKRINGEN/SÄKRINGARNA är hel/hela • att ev. STICKPROPP är ordentligt insatt Det tar lång tid att koka/steka Kontrollera att du valt ett lämpligt kärl med god värmeledningsförmåga (se s.
Rev.: 2004.10.19 60 Electrolux-konserni on maailman suurin keittiö-, siivous- ja puutarhakoneiden valmistaja. Electroluxin tuotteita myydään yli 150 maassa ympäri maailmaa vuosittain yli 55 miljoonaa kappaletta (mm. jääkaappeja, liesiä, pesukoneita, polynimureita, moottorisahoja sekä ruohonleikkureita) n. 14 miljardin dollarin arvosta. Electrolux-koncernen är världens största tillverkare av hushållsmaskiner och utrustning för kök, rengöring samt skogs- och trädgårdskötsel.