49176V-MN USER MANUAL EN User Manual Cooker
www.aeg.com CONTENTS 1. SAFETY INFORMATION............................................................................................. 2 2. SAFETY INSTRUCTIONS.............................................................................................5 3. PRODUCT DESCRIPTION...........................................................................................8 4. BEFORE FIRST USE..................................................................................................... 9 5.
ENGLISH 3 manufacturer is not responsible for any injuries or damages that are the result of incorrect installation or usage. Always keep the instructions in a safe and accessible location for future reference. 1.1 Children and vulnerable people safety WARNING! Risk of suffocation, injury or permanent disability.
www.aeg.com • • • • • • • • • • • • • • • Do not install the appliance behind a decorative door in order to avoid overheating. Do not install the appliance on a platform. Do not operate the appliance by means of an external timer or separate remote-control system. WARNING: Unattended cooking on a hob with fat or oil can be dangerous and may result in fire. NEVER try to extinguish a fire with water, but switch off the appliance and then cover flame e.g. with a lid or a fire blanket.
ENGLISH • • • • • 5 If the mains power supply cable is damaged, it must be replaced by the manufacturer, its Authorised Service Centre or similarly qualified persons to avoid an electrical hazard. Use only the food sensor (core temperature sensor) recommended for this appliance. To remove the shelf supports first pull the front of the shelf support and then the rear end away from the side walls. Install the shelf supports in the opposite sequence.
www.aeg.com • • • • • • • • • • electrical ratings of the mains power supply. Always use a correctly installed shockproof socket. Do not use multi-plug adapters and extension cables. Do not let mains cables touch or come near the appliance door, especially when the door is hot. The shock protection of live and insulated parts must be fastened in such a way that it cannot be removed without tools. Connect the mains plug to the mains socket only at the end of the installation.
ENGLISH • Do not activate the cooking zones with empty cookware or without cookware. • Do not put aluminium foil on the appliance or directly on the bottom of the appliance. • Cookware made of cast iron, aluminium or with a damaged bottom can cause scratches. Always lift these objects up when you have to move them on the cooking surface. • This appliance is for cooking purposes only. It must not be used for other purposes, for example room heating. 2.
www.aeg.com 3. PRODUCT DESCRIPTION 3.1 General overview 8 1 2 3 4 5 3 2 1 3 4 5 4 3 2 6 Control panel and hob Air vents for the cooling fan Heating element Lamp Shelf support, removable Socket for the core temperature sensor 7 Fan 8 Shelf positions 1 2 3 4 5 6 5 1 7 3.
ENGLISH 9 4. BEFORE FIRST USE WARNING! Refer to Safety chapters. 4.1 Initial Cleaning Remove all accessories and removable shelf supports from the appliance. Refer to "Care and cleaning" chapter. Clean the appliance and the accessories before first use. Put the accessories and the removable shelf supports back to their initial position. 4.2 Using the sensor fields To activate a function touch and hold the selected symbol on the display for minimum 1 second. 4.
www.aeg.com 5.1 Hob control panel 1 2 3 4 5 12 6 7 11 10 8 9 Use the sensor fields to operate the appliance. The displays, indicators and sounds tell which functions operate. Sensor Function field Comment 1 ON / OFF 2 Lock / The Child Safety De- To lock / unlock the control panel. vice 3 STOP+GO To activate and deactivate the function. 4 - To activate and deactivate the outer ring. - Heat setting display To show the heat setting.
ENGLISH Display 11 Description STOP+GO function operates. Automatic Heat Up function operates. + digit There is a malfunction. / OptiHeat Control (3 step Residual heat indicator): continue cooking / keep warm / residual heat. / Lock / The Child Safety Device function operates. Automatic Switch Off function operates. 5.3 OptiHeat Control (3 step Residual heat indicator) Heat setting WARNING! / / There is a risk of burns from residual heat. The indicator shows the level of the residual heat. 5.
www.aeg.com To activate the outer ring: touch the sensor field. The indicator comes on. cooking zone starts to flash slowly the time counts down. To activate more outer rings: touch the same sensor field again. The subsequent indicator comes on. To see the remaining time: set the To deactivate the outer ring: touch the sensor field until the indicator goes out. When you activate the zone but do not activate the outer ring the light that comes out from the zone may cover the outer ring.
ENGLISH To activate the function: touch . To deactivate the function: activate the Touch or of the timer to set the time. When the time comes to an end, the sound operates and 00 flashes. hob with To stop the sound: touch To override the function for only one . This function sets all cooking zones that operate to the lowest heat setting. When the function operates, you cannot change the heat setting. The function does not stop the timer functions. . To deactivate the function: touch .
www.aeg.com 6. HOB - HINTS AND TIPS WARNING! Refer to Safety chapters. 6.2 Examples of cooking applications The data in the table is for guidance only. 6.1 Cookware The bottom of the cookware must be as thick and flat as possible. Cookware made of enamelled steel and with aluminium or copper bottoms can cause the colour change on the glassceramic surface. Heat setting Use to: Time (min) Hints Keep cooked food warm. as necessary Put a lid on the cookware.
ENGLISH 15 7. HOB - CARE AND CLEANING If not, the dirt can cause damage to the hob. Take care to avoid burns. Put the special scraper on the glass surface at an acute angle and move the blade on the surface. • Remove when the hob is sufficiently cool: limescale rings, water rings, fat stains, shiny metallic discoloration. Clean the hob with a moist cloth and non-abrasive detergent. After cleaning, wipe the hob dry with a soft cloth.
www.aeg.com Sensor field Function Comment 5 Core temperature sensor To activate the Core temperature sensor function. 6 Return / Clock function selection To go back one level in the menu. To set the clock functions. Increase / Decrease To set the time and temperature value. 7 / 8.2 Indicators on the display A B C D E F G H 8 Name Description A Top / Main oven indicator Shows which oven operates. B Oven function indicator Shows the function which is active.
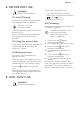
ENGLISH 17 8.3 Top oven functions Symbol Oven function Application Conventional Cooking To bake and roast food on one shelf position. Browning To roast larger meat joints or poultry with bones on one shelf position. Also to make gratins and to brown. Bottom Heat To bake cakes with crispy bottom and to preserve food. Dual Grill To grill flat food in large quantities and to toast bread. Oven Lamp To activate the lamp without a cooking function. 8.
www.aeg.com Symbol Oven function Application Defrost This function can be used for defrosting frozen foods, such as vegetables and fruits. The defrosting time depends on the amount and size of the frozen food. Oven Lamp To activate the lamp without a cooking function. 8.5 Activating and deactivating 1. Press 8.10 Residual heat indicator to activate the oven. 2. Repeatedly press or main oven. to select the top 8.
ENGLISH CAUTION! Only use the core temperature sensor supplied with the appliance, or genuine replacement parts. 1. Put the point of the core temperature sensor into the centre of the meat. Make sure that the core temperature sensor stays in the meat and in the socket during the cooking. 2. Put the plug of the core temperature sensor into the socket on the side of the appliance. 19 temperature again and again. The display constantly shows the new approximate end time. 7.
www.aeg.com • All accessories have small indentations at the top of the right and left side to increase safety. The indentations are also antitip devices. • The high rim around the shelf is a device which prevents cookware from slipping. 2. Put the deep pan into the oven on the necessary shelf position. You can use the trivet to grill flat dishes in large quantities and to toast. 1. Put the trivet into the deep pan so that the supports of the wire shelf point down. 8.
ENGLISH Clock function 21 Application MINUTE MINDER To set countdown time. This function has no effect on the operation of the appliance. You can set the MINUTE MINDER at any time, also when the appliance is off. 9.2 Setting the clock functions With the Duration For Duration and End set the oven function and temperature. This is not necessary for the Minute Minder Refer to "Setting an oven function". and the End , the oven deactivates automatically. . 1.
www.aeg.com before. Adapt your usual settings such as temperature, cooking time and shelf position to the values in the tables. • Use the lower temperature the first time. • If you cannot find the settings for a special recipe, look for the similar one. • You can extend baking times by 10 – 15 minutes if you bake cakes on more than one shelf position. • Cakes and pastries at different heights do not always brown equally at first. If this occurs, do not change the temperature setting.
ENGLISH 10.
www.aeg.com Food Temperature (°C) Time (min) Shelf position Souffles 170 - 180 20 - 30 2 Vegetables: Baked Jacket Pota- 180 - 190 tos 60 - 90 2 Vegetables: Roast Potatos 180 - 190 60 - 90 2 Yorkshire Pudding Large 220 - 210 25 - 40 2 Yorkshire Pudding Individual 210 - 220 15 - 25 2 Roasting Meat, Poultry Refer to the Roasting table. 10.
ENGLISH Food Temperature (°C) Time (min) Shelf position Quiches / Flans 200 - 210 25 - 45 3 Scones 220 - 230 8 - 12 3 Roasting: Meat, Poultry 170 - 190 Refer to the Roast- 3 ing table. 10.7 Thermaflow® Baking Main Oven 25 - Shelf positions are not critical but ensure that the oven accessories are evenly spaced when more than one is used.
www.aeg.com Food Temperature (°C) Time (min) Shelf position Quiches / Flans 170 - 180 25 - 45 3 Scones 210 - 230 8 - 12 1–3 Roasting: Meat, Poultry 160 - 180 Refer to the Roasting table. 2 10.8 Pizza Setting Food Temperature (°C) Time (min) Shelf position Apple Pie 160 - 180 50 - 60 2 Plate Tart 180 - 200 25 - 50 2 Pizza, frozen Follow manufacturer`s instructions 3 Pizza, home made 200 - 230 15 - 25 2 Quiches / Tarts 180 - 200 30 - 50 2 10.
ENGLISH 27 Food Temperature (°C) Time (min) Chicken 180 - 200 20 - 25 minutes per 0.5 kg (1 lb) and 20 minutes over Turkey / Goose 170 - 190 15 - 20 minutes per 0.5 kg (1 lb) up to 3.5 kg (7 lb) then 10 minutes per 0.5 kg (1 lb) over 3.5 kg (7 lb) Duck 180 - 200 25 - 35 minutes per 0.5 kg (1 lb) and 25 - 30 minutes over Pheasant 170 - 190 35 - 40 minutes per 0.5 kg (1 lb) and 35 - 40 minutes over Rabbit 170 - 190 20 minutes per 0.5 kg (1 lb) and 20 minutes over 10.
www.aeg.com Food Time (min) Shelf position Steaks: Well Done 12 - 15 3 Toasted Sandwiches 3-4 3 10.
ENGLISH 29 10.
www.aeg.com 3. Set oven function Low temperature cooking, change the temperature, if Food Quantity necessary, and cook until done (see the table). Temperature Preheating time (min) Shelf po(°C) sition Rare Medium Roast beef (well done) 800 - 1000 g 150 90 - 110 130 - 140 2 Roast beef (well done) 1200 - 1600 g 150 120 - 130 160 - 170 2 Rib of beef 600 - 1000 g 150 55 - 75 95 - 110 3 Shoulder of beef, boneless 3.
ENGLISH Food Quantity Defrosting time (min) Further de- Comments frosting time (min) Cream 2 x 200 g 80 - 100 10 - 15 Whip the cream when still slightly frozen in places. Cake 1.4 kg 60 60 - 31 11. OVEN - CARE AND CLEANING WARNING! Refer to Safety chapters. 11.1 Notes on cleaning • Clean the front of the appliance with a soft cloth with warm water and a cleaning agent. • To clean metal surfaces, use a dedicated cleaning agent. • Clean the appliance interior after each use.
www.aeg.com 3. Set the oven temperature to 250 °C and let the oven operate for 1 hour. 4. When the appliance is cool, clean it with a soft and moist sponge. 11.5 Removing and cleaning the door glasses - top oven The door glass in your product can be different in type and shape from the examples you see in the image. The number of glasses can also be different. 11.4 Removing the shelf supports To clean the oven, remove the shelf supports. 1. Pull the front of the shelf support away from the side wall.
ENGLISH 33 WARNING! Danger of electrocution! Disconnect the fuse before you replace the lamp. The lamp and the lamp glass cover can be hot. A 1. Deactivate the appliance. 2. Remove the fuses from the fuse box or deactivate the circuit breaker. 2 1 The back lamp The lamp glass cover is at the back of the cavity. 2. Pull up the trim. 3. Remove the glass panels. To replace the glass panels, do the same steps in reverse. Before you lower the trim, attach the A trim part to the door. Refer to the image.
www.aeg.com Problem Possible cause Remedy You cannot activate or oper- You touched 2 or more senate the hob. sor fields at the same time. Touch only one sensor field. You cannot activate or oper- STOP+GO function operate the hob. ates. Refer to "Hob - Daily use" chapter. You cannot activate or oper- There is water or fat stains ate the hob. on the control panel. Clean the control panel. An acoustic signal sounds You put something on one and the hob deactivates. or more sensor fields.
ENGLISH Problem Possible cause 35 Remedy The core temperature sensor The plug of the core temPut the plug of the core temdoes not operate. perature sensor is not corperature sensor as far as rectly installed into the sock- possible into the socket. et. It takes too long to cook the dishes or they cook too quickly. The temperature is too low or too high. Adjust the temperature if necessary. Follow the advice in the user manual.
www.aeg.com WARNING! The power cable must not touch the part of the appliance shaded in the illustration. A Minimum distances Dimension mm A 685 13.5 Covering terminal board 13.3 Levelling of the appliance Use small feet on the bottom of appliance to set the appliance top surface level with other surfaces. 13.4 Electrical installation WARNING! The manufacturer is not responsible if you do not follow the safety precautions from Safety chapters.
ENGLISH L L N N 37 N 14. ENERGY EFFICIENCY 14.1 Product information for hob according to EU 66/2014 Model identification 49176V-MN Type of hob Hob inside Freestanding Cooker Number of cooking zones 4 Heating technology Radiant Heater Diameter of circular cooking zones (Ø) Left front Left rear Right front Right rear 21.0 cm 14.5 cm 18.0 cm 18.0 cm Energy consumption per cooking zone (EC electric cooking) Left front Left rear Right front Right rear 174.9 Wh/kg 189.4 Wh/kg 179.7 Wh/kg 189.
www.aeg.com Energy Efficiency Index Top oven: 105.6 Main oven: 104.7 Energy efficiency class Top oven: A Main oven: A Energy consumption with a standard load, conventional mode Top oven: 0.75 kWh/cycle Main oven: 0.99 kWh/cycle Energy consumption with a standard load, fan-forced Top oven: not applicable mode Main oven: 0.89 kWh/cycle Number of cavities 2 Heat source Electricity Volume Top oven: 39 l Main oven: 72 l Type of oven Oven inside Freestanding Cooker Mass 60.
ENGLISH appliances. Do not dispose appliances marked with the symbol with the household waste. Return the product to * your local recycling facility or contact your municipal office.
867337284-A-212017 www.aeg.