EN User Manual Steam oven BE500472J
www.aeg.com CONTENTS 1. SAFETY INFORMATION.................................................................................................3 2. SAFETY INSTRUCTIONS................................................................................................ 4 3. PRODUCT DESCRIPTION.............................................................................................. 6 4. BEFORE FIRST USE.........................................................................................................
ENGLISH 1. 3 SAFETY INFORMATION Before the installation and use of the appliance, carefully read the supplied instructions. The manufacturer is not responsible if an incorrect installation and use causes injuries and damages. Always keep the instructions with the appliance for future reference. 1.
www.aeg.com • • • • • • Ensure that the appliance is switched off before replacing the lamp to avoid the possibility of electric shock. Do not use a steam cleaner to clean the appliance. Do not use harsh abrasive cleaners or sharp metal scrapers to clean the glass door since they can scratch the surface, which may result in shattering of the glass.
ENGLISH • Connect the mains plug to the mains socket only at the end of the installation. Make sure that there is access to the mains plug after the installation. • If the mains socket is loose, do not connect the mains plug. • Do not pull the mains cable to disconnect the appliance. Always pull the mains plug. • Use only correct isolation devices: line protecting cut-outs, fuses (screw type fuses removed from the holder), earth leakage trips and contactors.
www.aeg.com • Before maintenance, deactivate the appliance and disconnect the mains plug from the mains socket. • Make sure the appliance is cold. There is the risk that the glass panels can break. • Replace immediately the door glass panels when they are damaged. Contact the Service. • Be careful when you remove the door from the appliance. The door is heavy! • Clean regularly the appliance to prevent the deterioration of the surface material. • Remaining fat or food in the appliance can cause fire.
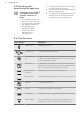
ENGLISH 3.2 Accessories • Wire shelf For cookware, cake tins, roasts. • Baking tray For cakes and biscuits. • Grill- / Roasting pan 7 To bake and roast or as pan to collect fat. • Core temperature sensor To measure how far the food is cooked. 4. BEFORE FIRST USE WARNING! Refer to Safety chapters. 4.1 Initial Cleaning Remove all accessories and removable shelf supports from the appliance. Refer to "Care and cleaning" chapter. Clean the appliance before first use.
www.aeg.com 5.2 Activating and deactivating the appliance It depends on the model if your appliance has knob symbols, indicators or lamps: • The indicator comes on when the oven heats up. • The lamp comes on when the appliance operates. • The symbol shows whether the knob controls the oven functions or the temperature. 1. Turn the knob for the oven functions to select an oven function. 2. Turn the knob for the temperature to select a temperature. 3.
ENGLISH Oven function 9 Application True Fan + Steam To steam dishes. Use this function to decrease the length of the cooking time and to preserve the vitamins and nutrients in the food. Select the function and set the temperature between 130 °C to 230 °C. 5.4 Fast heat up function The fast heat up function decreases the heat up time. 1. Set the fast heat up function. Refer to the Oven functions table. 2. Turn the knob for the temperature to set the temperature.
www.aeg.com 5.8 Steam Cooking 1. Set the function . 2. Press the cover of the water drawer to open it. Fill the water drawer with water until the Tank Full indicator comes on. The maximum capacity of the tank is 900 ml. It is sufficient for approximately 55 - 60 minutes of cooking. Use only water as the liquid. Do not use filtered (demineralised) or distilled water. Do not use other liquids. Do not put flammable or alcoholic liquids (grappa, whisky, cognac, etc.) into the water drawer. 3.
ENGLISH 11 The water tank can have some water when the 5. Remove the connector from the valve when the water stops flowing. display shows symbol. Wait until the water flow from the water outlet valve stops. Do not use the drained water to fill the water tank again. 6. CLOCK FUNCTIONS 6.1 Clock functions table Clock function Application TIME OF DAY To set, change or check the time of day. Refer to "Setting the time". MINUTE MINDER Use to set a countdown time (maximum 23 h 59 min).
www.aeg.com First you set the seconds, then the minutes and then the hours. At first, the time is calculated in minutes and seconds. When the time you set is longer than 60 minutes, the symbol comes on in the display. The appliance now calculates the time in hours and minutes. 3. The MINUTE MINDER starts automatically after five seconds. After 90% of the set time, an acoustic signal sounds. 4. When the set time ends, an acoustic signal sounds for two minutes. 6.
ENGLISH core temperature is 60 °C. While flashes, you can use the knob for the temperature to change the default core temperature. The display shows the symbol of the core temperature sensor and the default core temperature. to save the new core 4. Press temperature, or wait 10 seconds for the setting to be saved automatically. The new default core temperature is displayed during the next use of the core temperature sensor.
www.aeg.com The injector and the injector tube C D "C" is the injector tube for steam cooking, "D" is the injector for direct steam cooking. • Do not put cold liquids in the baking dish when it is hot. Injector tube (C) • Do not use the baking dish on a hot cooking surface. Injector for direct steam cooking (D) Steel grill (E) • Do not put the hot baking dish on cold / wet surfaces. • Do not clean the baking dish with abrasives, scourers and powders.
ENGLISH 7.3 Steam cooking in a dietary baking dish Put the food onto the steel grill in the baking dish and put the lid on it. 1. Put the injector tube into the special hole in the lid of the dietary baking dish. C 15 CAUTION! Do not use the lid of the dish. WARNING! Be careful when you use the injector when the oven operates. Always use oven gloves to touch the injector when the oven is hot. Always remove the injector from the oven when you do not use a steam function.
www.aeg.com For more information about steam cooking, refer to the cooking tables for steam cooking in the chapter "Hints and Tips". 8. ADDITIONAL FUNCTIONS 8.1 Using the Child Lock The Child Lock prevents an accidental operation of the appliance. 1. Do not set an oven function. 2. Press and hold and at the same time for 2 seconds. An acoustic signal sounds. SAFE comes on in the display. To deactivate the Child Lock, repeat step 2. 8.
ENGLISH 17 8.5 Cooling fan 8.6 Safety thermostat When the appliance operates, the cooling fan activates automatically to keep the surfaces of the appliance cool. If you deactivate the appliance, the cooling fan can continue to operate until the appliance cools down. Incorrect operation of the appliance or defective components can cause dangerous overheating. To prevent this, the oven has a safety thermostat which interrupts the power supply.
www.aeg.com 9.
ENGLISH Food Conventional Cooking True Fan Cooking 19 Time (min) Comments Temperature (°C) Shelf posi- Temperation ture (°C) Shelf position Biscuits / pastry stripes one level 140 3 140 - 150 3 30 - 35 In a baking tray Biscuits / pastry stripes two levels - - 140 - 150 2 and 4 35 - 40 In a baking tray Biscuits / pastry stripes three levels - - 140 - 150 1, 3 and 5 35 - 45 In a baking tray Meringues 120 - one level 3 120 3 80 - 100 In a baking tray Meringues- two - - 1
www.aeg.
ENGLISH Food Conventional Cooking True Fan Cooking 21 Time (min) Comments Temperature (°C) Shelf posi- Temperation ture (°C) Shelf position Pork 180 2 180 2 90 - 120 On a wire shelf Veal 190 2 175 2 90 - 120 On a wire shelf English roast beef, rare 210 2 200 2 50 - 60 On a wire shelf English roast beef, medium 210 2 200 2 60 - 70 On a wire shelf English roast beef, well done 210 2 200 2 70 - 75 On a wire shelf Shoulder of pork 180 2 170 2 120 - 150 With rind
www.aeg.com 9.6 Grilling Preheat the empty oven for 3 minutes before cooking. Food Quantity Temperature (°C) Time (min) 1st side 2nd side Shelf position Pieces (g) 4 800 max. 12 - 15 12 - 14 4 Beef steaks 4 600 max. 10 - 12 6-8 4 Sausages - max. 12 - 15 10 - 12 4 Pork chops 4 600 max. 12 - 16 12 - 14 4 Chicken (cut in 2) 2 1000 max. 30 - 35 25 - 30 4 Kebabs 4 - max. 10 - 15 10 - 12 4 Breast of chicken 4 400 max.
ENGLISH 23 Pork Food Quantity (kg) Temperature (°C) Time (min) Shelf position Shoulder, neck, ham joint 1 - 1.5 160 - 180 90 - 120 1 or 2 Chop, spare rib 1 - 1.5 170 - 180 60 - 90 1 or 2 Meat loaf 0.75 - 1 160 - 170 50 - 60 1 or 2 Pork knuckle (precooked) 0.75 - 1 150 - 170 90 - 120 1 or 2 Food Quantity (kg) Temperature (°C) Time (min) Shelf position Roast veal 1 160 - 180 90 - 120 1 or 2 Knuckle of veal 1.
www.aeg.com 9.8 Defrost Food Quantity (g) Defrosting time (min) Further defrosting time (min) Comments Chicken 1000 100 - 140 20 - 30 Place the chicken on an upturned saucer placed on a large plate. Turn halfway through. Meat 1000 100 - 140 20 - 30 Turn halfway through. Meat 500 90 - 120 20 - 30 Turn halfway through.
ENGLISH Food Temperature (°C) Time (h) Apple slices 60 - 70 Pears 60 - 70 25 Shelf position 1 position 2 positions 6-8 3 1/4 6-9 3 1/4 9.
www.aeg.
ENGLISH Food Temperature (°C) Time (min) Shelf position Comments Pasta and sauce1) 140 10 - 15 2 Reheat on a plate Side dishes (e.g. rice, potatoes, 140 10 - 15 2 Reheat on a plate 140 10 - 15 2 Reheat on a plate Meat1) 140 10 - 15 2 Reheat on a plate Vegetables1) 140 10 - 15 2 Reheat on a plate pasta)1) One-plate dishes1) 1) Preheat the oven for 10 minutes. 9.11 Cooking in the dietary baking dish Use the function True Fan + Steam.
www.aeg.com Food Temperature (°C) Time (min) Shelf position Poached chicken breast 150 25 - 35 2 Kasseler (smoked loin of pork) 150 80 - 100 2 Food Temperature (°C) Time (min) Shelf position Trout 150 25 - 30 2 Salmon filet 150 25 - 30 2 Food Temperature (°C) Time (min) Shelf position Rice 150 35 - 40 2 Unpeeled potatoes, medium 150 50 - 60 2 Boiled potatoes, quartered 150 35 - 45 2 Polenta 150 40 - 45 2 Fish Side dishes 9.
ENGLISH 29 10. CARE AND CLEANING WARNING! Refer to Safety chapters. 10.1 Notes on cleaning • Clean the front of the appliance with a soft cloth with warm water and a cleaning agent. • To clean metal surfaces, use a usual cleaning agent. • Clean the appliance interior after each use. Fat accumulation or other food remains may result in a fire. The risk is higher for the grill pan. • Clean stubborn dirt with a special oven cleaner. • Clean all accessories after each use and let them dry.
www.aeg.com After some time, you can have lime deposits in your oven. To prevent this, clean the parts of the oven that generate the steam. Empty the tank after each steam cooking. Types of water • Soft water with low lime content the manufacturer recommends this because it decreases the quantity of cleaning procedures. • Tap water - you can use it if your domestic water supply has purifier or water sweetener.
ENGLISH 5. Release the locking system to remove the glass panels. 2. Lift and turn the levers on the two hinges. 6. Turn the two fasteners by 90° and remove them from their seats. 90° 3. Close the oven door halfway to the first opening position. Then pull forward and remove the door from its seat. 7. First lift carefully and then remove the glass panels one by one. Start from the top panel. 1 4. Put the door on a soft cloth on a stable surface. 2 8. Clean the glass panels with water and soap.
www.aeg.com When the cleaning is completed, install the glass panels and the oven door. Do the above steps in the opposite sequence. Make sure that you put the glass panels (A and B) back in the correct sequence. The first panel (A) has a decorative frame. The screen-printing zone must face the inner side of the door. Make sure that after the installation the surface of the glass panel frame (A) on the screen-printing zones is not rough when you touch it. A B 10.
ENGLISH 33 11.1 What to do if... Problem Possible cause Remedy The oven does not heat up. The oven is deactivated. Activate the oven. The oven does not heat up. The clock is not set. Set the clock. The oven does not heat up. The necessary settings are not set. Make sure that the settings are correct. The oven does not heat up. The automatic switch-off is activated. Refer to "Automatic switchoff". The oven does not heat up. The Child Lock is on. Refer to "Using the Child Lock".
www.aeg.com Problem Possible cause Remedy The display shows "C2". You want to start the Defrost Remove the core temperafunction, but you did not re- ture sensor plug from the move the core temperature socket. sensor plug from the socket. The display shows an error code that is not in this table. There is an electrical fault. • Deactivate the oven with the house fuse or the safety switch in the fuse box and activate it again.
ENGLISH 35 12. INSTALLATION 12.3 Electrical installation WARNING! Refer to Safety chapters. The manufacturer is not responsible if you do not follow the safety precautions from the Safety chapters. 12.1 Building In This appliance is supplied with a main plug and a main cable. 548 21 558 min. 550 114 16 20 600 min.
www.aeg.com 13. ENERGY EFFICIENCY 13.1 Product Fiche and information according to EU 65-66/2014 Supplier's name AEG Model identification BE500472JM Energy Efficiency Index 99.7 Energy efficiency class A Energy consumption with a standard load, conventional mode 0.93 kWh/cycle Energy consumption with a standard load, fan-forced 0.85 kWh/cycle mode Number of cavities 1 Heat source Electricity Volume 72 l Type of oven Built-In Oven Mass 35.
ENGLISH 37 14. ENVIRONMENT CONCERNS Recycle the materials with the symbol . Put the packaging in applicable containers to recycle it. Help protect the environment and human health and to recycle waste of electrical and electronic appliances. Do not dispose appliances * marked with the symbol with the household waste. Return the product to your local recycling facility or contact your municipal office.
www.aeg.
ENGLISH 39
867304325-B-252014 www.aeg.