EN User Manual Oven BE530417MM
www.aeg.com CONTENTS 1. SAFETY INFORMATION............................................................................................. 2 2. SAFETY INSTRUCTIONS.............................................................................................4 3. PRODUCT DESCRIPTION...........................................................................................6 4. BEFORE FIRST USE..................................................................................................... 7 5. DAILY USE...
ENGLISH 3 manufacturer is not responsible for any injuries or damages that are the result of incorrect installation or usage. Always keep the instructions in a safe and accessible location for future reference. 1.
www.aeg.com • • • • • • Ensure that the appliance is switched off before replacing the lamp to avoid the possibility of electric shock. Do not use a steam cleaner to clean the appliance. Do not use harsh abrasive cleaners or sharp metal scrapers to clean the glass door since they can scratch the surface, which may result in shattering of the glass.
ENGLISH • • • • • • such a way that it cannot be removed without tools. Connect the mains plug to the mains socket only at the end of the installation. Make sure that there is access to the mains plug after the installation. If the mains socket is loose, do not connect the mains plug. Do not pull the mains cable to disconnect the appliance. Always pull the mains plug.
www.aeg.com for household appliances. Do not use it for house lighting. • Before maintenance, deactivate the appliance and disconnect the mains plug from the mains socket. • Make sure the appliance is cold. There is the risk that the glass panels can break. • Replace immediately the door glass panels when they are damaged. Contact the Authorised Service Centre. • Be careful when you remove the door from the appliance.
ENGLISH 3.2 Accessories 7 Combi pan Wire shelf For cookware, cake tins, roasts. Baking tray For cakes and biscuits. For cakes and biscuits. To bake and roast or as a pan to collect fat. Core temperature sensor To measure how far the food is cooked. 4. BEFORE FIRST USE WARNING! Refer to Safety chapters. To set the Time of day refer to "Clock functions" chapter. 4.1 Initial Cleaning Remove all accessories and removable shelf supports from the appliance. 5.
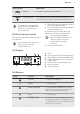
www.aeg.com 5.2 Activating and deactivating the appliance It depends on the model if your appliance has lamps, knob symbols or indicators: • The lamp comes on when the appliance operates. • The symbol shows whether the knob controls the oven functions or the temperature. • The indicator comes on when the oven heats up. 1. Turn the knob for the oven functions to select an oven function. 2. Turn the knob for the temperature to select a temperature. 3.
ENGLISH Oven function 9 Application Grilling To grill flat food and to toast bread. Turbo Grilling To roast larger meat joints or poultry with bones on one shelf position. Also to make gratins and to brown. The lamp may automatically deactivate at a temperature below 60 °C during some oven functions. 5.4 Fast heat up function The fast heat up function decreases the heat up time. Do not put food in the oven when the Fast heat up function operates. 1. Set the fast heat up function.
www.aeg.com 5.7 Heat-up indicator When you activate an oven function, the bars in the display one. The bars show that the oven temperature increases or decreases. come on one by 6. CLOCK FUNCTIONS 6.1 Clock functions table Clock function 00:00 Application TIME OF DAY To show or change the time of day. You can change the time of day only when the appliance is off. DURATION To set how long the appliance operates. Use only when an oven function is set. END To set when the appliance deactivates.
ENGLISH 6. Turn the knob for the oven functions to the off position. 6.4 Setting the END 1. Set an oven function. 2. Press again and again until starts to flash. or to set the hours and 3. Press the minutes for END time. 4. Press to confirm. At the set time an acoustic signal sounds for 2 minutes. and time setting flash in the display. The appliance deactivates automatically. 5. Press any button to stop the acoustic signal. 6. Turn the knob for the oven functions to the off position. 6.
www.aeg.com 2. Put the point of the core temperature on the sensor (with the symbol handle) into the centre of the meat. 3. Put the plug of the core temperature sensor into the socket on the front of the appliance. WARNING! Be careful when you remove the tip and plug of the core temperature sensor. The core temperature sensor is hot. There is a risk of burns. Every time you put the core temperature sensor in the socket, you need to set the core temperature time again.
ENGLISH 13 Wire shelf and the deep pan together: Push the deep pan between the guide bars of the shelf support and the wire shelf on the guide bars above and make sure that the feet point down. Deep pan: Push the deep pan between the guide bars of the shelf support. Small indentation at the top increase safety. The indentations are also anti-tip devices. The high rim around the shelf prevents cookware from slipping of the shelf. 8. ADDITIONAL FUNCTIONS 8.1 Using the Child Lock 8.
www.aeg.com 8.4 Cooling fan When the appliance operates, the cooling fan activates automatically to keep the surfaces of the appliance cool. If you deactivate the appliance, the cooling fan can continue to operate until the appliance cools down. 9. HINTS AND TIPS WARNING! Refer to Safety chapters. The temperature and baking times in the tables are guidelines only. They depend on the recipes and the quality and quantity of the ingredients used. 9.
ENGLISH 15 Baking results Possible cause Remedy The cake is too dry. The oven temperature is too The next time you bake, set low. a higher oven temperature. The cake is too dry. The baking time is too long. The cake browns unevenly. The oven temperature is too Set a lower oven temperahigh and the baking time is ture and a longer baking too short. time. The cake browns unevenly. The mixture is unevenly distributed. The cake is not ready in the baking time given.
www.aeg.com Food Function Temperature (°C) Time (min) Shelf position Cheesecake Top / Bottom Heat 170 - 190 60 - 90 1 1) Preheat the oven. Cakes / pastries / breads on baking trays Food Function Temperature (°C) Time (min) Shelf position Plaited bread / Bread crown Top / Bottom Heat 170 - 190 30 - 40 3 Christmas stollen Top / Bottom Heat 160 - 1801) 50 - 70 2 1. 2. 1 Bread (rye Top / Bottom bread): Heat 1. First part of baking procedure. 2. Second part of baking procedure.
ENGLISH Food Function Temperature (°C) Time (min) Shelf position 160 - 1801) 40 - 80 3 Temperature (°C) Time (min) Shelf position Short pastry bis- True Fan Cookcuits ing 150 - 160 10 - 20 3 Short bread / Short bread / Pastry stripes True Fan Cooking 140 20 - 35 3 Short bread / Short bread / Pastry stripes Top / Bottom Heat 1601) 20 - 30 3 Biscuits made with sponge mixture True Fan Cooking 150 - 160 15 - 20 3 Pastries made True Fan Cookwith egg white / ing Meringues 80 - 100
www.aeg.com Food Function Temperature (°C) Time (min) Shelf position Small cakes / Small cakes (20 per tray) Top / Bottom Heat 1701) 20 - 30 3 1) Preheat the oven. 9.
ENGLISH Food Temperature (°C) 19 Time (min) Shelf position Apple cake, made with sponge mix- 160 - 170 ture (round cake tin) 70 - 80 3 White bread 55 - 70 3 190 - 200 9.7 Multilevel Baking Use the function True Fan Cooking. Cakes / pastries / breads on baking trays Food Temperature (°C) Time (min) Cream puffs / Eclairs 160 - 1801) Dry streusel cake 150 - 160 Shelf position 2 positions 3 positions 25 - 45 1/4 - 30 - 45 1/4 - 1) Preheat the oven.
www.aeg.com Food Small cakes / Small cakes (20 per tray) Temperature (°C) Time (min) 1501) 23 - 40 Shelf position 2 positions 3 positions 1/4 - 1) Preheat the oven. 9.
ENGLISH • Baste large roasts and poultry with their juices several times during roasting. This gives better roasting results. • You can deactivate the appliance approximately 10 minutes before the 21 end of the roasting time, and use the residual heat. 9.10 Roasting tables Beef Food Quantity Function Temperature (°C) Time (min) Shelf position Pot roast 1 - 1.
www.aeg.com Lamb Food Quantity (kg) Function Temperature Time (min) (°C) Shelf position Leg of lamb / 1 - 1.5 Roast lamb Turbo Grilling 150 - 170 100 - 120 1 Saddle of lamb 1 - 1.5 Turbo Grilling 160 - 180 40 - 60 1 Food Quantity (kg) Function Temperature Time (min) (°C) Saddle / Leg of hare up to 1 Top / Bottom 2301) Heat 30 - 40 1 Saddle of venison 1.5 - 2 Top / Bottom 210 - 220 Heat 35 - 40 1 Haunch of venison 1.
ENGLISH 9.11 Grilling • Always grill with the maximum temperature setting. • Set the shelf into the shelf position as recommended in the grilling table. • Always set the pan to collect the fat into the first shelf position. • Grill only flat pieces of meat or fish. • Always preheat the empty oven with the grill functions for 5 minutes. CAUTION! Always grill with the oven door closed.
www.aeg.
ENGLISH 9.14 Preserving - Bottom Heat • Use only preserve jars of the same dimensions available on the market. • Do not use jars with twist-off and bayonet type lids or metal tins. • Use the first shelf from the bottom for this function. • Put no more than six one-litre preserve jars on the baking tray. • Fill the jars equally and close with a clamp. 25 • The jars cannot touch each other. • Put approximately 1/2 litre of water into the baking tray to give sufficient moisture in the oven.
www.aeg.com Vegetables Food Temperature (°C) Time (h) Beans 60 - 70 Peppers Shelf position 1 position 2 positions 6-8 3 1/4 60 - 70 5-6 3 1/4 Vegetables for sour 60 - 70 5-6 3 1/4 Mushrooms 50 - 60 6-8 3 1/4 Herbs 40 - 50 2-3 3 1/4 Temperature (°C) Time (h) Shelf position Plums 60 - 70 Apricots Fruit Food 1 position 2 positions 8 - 10 3 1/4 60 - 70 8 - 10 3 1/4 Apple slices 60 - 70 6-8 3 1/4 Pears 60 - 70 6-9 3 1/4 9.
ENGLISH 27 Mutton / lamb Food Food core temperature (°C) Leg of mutton 80 - 85 Saddle of mutton 80 - 85 Roast lamb / Leg of lamb 70 - 75 Game Food Food core temperature (°C) Saddle of hare 70 - 75 Leg of hare 70 - 75 Whole hare 70 - 75 Saddle of venison 70 - 75 Leg of venison 70 - 75 Fish Food Food core temperature (°C) Salmon 65 - 70 Trouts 65 - 70 10. CARE AND CLEANING WARNING! Refer to Safety chapters. 10.
www.aeg.com 10.4 Removing and installing the door 1 2 Install the shelf supports in the opposite sequence. 10.3 Oven ceiling WARNING! Deactivate the appliance before you remove the heating element. Make sure that the appliance is cold. There is a risk of burns. You can remove the door and the internal glass panels to clean it. The number of glass panels is different for different models. WARNING! Be careful when you remove the door from the appliance. The door is heavy. 1. Open the door fully. 2.
ENGLISH 29 1. Deactivate the appliance. 2. Remove the fuses from the fuse box or deactivate the circuit breaker. 2 The top lamp B 1 CAUTION! Rough handling of the glass, especially around the edges of the front panel, can cause the glass to break. 7. Pull the door trim to the front to remove it. 8. Hold the door glass panels on their top edge one by one and pull them up out of the guide. 1. Turn the lamp glass cover counterclockwise to remove it. 2. Clean the glass cover. 3.
www.aeg.com 11. TROUBLESHOOTING WARNING! Refer to Safety chapters. 11.1 What to do if... Problem Possible cause Remedy You cannot activate or oper- The oven is not connected Check if the oven is correctly ate the oven. to an electrical supply or it is connected to the electrical connected incorrectly. supply (refer to the connection diagram if available). The oven does not heat up. The oven is deactivated. Activate the oven. The oven does not heat up. The clock is not set. Set the clock.
ENGLISH 31 Problem Possible cause Remedy The display shows an error code that is not in this table. There is an electrical fault. • Deactivate the oven with the house fuse or the safety switch in the fuse box and activate it again. • If the display shows the error code again, contact the Customer Care Department. The appliance is activated and does not heat up. The fan does not operate. The display shows "Demo". The demo mode is activated. 1. 2. 3. 4. Deactivate the oven.
www.aeg.com 12.1 Building in The built-in unit must meet the stability requirements of DIN 68930. min. 3 mm min.
ENGLISH 546 21 min. 550 20 600 548 15 546 21 114 589 594 min. 560 579 min. 550 590 20 548 15 114 min. 560 589 594 579 594 594 5 5 3 3 alternativ 100 max. R1200 mm 130 140 H05VV-F H05RR-F min.
www.aeg.com 2x3,5x25 13. ENERGY EFFICIENCY 13.1 Product Fiche and information according to EU 65-66/2014 Supplier's name AEG Model identification BE530417MM Energy Efficiency Index 81.2 Energy efficiency class A+ Energy consumption with a standard load, conventional mode 1.09 kWh/cycle Energy consumption with a standard load, fan-forced 0.69 kWh/cycle mode Number of cavities 1 Heat source Electricity Volume 71 l Type of oven Built-In Oven Mass 36.
ENGLISH 13.2 Energy saving 35 cooking time is longer than 30 minutes, the heating elements deactivate automatically 10% faster in some oven functions. The appliance contains features which help you save energy during everyday cooking. The fan and lamp continue to operate. General hints Make sure that the oven door is closed properly when the appliance operates and keep it closed as much as possible during the cooking. Use metal dishes to improve energy saving.
867316831-C-402016 www.aeg.