BOB35702XV FR DE USER MANUAL Notice d'utilisation Four Benutzerinformation Backofen 2 26
www.aeg.com TABLE DES MATIÈRES 1. INFORMATIONS DE SÉCURITÉ.................................................................................3 2. CONSIGNES DE SÉCURITÉ........................................................................................4 3. DESCRIPTION DE L'APPAREIL...................................................................................7 4. BANDEAU DE COMMANDE......................................................................................7 5.
FRANÇAIS 1. 3 INFORMATIONS DE SÉCURITÉ Avant d'installer et d'utiliser cet appareil, lisez soigneusement les instructions fournies. Le fabricant ne pourra être tenu pour responsable des blessures et dégâts résultant d'une mauvaise installation ou utilisation. Conservez toujours les instructions dans un lieu sûr et accessible pour vous y référer ultérieurement. 1.
www.aeg.com 1.2 Sécurité générale • • • • • • • • • L'appareil doit être installé et le câble remplacé uniquement par un professionnel qualifié . AVERTISSEMENT : L'appareil et ses parties accessibles deviennent chauds pendant son fonctionnement. Veillez à ne pas toucher les éléments chauffants. Utilisez toujours des gants de cuisine pour retirer ou enfourner des accessoires ou des plats allant au four. Avant d'effectuer une opération de maintenance, débranchez l'appareil de la prise secteur.
FRANÇAIS • Installez l'appareil dans un lieu sûr et adapté répondant aux exigences d'installation. • Les côtés de l'appareil doivent rester à côté d'appareils ou d'éléments ayant la même hauteur. • Cet appareil est équipé d'un système de refroidissement électrique. Il doit être utilisé lorsque l'appareil est raccordé à une prise secteur. 2.2 Branchement électrique AVERTISSEMENT! Risque d'incendie ou d'électrocution. • L'ensemble des branchements électriques doit être effectué par un technicien qualifié.
www.aeg.com • Ne placez pas de produits inflammables ou d'éléments imbibés de produits inflammables à l'intérieur ou à proximité de l'appareil, ni sur celui-ci. AVERTISSEMENT! Risque d'endommagement de l'appareil. • Pour éviter tout endommagement ou décoloration de l'émail : – ne posez pas de plats allant au four ni aucun autre objet directement sur le fond de l'appareil. – ne placez jamais de feuilles d'aluminium directement sur le fond de la cavité de l'appareil.
FRANÇAIS • Utilisez exclusivement des pièces d'origine. 7 • Débranchez l'appareil de l'alimentation électrique. • Coupez le câble d'alimentation au ras de l'appareil et mettez-le au rebut. • Retirez le dispositif de verrouillage du hublot pour empêcher les enfants et les animaux de s'enfermer dans l'appareil. 2.7 Mise au rebut AVERTISSEMENT! Risque de blessure ou d'asphyxie. 3. DESCRIPTION DE L'APPAREIL 3.
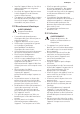
www.aeg.com 4.2 Affichage A B C A. Fonctions de l'horloge B. Minuteur C. Fonction de l'horloge 5. AVANT LA PREMIÈRE UTILISATION AVERTISSEMENT! Reportez-vous aux chapitres concernant la sécurité. 1. Sélectionnez la fonction et la température maximale. 2. Laissez le four en fonctionnement pendant 1 heure. Pour modifier l'heure, reportez-vous au chapitre « Fonctions de l'horloge ». et réglez 3. Sélectionnez la fonction la température maximale. 4. Laissez le four en fonctionnement pendant 15 minutes.
FRANÇAIS 6.3 Modes de cuisson Fonction du four Fonction du four Utilisation Le four est éteint. Gril Position Arrêt Pour allumer l'éclairage même si aucune fonction Eclairage Four de cuisson n'est sélectionnée. Pour cuire et rôtir des aliments sur un seul niveau. Convection naturelle (Voûte) Voûte Pour faire dorer du pain, des gâteaux et des petites pâtisseries. Pour terminer la cuisson des plats. Pour cuire des gâteaux à fond croustillant et pour stériliser des aliments.
www.aeg.com 7.2 Réglage de l'heure. Modification de l'heure Vous devez régler l'heure avant de mettre le four en marche. Le voyant clignote lorsque vous branchez l'appareil à l'alimentation électrique, lorsqu'il y a eu une coupure de courant ou que le minuteur n'est pas réglé. ou pour Appuyez sur la touche régler la bonne heure. Au bout d'environ 5 secondes, le clignotement s'arrête et l'heure réglée s'affiche.
FRANÇAIS 7.7 Annuler des fonctions de l'horloge 1. Appuyez sur plusieurs fois jusqu'à ce que le voyant de la fonction souhaitée clignote. 2. Maintenez la touche enfoncée. Au bout de quelques secondes, la fonction de l'horloge s'éteint. 8. UTILISATION DES ACCESSOIRES AVERTISSEMENT! Reportez-vous aux chapitres concernant la sécurité. 8.
www.aeg.com 9. FONCTIONS SUPPLÉMENTAIRES 9.1 Ventilateur de refroidissement Lorsque le four fonctionne, le ventilateur de refroidissement se met automatiquement en marche pour refroidir les surfaces du four. Si vous éteignez le four, le ventilateur de refroidissement continue à fonctionner jusqu'à ce que le four refroidisse. causer une surchauffe dangereuse. Pour éviter cela, le four dispose d'un thermostat de sécurité interrompant l'alimentation électrique.
FRANÇAIS 13 10.
www.aeg.
FRANÇAIS Plat Voûte Chaleur Tournante Durée (min) Remarques 15 Température (°C) Positions des grilles Température (°C) Positions des grilles 190 2 180 2 (1 et 3) 25 - 40 6 à 8 petits pains sur un plateau de cuisson Pizza1) 190 1 190 1 20 - 30 Dans un plat à rôtir Scones1) 200 3 190 2 10 - 20 Sur un plateau de cuisson Durée (min) Remarques Petits pains1) 1) Préchauffez le four pendant 10 minutes.
www.aeg.
FRANÇAIS Plat Voûte Chaleur Tournante Durée (min) Remarques 17 Température (°C) Positions des grilles Température (°C) Positions des grilles Lapin 190 2 175 2 60 - 80 En morceaux Lièvre 190 2 175 2 150 - 200 En morceaux Faisan 190 2 175 2 90 - 120 Entier dans un plat à rôtir Durée (min) Remarques Poisson Plat Voûte Chaleur Tournante Température (°C) Positions des grilles Température (°C) Positions des grilles Truite/ daurade 190 2 175 2 (1 et 3) 40 - 55 3 - 4 p
www.aeg.com 10.4 Décongélation Plat Quantité (kg) Durée de décongélation (min) Décongélation complémentaire (min) Remarques Poulet 1,0 100 - 140 20 - 30 Placez le poulet sur une sous-tasse retournée, posée sur une grande assiette. Retournez à micuisson. Viande 1,0 100 - 140 20 - 30 Retournez à mi-cuisson. Viande 0,5 90 - 120 20 - 30 Retournez à mi-cuisson.
FRANÇAIS Plat Fonction Accessoi- Posi- TemDurée (min) res tions pératudes re (°C) grilles Remarques Biscuits sablés Convection naturelle Plateau de cuisson Préchauffez le four pendant 10 minutes. Toasts 4 - (6 pièces) Gril Steak haché 6 pièces, 0,6 kg Gril 3 150 20 - 35 Grille mé- 3 tallique max. 2 à 4 minutes Préchauffez le sur la première four pendant face ; 2 à 3 mi- 3 minutes. nutes sur la seconde face. Grille mé- 3 tallique et lèchefrite max.
www.aeg.com N'utilisez jamais de produits abrasifs ou acides ni d'éponges métalliques car ils peuvent endommager la surface du four. Nettoyez le bandeau de commande du four en observant ces mêmes recommandations. 11.3 Nettoyez le joint d'étanchéité de la porte Vérifiez régulièrement le joint d'étanchéité de la porte. Le joint d'étanchéité de la porte est posé sur l'encadrement de la cavité du four. N'utilisez pas le four si le joint d'étanchéité de la porte est endommagé.
FRANÇAIS 21 6. Faites pivoter les deux fixations de 90° et retirez-les de leurs logements. 3. Fermez la porte du four à la première position d'ouverture (mi-parcours). Puis soulevez et tirez la porte vers l'avant et retirez-la de son logement. 90° 7. Soulevez doucement puis sortez le panneau de verre. 1 4. Déposez la porte sur une surface stable recouverte d'un tissu doux. 2 8. Nettoyez les panneaux de verre avec de l'eau savonneuse. Séchez soigneusement les panneaux de verre.
www.aeg.com A 11.6 Remplacement de l'éclairage AVERTISSEMENT! Risque d'électrocution ! L'ampoule peut être chaude. 1. Éteignez le four. Attendez que le four ait refroidi. 2. Débranchez le four de l'alimentation secteur. 3. Placez un chiffon au fond de la cavité. Éclairage arrière 1. Retirez le diffuseur en verre de l'ampoule en le tournant. 2. Nettoyez le diffuseur en verre. 3. Remplacez l'ampoule par une ampoule adéquate résistant à une température de 300 °C . 4. Replacez le diffuseur en verre.
FRANÇAIS Nous vous recommandons de noter ces informations ici : Modèle (MOD.) ......................................... Référence du produit (PNC) ......................................... Numéro de série (S.N.) ......................................... 13. INSTALLATION AVERTISSEMENT! Reportez-vous aux chapitres concernant la sécurité. 13.1 Encastrement 540 21 min. 550 20 600 558 19 114 min. 560 589 598 570 594 9 3 540 21 min. 550 20 590 558 19 114 min.
www.aeg.com 13.2 Fixation de l'appareil au meuble 13.4 Câble Types de câbles compatibles pour l'installation ou le remplacement : H07 RN-F, H05 RN-F, H05 RRF, H05 VV-F, H05 V2V2-F (T90), H05 BB-F A B 13.3 Installation électrique Le fabricant ne pourra être tenu pour responsable si vous ne respectez pas les précautions de sécurité du chapitre « Consignes de sécurité ». Cet appareil n'est fourni qu'avec un câble d'alimentation.
FRANÇAIS 14.2 Économie d'énergie Ce four est doté de caractéristiques qui vous permettent d'économiser de l'énergie lors de votre cuisine au quotidien. Conseils généraux Assurez-vous que la porte du four est correctement fermée lorsque le four est en marche. En cours de la cuisson, n'ouvrez pas la porte. Nettoyez régulièrement le joint de la porte pour qu'il reste propre et assurez-vous qu'il est toujours bien fixé, dans la bonne position.
www.aeg.com INHALTSVERZEICHNIS 1. SICHERHEITSHINWEISE........................................................................................... 27 2. SICHERHEITSANWEISUNGEN.................................................................................29 3. GERÄTEBESCHREIBUNG......................................................................................... 31 4. BEDIENFELD..............................................................................................................32 5.
DEUTSCH 1. 27 SICHERHEITSHINWEISE Lesen Sie vor der Montage und dem Gebrauch des Geräts zuerst die Gebrauchsanleitung. Bei Verletzungen oder Schäden infolge nicht ordnungsgemäßer Montage oder Verwendung des Geräts übernimmt der Hersteller keine Haftung. Bewahren Sie die Anleitung immer an einem sicheren und zugänglichen Ort zum späteren Nachschlagen auf. 1.
www.aeg.com 1.2 Allgemeine Sicherheit • • • • • • • • • Die Montage des Geräts und der Austausch des Kabels muss von einer Fachkraft vorgenommen werden. WARNUNG: Das Gerät und die zugänglichen Geräteteile werden während des Betriebs heiß. Seien Sie vorsichtig und berühren Sie niemals die Heizelemente. Verwenden Sie zum Anfassen des Zubehörs und der Töpfe wärmeisolierende Handschuhe. Ziehen Sie bitte vor jeder Wartungsmaßnahme den Netzstecker aus der Steckdose.
DEUTSCH 29 2. SICHERHEITSANWEISUNGEN 2.1 Montage WARNUNG! Die Montage des Geräts darf nur von einer qualifizierten Fachkraft durchgeführt werden. • Entfernen Sie das Verpackungsmaterial. • Montieren Sie ein beschädigtes Gerät nicht und benutzen Sie es nicht. • Halten Sie sich an die mitgelieferte Montageanleitung. • Seien Sie beim Umsetzen des Gerätes vorsichtig, da es sehr schwer ist. Tragen Sie stets Sicherheitshandschuhe und festes Schuhwerk. • Ziehen Sie das Gerät nicht am Griff.
www.aeg.com • Nehmen Sie keine technischen Änderungen am Gerät vor. • Die Lüftungsöffnungen dürfen nicht abgedeckt werden. • Lassen Sie das Gerät bei Betrieb nicht unbeaufsichtigt. • Schalten Sie das Gerät nach jedem Gebrauch aus. • Gehen Sie beim Öffnen der Tür vorsichtig vor, wenn das Gerät in Betrieb ist. Es kann heiße Luft austreten. • Bedienen Sie das Gerät nicht mit feuchten oder nassen Händen oder wenn es mit Wasser in Kontakt gekommen ist.
DEUTSCH Lösungsmittel oder Metallgegenstände. • Falls Sie ein Backofenspray verwenden, befolgen Sie die Anweisungen auf der Verpackung. • Reinigen Sie die katalytische Emailbeschichtung (falls vorhanden) nicht mit Reinigungsmitteln. 2.5 Innenbeleuchtung 31 2.6 Service • Wenden Sie sich zur Reparatur des Geräts an einen autorisierten Kundendienst. • Verwenden Sie ausschließlich Originalersatzteile. 2.7 Entsorgung WARNUNG! Verletzungs- und Erstickungsgefahr. WARNUNG! Stromschlaggefahr.
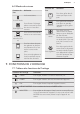
www.aeg.com 4. BEDIENFELD 4.1 Tasten Sensorfeld/Taste Funktion Beschreibung MINUS Einstellen der Zeit. UHR Einstellen einer Uhrfunktion. PLUS Einstellen der Zeit. C A. Uhrfunktionen B. Timer C. Uhrfunktion 4.2 Display A B 5. VOR DER ERSTEN INBETRIEBNAHME WARNUNG! Siehe Kapitel Sicherheitshinweise. Einstellen der Tageszeit siehe Kapitel „Uhrfunktionen“. 5.1 Erste Reinigung Nehmen Sie die Zubehörteile und die herausnehmbaren Einhängegitter aus dem Backofen.
DEUTSCH 33 6. TÄGLICHER GEBRAUCH WARNUNG! Siehe Kapitel Sicherheitshinweise. 6.1 Versenkbare Knöpfe Drücken Sie zum Benutzen des Geräts den Knopf. Der Knopf kommt dann heraus. 6.2 Einstellen einer Ofenfunktion 1. Drehen Sie den BackofenEinstellknopf auf eine Ofenfunktion. 2. Drehen Sie den Wahlknopf, um die Temperatur. Die Lampe leuchtet, während der Ofen in Betrieb ist. 3. Drehen Sie die Knöpfe in die AusPosition, um den Backofen auszuschalten. 6.
www.aeg.com 7. UHRFUNKTIONEN 7.1 Tabelle der Uhrfunktionen Uhrfunktion Anwendung TAGESZEIT Einstellen, Ändern oder Abfragen der Tageszeit. DAUER Einstellen der Einschaltdauer für das Gerät. ENDE Einstellen, wann das Gerät ausgeschaltet werden soll. ZEITVORWAHL Kombinieren der Funktionen DAUER und ENDE. KURZZEIT-WECKER Zum Einstellen einer Countdown-Zeit. Diese Funktion hat keine Auswirkung auf den Gerätebetrieb.
DEUTSCH 2. Drücken Sie wiederholt, bis anfängt zu blinken. 3. Die DAUER wird mit eingestellt. 4. Drücken Sie oder . 5. Das ENDE wird mit eingestellt. oder 6. Mit bestätigen. Das Gerät schaltet sich später automatisch ein, gart für die eingestellte DAUER und stoppt um die eingestellte ENDE-Zeit. Nach Ablauf der eingestellten Zeit ertönt ein Signalton. 7. Das Gerät wird automatisch ausgeschaltet. Drücken Sie eine beliebige Taste, um das Signal abzustellen. 8.
www.aeg.com Kombirost und Backblechzusammen: Die kleine Einkerbung auf der Oberseite erhöht die Sicherheit. Diese Einkerbungen dienen auch als Kippsicherung. Durch den umlaufend erhöhten Rand des Rosts ist das Kochgeschirr gegen Abrutschen vom Rost gesichert. Schieben Sie das Backblech zwischen die Führungsschienen der Einhängegitter und den Kombirost in die Führungsschienen darüber. 9. ZUSATZFUNKTIONEN 9.
DEUTSCH 10.1 Garempfehlungen Der Backofen hat vier Einschubebenen. Die Ebenen werden vom Boden des Backofens aus gezählt. Ihr Backofen backt oder brät unter Umständen anders als Ihr früherer Backofen. Die nachstehenden Tabellen enthalten die standardmäßigen Temperatureinstellungen, die Gardauer und die Einschubebene. Finden Sie für ein bestimmtes Rezept keine konkreten Angaben, orientieren Sie sich an einem ähnlichem Rezept.
www.aeg.com Speise Ober-/Unterhitze Heißluft Dauer (Min.
DEUTSCH 39 Brot und Pizza Speise Ober-/Unterhitze Heißluft Dauer (Min.) Bemerkungen Temperatur (°C) Einschubebene Temperatur (°C) Einschubebene Weißbrot1) 190 1 190 1 60 - 70 1 - 2 Stück, 500 g pro Stück Roggenbrot 190 1 180 1 30 - 45 In einer Brotform Brötchen1) 190 2 180 2 (1 und 3) 25 - 40 6 - 8 Brötchen auf einem Backblech Pizza1) 190 1 190 1 20 - 30 Auf einem tiefen Blech Scones1) 200 3 190 2 10 - 20 Auf dem Backblech Dauer (Min.
www.aeg.com Fleisch Speise Ober-/Unterhitze Heißluft Dauer (Min.
DEUTSCH Speise Ober-/Unterhitze Heißluft Temperatur (°C) Einschubebene Temperatur (°C) Einschubebene Pute 180 1 160 Ente 175 2 Gans 175 Hasenbraten 41 Dauer (Min.) Bemerkungen 1 210 - 240 Ganz auf einem tiefen Blech 160 2 120 - 150 Ganz auf einem tiefen Blech 1 160 1 150 - 200 Ganz auf einem tiefen Blech 190 2 175 2 60 - 80 Zerlegter Hase 190 2 175 2 150 - 200 Zerlegter Fasan 190 2 175 2 90 - 120 Ganz auf einem tiefen Blech Dauer (Min.
www.aeg.com Speise Menge Dauer (Min.) Stück Menge (kg) 1. Seite 2. Seite Hähnchen, 2 halbe 2 1 30 - 35 25 - 30 Spieße 4 - 10 - 15 10 - 12 Hähnchenbrustfilet 4 0.4 12 - 15 12 - 14 Hamburger 6 0.6 20 - 30 - Fischfilet 4 0.4 12 - 14 10 - 12 Belegte Toastbrote 4-6 - 5-7 - Toast 4-6 - 2-4 2-3 10.4 Auftauen Speise Menge (kg) Auftauzeit (Min.) Zusätzliche Auftauzeit (Min.) Bemerkungen Hähnchen 1.
DEUTSCH 43 Speise Funktion Zubehör EinTemDauer (Min.) schub- peraebene tur (°C) Bemerkungen Kleiner Kuchen Konventionelle Heizfunktion Backblech 3 170 20 - 30 20 kleine Kuchen auf ein Backblech legen. Apfelkuchen Konventionelle Heizfunktion Kombirost 1 170 80 - 120 2 Formen (20 cm Durchmesser) diagonal versetzt verwenden.
www.aeg.com Reinigungsmittel an. Reinigen Sie die Zubehörteile nicht im Geschirrspüler. Entfernen Sie hartnäckige Verschmutzungen mit einem speziellen Backofenreiniger. Zubehörteile mit Antihaftbeschichtung dürfen nicht mit aggressiven Reinigungsmitteln, scharfkantigen Gegenständen oder im Geschirrspüler gereinigt werden. Andernfalls kann die Antihaftbeschichtung beschädigt werden. Es kann sich Feuchtigkeit im Ofen oder an den Glastüren niederschlagen.
DEUTSCH 45 4. Legen Sie die Backofentür auf ein weiches Tuch auf einer stabilen Fläche. 2. Heben und drehen Sie die Hebel ganz, an beiden Scharnieren. 5. Lösen Sie das Verriegelungssystem, um die innere Glasscheibe zu entfernen. 6. Drehen Sie die beiden Befestigungselemente um 90° und nehmen Sie sie aus der Halterung. 3. Schließen Sie die Backofentür halb bis zur ersten Raststellung. Anschließend heben und ziehen Sie sie die Tür nach vorn aus der Aufnahme heraus. 90° 7.
www.aeg.com 8. Reinigen Sie die Glasscheiben mit Wasser und Spülmittel. Trocknen Sie die Glasscheiben sorgfältig ab. Reinigen Sie die Glasscheiben nicht im Geschirrspüler. Wenn die Reinigung abgeschlossen ist, bauen Sie die Glasscheibe und anschließend die Backofentür ein. Bei korrektem Einbau macht die Türabdeckung ein Klickgeräusch. Achten Sie darauf, die innere Glasscheibe richtig in die Aufnahmen einzusetzen. A 1. Schalten Sie den Backofen aus. Warten Sie, bis der Backofen abgekühlt ist. 2.
DEUTSCH Störung Mögliche Ursache 47 Abhilfe Die Beleuchtung funktioniert Die Lampe ist defekt. nicht. Tauschen Sie die Lampe aus. Dampf und Kondenswasser schlagen sich auf den Speisen und im Garraum nieder. Lassen Sie die Speisen nach Beendigung des Gar- oder Backvorgangs nicht länger als 15 - 20 Minuten im Backofen stehen. Die Speisen standen zu lange im Backofen. Das Display zeigt „12.00“ an. Es gab einen Stromausfall. 12.
www.aeg.com 13.1 Einbau 540 21 min. 550 20 600 558 19 114 min. 560 589 598 570 594 9 3 540 21 min. 550 20 590 558 19 114 min. 560 589 598 570 594 9 3 13.2 Befestigung des Geräts im Möbel A B 13.3 Elektrischer Anschluss Der Hersteller haftet nicht für Schäden, die aufgrund der Nichtbeachtung der in den Sicherheitshinweisen beschriebenen Sicherheitsvorkehrungen entstehen. Das Gerät wird nur mit einem Netzkabel geliefert. 13.
DEUTSCH Näheres zum Kabelquerschnitt siehe Gesamtleistung auf dem Typenschild. Weitere Informationen finden Sie in der Tabelle: Gesamtleistung (W) Kabelquerschnitt (mm²) maximal 1380 3 x 0.75 maximal 2300 3x1 Gesamtleistung (W) Kabelquerschnitt (mm²) maximal 3680 3 x 1.5 49 Die Erdleitung (gelb/grünes Kabel) muss 2 cm länger sein als die Phasenleitung und der Nullleiter (blaues und braunes Kabel). 14. ENERGIEEFFIZIENZ 14.
www.aeg.com Warmhalten von Speisen Wählen Sie die niedrigstmögliche Temperatureinstellung, wenn Sie die Restwärme zum Warmhalten von Speisen nutzen möchten. Restwärme des Backofens werden die Speisen weiter gegart. Nutzen Sie die Restwärme, um andere Speisen aufzuwärmen. Halten Sie die Unterbrechungen beim Backen so kurz wie möglich, wenn Sie mehrere Gerichte gleichzeitig zubereiten. Garen mit Heißluft Nutzen Sie, wenn möglich, die Garfunktionen mit Heißluft, um Energie zu sparen. 15.
DEUTSCH 51
867347526-A-302018 www.aeg.