BP3313091 PT Manual de instruções
www.aeg.com ÍNDICE 1. 2. 3. 4. 5. 6. 7. 8. 9. 10. 11. INFORMAÇÕES DE SEGURANÇA . . . . . . . . . . . . . . . . . . . . . . . . . . . . . . . . . . . . . . . . . . . . . . 3 INSTRUÇÕES DE SEGURANÇA . . . . . . . . . . . . . . . . . . . . . . . . . . . . . . . . . . . . . . . . . . . . . . . . 4 DESCRIÇÃO DO PRODUTO . . . . . . . . . . . . . . . . . . . . . . . . . . . . . . . . . . . . . . . . . . . . . . . . . . . 7 ANTES DA PRIMEIRA UTILIZAÇÃO . . . . . . . . . . . . . . . . . . . . . . . . . . . . .
PORTUGUÊS 3 1. INFORMAÇÕES DE SEGURANÇA Leia atentamente as instruções fornecidas antes de instalar e utilizar o aparelho. O fabricante não é responsável por lesões ou danos resultantes da instalação e utilização incorrectas. Guarde sempre as instruções junto do aparelho para futura referência. 1.1 Segurança para crianças e pessoas vulneráveis ADVERTÊNCIA Risco de asfixia, ferimentos ou incapacidade permanente.
www.aeg.com • Desligue a alimentação eléctrica antes de qualquer manutenção. • Não utilize produtos de limpeza abrasivos ou raspadores metálicos afiados para limpar a porta de vidro porque podem riscar a superfície e partir o vidro. • Antes da limpeza por Pirólise, deve limpar todos os resíduos facilmente removíveis. Retire todas as peças do forno.
PORTUGUÊS • As protecções contra choques eléctricos das peças isoladas e não isoladas devem estar fixas de modo a não poderem ser retiradas sem ferramentas. • Ligue a ficha de alimentação eléctrica à tomada apenas no final da instalação. Certifique-se de que a ficha fica acessível após a instalação. • Se a tomada eléctrica estiver solta, não ligue a ficha. • Não puxe o cabo de alimentação para desligar o aparelho. Puxe sempre a ficha.
www.aeg.com • Certifique-se de que o aparelho está frio. Existe o risco de quebra dos painéis de vidro. • Substitua imediatamente os painéis de vidro se estiverem danificados. Contacte a Assistência Técnica. • Tenha cuidado quando retirar a porta do aparelho. A porta é pesada! • Limpe o aparelho com regularidade para evitar que o material da superfície se deteriore. • Manter gorduras ou restos de alimentos no aparelho pode provocar incêndio. • Limpe o aparelho com um pano macio e húmido.
PORTUGUÊS • Desligue o aparelho da alimentação eléctrica. • Corte o cabo de alimentação eléctrica e elimine-o. 7 • Remova o trinco da porta para evitar que crianças ou animais de estimação possam ficar aprisionados no interior do aparelho. 3.
www.aeg.com Divisor do tabuleiro Para pratos em que deseje guarnições, frutas ou cores diferentes, ou quando precisar de ajustar o tamanho. 4. ANTES DA PRIMEIRA UTILIZAÇÃO ADVERTÊNCIA Consulte os capítulos relativos à segurança. tos seguintes, a hora é guardada automaticamente após 5 segundos). e a hora O visor apresenta definida. "00" está intermitente. 4.1 Limpeza inicial 3. • Retire todas as peças do aparelho. • Limpe o aparelho antes da primeira utilização. Prima nutos. 4.
PORTUGUÊS 3. Para desactivar o aparelho, rode o botão das funções do forno para a posição Off ("0") . Símbolo, indicador ou lâmpada do botão (depende do modelo - consulte a descrição do seu modelo): • O indicador acende quando o forno está a aquecer. • A lâmpada acende quando o aparelho está a funcionar. • O símbolo indica se o botão controla uma das zonas de cozedura, as funções do forno ou a temperatura. 5.
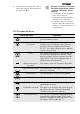
www.aeg.com 5.3 Visor A B C A) Temporizador B) Indicador de aquecimento e indica- dor de calor residual C) Gaveta da água (apenas alguns mo- delos) D) Sonda térmica (apenas alguns mode- G F E D los) E) Bloqueio electrónico da porta (ape- nas alguns modelos) F) Horas / minutos G) Funções de relógio 5.4 Botões Botão Função RELÓGIO MENOS, MAIS , 5.5 Indicador de aquecimento / calor residual Descrição Para seleccionar uma função de relógio. Para definir um tempo.
PORTUGUÊS Prima repetidamente para alterar a função de relógio. 1. Prima para confirmar os valores das funções de relógio ou aguarde 5 segundos para os valores serem confirmados automaticamente. 2. 6.1 Definir a DURAÇÃO ou o FIM 1. Prima repetidamente até o visor ou . apresentar ou visor. aparece intermitente no 2. Prima tos. ou 3. Prima para confirmar. 4. Prima ou para definir os minu- para definir a hora. 5. Prima para confirmar.
www.aeg.com 7.1 Inserir os acessórios do forno O tabuleiro para grelhar e a prateleira em grelha possuem saliências laterais. Estas saliências e a forma das barras de guia impedem que os tabuleiros e as assadeiras deslizem. Instalar simultaneamente a prateleira em grelha e o tabuleiro para grelhar Coloque a prateleira em grelha no tabuleiro para grelhar. Coloque o tabuleiro para grelhar entre as barras de guia de um dos níveis do forno. 7.
PORTUGUÊS 13 7.3 Colocar simultaneamente a prateleira em grelha e o tabuleiro para grelhar Coloque a prateleira em grelha no tabuleiro para grelhar. Coloque a prateleira em grelha e o tabuleiro para grelhar nas calhas telescópicas. 8. FUNÇÕES ADICIONAIS 8.1 Bloqueio de segurança para crianças O Bloqueio de Segurança para Crianças evita um funcionamento acidental do aparelho. Activar e desactivar a função de Bloqueio de Segurança para Crianças: 1. Não seleccione nenhuma função do forno. 2.
www.aeg.com manter as superfícies do aparelho frias. Se desactivar o aparelho, a ventoinha de arrefecimento continua a funcionar até o aparelho arrefecer. • Se estiver alguma função do forno a funcionar. • Se a temperatura do forno não for alterada. 8.
PORTUGUÊS 15 9.3 Sugestões para cozer Resultado da cozedura Causa possível Solução A base do bolo não está suficientemente alourada. A posição da prateleira não é a correcta. Coloque o bolo numa prateleira inferior. O bolo desfaz-se (mal cozido, com buracos, aguado). A temperatura do forno é demasiado elevada. Quando voltar a cozer, seleccione uma temperatura do forno ligeiramente inferior. O bolo desfaz-se (mal cozido, com buracos, aguado). O tempo de cozedura é demasiado curto.
www.aeg.com Tipo de cozedura Função do forno Posição da prateleira Temperatura (°C) Tempo (min.
PORTUGUÊS Tipo de cozedura Função do forno Posição da prateleira Pão (pão de centeio): 1. Primeira parte do processo de cozedura. 2. Segunda parte do processo de cozedura.
www.aeg.com 2) Utilize o tabuleiro para grelhar. Biscoitos Tipo de cozedura Função do forno Posição da prateleira Temperatura (°C) Tempo (min.
PORTUGUÊS 19 Soufflés e gratinados Prato Função do forno Posição da prateleira Temperatura (°C) Tempo (min.
www.aeg.com Biscoitos/small cakes/bolos pequenos/pãezinhos/pastéis Ventilado + Resistência Circ Tipo de cozedura Posição da prateleira Temperatura (°C) Tempo (min.
PORTUGUÊS Tipo de cozedura Posição da prateleira Temperatura em °C Tempo (min.) Bolo de maçã, coberto 1 150 - 170 50 - 60 Tarte de legumes 1 160 - 180 50 - 60 Pão não fermentado 2 230 - 2501) 10 - 20 Tarte de massa folhada 2 160 - 180 1) 45 - 55 Flammekuchen (tipo Pizza da Alsácia) 2 230 - 2501) 12 - 20 Piroggen (versão russa do calzone) 2 180 - 200 1) 15 - 25 21 1) Pré-aqueça o forno. 2) Utilize o tabuleiro para grelhar. 9.
www.aeg.com Tipo de carne Quantida- Função do de forno Posição da prateleira Carne assada ou lombo: médio por cm de espessura Grelhador ventilado 1 Carne assada ou lombo: bem passado por cm de espessura Grelhador ventilado 1 Temperatura em °C 180 - 190 1) 170 - 180 Tempo (min.) 6-8 1) 8 - 10 Função do Posição da forno prateleira Temperatura em °C Tempo (min.) 1) Pré-aqueça o forno.
PORTUGUÊS 23 Lombo de caça Tipo de carne Quantidade Função do forno Posição da Temperaprateleira tura em °C Tempo (min.) Lombo / perna de lebre até 1 kg Aquecimento convencional 1 230 1) 30 - 40 Lombo de veado 1,5 - 2 kg Aquecimento convencional 1 210 - 220 35 - 40 Coxa de veado 1,5 - 2 kg Aquecimento convencional 1 180 - 200 60 - 90 1) Pré-aqueça o forno. Aves Tipo de carne Quantidade Função do forno Posição da Temperaprateleira tura em °C Tempo (min.
www.aeg.com CUIDADO Grelhe sempre com a porta do forno fechada. Grelhador Alimento a grelhar Posição da prateleira Temperatura Carne assada 2 Lombo de vaca Tempo (min.) 1.º lado 2.º lado 210 - 230 30 - 40 30 - 40 3 230 20 - 30 20 - 30 Lombo de porco 2 210 - 230 30 - 40 30 - 40 Lombo de vitela 2 210 - 230 30 - 40 30 - 40 Lombo de borrego 3 210 - 230 25 - 35 20 - 25 3/4 210 - 230 15 - 30 15 - 30 Peixe inteiro, 500 - 1000 g Grelhador rápido Alimento a grelhar Tempo (min.
PORTUGUÊS Refeições prontas Posição da prateTemperatura (°C) leira 25 Tempo (min.
www.aeg.com Prato Tempo de descongelação (min.) Tempo de pós-descongelação (min.) Comentário Frango, 1000 g 100 - 140 20 - 30 Coloque o frango sobre um pires virado ao contrário e este sobre um prato grande. Vire a meio do tempo. Carne, 1000 g 100 - 140 20 - 30 Vire a meio do tempo. Carne, 500 g 90 - 120 20 - 30 Vire a meio do tempo.
PORTUGUÊS 27 Legumes Temperatura em °C Tempo de cozedura até começar a ferver (min.) Continue a cozinhar a 100 °C (min.) Cenouras 1) 160 - 170 50 - 60 5 - 10 Pepinos 160 - 170 50 - 60 - Picles mistos 160 - 170 50 - 60 5 - 10 Couve-rábano / ervilhas / espargos 160 - 170 50 - 60 15 - 20 Conservas 1) Deixe ficar no forno após desligar. 9.13 Secar - Ventilado + Resistência Circ Utilize papel vegetal para cobrir as prateleiras do forno.
www.aeg.com 10. MANUTENÇÃO E LIMPEZA ADVERTÊNCIA Consulte os capítulos relativos à segurança. Notas sobre a limpeza: • Limpe a parte da frente do aparelho com um pano macio, água quente e um produto de limpeza. • Para limpar as superfícies de metal, utilize um produto de limpeza normal. • Limpe o interior do aparelho após cada utilização. Desta forma, a sujidade não ficará queimada e poderá removê-la com mais facilidade. • Limpe a sujidade persistente com um produto de limpeza especial para forno.
PORTUGUÊS 29 10.2 Apoios para prateleiras Remover os apoios para prateleiras É possível retirar os apoios para prateleiras para limpar as paredes laterais. 1. Puxe a parte da frente do apoio para prateleiras para fora da parede lateral. 2. Puxe a parte de trás do apoio para prateleiras para fora da parede lateral e retire-o. 2 1 Instalar os apoios para prateleiras Instale os apoios para prateleiras na sequência inversa.
www.aeg.com 10.4 Limpeza da porta do forno Remover a porta e os painéis de vidro Pode remover a porta do forno e os painéis de vidro internos para limpar. O número de painéis de vidro varia de modelo para modelo. ADVERTÊNCIA Tenha cuidado quando retirar a porta do aparelho. A porta é pesada. Abra a porta totalmente. Pressione totalmente as alavancas de fixação (A) nas duas dobradiças da porta. 3. Feche a porta do forno até à primeira posição de abertura (ângulo de 70°). 4.
PORTUGUÊS 31 11. O QUE FAZER SE… ADVERTÊNCIA Consulte os capítulos relativos à segurança. Problema Causa possível O aparelho não aquece. O aparelho está desactivado. Active o aparelho. Solução O aparelho não aquece. O relógio não está regulado. Acerte o relógio. Consulte “Acertar a hora”. O aparelho não aquece. As regulações necessárias não estão configuradas. Certifique-se de que as regulações estão correctas. O aparelho não aquece. A desactivação automática foi activada.
www.aeg.com Problema Causa possível O visor apresenta um có- Existe uma anomalia digo de erro que não es- eléctrica. tá nesta lista. Se não conseguir encontrar uma solução para o problema, contacte o seu fornecedor ou o Centro de Assistência Técnica. Os dados de contacto do Centro de Assistência Técnica encontram-se na placa Solução • Desactive o aparelho no disjuntor do quadro eléctrico de sua casa e active-o novamente.
PORTUGUÊS 33
www.aeg.
PORTUGUÊS 35
892960387-A-492012 www.aeg.