
Operating instructions


Table Of Contents
- OPERATING INSTRUCTIONS
- Table of Contents
- 1 General Information
- 2 Safety
- 3 Scope of Delivery
- 4 Equipment Specifications
- 5 Functional Description
- 6 Storage and Transport
- 7 Installation
- 8 Commissioning
- 9 Operation
- 10 Maintenance
- 11 Decommissioning and Dismantling
- List of Tables
- List of Figures
Protect PV.600/800 OD Series - Operating Instructions
8000041160 BAL Page 77 of 100
In all other menus, you can press any key (even a key to which no
functions have been assigned) to acknowledge the generator. If
the number of messages or faults increases, however, the
acknowledgement is cancelled.
9.2 Main Menu
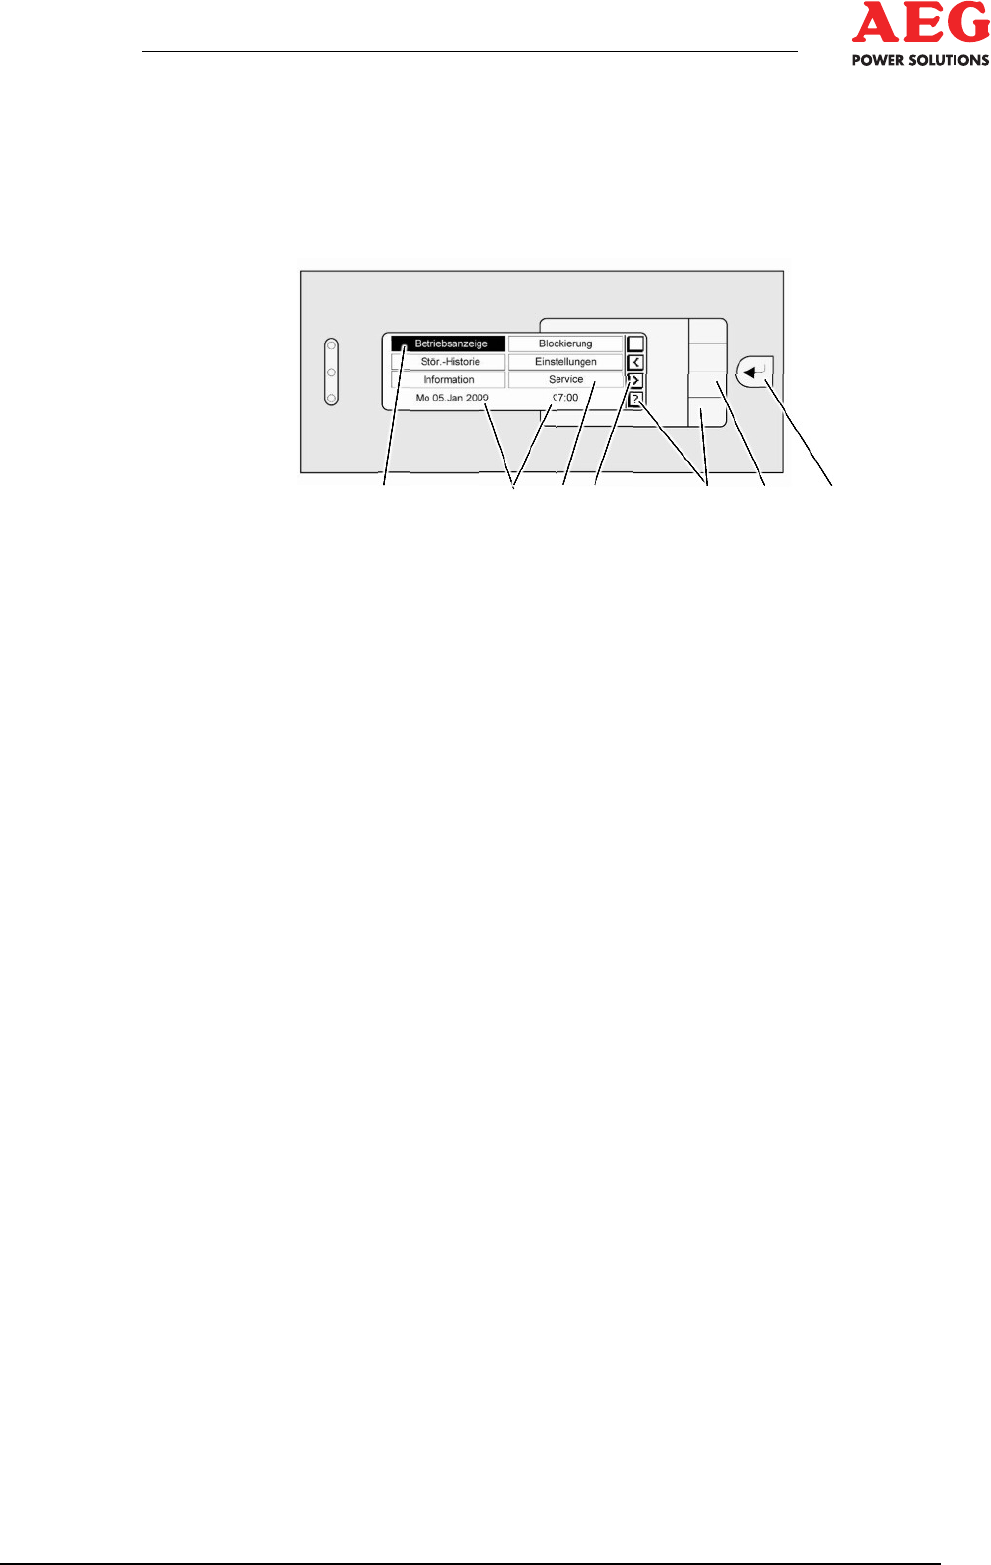
1 2 3 4 5 6 7
Figure 26 - Main menu
1 Selected submenu
2 Real time (adjustable)
3 Submenu
4 Functional assignment of the keys
5 Help
6 Keys
7 ENTER key
The "Main menu" represents the highest menu level after commis-
sioning, which means that it is possible to call up further submenus
and reset from this point.
The selected submenu is always shown on a black background.
The real time displayed in the status line can be corrected in "Set-
tings".
The functional assignment of the keys changes depending on the
menu and is displayed as a symbol (Table 8 - Key symbols
symbols). Use the ENTER key to activate a selected submenu.
The "Main menu" displays the menus in the first level of the menu
tree.