
Owner's manual
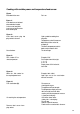


Cooking with variable power and temperature/food sensor
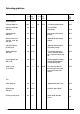
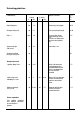
Figurer
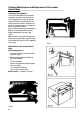
Place food in the oven.
Fan is on.
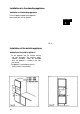
Figure 11
Insert food sensor into food
to be cooked or heated,
in the case of meat joints
insert sensor into the centre
of the thickest part.
Figure 12
insert food sensor plug into
plug socket in the oven.
Close the door.
Clock symbol for cooking time
will go out.
Temperature symbol X comes on.
40 X will be shown on the left
of display D.
The lowest temperature to which
foods can be heated is 40 X.
The fan will stop.
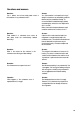
Figure 13
Push buttons E to
select temperature:
Example: SOX
Push buttons from left to right:
1.1x = 5
2. Ox = 0
Display shows SOX on the left
hand side.
Figure 14
Move the slide control to
the required power level:
Example: 100 = 100%.
Cook light next to the start button
will flash on and off.
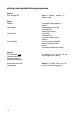
Figure 10
Push start button (G).
On reaching the set temperature:
Remove food sensor from
plug socket.
Fan comes on.
Cook light will stay on.
The appliance will start to cook.
The temperature display will show
40 X on the left hand side. After
reaching 40 X the temperature increase
is shown on the display.
SOX will be shown twice -
side-by-side - in the display.
Fan will stop.
Acoustic signal will come on.
Food sensor must not be left In the oven.
11