FAVORIT34500IM0 NL Gebruiksaanwijzing FR Notice d'utilisation DE Benutzerinformation 2 17 32
www.aeg.com INHOUD 1. 2. 3. 4. 5. 6. 7. 8. 9. 10. VEILIGHEIDSVOORSCHRIFTEN . . . . . . . . . . . . . . . . . . . . . . . . . . . . . . . . . . . . . . . . . . . . . . . . 3 BESCHRIJVING VAN HET PRODUCT . . . . . . . . . . . . . . . . . . . . . . . . . . . . . . . . . . . . . . . . . . . 5 BEDIENINGSPANEEL . . . . . . . . . . . . . . . . . . . . . . . . . . . . . . . . . . . . . . . . . . . . . . . . . . . . . . . . 5 PROGRAMMA’S . . . . . . . . . . . . . . . . . . . . . . . . . . . . . . . . . . . . .
NEDERLANDS 1. 3 VEILIGHEIDSVOORSCHRIFTEN Lees zorgvuldig de meegeleverde instructies voor installatie en gebruik van het apparaat. De fabrikant is niet verantwoordelijk voor letsel en schade veroorzaakt door een foutieve installatie. Bewaar de instructies van het apparaat voor toekomstig gebruik. 1.1 Veiligheid van kinderen en kwetsbare mensen WAARSCHUWING! Gevaar voor verstikking, letsel of permanente invaliditeit.
www.aeg.com • Zorg dat u de hoofdstekker en kabel niet beschadigt. Indien de voedingskabel moet worden vervangen, dan MOET dit gebeuren door onze Klantenservice. • Steek de stekker pas in het stopcontact als de installatie is voltooid. Zorg ervoor dat het netsnoer na installatie bereikbaar is. • Trek niet aan het aansluitnoer om het apparaat los te koppelen. Trek altijd aan de stekker. • Raak de stroomkabel of stekker niet aan met natte handen. • Dit apparaat voldoet aan de EU-richtlijnen. 1.
NEDERLANDS 2. BESCHRIJVING VAN HET PRODUCT 1 2 10 9 8 7 6 5 4 3 1 Bovenste sproeiarm 6 Glansmiddeldoseerbakje 2 Onderste sproeiarm 3 Filters 7 Afwasmiddeldoseerbakje 4 Typeplaatje 9 Onderkorf 10 Bovenkorf 5 Zoutreservoir 8 Bestekkorf 3.
www.aeg.com 3 Indicatielampjes 5 Starttoets 4 Toets startuitstel 6 Programmaknop Indicatielampjes Beschrijving Wasfase-indicatielampje. Droogfase-indicatielampje. Einde-indicatielampje. Zoutindicatielampje. Dit indicatielampje is uit als het programma werkt. Glansmiddelindicatielampje. Dit indicatielampje is uit als het programma werkt. 4.
NEDERLANDS 7 Aanwijzingen voor testinstituten Stuur voor alle benodigde informatie over testprestaties een e-mail naar: info.test@dishwasher-production.com Schrijf het productnummer (PNC) op dat u op het typeplaatje vindt. 5. VOOR HET EERSTE GEBRUIK 1. Controleer of het ingestelde niveau van de waterontharder juist is voor de waterhardheid in uw omgeving. Als dat niet het geval is, stelt u de waterontharder in.
www.aeg.com • Het controlelampje "aan/uit" en het controlelampje "start" blijven knipperen. • Het onderbroken knipperen van verwijst naar het huidige, ingestelde niveau, bijv. 5 keer knipperen + pauze + 5 keer knipperen = niveau 5. 5. Druk herhaaldelijk op Delay om de instelling te wijzigen. Elke keer dat u op Delay drukt gaat het getal van het niveau omhoog. 6. Om de instelling te bevestigen en het apparaat uit te schakelen, draai de schakelaar totdat de programmaaanwijzer op de aan-/uit-stand staat.
NEDERLANDS 9 5.3 Het glansmiddeldoseerbakje vullen A D 1. B C U kunt het schuifje voor de vrij te geven hoeveelheid (B) instellen tussen stand 1 (laagste hoeveelheid) en stand 4 of 6 (hoogste hoeveelheid). B A Druk op de ontgrendelknop (D) om het deksel (C) te openen. 2. Vul het glansmiddeldoseerbakje (A) niet verder dan de aanduiding 'max'. 3. Verwijder gemorst glansmiddel met een absorberend doekje om te voorkomen dat er te veel schuim ontstaat. 4. Sluit het deksel.
www.aeg.com 6.1 Vaatwasmiddel gebruiken 1. D A B 2. 30 3. 20 4. C 5. A 30 B D Druk op de ontgrendelknop (B) om het deksel (C) te openen. Doe het vaatwasmiddel in het doseerbakje (A) . Als het programma over een voorspoelfase beschikt, plaats dan een kleine dosis afwasmiddel in doseerbakje (D). Als u vaatwastabletten gebruikt, plaatst u deze in het doseerbakje (A). Sluit het deksel. Zorg ervoor dat het ontgrendelknopje op zijn plaats dichtklikt. 20 32 - 1 4 MAX + C 6.
NEDERLANDS 6.3 Een programma instellen en starten Instelmodus Het apparaat moet in de instelmodus staan om een programma te starten. Draai de programmaschakelaar totdat de programma-aanwijzer overeenkomt met het programma op het bedieningspaneel. Het indicatielampje aan/uit gaat branden en het startindicatielampje gaat knipperen, het apparaat staat in de instelmodus. Druk op de startknop ingedrukt als het bedieningspaneel andere omstandigheden weergeeft, tot het apparaat in de instelmodus staat.
www.aeg.com Let op • Laat de borden afkoelen voordat u deze uit het apparaat neemt. Hete borden zijn gevoelig voor beschadigingen. • Ruim eerst het onderrek en dan het bovenrek uit. • Er kan water liggen aan de zijkanten en op de deur van het apparaat. Roestvrij staal koelt sneller af dan borden. 7. AANWIJZINGEN EN TIPS 7.1 De waterontharder Hard water bevat een grote hoeveelheid mineralen die schade aan het apparaat en slechte schoonmaakresultaten kan veroorzaken.
NEDERLANDS • De filters schoon zijn en correct zijn geplaatst. • De sproeiarmen niet zijn verstopt. • De positie van de items in de mandjes correct is. • Het programma van toepassing is op het type lading en de mate van bevuiling. 13 • De juiste hoeveelheid afwasmiddel is gebruikt. • Er regenereerzout en glansmiddel is toegevoegd (tenzij u gecombineerde afwastabletten gebruikt). • De dop van het zoutreservoir goed dicht zit. 8.
www.aeg.com 6. 7. Zorg ervoor dat het filter (B) juist wordt geplaatst onder de 2 geleiders (C). Monteer het filter (A) en zet het terug in filter (B). Rechtsom draaien tot het vastzit. Een onjuiste plaatsing van de filters kan leiden tot slechte wasresultaten en het apparaat beschadigen. 8.2 De sproeiarmen reinigen 8.3 Buitenkant reinigen Probeer niet de sproeiarmen te verwijderen. Als etensresten de openingen in de sproeiarmen hebben verstopt, verwijder deze dan met een smal en puntig voorwerp.
NEDERLANDS Storing Mogelijke oplossing U kunt het apparaat niet activeren. Zorg dat de stekker in het stopcontact zit. 15 Zorg dat er geen zekering in de zekeringenkast is doorgebrand. Het programma start niet. Zorg dat de deur van het apparaat is gesloten. Druk op de starttoets. Als de starttijdkeuze start is ingesteld, annuleert u deze functie of wacht u tot het einde van het aftellen. Het apparaat wordt niet met wa- Controleer of de waterkraan is geopend. ter gevuld.
www.aeg.com Het serviesgoed is nat • Het programma heeft geen droogfase of een te lage droogtemperatuur. • Het glansmiddeldoseerbakje is leeg. • De kwaliteit van het glansmiddel kan de oorzaak zijn. Zie ‘AANWIJZINGEN EN TIPS’ voor andere mogelijke oorzaken. 10. TECHNISCHE INFORMATIE Afmeting Breedte / hoogte / diepte (mm) Aansluiting op het elektriciteitsnet Zie het typeplaatje. Voltage 596 / 818 -898 / 575 220 - 240 V Tijd 50 Hz Waterdruk Min. / max. (bar / MPa) (0.5 / 0.05 ) / (8 / 0.
FRANÇAIS 17 SOMMAIRE 1. 2. 3. 4. 5. 6. 7. 8. 9. 10. INSTRUCTIONS DE SÉCURITÉ . . . . . . . . . . . . . . . . . . . . . . . . . . . . . . . . . . . . . . . . . . . . . . . . DESCRIPTION DE L'APPAREIL . . . . . . . . . . . . . . . . . . . . . . . . . . . . . . . . . . . . . . . . . . . . . . . . BANDEAU DE COMMANDE . . . . . . . . . . . . . . . . . . . . . . . . . . . . . . . . . . . . . . . . . . . . . . . . . PROGRAMMES . . . . . . . . . . . . . . . . . . . . . . . . . . . . . . . . . . . . . . . . . . .
www.aeg.com 1. INSTRUCTIONS DE SÉCURITÉ Avant d'installer et d'utiliser cet appareil, lisez soigneusement les instructions fournies. Le fabricant ne peut être tenu pour responsable des dommages et blessures liés à une mauvaise installation ou utilisation. Conservez toujours cette notice avec votre appareil pour vous y référer ultérieurement. 1.1 Sécurité des enfants et des personnes vulnérables AVERTISSEMENT Risque d'asphyxie, de blessure ou d'invalidité permanente.
FRANÇAIS • • • • remplacement du cordon d'alimentation de l'appareil doit être effectué par notre service après-vente. Ne connectez la fiche d'alimentation à la prise de courant qu'à la fin de l'installation. Assurez-vous que la prise de courant est accessible une fois l'appareil installé. Ne tirez jamais sur le câble d'alimentation électrique pour débrancher l'appareil. Tirez toujours sur la prise. Ne touchez jamais le câble d'alimentation ou la prise avec des mains mouillées.
www.aeg.com 2. DESCRIPTION DE L'APPAREIL 1 2 10 9 8 7 6 5 4 3 1 Bras d'aspersion supérieur 6 Distributeur de liquide de rinçage 2 Bras d'aspersion inférieur 3 Filtres 7 Distributeur de produit de lavage 4 Plaque signalétique 9 Panier inférieur 10 Panier supérieur 5 Réservoir de sel régénérant 8 Panier à couverts 3.
FRANÇAIS 3 Voyants 5 Touche Départ 4 Touche Départ différé 6 Sélecteur de programme Voyants 21 Description Voyant de phase de lavage. Voyant de phase de séchage. Voyant de fin. Voyant du réservoir de sel régénérant. Ce voyant est éteint pendant le déroulement du programme. Voyant du réservoir de liquide de rinçage. Ce voyant est éteint pendant le déroulement du programme. 4.
www.aeg.com 4) Ce programme permet un rinçage rapide. Cela empêche les restes de nourriture de coller sur la vaisselle et évite les mauvaises odeurs. N'utilisez pas de produit de lavage avec ce programme. Informations pour les instituts de test Pour toute information relative aux performances de test, envoyez un courrier électronique à l'adresse : info.test@dishwasher-production.com Notez le numéro du produit (PNC) situé sur la plaque signalétique. 5. AVANT LA PREMIÈRE UTILISATION 1.
FRANÇAIS Comment régler le niveau de l'adoucisseur d'eau 1. Assurez-vous que l'indicateur de programme du sélecteur est aligné sur l'indicateur Marche/Arrêt. 2. Appuyez de façon prolongée sur Delay. Simultanément, tournez le sélecteur vers la gauche jusqu'à ce que l'indicateur de programme soit aligné sur le premier programme. 3. Relâchez la touche Delay lorsque les voyants Départ et Marche/Arrêt commencent à clignoter. 4. Appuyez sur la touche Delay. • commence à clignoter.
www.aeg.com 5.3 Remplissage du distributeur de liquide de rinçage A D 1. B C Vous pouvez tourner le sélecteur de quantité délivrée (B) entre la position 1 (quantité minimale) et la position 4 ou 6 (quantité maximale). B A M AX 4 3 2 1 + Appuyez sur le bouton d'ouverture (D) pour ouvrir le couvercle (C). 2. Remplissez le distributeur de liquide de rinçage (A), sans dépasser le repère « max ». 3.
FRANÇAIS 25 6.1 Utilisation du produit de lavage 1. D A B 2. 30 3. 20 4. C 5. A 30 B D Appuyez sur le bouton d'ouverture (B) pour ouvrir le couvercle (C). Versez le produit de lavage dans le compartiment (A). Si le programme comporte une phase de prélavage, versez une petite quantité de produit de lavage dans le compartiment (D). Si vous utilisez des pastilles de détergent, placez une pastille dans le compartiment (A). Fermez le couvercle.
www.aeg.com 6.3 Réglage et départ d'un programme Mode Programmation L'appareil doit être en mode Programmation pour lancer un programme. Tournez le sélecteur jusqu'à ce que l'indicateur de programme soit aligné sur un programme sur le bandeau de commande. Si le voyant Marche/Arrêt s'allume et le voyant Départ se met à clignoter, l'appareil est en mode Programmation.
FRANÇAIS Important • Attendez que la vaisselle refroidisse avant de la retirer du lave-vaisselle. La vaisselle encore chaude est sensible aux chocs. • Déchargez d'abord le panier inférieur, puis le panier supérieur. 27 • Les côtés et la porte de l'appareil peuvent être mouillés. L'acier inoxydable refroidit plus rapidement que la vaisselle. 7. CONSEILS 7.1 Adoucisseur d'eau L'eau dure contient une grande quantité de minéraux pouvant endommager l'appareil et donner de mauvais résultats de lavage.
www.aeg.com • Placez les articles légers dans le panier supérieur. Disposez-les de façon à ce qu'ils ne puissent pas se retourner. • Assurez-vous que les bras d'aspersion tournent librement avant de lancer un programme. 7.4 Avant le démarrage d'un programme Assurez-vous que : • Les filtres sont propres et correctement installés. • Les bras d'aspersion ne sont pas obstrués. • La vaisselle est bien positionnée dans les paniers. • Le programme est adapté au type de vaisselle et au degré de salissure.
FRANÇAIS 6. 7. 29 Assurez-vous que le filtre (B) est correctement positionné, sous les 2 guides (C). Assemblez le filtre (A) et remettez-le en place dans le filtre (B). Tournez-le vers la droite jusqu'à la butée. Une position incorrecte des filtres peut donner de mauvais résultats de lavage et endommager l'appareil. 8.2 Nettoyage des bras d'aspersion Ne retirez pas les bras d’aspersion. Si des résidus ont bouché les orifices des bras d'aspersion, éliminez ceux-ci à l'aide d'un objet fin et pointu. 8.
www.aeg.com Problème Solution possible L'appareil ne s'allume pas. Assurez-vous que la fiche du câble d'alimentation est bien insérée dans la prise de courant. Assurez-vous qu'aucun fusible n'est grillé dans la boîte à fusibles. Le programme ne démarre pas. Vérifiez que la porte de l'appareil est fermée. Appuyez sur la touche Départ. Si vous avez sélectionné un départ différé, annulez-le ou attendez la fin du décompte. L'appareil ne se remplit pas d'eau.
FRANÇAIS • Il se peut que la qualité du produit de lavage soit en cause. 31 • Il se peut que la qualité du liquide de rinçage soit en cause. La vaisselle est mouillée • Le programme ne contient pas de phase de séchage ou une phase de séchage à basse température. • Le distributeur de liquide de rinçage est vide. Pour trouver d'autres causes possibles, reportez-vous au chapitre « CONSEILS ». 10.
www.aeg.com INHALT 1. 2. 3. 4. 5. 6. 7. 8. 9. 10. SICHERHEITSHINWEISE . . . . . . . . . . . . . . . . . . . . . . . . . . . . . . . . . . . . . . . . . . . . . . . . . . . . . GERÄTEBESCHREIBUNG . . . . . . . . . . . . . . . . . . . . . . . . . . . . . . . . . . . . . . . . . . . . . . . . . . . . BEDIENFELD . . . . . . . . . . . . . . . . . . . . . . . . . . . . . . . . . . . . . . . . . . . . . . . . . . . . . . . . . . . . . . PROGRAMME . . . . . . . . . . . . . . . . . . . . . . . . . . . . . . . .
DEUTSCH 1. 33 SICHERHEITSHINWEISE Lesen Sie vor der Montage und dem Gebrauch des Geräts zuerst die Gebrauchsanleitung. Der Hersteller übernimmt keine Verantwortung für Verletzungen und Beschädigungen durch unsachgemäße Montage. Bewahren Sie die Gebrauchsanleitung griffbereit auf. 1.1 Sicherheit von Kindern und schutzbedürftigen Personen WARNUNG! Es besteht Erstickungsgefahr, Risiko von Verletzungen oder permanenten Behinderungen.
www.aeg.com • Verwenden Sie keine Mehrfachsteckdosen oder Verlängerungskabel. • Achten Sie darauf, Netzstecker und Netzkabel nicht zu beschädigen. Falls das Netzkabel des Geräts ersetzt werden muss, lassen Sie dies durch unseren Kundendienst durchführen. • Stecken Sie den Netzstecker erst nach Abschluss der Montage in die Steckdose. Stellen Sie sicher, dass der Netzstecker nach der Montage noch zugänglich ist. • Ziehen Sie nicht am Netzkabel, um das Gerät von der Spannungsversorgung zu trennen.
DEUTSCH 2. GERÄTEBESCHREIBUNG 1 2 10 9 8 7 6 5 4 3 1 Oberer Sprüharm 6 Klarspülmittel-Dosierer 2 Unterer Sprüharm 3 Filter 7 Reinigungsmittelbehälter 4 Typenschild 9 Unterkorb 10 Oberkorb 8 Besteckkorb 5 Salzbehälter 3.
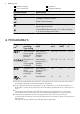
www.aeg.com 3 Kontrolllampen 5 Start-Taste 4 Zeitvorwahl-Taste 6 Programmwahlschalter Kontrolllampen Beschreibung Kontrolllampe „Hauptspülgang“. Kontrolllampe „Trocknungsphase“. Kontrolllampe „Programmende“. Kontrolllampe „Salz“. Diese Kontrolllampe erlischt während des Programmbetriebs. Kontrolllampe „Klarspülmittel“. Diese Kontrolllampe erlischt während des Programmbetriebs. 4. PROGRAMME Programm Verschmut1) zungsgrad Beladung 2) 3) 4) Programmphasen Dauer (Min.
DEUTSCH 37 Verwenden Sie für dieses Programm kein Reinigungsmittel. Informationen für Prüfinstitute Möchten Sie Informationen zum Leistungstest erhalten, schicken Sie eine E-Mail an: info.test@dishwasher-production.com Notieren Sie die Produktnummer (PNC), die Sie auf dem Typenschild finden. 5. VOR DER ERSTEN INBETRIEBNAHME 1. Prüfen Sie, ob die Einstellung des Wasserenthärters der Wasserhärte in Ihrem Gebiet entspricht. Stellen Sie ihn bei Bedarf entsprechend ein.
www.aeg.com Einstellen der Wasserenthärterstufe 1. Drehen Sie den Programmwahlschalter, bis die Referenzmarkierung auf die Position „Ein/Aus“ zeigt. 2. Halten Sie Delay gedrückt. Drehen Sie gleichzeitig den Programmwahlschalter entgegen dem Uhrzeigersinn, bis die Referenzmarkierung auf das erste Programm zeigt. 3. Lassen Sie die Taste „Delay“ los, wenn die Kontrolllampen „Start“ und „Ein/Aus“ zu blinken beginnen. 4. Drücken Sie Delay. • beginnt zu blinken.
DEUTSCH 39 5.3 Befüllen des Klarspülmittel-Dosierers A D 1. B C Sie können den Wahlschalter der Freigabemenge (B) zwischen Position 1 (geringste Menge) und Position 4 oder 6 (größte Menge) einstellen. B A M AX 4 3 2 1 + Drücken Sie die Entriegelungstaste (D), um den Deckel (C) zu öffnen. 2. Füllen Sie den Klarspülmittel-Dosierer (A) nicht über die Marke „max“ hinaus. 3. Wischen Sie verschüttetes Klarspülmittel mit einem saugfähigen Tuch auf, um zu große Schaumbildung zu vermeiden. 4.
www.aeg.com 6.1 Verwendung des Reinigungsmittels 1. D A B 2. 30 3. 20 4. C 5. A 30 B D Drücken Sie die Entriegelungstaste (B), um den Deckel (C) zu öffnen. Füllen Sie das Reinigungsmittel in den Behälter (A). Wenn das Programm einen Vorspülgang hat, füllen Sie eine kleine Menge Reinigungsmittel in das Fach (D). Wenn Sie Geschirrspüler-Tabs verwenden, legen Sie diese in den Reinigungsmittelbehälter (A). Schließen Sie den Deckel. Achten Sie darauf, dass die Entriegelungstaste einrastet.
DEUTSCH 6.3 Einstellen und Starten eines Programms Einstellmodus Das Gerät muss sich zum Starten eines Programms im Einstellmodus befinden. Drehen Sie den Programmwahlschalter, bis die Referenzmarkierung auf das Programm auf dem Bedienfeld zeigt. Wenn die Kontrolllampe „Ein/Aus“ aufleuchtet und die Kontrolllampe „Start“ blinkt, befindet sich das Gerät im Einstellmodus.
www.aeg.com Wichtig • Lassen Sie das Geschirr abkühlen, bevor Sie es aus dem Gerät nehmen. Heißes Geschirr ist stoßempfindlich. • Nehmen Sie das Geschirr zuerst aus dem Unterkorb und dann aus dem Oberkorb. • An den Innenseiten und an der Tür des Gerätes kann sich Wasser niederschlagen. Edelstahl kühlt schneller ab als Geschirr. 7. TIPPS UND HINWEISE 7.1 Der Wasserenthärter Hartes Wasser enthält viele Mineralien, die das Gerät beschädigen können und zu schlechten Spülergebnissen führen.
DEUTSCH 7.4 Vor dem Starten eines Programms Kontrollieren Sie folgende Punkte: • Die Filter sind sauber und ordnungsgemäß eingesetzt. • Die Sprüharme sind nicht verstopft. • Die Geschirrteile sind richtig in den Körben angeordnet. 43 • Das Programm eignet sich für die Beladung und den Verschmutzungsgrad. • Die Reinigungsmittelmenge stimmt. • Geschirrspülsalz und Klarspülmittel sind vorhanden (außer Sie verwenden Kombi-Reinigungstabeletten). • Der Deckel des Salzbehälters ist fest geschlossen. 8.
www.aeg.com 6. 7. Stellen Sie sicher, dass der Filter (B) korrekt unter den beiden Führungen (C) eingesetzt wurde. Bauen Sie den Filter (A) zusammen und setzen Sie ihn wieder in den Filter (B) ein. Drehen Sie ihn nach rechts, bis er einrastet. Eine falsche Anordnung der Filter führt zu schlechten Spülergebnissen und kann das Gerät beschädigen. 8.2 Reinigen der Sprüharme Bauen Sie die Sprüharme nicht aus.
DEUTSCH 45 WARNUNG! Schalten Sie das Gerät aus, bevor Sie die Überprüfungen vornehmen. Drehen Sie den Programmwahlschalter, bis die Referenzmarkierung auf die Ein/AusPosition zeigt. Problem Mögliche Abhilfe Das Gerät lässt sich nicht einschalten. Vergewissern Sie sich, dass der Netzstecker in die Netzsteckdose eingesteckt ist. Vergewissern Sie sich, dass im Sicherungskasten keine Sicherung ausgelöst hat. Das Programm startet nicht. Vergewissern Sie sich, dass die Tür geschlossen ist.
www.aeg.com 9.1 Die Spül- und Trocknungsergebnisse sind nicht zufriedenstellend. Weiße Streifen oder blau schimmernder Belag auf Gläsern und Geschirr • Die zugegebene Klarspülmittelmenge ist zu hoch. Stellen Sie den Dosierwähler für Klarspülmittel niedriger ein. • Die Reinigungsmittelmenge ist zu hoch. • Die Ursache kann in der Qualität des Reinigungsmittels liegen. Das Geschirr ist noch nass. • Das Programm enthält keine Trocknungsphase oder eine Trocknungsphase mit niedriger Temperatur.
DEUTSCH 47
156972610-A-402013 www.aeg.