
Operation Manual


3
ENGLISH
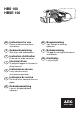
HBS 100, HBSE 100
Always disconnect the plug from the
socket before carrying out any work on the
machine.
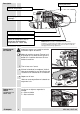
Prior the changing belt, adjust sanding belt
by turning the belt adjusting screw approx.
2–3 cm in the direction of the open side of
the machine beyond the rollers, whilst the
machine is running, as the new sanding
belt can sometimes brush against the
machine housing.
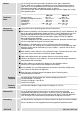
1. Pull the clamping lever forwards
2. Remove the worn belt and fit the inside of
the belt is pointing in the same direction as
the arrow on the machine.
3. Push the clamping lever back again
4. Taking a test run, position the sanding belt
with the aid of the belt adjusting screw so
that it is flush with the outer edge of the
sanding belt support.
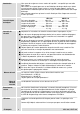
The speed is adjusted by means of the
electronic thumb wheel.
A = lowest speed
F = highest speed
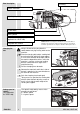
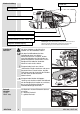
Brief description
Modifications: Text, diagrams and data are correct at the time of
printing. In the interest of continuous improvement of our products,
technical specifications are subject to alteration without prior notice.
Integrated dust removal
Locking button
On-/off switch
Suction connector
Adjusting screw for belt
Dust bag
Electronic thumb wheel (only
applicable for HBSE 100)
Changing the
belt
Setting speed of
rotation
(only applicable
for HBSE 100)
HBSE
electronic