L 87695 WD EN User manual ES Manual de instrucciones 2 40
www.aeg.com CONTENTS 1. 2. 3. 4. 5. 6. 7. 8. 9. 10. 11. 12. 13. 14. 15. SAFETY INFORMATION . . . . . . . . . . . . . . . . . . . . . . . . . . . . . . . . . . . . . . . . . . . . . . . . . . . . . . 3 SAFETY INSTRUCTIONS . . . . . . . . . . . . . . . . . . . . . . . . . . . . . . . . . . . . . . . . . . . . . . . . . . . . . . 4 TECHNICAL INFORMATION . . . . . . . . . . . . . . . . . . . . . . . . . . . . . . . . . . . . . . . . . . . . . . . . . . 6 PRODUCT DESCRIPTION . . . . . . . . . . . . . . . .
ENGLISH 3 1. SAFETY INFORMATION Before the installation and use of the appliance, carefully read the supplied instructions. The manufacturer is not responsible if an incorrect installation and use causes injuries and damages. Always keep the instructions with the appliance for future reference. 1.1 Children and vulnerable people safety WARNING! Risk of suffocation, injury or permanent disability.
www.aeg.com • If the supply cord is damaged, it must be replaced by the manufacturer, its service agent or similarly qualified persons in order to avoid a hazard. • The operating water pressure (minimum and maximum) must be between 0,5 bar (0,05 MPa) and 8 bar (0,8 MPa) • The ventilation openings in the base (if applicable) must not be obstructed by a carpet. • The appliance is to be connected to the water mains using the new supplied hose-sets. Old hose sets must not be reused. 2.
ENGLISH Water connection • Make sure not to cause damage to the water hoses. • The appliance is to be connected to the water mains using the new supplied hose-sets. Old hose sets must not be reused. • Before you connect the appliance to new pipes or pipes not used for a long time, let the water flow until it is clean. • The first time you use the appliance, make sure that there is no leakage. 2.2 Use WARNING! Risk of injury, electrical shock, fire, burns or damage to the appliance.
www.aeg.com • Disconnect the appliance from the mains supply. • Cut off the mains cable and discard it. • Remove the door catch to prevent children and pets to get closed in the appliance. 3.
ENGLISH 4. PRODUCT DESCRIPTION 1 2 3 8 9 10 4 5 11 6 12 7 1 Worktop 7 Feet for the appliance level 2 Detergent dispenser 8 Water drain hose 3 Control panel 4 Door handle 9 Water inlet valve 10 Mains cable 5 Rating plate 11 Transit bolts 6 Drain pump 12 Feet for the appliance level 4.1 Accessories 1 4 2 3 4.2 Child safety device • When you activate this device, you cannot close the door. This prevents children or pets to be closed in the drum.
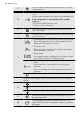
www.aeg.com 5. CONTROL PANEL 1 2 3 Anti-arrugas Algodón Refresco Sintéticos Algodón Eco Plancha Fácil Super Eco Non Stop 60 Min. Algodón Delicados Lana/Seda 20 Min. - 3 kg Sintéticos Lana Marcha/Parada Aclarado Centrifugado/ Descarga Temp. Manchas/ Aclarado Centrif.
ENGLISH 9 5.3 Display 3 A B C P D E O F G H I N J M K L The display shows: The temperature of the set programme A Cold water The spin speed of the set programme B No Spin symbol1) Rinse Hold symbol 1) Only available for SPIN/DRAIN programme. Prewash phase Washing phase Rinses phase Spin phase C The phase symbols • When a programme is set, all the symbols of the phases related to the programme come on. • When the programme starts, only the symbol of the phase in operation flashes.
www.aeg.com F The anti-crease symbol comes on when you set a drying programme. You cannot open the appliance door when the symbol is on. You can open the door only when the symbol goes off. G If the programme is completed but the symbol stays on: • The 'Rinse Hold' function is on. • There is water in the drum. H The child safety lock symbol comes on when this device is activated. I The delay start symbol comes on when you set the delay start function.
ENGLISH 11 Graphic bars The empty indicator bar appears only if the related function is available for the set programme. The indicator bar fills accordingly to the set functions. If you make a wrong selection the message Err indicates that the selection is not possible. The time save symbol comes on when you set one of the programme duration. N • Shortened time • Extra Quick The extra rinse symbol comes on when this function is activated. O The value shows the total number of the rinses.
www.aeg.com – Press two times to set 'Extra Quick' for items with light soil. Some programmes accept only one of the two functions. 5.9 Extra rinse button 9 Press button 9 to add rinsing phases to a programme. Use this function for persons allergic to detergents and in areas where the water is soft. 5.10 The Stain-Prewash button 10 Press button 10 to add the stain and/or a prewash phase to a programme. Press the button again and again to activate one or two options.
ENGLISH • To activate the function press button 8 and button 7 at the same time until the display shows the symbol . • To deactivate the function press button 8 and button 7 at the same time until the symbol goes off. 6. PROGRAMMES Programme Temperature Type of load Max. weight of load Cycle description Functions WASHING PROGRAMMES Algodón 95° - Cold White and coloured cotton Wash with heavy level of soil. Rinses max.
www.aeg.com Programme Temperature Type of load Max. weight of load Cycle description Functions Aclarado Cold All fabrics. max. load 9 kg One rinse with additive spin phase SPIN REDUCTION RINSE HOLD EXTRA RINSE5) Centrifugado / Descarga6) All fabrics. The spin phase assumes the setting for cotton items. Set the spin speed according the type fabrics. max.
ENGLISH 15 3) If you select the Extra Quick duration, we recommend that you decrease the quantity of the load. It is possible to load fully the appliance, however the washing results are reduced. 4) This programme is not compatible with drying. 5) Press EXTRA RINSE button to add rinses. With a low spin speed the appliance performs delicate rinses and a short spin. 6) To set the DRAIN programme only, set the function NO SPIN.
www.aeg.com In UK, Eire, Hong Kong and India the Woolmark symbol is a certification trademark. ©The Woolmark Company Pty Ltd. 6.2 Programmes for automatic drying Level of dryness Type of fabric Extra dry For towelling materials Cotton and linen (bathrobes, bath towels, etc) up to 7 kg Cotton and linen (bathrobes, bath towels, etc) up to 7 kg Synthetics and mixed fabrics (jumpers, blouses, underwear, household linen) up to 3 kg Cotton and linen (sheets, tablecloths, shirts, etc.
ENGLISH 17 7. CONSUMPTION VALUES At programme start the display shows the duration programme for the maximum load capacity. During the washing phase the programme duration is automatically calculated and can greatly be reduced if the laundry load is lower than the maximum load capacity (e.g. Cotton 60°C, maximum load capacity 0 kg, the programme duration exceeds 2 hours; real load 1 kg, the programme duration don’t reach 1 hour).
www.aeg.com 2. Connect the mains plug to the mains socket. 3. Press button 1 to activate the appliance. 4. Put the laundry in the appliance. 5. Use the correct quantity of detergent and additives. 6. Set and start the correct programme for the type of laundry and soil. 2. Put the laundry in the drum, one item at a time. Shake the items before you put them in the appliance. Make sure not to put too much laundry in the drum. 3. Close the door. 9.1 Loading the laundry 1. Open the appliance door.
ENGLISH 19 This is the maximum level for the quantity of liquid additives. Flap for powder or liquid detergent Turn it (up or down) in the correct position to use powder or liquid detergent. Always obey the instructions that you find on the packaging of the detergent products. Check the position of the flap 1. Pull out the detergent dispenser until it stops. 2. Press the lever down to remove the dispenser. 3. To use powder detergent, turn the flap up. 4. To use liquid detergent, turn the flap down.
www.aeg.com 9.3 Setting and starting a programme 1. Turn the programme knob. The related programme indicator comes on. 2. The indicator of button 6 flashes with red colour. 3. The display shows the default temperature, the spin speed and the empty indicator bars of the available functions. 4. To change the temperature and/or the spin speed, press the related buttons. 5. Set the available functions. 6. 9.6 Change a function You can change only some functions before they operate. 1. Press button 6 .
ENGLISH If the temperature and level of the water in the drum are too high, the door lock symbol stays on and you cannot open the door. To open the door do the steps that follow: 1. Deactivate the appliance. 2. Wait for some minutes. 3. Make sure that no water is in the drum. If you deactivate the appliance, it is necessary to set the programme again. 9.10 At the end of programme • The appliance stops automatically. • The acoustic signals operate. • In the display comes on.
www.aeg.com • Press the button 4 again and again until a black line appears under one of the dryness level symbol: The extra dry level comes on. the cupboard dry level comes on. The Iiron dry level comes on. The drying time symbol goes off. • The display shows a time value, calculated on a default load size. If the amount of your laundry is more or less than the default size, the appliance adjusts automatically the time value during the cycle. • Press button 6 to start the programme.
ENGLISH 23 11. USING THE APPLIANCE - WASHING & DRYING 11.1 NON-STOP programme Washing & Automatic drying CAUTION! Do not put a plastic device/ball for the detergent into the drum. • Press button 1 to activate the appliance. • Load the laundry. • Measure out the detergent and fabric conditioner. • Turn the programme dial to the washing programme. The display shows the symbols of the different washing phases. CAUTION! Do not set a spin speed lower than the automatic speed of the set programme.
www.aeg.com • The display shows the set drying value time. Set drying time value • After some seconds the display shows the total duration of the cycles: Final time value (washing + drying + anticrease + cooling phases) If you set a drying time of only 10 minutes, the final time value includes also the anti-crease and the cooling phases. • Press button 6 to start the programme. The door is locked The display shows the new time value each minute.
ENGLISH – Use a washing bag to wash small items. • A very small load can cause balance problems with the spin phase. If this occurs, adjust manually the items in the tub and start the spin phase again. 12.2 Stubborn stains For some stains, water and detergent is not sufficient. We recommend that you remove these stains before you put the items in the appliance. Special stain removers are available. Use the special stain remover that is applicable to the type of stain and fabric. 12.
www.aeg.com • For the maximum laundry load of the drying programmes, refer to the drying programmes table. Do no not set a drying programme for this laundry: – Very delicate items. – Synthetic curtains. – Woollen and silk items. – Pieces of clothing with metal inserts. – Nylon stockings. – Quilts. – Bed covers. – Duvets. – Anoraks. – Sleeping bags – Fabrics with residue of hair sprays, nail solvents or similar. – Garments with foam-rubber or materials similar to foam-rubber. 12.
ENGLISH 13.3 Maintenance wash With the low temperature programmes it is possible that some detergent stays in the drum. Make regularly a maintenance wash. To do this: • Empty the laundry from the drum. 27 • Set the hottest cotton wash programme • Use a correct quantity of powder detergent with biological properties. After each wash, keep the door open for a while to prevent mould and to let unpleasant smells go out. 13.4 Door seal Regularly examine the seal and remove all objects from the inner part.
www.aeg.com 5. 6. 13.7 Drain pump Regularly examine the drain pump and make sure that it is clean. Clean the dispenser recess with a brush. Put back the dispenser in the recess. • The display shows an alarm code because of the problem with water drain. WARNING! 1. Disconnect the mains plug from the mains socket. 2. Do not remove the filter while the appliance operates. Do not clean the drain pump if the water in the appliance is hot. The water must be cold before you clean the drain pump.
ENGLISH 5. 1 6. 29 When the container is full of water, put the drainage duct back again and empty the container. Do steps 4 and 5 again and again until no more water flows out from the drain pump. Pull back the drainage duct and turn the filter to remove it. 2 2 1 13.8 The inlet hose filter and the valve filter It could be necessary to clean the filters when: • The appliance does not fill with water. • The appliance fills with the water for a long time. 7. Remove fluff and objects from the pump.
www.aeg.com To clean the water inlet filters: Close the water tap. Remove the water inlet hose from the water tap. 3. Clean the filter in the inlet hose with a stiff brush. 1. 2. 4. 5. 6. 7. 20° Remove the inlet hose behind the appliance. Clean the filter in the valve with a stiff brush or a towel. Install again the inlet hose. Make sure that the couplings are tight to prevent leakages. Open the water tap. 45° 13.9 Emergency drain Because of a malfunction, the appliance cannot drain the water.
ENGLISH 31 14. TROUBLESHOOTING The start of the appliance does not occur or it stops during operation. First try to find a solution to the problem (refer to the table). If not, contact the service centre. With some problems, the acoustic signals operate and the display shows an alarm code: • - The appliance does not fill with water. • - The appliance does not drain the water. • - The appliance door is open or not closed correctly. • - The anti-flood device is on.
www.aeg.com Problem Possible cause The anti-flood device is on. The spin phase does not operate. The programme does not start. There is water on the floor. Possible solution • Disconnect the appliance. • Close the water tap. • Contact the service centre. The spin phase is off. Set the spin programme. The filter of the drain pump is blocked. Clean the filter of the drain pump. Refer to 'Care and cleaning'. Balance problems with the laundry load.
ENGLISH Problem Possible cause Possible solution The appliance fills The end of the drain with water and hose is too low. drain immediately. The washing results are not satisfactory. The appliance does not dry or does not dry correctly. The laundry is full of different colours fluff. 33 Make sure that the drain hose is in the correct position. The detergent you used Increase the detergent quantity was not sufficient or cor- or use a different one. rect.
www.aeg.com 15. INSTALLATION 15.1 Fixing plate kit (405517114) Available from your authorized dealer. If you install the appliance on a plinth, secure the appliance in the fixing plates. Follow the instructions supplied with the kit. 15.2 Unpacking 1. Use the gloves. Remove the external film. If necessary, use a cutter. 2. 3. Remove the cardboard top. Remove the polystyrene packaging materials. 4. Remove the internal film.
ENGLISH 35 5. Open the door. Remove the polystyrene piece from the door seal and all the items from the drum. 6. Put one of the polystyrene packaging elements on the floor behind the appliance. Carefully put down the appliance with the rear side on it. Make sure not to damage the hoses. 7. Remove the polystyrene protection from the bottom. Pull up the appliance in vertical position. 8. 1 2 9. Remove the power supply cable and the drain hose from the hose holders.
www.aeg.com 10. Remove the three bolts. Use the key supplied with the appliance. 11. Pull out the plastic spacers. 12. Put the plastic caps in the holes. You can find these caps in the user manual bag. WARNING! Remove all the packaging and the transit bolts before you install the appliance. We recommend that you keep the packaging and the transit bolts for when you move the appliance. 15.3 Positioning and levelling • Install the appliance on a flat hard floor.
ENGLISH 37 • The appliance must be level and stable. CAUTION! Do not put cardboard, wood or equivalent materials below the appliance feet to adjust the level. 15.4 The inlet hose • Connect the hose to the appliance. Turn the inlet hose only left or right. Loose the ring nut to set it in the correct position. 20 O 45 O • Connect the water inlet hose to the cold water tap with 3/4 thread. CAUTION! Make sure that there are no leaks from the couplings.
www.aeg.com Water-stop device The inlet hose has a water stop device. This device prevents water leaks in the hose because of its natural ageing. The red sector in the window «A» shows this fault . If this occur, close the water tap and contact the service centre to replace the hose. A 15.5 Water drainage There are different procedures to connect the drain hose: With the plastic hose guide. • On the edge of a sink. • Make sure that the plastic guide cannot move when the appliance drains.
ENGLISH 39 Without the plastic hose guide. • To a sink spigot. Refer to the illustration. Put the drain hose in the spigot and tighten it with a clip. Make sure that the drain hose makes a loop to prevent that remaining particles go in the appliance from the sink. • Directly to a built-in drain pipe in the room wall and tighten it with a clip. You can extend the drain hose to maximum 400 cm. Contact the service centre for the other drain hose and the extension. 16.
www.aeg.com ÍNDICE DE MATERIAS 1. 2. 3. 4. 5. 6. 7. 8. 9. 10. 11. 12. 13. 14. 15. INFORMACIÓN SOBRE SEGURIDAD . . . . . . . . . . . . . . . . . . . . . . . . . . . . . . . . . . . . . . . . . . INSTRUCCIONES DE SEGURIDAD . . . . . . . . . . . . . . . . . . . . . . . . . . . . . . . . . . . . . . . . . . . . INFORMACIÓN TÉCNICA . . . . . . . . . . . . . . . . . . . . . . . . . . . . . . . . . . . . . . . . . . . . . . . . . . . DESCRIPCIÓN DEL PRODUCTO . . . . . . . . . . . . . . . . . . . . . . . . . .
ESPAÑOL 41 1. INFORMACIÓN SOBRE SEGURIDAD Antes de instalar y utilizar el aparato, lea atentamente las instrucciones facilitadas. El fabricante no se hace responsable de los daños y lesiones causados por una instalación y uso incorrectos. Guarde siempre las instrucciones junto con el aparato para futuras consultas. 1.1 Seguridad de niños y personas vulnerables ADVERTENCIA Existe riesgo de sufrir asfixia, lesiones o incapacidad permanente.
www.aeg.com • Respete la carga máxima de 9 kg (consulte el capítulo “Tabla de programas”). • Si el cable eléctrico sufre algún daño, el fabricante, su servicio técnico o un profesional tendrán que cambiarlo para evitar riesgos. • La presión de trabajo del agua (mínima y máxima) debe oscilar entre 0,5 bares (0,05 MPa) y 8 bares (0,8 MPa) • Vigile que ninguna alfombra obstruya las aberturas de ventilación de la base (si existen).
ESPAÑOL • No desconecte el aparato tirando del cable de conexión a la red. Tire siempre del enchufe. • No toque el cable de red ni el enchufe con las manos mojadas. • Este aparato cumple las directivas CEE. Conexión de agua • Asegúrese de no provocar daños en los tubos de agua. • El aparato debe conectarse a la toma de agua utilizando los nuevos juegos de tubo suministrados. No se deben reutilizar los juegos de tubos antiguos.
www.aeg.com 2.3 Mantenimiento y limpieza 2.4 Desecho ADVERTENCIA Podría sufrir lesiones o dañar el aparato. • Antes de proceder con el mantenimiento, apague el aparato y desconecte el enchufe de la red. • No utilice pulverizadores ni vapor de agua para limpiar el aparato. • Limpie el aparato con un paño suave humedecido. Utilice sólo detergentes neutros. No utilice productos abrasivos, estropajos duros, disolventes ni objetos de metal. ADVERTENCIA Existe riesgo de lesiones o asfixia.
ESPAÑOL 45 4. DESCRIPCIÓN DEL PRODUCTO 1 2 3 8 9 10 4 5 11 6 12 7 1 Encimera 7 Pata para nivelación del aparato 2 Dosificador de detergente 8 Tubo de desagüe 3 Panel de mandos 4 Tirador de la puerta 9 Válvula de entrada de agua 10 Cable de alimentación 5 Placa de características 11 Pasadores de transporte 6 Bomba de desagüe 12 Pata para nivelación del aparato 4.1 Accesorios 1 4 2 3 4.2 Seguridad de los niños • Cuando se activa este dispositivo, no se puede cerrar la puerta.
www.aeg.com 5. PANEL DE MANDOS 1 2 3 Anti-arrugas Algodón Refresco Sintéticos Algodón Eco Plancha Fácil Super Eco Non Stop 60 Min. Algodón Delicados Lana/Seda 20 Min. - 3 kg Sintéticos Lana Marcha/Parada Aclarado Centrifugado/ Descarga Temp. Manchas/ Aclarado Centrif.
ESPAÑOL 47 5.3 Pantalla 3 A B C D P E F O G H I N J M K L La pantalla muestra: La temperatura del programa ajustado A Agua fría La velocidad de centrifugado del programa ajustado B Símbolo Sin centrifugado1) Símbolo Agua en la cuba 1) Solo disponible para el programa Centrifugado/Descarga.
www.aeg.com F El símbolo de antiarrugas se enciende cuando se selecciona un programa de Secado. No se puede abrir la puerta del aparato cuando el símbolo está encendido. Puede abrir la puerta únicamente cuando se apague el símbolo. G Si el programa termina, pero el símbolo sigue encendido: • La función "Agua en la cuba" está encendida. • Hay agua en el tambor. H El símbolo del bloqueo de seguridad para niños se enciende cuando se activa este dispositivo.
ESPAÑOL 49 El símbolo de exceso de dosificación de detergente se enciende al final del ciclo cuando el aparato detecta que hay demasiado detergente. M Barras gráficas La barra indicadora vacía aparece solo si la función correspondiente está disponible para el programa seleccionado. La barra indicadora se rellena según las funciones programadas. Si se realiza una selección incorrecta, el mensaje Err indica que la selección no es posible.
www.aeg.com 5.6 Botón de inicio/pausa 6 Pulse el botón 6 para iniciar o interrumpir el programa. 5.7 Tecla de inicio diferido 7 Pulse el botón 7 para retrasar el inicio de un programa entre 30 minutos y 20 horas. 5.8 Tecla de ahorro de tiempo 8 Pulse el botón 8 para reducir la duración del programa. – Púlselo una vez para ajustar la "duración corta" para prendas poco sucias. – Púlselo dos veces para ajustar "Extra rápido" para prendas prácticamente sin suciedad.
ESPAÑOL 5.14 Función del bloqueo contra la manipulación por niños Esta función impide que los niños jueguen con el panel de control. • Para activar la función, pulse el botón 12 y el botón 11 al mismo tiempo hasta que la pantalla muestre el símbolo . • Para desactivar la función, pulse el botón 12 y el botón 11 al mismo tiempo hasta que se apague el símbolo . Puede activar la función: • Antes de pulsar el botón de inicio/ pausa 6 : el aparato no se puede iniciar.
www.aeg.com Programa Temperatura Tipo de carga Peso máx. de la carga Descripción de ciclo Funciones Plancha Fácil4) 60° - Frío Tejidos sintéticos. El lavado y el centrifugado de este programa son delicados para evitar arrugas en la colada. El aparato añade algunos aclarados.
ESPAÑOL Programa Temperatura Tipo de carga Peso máx. de la carga Descripción de ciclo Sintéticos Prendas sintéticas máx. 3 kg Nivel de secado o tiempo de secado Algodón Máx. 7 kg de prendas de algodón Nivel de secado o tiempo de secado Non Stop 60 Min. 30° Programa completo compuesto de fase de lavado + fase de secado para una carga pequeña de tejidos mixtos (algodón y sintéticos). máx.
www.aeg.com Programa1) Tipo de carga Carga máx. PROGRAMAS DE VAPOR Refresco Prendas de algodón y sintéticas. Este ciclo elimina los olores de la colada. hasta 1.5 kg El vapor no elimina los olores de animales. Antiarrugas Prendas de algodón y sintéticas. hasta 1.5 kg Este ciclo ayuda a reducir las arrugas de la colada. El vapor se puede usar para las prendas secadas, lavadas o que se han puesto una vez. Estos programas pueden reducir la cantidad de arrugas y los olores y suavizar las prendas.
ESPAÑOL 55 6.2 Programas de secado automático Nivel de secado Tipo de tejido Extra seco Para materiales de felpa Algodón y lino (albornoces, toallas de baño, etc.) hasta 7 kg Algodón y lino (albornoces, toallas de baño, etc.) hasta 7 kg Tejidos sintéticos y mezclas (jerséis, blusas, ropa interior, ropa de hogar) hasta 3 kg Algodón y lino (sábanas, manteles, camisas, etc.) hasta 7 kg Armario Para prendas que pueden guardarse Seco plancha Para planchar red. 6.
www.aeg.com 7. VALORES DE CONSUMO Al inicio del programa, la pantalla muestra la duración para la capacidad de carga máxima. Durante la fase de lavado, la duración del programa se calcula automáticamente y se puede reducir mucho si la carga es inferior a la capacidad de carga máxima (p. ej., algodón 60°C, capacidad de carga máxima 0 kg, la duración del programa supera 2 horas; carga real 1 kg, la duración del programa no alcanza 1 hora).
ESPAÑOL 2. Conecte el enchufe a la toma de red. 3. Pulse el botón 1 para encender el aparato. 4. Introduzca la colada en el aparato. 5. Utilice la cantidad correcta de detergente y aditivos. 6. Ajuste e inicie el programa correcto para el tipo de colada y suciedad. 57 2. Introduzca las prendas en el tambor, una por una. Sacuda las prendas antes de colocarlas en el aparato. Asegúrese de no colocar demasiada colada en el tambor. 3. Cierre la puerta del aparato. 9.1 Carga de la colada 1.
www.aeg.com Es el nivel máximo para la cantidad de aditivos líquidos. Tapa para detergente líquido o en polvo Gírelo (hacia arriba o hacia abajo) en la posición correcta para usar detergente líquido o en polvo. Cumpla siempre las instrucciones que se encuentran en el envase de los productos de detergente. Compruebe la posición de la tapa 1. Tire del depósito dosificador hasta el tope. 2. Presione la palanca hacia abajo para extraer el dosificador. 3.
ESPAÑOL El aparato no desagua. 9.3 Ajuste e inicio de un programa 1. Gire el selector de programas. Se ilumina el indicador de programa correspondiente. 2. El indicador del botón 6 parpadea en color rojo. 3. La pantalla muestra la temperatura por defecto, la velocidad de centrifugado y las barras indicadoras vacías de las funciones disponibles. 4. Para cambiar la temperatura o la velocidad de centrifugado, pulse los botones correspondientes. 5. Programe las funciones disponibles. 6.
www.aeg.com Si la temperatura y el nivel de agua del tambor son demasiado elevados, el símbolo de bloqueo de la puerta permanece encendido y no se puede abrir la puerta. Para abrir la puerta, siga estos pasos: 1. Apague el aparato. 2. Espere unos minutos. 3. Asegúrese de que no hay agua en el tambor. Si apaga el electrodoméstico, es necesario volver a ajustar el programa. 9.10 Al finalizar el programa • El aparato se para automáticamente. • Se activan las señales acústicas.
ESPAÑOL Puede secar la colada de dos formas: Con el secado automático • Pulse la tecla 4 repetidamente hasta que aparezca una línea negra debajo de un símbolo de nivel de secado: Se enciende el nivel Extra seco. Se enciende el nivel Seco armario. Se enciende el nivel Seco plancha. Se apaga el símbolo de tiempo de secado. • En la pantalla aparece un valor de tiempo calculado con la carga predeterminada.
www.aeg.com 11. USO DEL APARATO - LAVADO Y SECADO 11.1 Programa SIN PAUSAS Lavado y secado automático Se enciende el símbolo de bloqueo de la puerta. PRECAUCIÓN No coloque ninguna bola ni dispositivo de plástico para el detergente en el tambor. La pantalla muestra el nuevo valor de tiempo cada minuto. • Pulse la tecla 1 para encender el aparato. • Cargue la ropa. • Dosifique el detergente y el suavizante. • Gire el selector hasta el programa de lavado.
ESPAÑOL Se enciende el símbolo de antiarrugas. Se enciende el símbolo de tiempo de secado. • La pantalla muestra el valor del tiempo de secado ajustado: Valor del tiempo de secado ajustado • Tras unos segundos, la pantalla muestra la duración total de los ciclos: Valor de tiempo final (fases de lavado + secado + antiarrugas + enfriamiento) Si ajusta un tiempo de secado de tan solo 10 minutos, el valor de tiempo final también incluye las fases antiarrugas y de enfriamiento.
www.aeg.com • Dé la vuelta a las prendas de varias capas, de lana y con motivos pintados. • Retire las manchas difíciles. • Lave con detergente especial las manchas difíciles. • Tenga cuidado con las cortinas. Quite los ganchos o coloque las cortinas en una bolsa para lavadora o funda de almohada. • No lave en el aparato: – Prendas sin dobladillos o desgarradas – Sujetadores con aros. – Use una bolsa para lavadora para lavar las prendas pequeñas.
ESPAÑOL • Si fuera necesario, utilice un quitamanchas cuando ajuste un programa a baja temperatura. • Para utilizar la cantidad correcta de detergente, compruebe la dureza del agua de su sistema doméstico 12.6 Consejos de secado Prepare el ciclo de secado • Abra el grifo. • Compruebe la correcta conexión de la manguera de descarga. Para obtener más información, consulte el capítulo de instalación. • Para conocer la carga máxima de los programas de secado, consulte la tabla de los programas de secado.
www.aeg.com 13.1 Descalcificación El agua corriente que utilizamos suele contener cal. Si es necesario, use un descalcificador de agua para eliminar la cal. Use un producto especial para lavadoras. Siga siempre las instrucciones que se encuentran en el envase del fabricante. Hágalo de forma separada del lavado de la colada. 13.2 Limpieza del exterior Limpie el aparato solo con agua templada y jabón. Seque completamente todas las superficies.
ESPAÑOL 3. 4. 5. 6. 67 Retire la parte superior del compartimento de aditivo líquido. Limpie todas las piezas con agua. Limpie el hueco del dosificador con un cepillo. Vuelva a colocar el dosificador en el hueco. ADVERTENCIA 1. Desenchufe el aparato de la toma de red. 2. No quite el filtro mientras el aparato esté en funcionamiento. No limpie la bomba si el agua del electrodoméstico está caliente. El agua debe enfriarse para poder limpiar la bomba de desagüe. 13.
www.aeg.com 3. 4. 5. 1 6. Coloque un recipiente debajo del hueco de la bomba para recoger el agua que salga. Presione las dos palancas y tire del conducto de desagüe para que salga el agua. Cuando el contenedor esté lleno de agua, vuelva a colocar el conducto y vacíe el contenedor. Realice los pasos 4 y 5 repetidamente hasta que no salga más agua de la bomba. Vuelva a colocar el conducto de desagüe y gire el filtro para retirarlo. 2 2 1 13.
ESPAÑOL 69 Limpieza de los filtros de entrada de agua: Cierre la toma de agua. Retire las tomas de entrada de agua de los grifos. 3. Limpie el filtro del tubo de entrada con un cepillo rígido. 1. 2. 4. 5. 6. 7. 20° Retire el tubo de entrada situado detrás del aparato. Limpie el filtro de la válvula con un cepillo rígido o una toalla. Vuelva a colocar el tubo de entrada. Cerciórese de que las conexiones están bien apretadas para evitar fugas. Abra el grifo. 45° 13.
www.aeg.com ADVERTENCIA Asegúrese de que la temperatura es superior a 0 °C antes de usar de nuevo el aparato. El fabricante no se hace responsable de los daños derivados de las bajas temperaturas. 14. RESOLUCIÓN DE PROBLEMAS El aparato no se pone en marcha o se detiene durante el funcionamiento. Primero, intente buscar una solución al problema (consulte la tabla). Si no la encuentra, póngase en contacto con el servicio técnico. • - El aparato no desagua.
ESPAÑOL Problema 71 Posible causa Posible solución Se ha ajustado un programa de lavado sin la fase de desagüe. Ajuste el programa de desagüe. La función "Agua en la cuba" está encendida. Ajuste el programa de desagüe. La puerta del aparato está abierta o no está bien cerrada. Cierre la puerta correctamente. El dispositivo anti inundación se ha puesto en marcha. • Desconecte la lavadora. • Cierre el grifo. • Póngase en contacto con el servicio técnico. La fase de centrifugado no funciona.
www.aeg.com Problema Posible causa No se puede abrir El programa de lavado la puerta del apa- está en marcha. rato. La lavadora produce un ruido extraño. Deje que termine el programa de lavado. Hay agua en el tambor. Seleccione el programa de descarga o de centrifugado. Nivel incorrecto del aparato. Ajuste el nivel del aparato. Consulte el apartado "Instalación". No ha retirado el embalaje o los pasadores de transporte. Retire el embalaje o los pasadores de transporte.
ESPAÑOL Problema 73 Posible causa Posible solución Si hay gran cantidad de pelusa en el tambor, repita este procedimiento una y otra vez: • Limpie el tambor vacío, la junta y la puerta con un paño húmedo. • Ajuste un ciclo de aclarado • Coloque un paño de lana o terciopelo en el interior del tambor. • Ajuste un ciclo de secado de 10 minutos • Saque el paño de lana. Una vez finalizada la revisión, conecte el aparato. El programa continuará a partir del punto en que se haya interrumpido.
www.aeg.com 4. Retire la película interna. 5. Abra la puerta. Retire la pieza de poliestireno de la junta de la puerta y todos los elementos del tambor. 6. Extienda uno de los materiales de embalaje de poliestireno en el suelo detrás del aparato. Baje con cuidado el aparato sobre el lado posterior. Tenga cuidado para no dañar los tubos. 7. Retire la protección de poliestireno de la base. Levante el aparato hasta la posición vertical. 8.
ESPAÑOL 9. 75 Retire el cable de alimentación y el tubo de desagüe de los soportes de los tubos. 10. Suelte los tres pernos. Utilice la llave suministrada con el aparato. 11. Extraiga los separadores de plásti- co. 12. Coloque los tapones de plástico en los orificios. Encontrará los tapones en la bolsa del manual de instrucciones. ADVERTENCIA Retire todo el embalaje y los pasadores de transporte antes de instalar el aparato.
www.aeg.com 15.3 Colocación y nivelado • Instale la lavadora en el suelo sobre una superficie plana y rígida. • Asegúrese de que las moquetas no impidan la circulación de aire por debajo del electrodoméstico. • Cerciórese de que el aparato no entra en contacto con la pared u otros armarios de cocina. • Afloje o apriete las patas para ajustar el nivel. El ajuste correcto del nivel del aparato evita vibraciones, ruidos y el movimiento del aparato cuando está funcionando.
ESPAÑOL 77 • Conecte el tubo de entrada de agua fría a una toma de agua fría con rosca de 3/4. PRECAUCIÓN Asegúrese de que no haya fugas de los acoplamientos. No utilice ningún tubo de extensión si el tubo de entrada es demasiado corto. Póngase en contacto con el servicio técnico para cambiar el tubo. Dispositivo antifuga El tubo de entrada tiene un dispositivo antifuga. Este dispositivo evita las fugas de agua del tubo por el desgaste normal. El sector rojo de la ventana «A» muestra este fallo.
www.aeg.com • En el borde de un fregadero. • Asegúrese de que la guía de plástico no se mueva cuando el aparato desagua. Acople la guía al grifo de agua o a la pared. • A un tubo vertical con orificio de ventilación. Consulte la ilustración. Directamente en un tubo de desagüe a una altura mínima de 60 cm y máxima de 100 cm.
ESPAÑOL 16. ASPECTOS MEDIOAMBIENTALES Recicle los materiales con el símbolo . Coloque el material de embalaje en los contenedores adecuados para su reciclaje. Ayude a proteger el medio ambiente y la salud pública, así como a reciclar residuos de aparatos eléctricos y electrónicos. No deseche los aparatos marcados con el símbolo junto con los residuos domésticos. Lleve el producto a su centro de reciclaje local o póngase en contacto con su oficina municipal.
132917020-C-2032013 www.aeg.