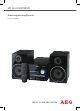
MC 4434 DVD/USB/CR Bedienungsanleitung/Garantie Instruction Manual PERFECT IN FORM AND FUNCTION
Inhaltsverzeichnis Inhaltsverzeichnis Inhaltsverzeichnis.................................................................................................................................2 Einleitung................................................................................................................................................6 Dankeschön ..........................................................................................................................................................
Inhaltsverzeichnis 3 Fernbedienung .................................................................................................................................. 22 Funktionstasten.................................................................................................................................................................... 22 Einsetzen von Batterien......................................................................................................................................
Inhaltsverzeichnis DVD-Player: Audio-Funktionen......................................................................................................................................... 36 VOL + und VOL-: Lautstärke einstellen................................................................................................................................... 36 MUTE: Stummschaltung ................................................................................................................................
Inhaltsverzeichnis 5 VIDEO-SETUP: Video-Einstellungen ................................................................................................................................ 48 Allgemeine Bemerkungen........................................................................................................................................................... 48 VIDEO AUSGANG: Video-Ausgang.....................................................................................................................
Deutsch Einleitung Dankeschön Wir möchten uns bei Ihnen recht herzlich bedanken, dass Sie unser Produkt erworben haben. Wir wünschen Ihnen viel Spaß mit Ihrer neuen DVD Anlage. Diese Bedienungsanleitung enthält detaillierte Informationen und Anweisungen, die Ihnen helfen sollen, auf einfachem Wege das Beste aus Ihrer DVD Anlage herauszuholen.
Deutsch Sicherheitshinweise GEFAHR NICHT ÖFFNEN! STROMSCHLAGGEFAHR CAUTION RISK OF ELECTRIC SHOCK DO NOT OPEN ACHTUNG: UM DIE STROMSCHLAGGEFAHR ZU VERMEIDEN ÖFFNEN SIE NIEMALS DAS GEHÄUSE. DARIN BEFINDEN SICH KEINE TEILE DIE VOM BENUTZER GEWARTET WERDEN SOLLEN. ALLE REPARATUREN SOLLEN VON QUALIFIZIERTEN FACHKRÄFTEN DURCHGEFÜHRT WERDEN. 7 Das Pfeilblitzsymbol in einem gleichseitigen Dreieck warnt den Benutzer vor nicht isolierten Teilen mit “gefährlicher Spannung”, die sich im Gerät befinden.
Deutsch 7. Stromkabel sollen so verlegt werden, dass niemand darauf treten kann. Stromkabel sollen nicht zwischen Gegenständen eingeklemmt werden. Stellen Sie keine Gegenstände auf Stromkabel. Zerren Sie niemals direkt an Stromkabeln. Stromkabel sollen nicht gequetscht, eng zusammengepackt oder übermäßig gebogen werden. 8. Achten Sie insbesondere auf die Verbindungsstellen zwischen Kabeln und Steckern, Kabeln und Verlängerungskabeln sowie Kabeln und dem Gerät. 9.
Deutsch 9 10. Für optimale Leistung stellen Sie keine schweren Gegenstände aufs Gerät. 11. Stellen Sie das Gerät nicht in die Nähe von starken magnetischen Feldern und setzen Sie es nicht direkter Sonnen- oder Hitzestrahlung aus (wie z.B. in der Nähe von Heizungen oder Heizlüftern). 12. Stellen Sie das Gerät nicht in die Nähe von anderen Geräten, die starke Wärme oder magnetischen Fluss ausstrahlen wie z.B.
Deutsch • In das Gerät ist Flüssigkeit eingedrungen. • Das Gerät ist dem Regen oder der Feuchtigkeit ausgesetzt worden. • In das Gerät sind Gegenstände eingedrungen. • Wenn das Gerät nicht einwandfrei funktioniert, obwohl die Hinweise der Bedienungsanleitung strikt befolgt werden. • Wenn das Gerät mechanisch beschädigt ist. Lasersystem 1. Dieses Gerät ist mit einem Lasersystem ausgestattet. Um nicht direkter Laserstrahlung ausgesetzt zu werden, versuchen Sie niemals das Gehäuse zu öffnen.
Deutsch 11 Handhabung und Pflege von Disks • Berühren Sie die bespielte Seite einer Disk nicht. Fassen Sie die Disks an den Kanten an um nicht deren Oberfläche mit Fingern zu berühren. • Bringen Sie auf keiner der beiden Diskseiten Aufkleber oder Klebeband an. Beschreiben Sie die Etikettseite nicht mit einem Kugelschreiber oder anderen Schreibgeräten. • Lassen Sie die Disks nicht fallen. Biegen Sie die Disks nicht.
Deutsch Anschlüsse und Bedienelemente Funktionstasten und Anschlüsse auf der Vorderseite des Geräts 1. Display (Anzeigeschirm): Auf dem Display werden Meldungen eingeblendet, die über den Verlauf der Diskwiedergabe oder über den empfangenen Radiosender informieren. 2. Infrarot-Fernbedienungssensor: Richten Sie die Fernbedienung auf diesen Sensor aus. Halten Sie den Fernbedienungssensor frei. Auf keinen Fall bedecken oder verstellen Sie den Fernbedienungssensor mit irgendwelchen Gegenständen. 3.
Deutsch 13 7. VOLUME UP und VOLUME DOWN: Drehen Sie den Lautstärkeregler VOLUME in die Richtung UP um die Lautstärke zu erhöhen. Drehen Sie den Lautstärkeregler VOLUME in die Richtung DOWN um die Lautstärke zu verringern. 8. EJECT: Drücken Sie die Auswurftaste EJECT, um die Diskschublade zu öffnen. Anschließend können Sie eine DVD- oder Audio-Disk mit der Etikettseite nach oben in die Diskschublade einlegen. Drücken Sie die Auswurftaste EJECT nochmals, um die Diskschublade zu schließen.
Deutsch 5. SCART OUTPUT (Scart-Ausgang): Benutzen Sie die SCART-Buchse, um einen Fernseher an das Gerät anzuschließen. Der SCART-Ausgang überträgt sowohl Bild als auch Stereo-Ton. Sie brauchen also keine zusätzliche AudioVerbindung für Tonübertragung zwischen dem Gerät und dem angeschlossenen Fernseher aufzubauen. 6. L/R SPEAKERS (RCA Anschlussbuchsen für die Lautsprecher): Benutzen Sie die Anschlussbuchsen, um den mitgelieferten rechten (R) und linken (L) Lautsprecher an das Gerät anzuschließen. 7.
Audio/Video Kabel Deutsch 15 1. VIDEO (Composite Video, CVBS, gelber Ausgang) überträgt nur Video-Signal (Bild). Eine zusätzliche Audio-Verbindung zwischen dem Gerät und dem angeschlossenen Fernseher über den linken und rechten Audio-Ausgang AUDIO FL und AUDIO FR ist notwendig. 2. VIDEO OUTPUT (Component Video, Pr/Cr, Pb/Cb, Y, grün-blau-roter Ausgang) überträgt nur Video-Signal (Bild).
Deutsch VIDEO-ANSCHLUSS (CVBS, COMPOSITE VIDEO) Der VIDEO-ANSCHLUSS (CVBS, COMPOSITE VIDEO, gelbe Buchse) überträgt nur Video-Signal (Bild). Eine zusätzliche Audio-Verbindung mit dem angeschlossenen Fernseher für Tonübertragung ist notwendig. Verbindungsaufbau: Video-Signalübertragung Schalten Sie die beiden Geräte ein und wenn notwendig wählen Sie den VIDEO- oder AV-Kanal für den Fernseher.
Deutsch 17 auch die mitgelieferten Lautsprecher (die Audio-Anschlüsse der Anlage) benutzen. Für Einzelheiten sehen Sie das Kapitel „Anschluss an Audio-Geräte“. Verbindungsaufbau: Video-Ausgang Um die richtige Option des Video-Ausgangs für die Komponenten-Verbindung (COMPONENT VIDEO, YUV, Y, Cb/Pb, Cr/Pr) einzustellen: 1. Während der Wiedergabe einer Disk oder nachdem Sie die Wiedergabe mit der Taste STOP angehalten haben, drücken Sie die Taste SETUP auf der Fernbedienung, um das Einstellungsmenü zu öffnen.
Deutsch 1. Drücken Sie die Taste SETUP auf der Fernbedienung, um das Einstellungsmenü zu öffnen. 2. Mit der Navigationstaste ► wählen Sie das dritte Icon VIDEO SETUP in der oberen Menüleiste und drücken Sie die Taste PLAY/ENTER, um die Menüpunkte einzublenden. 3. Mit der Navigationstaste ▼ wählen Sie den Menüpunkt FERNSEHMODUS. 4.
Deutsch 19 Einstellung des Bildformats (4:3PS, 4:3LB, 16:9) Da das Gerät verschiedene Bildformate (Bildseitenverhältnisse) unterstützt, kann es vorkommen, dass das angezeigte Bild nicht den gesamten Bildschirm füllt oder die Bildränder abgeschnitten werden. In solchen Fällen müssen Sie das richtige Bildformat (Bildseitenverhältnis) einzustellen: 1.
Deutsch Optischer Ausgang Wählen Sie eine der digitalen Anschlussmöglichkeiten Koaxialer Ausgang Video-Verbindungskabel COAXIAL oder OPTICAL Ausgang: Digital-Verstärker-Anschluss Linker Kanal Rechter Kanal Um die DVD Anlage an einen Digital-Verstärker anzuschließen können Sie entweder den Koaxial-Ausgang COAXIAL oder den optischen Ausgang OPTICAL benutzen.
Deutsch 21 Anmerkung: Um den Koaxial- oder den optischen Anschluss zu benutzen, benötigen Sie einen Verstärker, der imstande ist das DOLBY DIGITAL- oder MPEG-Format zu dekodieren.
Deutsch Verwenden Sie ein Audio-Kabel – den roten Stecker für die rechte Buchse (FR), den weißen für die linke (FL), um ein Gerät an den Audio-Ausgang des Geräts anzuschließen. Lautsprecherbuchsen (RCA Buchsen) 1. Schließen Sie den mitgelieferten rechten und linken Lautsprecher an die linke und rechte Lautsprecherbuchse an. 2. An die rote Anschlussbuchse (markiert R) soll der rechte Audio-Kanal angeschlossen werden.
Deutsch 23 5. TUNE+/: • DVD: Während der Wiedergabe einer Disk drücken Sie die Taste TUNE+/ fünfmal nacheinander, um die aktuell wiedergegebene Disk mit wachsender Geschwindigkeit vorzuspulen. • Radio: Beim Radioempfang drücken Sie die Taste TUNE+/, um die Frequenz eines Radiosenders vorwärts abzustimmen. /TUNE-: • DVD: Während der Wiedergabe einer Disk drücken Sie die Taste /TUNE- fünfmal nacheinander, um die aktuell wiedergegebene Disk mit wachsender Geschwindigkeit zurückzuspulen.
Deutsch /CH-: • DVD: Während der Wiedergabe einer Disk drücken Sie die Sprungtaste /CH-, um zum vorherigen Titel, Kapitel, Soundtrack oder zur vorherigen Datei zu springen. • Radio: Beim Radioempfang drücken Sie die Taste /CH-, um den vorherigen gespeicherten Radiosender anzuwählen. 22. Zifferntasten (0-9/10+): • DVD: Mit den Zifferntasten 0-9/10+ können Sie die Nummer von Titeln, Kapiteln, Soundtracks, Dateien, Menüpunkten, Zeitangaben usw. direkt eingeben.
Deutsch 25 Anmerkungen: • Setzen Sie Batterien keiner hohen Wärme oder dem direkten Sonnenlicht aus. Werfen Sie Batterien niemals ins Feuer. Es besteht Explosionsgefahr! • Ungleiche Batterietypen oder neue und gebrauchte Batterien dürfen nicht zusammen verwendet werden. • Ersetzen Sie immer die beiden Batterien gleichzeitig durch neue voll aufgeladene. • Leere Batterien sollen unverzüglich entfernt werden um Korrosionsschäden vorzubeugen.
Deutsch Systembedienung Funktionstasten auf der Vorderseite des Geräts Die Funktionstasten auf der Vorderseite des Geräts bedienen die gleichen Funktionen wie die entsprechenden Tasten der Fernbedienung. Detaillierte Angaben befinden sich in den folgenden Abschnitten. Grundlegende Funktionen POWER : Gerät ein- und ausschalten 1. Bevor Sie die DVD Anlage einschalten, prüfen Sie, ob alle Elemente des Systems und alle Außengeräte (z.B.
Deutsch 27 9. Wenn eine Disk ein Diskmenü hat oder sich darauf viele Titel (Filme) befinden, erscheint ein Diskmenü auf dem Bildschirm. 10. Mit den Navigationsstasten ▲▼►◄ können Sie einzelne Menüpunkte z.B. Film starten oder einzelne Titel (Filme) wählen. Sehen Sie auch das Kapitel „MENU: Wiedergabe mit Hilfe des Diskmenüs“. 11. Haben Sie einen Menüpunkt gewählt, drücken Sie die Taste PLAY/ENTER, um die Wieder-gabe zu starten.
Deutsch DVD-Disks 1. Legen Sie eine DVD-Disk in die Diskschublade ein. Das Diskhauptmenü erscheint automatisch auf dem Bildschirm. 2. Sie können auch während der Wiedergabe einer DVD-Disk die Taste MENU drücken, um den Inhalt des Diskmenüs auf dem Bildschirm einzublenden. 3. Mit den Navigationsstasten ▲▼►◄ wählen Sie den gewünschten Menüpunkt. • Wahlweise können Sie die Nummer des gewünschten Menüpunkts mit den Zifferntasten 0-9/ 10+ direkt eingeben. 4.
Deutsch 29 Programmmenü für VCD- und CD-Disks Programmmenü für DVD-Disks 2. Auf dem Bildschirm erscheint das Programmmenü, um die Nummer der gewählten Titel, Kapitel oder Spuren einzugeben. 3. Mit den Navigationsstasten ▲▼►◄ können Sie einzelne Eingabefelder markieren. 4. In den markierten Eingabefeldern geben Sie mit den Zifferntasten 0-9/10+ die Nummer der gewählten Titel TT, Kapitel CH oder Spuren ein, und zwar in der Reihenfolge, in der sie wiedergegeben werden sollen.
Deutsch VCD-, CD-R- und CD-Disks 1. Während der Wiedergabe einer VCD-, CD-R- oder CD-Disk drücken Sie die Taste REPEAT kontinuierlich, um eine der folgenden Wiederholungsoptionen zu wählen: • Stück: Wählen Sie diese Option um die aktuell wiedergegebene Spur bzw. Datei fortlaufend zu wiederholen. • Alle: Wählen Sie diese Option um die ganze Disk fortlaufend zu wiederholen. 2. Drücken Sie die Taste REPEAT nochmals, um zur normalen Wiedergabe zurück-zukehren. MP3- und JPEG-Disks 1.
Deutsch 31 Anmerkung! Nicht alle MP3-Disks unterstützen diese Funktion. TUNE+/: Disk vorspulen 1. Während der Wiedergabe einer Disk drücken Sie die Taste TUNE+/ fünfmal nacheinander, um die aktuell wiedergegebene Disk mit folgenden Geschwindigkeiten vorwärts durchzulaufen: 2x, 4x, 8x 16x und 32x der normalen Wiedergabegeschwindigkeit. 2. Drücken Sie die Taste TUNE+/ nochmals oder die Taste PLAY/ENTER, um zur normalen Wiedergabegeschwindigkeit zurückzukehren. /TUNE-: Disk rückspulen 1.
Deutsch DVD-Player: Erweiterte Funktionen Zifferntasten 0-9/10+: Titel, Kapitel, Datei oder Soundtrack direkt wählen Während der Wiedergabe einer DVD-Disk können Sie direkt die Nummer des gewünschten Titels oder Kapitels mit den Zifferntasten 0-9/10+ eingeben. Während der Wiedergabe einer SVCD- oder VCD-Disk können Sie direkt die Nummer der gewählten Spur mit den Zifferntasten 0-9/10+ eingeben.
Deutsch 33 DISPLAY: Bildschirmanzeige (Zustandsanzeige) DVD-Disks 1. Während der Wiedergabe einer DVD-Disk drücken Sie die Taste DISPLAY kontinuierlich, um die Angaben über die aktuelle Disk auf dem Bildschirm einzublenden. 2. Auf dem Bildschirm erscheinen folgende Informationen: • ABGL. SPIELDAUER TITEL: Ablaufzeit des aktuellen Titels • TITEL RESTSPIELDAUER: Restzeit des aktuellen Titels • KAP. ABGL. SPIELDAUER: Ablaufzeit des aktuellen Kapitels • KAPITEL RESTSPIELDAUER: Restzeit des aktuellen Kapitels 3.
Deutsch VCD-Disks Um eine Spur oder eine Zeitstelle auf einer VCD-Disk zu finden: 1. Während der Wiedergabe einer VCD-Disk drücken Sie die Taste T/F. 2. Auf dem Bildschirm erscheint das Suchmenü, wo Sie verschiedene Suchoptionen wählen können. 3. Es stehen Ihnen die folgenden Suchoptionen zur Verfügung: TRACK: Spurnummer, DISC TIME: Ablaufzeit der ganzen Disk, TRACK TIME: Ablaufzeit der gewählten Spur, WIEDERHOLEN: Wiederholungsoption, TIME DISP: Zeit auf dem Display.
Deutsch 35 SUB: Untertitelsprache wählen 1. Während der Wiedergabe einer DVD, drücken Sie die Taste SUB., um Ihre bevorzugte Untertitelsprache zu wählen. 2. Jedes Mal wenn Sie die Taste SUB. drücken, wählen Sie eine neue Untertitelsprache. 3. Drücken Sie die Taste SUB. bis Sie Ihre bevorzugte Sprache gefunden haben. 4. Um die Untertitel vollständig auszublenden, drücken Sie die Taste SUB. bis die Meldung UNTERTITEL AUS auf dem Bildschirm erscheint.
Deutsch Um das richtige Farbübertragungssystem für Ihren Fernseher zu wählen, drücken Sie die Taste PAL/NTSC auf der FB. Jedes Mal wenn Sie die Taste PAL/NTSC drücken, wählen Sie einen neuen TV-Standard. Es stehen Ihnen folgende Farbübertragungssysteme zu Verfügung: • PAL: Wählen Sie diese Option, wenn die DVDAnlage an einen PAL-System-Fernseher angeschlossen wird.
Deutsch 37 Wiedergabe von MP3-Disks 1. Drücken Sie die Taste EJECT , um die Diskschublade zu öffnen. 2. Legen Sie eine MP3-Disk in die Diskschublade ein und drücken Sie die Taste EJECT schublade zu schließen. nochmals, um die Disk- 3. Ihre DVD Anlage MC 4434 DVD/USB/CR erkennt automatisch die MP3-Dateien. 4. Auf dem Bildschirm erscheinen die Disk-Dateiordner (das Ordner-Verzeichnis) mit einzelnen MP3-Dateien. Ordner-Verzeichnis 5.
Deutsch 5. Das linke Fenster enthält das Ordner- bzw. Datei-Verzeichnis – im rechte Fenster wird Ihnen ein Vorschaubild des aktuell markierten Bildes angezeigt. 6. Mit den Navigationsstasten ▲▼►◄ können Sie einzelne Ordner und Unterordner öffnen und anschließend die Dateien (z.B. Fotos oder Videos) wählen, die sich darin befinden. 7. Drücken Sie die Taste PLAY/ENTER, um den gewählten Ordner bzw. Unterordner zu öffnen oder die Wiedergabe der gewählten Datei (z.B. Foto oder Video) zu starten. 8.
Deutsch 39 Sowohl der Slot des Speicherkartenlesers als auch der USB-Port/Anschluss befinden sich auf der Vorderseite des Geräts. Um die Speichermedien (einen USB-Speicher und/oder eine Speicherkarte) an die DVD Anlage anzuschließen, gehen Sie wie folgt vor: 1. Schalten Sie das Gerät ein. 2. Schließen Sie einen USB-Speicher (z.B. einen MP3-Player) direkt an den USB-Anschluss an und/oder stecken Sie eine Speicherkarte in den Kartenslot (Kartensteckplatz) des Speicherkartenlesers ein.
Deutsch Wechseln der Abspielfunktionen (Radio-DVD-USB/Speicherkarte) mit der Fernbedie-nung. 1. Wechseln in den Radio Modus: 1) Drücken Sie die Taste FM auf der Fernbedienung, um vom DVD in den Radio Modus zu wechseln. 2) Um in den Radio Modus von USB oder Speicherkarte zu wechseln, müssen Sie zuerst in den DVD Modus (DVD Taste) danach die Taste FM drücken. 2. Wechseln in den DVD Modus: 1) Zum Wechseln vom Radio in den DVD Modus, drücken Sie die Taste DVD auf der Fernbedienung.
Deutsch 41 CREATE ID3: Wählen Sie aus, ob eine ID3 Information kreiert werden soll (YES = Ja, NO = Nein). DEVICE: Hier wird das angeschlossene Speichermedium angezeigt. 5. Wählen Sie nun in der rechten Spalte die umzuwandelnden Tracks mit den Navigationstasten ▲▼ und der Taste PLAY/ENTER aus. 6. In der Übersicht (SUMMARY) wird die Anzahl der ausgewählten Tracks und die gesamte Trackdauer angezeigt. • Wollen Sie alle Tracks umwandeln, wählen Sie das Feld „SELECT ALL“ aus.
Deutsch Um einen manuellen Sendersuchlauf durchzuführen: 1. Schalten Sie die DVD Anlage an und drücken Sie die Taste FM, um UKW-Radio als Betriebs-modus fürs Gerät zu wählen. 2. Drücken Sie die Taste T/F, um ein Eingabefeld einzublenden, wo Sie die Frequenz des gesuchten Radiosenders eingeben können. 3. Mit den Zifferntasten 0-9 geben Sie die Frequenz des gesuchten Radiosenders ein. • Sie können eine UKW-Frequenz im Bereich von 87.50 MHz bis 108.00 MHz eingeben. 4.
Deutsch 43 SETUP: Systemeinstellungsmenü Allgemeine Bemerkungen Im Systemeinstellungsmenü können Sie Ihre persönlichen Einstellungen des DVD-Players der Anlage festlegen. Die veränderten Systemeinstellungen werden vom Gerät gespeichert und bleiben beibehalten bis Sie sie wieder ändern. Sie können jederzeit die Werkseinstellungen wiederherstellen, indem Sie z.B. die Taste RESET drücken und auf diese Weise alle zuvor benutzerdefinierten Änderungen rückgängig machen.
Deutsch ALLGEMEINES SETUP-MENÜ: Allgemeine Systemeinstellungen TV BILDSCHRIM: Bildformat (4:3, 16:9) In diesem Menüpunkt können Sie das Bildformat (Bildseitenverhältnis) des ausgehenden Videosignals dem angeschlossenen Fernseher anpassen. Es stehen Ihnen folgende Bildformate (Bildseitenverhältnisse) zur Verfügung: • 4:3 PANSCAN: Wählen Sie dieses Bildformat, wenn das Gerät an einen Fernseher mit dem normalen 4:3 Bildschirm angeschlossen wird.
Deutsch 45 OSD SPRACHE: Sprache des Bildschirmmenüs Im Menüpunkt OSD SPRACHE können Sie die Sprache des Bildschirm- (OSD) und Einstellungsmenüs ändern. Um Ihre bevorzugte Sprache des Bildschirmmenüs festzulegen: 1. Mit der Navigationstaste ▲ oder ▼ wählen Sie die gewünschte Sprache z.B. DEUTSCH. 2. Danach drücken Sie die Taste PLAY/ENTER, um die Wahl zu bestätigen. 3. Das Bildschirm- (OSD) und Einstellungsmenü wird in der gewählten Sprache einge-blendet.
Deutsch • AUS: Wählen Sie diese Option, um die Funktion zu deaktivieren. Das System fängt die Wiedergabe einer Disk immer vom Diskanfang an. S/W VERSION: Gerätetyp und Fabrikbezeichnung Im Menüpunkt S/W VERSION werden der Typ dieses Geräts und seine Fabrikbezeichnung ange-geben. AUDIO SETUP MENÜ: Audio-Einstellungen Allgemeine Bemerkungen Im Untermenü AUDIO SETUP können Sie die Einstellungen ändern, die die Tonübertragung zwischen der DVD Anlage und den angeschlossenen Außengeräten betreffen.
Deutsch 47 • NUR PCM: Wählen Sie diese Option wenn das Gerät an einen 2-Kanal-Stereo-Digitalverstärker angeschlossen wird. LPCM AUSGANG: Puls-Code-Modulation Die Puls-Code-Modulation ist ein Verfahren, das ein analoges Signal in ein digitales Signal bzw. in einen Binärcode umsetzt. Es wird für Audio- und Video-Signale verwendet. Im Menüpunkt LPCM AUSGANG können Sie zwischen zwei Abtastfrequenzen - 48 KHz und 96 KHz wählen.
Deutsch BASSVERSTÄRKUNG: Bassanhebung Im Menüpunkt BASSVERSTÄRKUNG können Sie Bässe anheben, wenn Sie die Option EIN wählen. Wenn Sie die Option AUS wählen, bleiben Bässe im normalen Tonfrequenzbereich. SUPER BASS: Toneffekt der Super-Bässe Im Menüpunkt SUPER BASS können Sie den Toneffekt der Super-Bässe aktivieren, wenn Sie die Option EIN wählen. Anschließend kann man die Super-Bässe einstellen. Wählen Sie die Option AUS, um den Toneffekt der Super-Bässe zu deaktivieren.
Deutsch 49 Sie können eine der folgenden Optionen des Videoausgangs wählen: • CVBS: Wählen Sie diese Option, wenn der Fernseher über den Videoausgang und den analogen Audio Ausgang (links/rechts) angeschlossen wird. • YUV: Wählen Sie diese Option wenn ein Fernseher an den KOMPONENTEN-AUSGANG (YUV, COMPONENT VIDEO, Y, Pb/Cb, Pr/Cr; grün-blau-roten Ausgang) des Geräts angeschlossen wird. • RGB: Wählen Sie diese Option wenn ein Fernseher an den SCART-AUSGANG des Geräts angeschlossen wird.
Deutsch Wichtig! Das Untermenü VORZUGSEINSTELLUNGEN ist nur aktiv wenn die Disk Wiedergabe vollständig gestoppt ist bzw. wenn keine Disk eingelegt ist. TV TYP: TV-Standard (PAL, AUTO, NTSC) Im Menüpunkt TV TYP können Sie ein Verfahren zur Farbübertragung (TV-Standard, Farbübertragungssystem) festlegen. Folgende TV-Standards (Verfahren zur Farbübertragung) stehen Ihnen zur Verfügung: • PAL: Wählen Sie diese Option, wenn die DVD Anlage an einen PAL-System-Fernseher angeschlossen wird.
Deutsch 51 • Normalerweise kann man die Audio-Sprache auch im Diskmenü wählen. Um ein Diskmenü zu öffnen, drücken Sie die Taste MENU. UNTERTITEL: Untertitelsprache In diesem Menüpunkt können Sie Ihre bevorzugte Untertitelsprache der DVD-Disks festlegen. Mit der Navigationstaste ▲ oder ▼ wählen Sie Ihre bevorzugte Sprache z.B. DEUTSCH und drücken Sie die Taste PLAY/ENTER, um die Einstellung zu aktivieren.
Deutsch • 1. KIND.-SICH. (für Kinder) • 2. O. ALTERSB. (für alle Altersgruppen) • 3. FREIG AB 6 (für Kinder in der Begleitung von Erwachsenen) • 4. FREIG AB 12 (für Jugendliche über 12) • 5. FREIG AB 16 (für Jugendliche in Begleitung von Erwachsenen) • 6. N.FREI U.16 (nicht für Jugendliche) • 7. N.FREI U.18 (für Jugendliche über 18) • 8. ADULT (nur für Erwachsene). 4. Drücken Sie die Taste PLAY/ENTER, um die gewählte Kindersicherungsstufe zu aktivieren. 5.
Deutsch 53 PASSWORT: Passwort festlegen Im Menüpunkt PASSWORT können Sie Ihr eigenes Passwort festlegen, um ggf. das Gerät zu sperren. Ihr persönliches Passwort soll verhindern, dass Unbefugte (z.B. Kinder) die DVD-Disks mit gesperrten Inhalten (z.B. Gewalt- oder Sexszenen) wiedergeben können. Der Benutzer muss das gültige Passwort jedes Mal eingeben wenn eine Disk mit gesperrten Inhalten wiedergegeben werden soll (dazu sehen Sie das Kapitel „KI.SICHER.: Kindersicherung“).
Deutsch Defekt Kein Ton oder verzerrter Ton von Lautsprechern Ursache Problemlösung Der Typ des Audio-Ausgangs ist nicht richtig für die gewählte Verbindung mit den AudioGeräten. Wählen Sie die richtige Option des AudioAusgangs für die Verbindung mit den AudioGeräten. Das Audio-Kabel ist nicht richtig angeschlossen. Stecken Sie den Stecker des Audiokabels vollständig in die richtige Steckdose ein. Das Audio-System ist nicht an das Gerät angeschlossen.
Deutsch 55 Technische Daten Unterstützte Disk-Formate: DVD, VCD, CD, MP3, DVCD, SVCD, CD-R, MPEG4 Video-Format: MPEG2 für DVD und MPEG1 für VCD Audio-Format: MPEG1, MPEG2, PCM, Stereo Video-Format: PAL, NTSC, AUTO Signal-Ausgang: Video-Ausgang: 1.0Vp~p Audio: Stereo, 1 ~ 2V (RMS) Video-Ausgang, Audio-Ausgang, Ausgänge: OPTISCHER AUSGANG, Componenten Ausgang KOAXIAL-AUSGANG und SCART-AUSGANG Eingänge: USB, Mutimedia-Speicherkarte Energieversorgung: ~ 220-240V/50Hz Max.
Deutsch 5. Durch Garantieleistungen wird die Garantiezeit nicht verlängert. Es besteht auch kein Anspruch auf neue Garantieleistungen. Diese Garantieerklärung ist eine freiwillige Leistung von uns als Hersteller des Geräts. Die gesetzlichen Gewährleistungsrechte (Nacherfüllung, Rücktritt, Schadensersatz und Minderung) werden durch diese Garantie nicht berührt.
OSD Menü Übersicht Allgemeines Setup-Menü TV BILDSCHIRM 4:3 PANSCAN 4:3 LETTERBOX 16:9 WIDE WINKELZEICHEN EIN AUS OSD SPRACHE GEHÖRLOS TITEL EIN AUS BILDS.SCHONER EIN AUS LETZTER SPEICHEREIN PLATZ AUS S/W VERSION MC 4434 DVD Deutsch 57 Video Setup VIDEO-AUSGANG CVBS YUV RGB FERNSEHMODUS PROGRESSIVE INTERLACE FARBEINSTELLUNG SCHÄRFE HELL KONTRAST GAMMA FARBTON FARBSÄTTIGUNG TV TYPE PBC Vorzugseinstellungen PAL AUTO NTSC EIN AUS AUDIO UNTERTITEL DISK-MENÜ KI.SICHERUNG GRUNDEINST. 1 KIND.-SICH. 2 O.
Deutsch OSD Menü Übersicht Audio Setup Menü ANALOG AUDIO EINSTELL DOWN MIX DIGITAL AUDIO EINSTELL DIALOG DIGITALAUSGANG LPCM-AUSGANG SETUP DOLBY DIGITAL DOPPELTES MONO L/R STEREO SPDIF AUS ALLE NUR PCM 48K 96K STEREO L-MONO R-MONO MIX-MONO DYNAMIK KANAL-EQUALIZER KLANGMODUS BASSVERSTÄRKUNG SUPER-BASS VERSTÄRKUNG LÖSCHEN 3D-VERARBEITUNG HALLMODUS HDCD FILTER AUS ROCK POP LIVE DANCE TECHNO KLASSIK LEISE EIN AUS EIN AUS EIN AUS AUS KONZERTSAAL WOHNZIMMER HALLE BADEZIMMER HÖHLE ARENA KRICHE AU
GARANTIE-KARTE Garantiebewijs • Carte de garantie Certificato di garanzia • Tarjeta de garantia Cartão de garantia • Guarantee card Garantikort • Karta gwarancyjna • Záruční list Garancia lap • Гарантийная карточка MC 4434 DVD/USB/CR 24 Monate Garantie gemäß Garantie-Erklärung • 24 maanden garantie overeenkomstig schriftelijke garantie • 24 mois de garantie conformément à la déclaration de garantie • 24 meses de garantie según la declaratión de garantía • 24 meses de garantia, conforme a declaração de gara