Protect PV - Solar Inverters Benutzerhandbuch AEG Power Solutions GmbH Revision: 01 Date: 2011-05-25 User Manual 8000038784_00_BAL_de
Inhaltsverzeichnis Inhaltsverzeichnis 1. Einführung 2 Einführung 2 Definition der Betriebsarten 2 2. Display 4 Display 4 Ansicht 5 Ansicht 2 5 Status 6 Energielog 8 Setup 10 3. Webserver-Kurzanleitung 12 Einführung 12 Unterstützte Zeichen 12 Zugang und Ersteinrichtung 12 Setup-Assistent 13 Betrieb 17 Webserver-Struktur 17 Ansichten „Anlage“, „Gruppe“ und „Wechselrichter“ 19 Zusätzliche Informationen 20 4. Fehlerbehebung Fehlerbehebung 5.
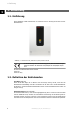
1. Einführung 1 1. Einführung 1.1. Einführung Dieses Handbuch enthält Informationen zu Funktionen und zur Wartung des Protect PV SolarWechselrichters. Abbildung 1.1: Protect PV 10 kW, Protect PV 12,5 kW, Protect PV 15 kW CE-Kennzeichnung: Diese Kennzeichnung gibt an, dass die Geräte den geltenden Vorschriften der Richtlinien 2004/108/EG und 2006/95/EG entsprechen. Die Protect PV-Wechselrichter-Reihe umfasst: Protect PV Protect PV easy 1.2.
1. Einführung onen liegen (abhängig von den Ländereinstellungen), beginnt der Wechselrichter mit der Versorgung des Netzes. 1 Am Netz (Grüne LED leuchtet) Der Wechselrichter ist mit dem Netz verbunden und versorgt es mit Strom. Der Wechselrichter wird getrennt, wenn von der Norm abweichende Netzbedingungen festgestellt werden (abhängig von den Ländereinstellungen), im Fall eines internen Ereignisses oder wenn keine PV-Leistung verfügbar ist (wenn das Netz 10 Minuten lang nicht mit Strom versorgt wird).
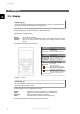
2. Display 2. Display 2 2.1. Display Anmerkung: Durch die erweiterten Funktionen des Wechselrichters kann es bis zu 10 Sekunden dauern, bis das Display nach dem Einschalten zur Verfügung steht. Der Benutzer hat über das integrierte Display auf der Vorderseite des Wechselrichters Zugang zu allen Informationen über das PV-System und den Wechselrichter. Das Display hat zwei Betriebsarten: Normal Energieeinsparung Das Display ist in Gebrauch.
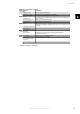
2. Display 2.1.1. Ansicht Menüstruktur – Ansicht Parameter Modus: Am Netz Prod. Heute: 12345 kWh Ausgangsleistung: 12345 W [ --- Auslastungsleiste --- ] Beschreibung Zeigt die aktuelle Betriebsart des Wechselrichters an. Siehe Definitionen der Betriebsarten Energieerzeugung von heute in kWh. Wert vom Wechselrichter oder S0-Energiemesser. Aktuelle Ausgangsleistung in Watt. Zeigt das Niveau der Wechselrichterauslastung als % der max. Nutzung 2 Tabelle 2.1: Ansicht 2.1.2.
2. Display 2.1.3. Status Menüstruktur – Status Displayfunktionen [-] Umgebungsbedingungen Einstrahlung: 1400 W/m2 PV-Modultemp.: 100 oC Umgebungstemp.: 20 oC Temp. Bestr.
2. Display Menüstruktur – Status – Fortsetzung Displayfunktionen [-] Wechselrichter [-] Land: Deutschland [-] Interne Bedingungen Leistungsmodul 1: 100 oC PCB1 (AUX): 100 oC [-] Seriennr. und SW-Ver. [-] Wechselrichter Prod- und Seriennummer: A0010000201 011900H2304 Softwareversion: MAC-Adresse: ...
2. Display 2.1.4.
2. Display Menüstruktur - Energielog – Fortsetzung Displayfunktionen Beschreibung [-] Zeitstempel Installiert: 31-12-07 Datum des ersten Netzanschlusses Abschaltung: 21:00:00 Letzter Anschluss des Wechselrichters an das Netz Prod. gestartet: 06:00:00 Erster Anschluss des Wechselrichters an das Netz heute. [-] Reduzierung Dauer, während der der Wechselrichter begrenzt Energie erzeugt, angezeigt als GeGst.reduzier.: 0 h samtzeit in Stunden Anp. Leistungspegel: 0 h Bedingt durch Leistungspegelanpassung Freq.
2. Display 2.1.5. Setup Menüstruktur - Setup Displayfunktionen [-] Externer Alarm Alarm stoppen Alarm testen 2 Alarmtimeout: 009 s Beschreibung Nur anwendbar, wenn ein externer Alarm angeschlossen ist Alarm stoppen Schließt Testen der roten LED an der Vorderseite ein Dauer der Zeit, in der der Alarm aktiv ist. Wenn der Wert auf 0 eingestellt ist, ist der Alarmtimeout deaktiviert und der Alarm ist aktiv, bis die Störung, die den Alarm ausgelöst hat, behoben ist oder der Alarm abgestellt wird. Siehe oben.
2. Display *) Nicht verfügbar. Menüstruktur – Setup – Fortsetzung Displayfunktionen GPRS-Verbindungseinr. SIM PIN-Code: 0000 Zugangspunktname: Name Benutzername: Benutzer Kennwort: Kennwort Roaming: Deaktiviert [-] Data-Warehouse-Service Upl.-Kan.: LAN Uploadzeit (h:m): 14:55 Protokoll-Upload starten [-] [-] [-] [-] Beschreibung 2 4-8 Zeichen Max. 24 Zeichen Max. 24 Zeichen Max. 24 Zeichen Erfordert Energieerzeugungsdaten über einen Zeitraum von mindestens 10 Minuten D.W. FTP-Serveradresse: www.
3. Webserver-Kurzanleitung 3. Webserver-Kurzanleitung 3.1. Einführung 3 In diesen Anweisungen wird der Protect PV Webserver erläutert, der den Remote-Zugriff auf den Wechselrichter erleichtert. Aktuelle Anweisungen finden Sie im Download-Bereich unter www.aegps.com/solarinverters. 3.2.
3. Webserver-Kurzanleitung 3 Abbildung 3.1: Produktschild 6. Das Webserver-Anmeldedialogfeld wird geöffnet. 7. Geben Sie in die Felder für Benutzer und Passwort "admin" ein, und klicken Sie auf [Anmelden]. 8. Beim ersten Anmelden wird ein Setup-Assistent gestartet. Stellen Sie sicher, dass Popups aktiviert sind, bevor der Assistent startet. 3.3.2.
3. Webserver-Kurzanleitung Schritt 2 von 7: Display-Sprache Wählen Sie die Display-Sprache. Dies ist keine Ländereinstellung. • Die Standardsprache ist Englisch. 3 Abbildung 3.3: Schritt 2 von 7: Display-Sprache Informationen zum späteren Ändern der Spracheinstellung finden Sie unter Setup, Setup-Details.
3. Webserver-Kurzanleitung Schritt 4 von 7: Anschlussleistung Geben Sie für jeden PV-Eingang folgendes ein: • Flächenbereich • Anschlussleistung Weitere Informationen erhalten Sie im Protect PV-Referenzhandbuch. 3 Falsche Einstellungen können schwerwiegende Folgen für die Produktionseffizienz haben. Abbildung 3.5: Schritt 4 von 7: Anschlussleistung Informationen zum Ändern der Anschlussleistung finden Sie unter Setup, Kalibrierung, PV-Anlage.
3. Webserver-Kurzanleitung 3 Abbildung 3.6: Schritt 5 von 7: Ländereinstellung Anmerkung: Wenn die ersten Einstellungen nicht mit den bestätigten Einstellungen übereinstimmen, • wird die Länderauswahl abgebrochen. • Der Assistent kehrt zu Schritt 5 zurück. Wenn die ersten Einstellungen und die bestätigten Einstellungen übereinstimmen, aber inkorrekt sind, wenden Sie sich an den Service. Informationen zum späteren Ändern der Ländereinstellungen erhalten Sie unter Setup, SetupDetails.
3. Webserver-Kurzanleitung 3 Abbildung 3.7: Schritt 6 von 7: Replikation Schritt 7 von 7: Starten des Wechselrichters Der Wechselrichter startet automatisch, wenn die Installationsfolge abgeschlossen ist (siehe Protect PV-Installationsanleitung) und die Sonneneinstrahlung nicht ausreichend ist. Der Startvorgang einschließlich Selbsttest dauert einige Minuten. Abbildung 3.
3. Webserver-Kurzanleitung 3 Abbildung 3.9: Übersicht 1. 2. 3. 18 Anlagenname: Zeigt den aktuellen Namen der Anlage an: • Klicken Sie auf den Anlagennamen, um die Anlagenansicht anzuzeigen. • Ändern Sie den Anlagennamen unter [Setup → Anlagendetails]. Gruppenmenü: Zeigt die Gruppen der Wechselrichter: • Standardmäßig werden die Wechselrichter der Gruppe 1 zugeordnet. • Klicken Sie auf einen Gruppennamen, um die Gruppenanzeige und eine Liste der Wechselrichter in der Gruppe anzuzeigen.
3. Webserver-Kurzanleitung • Sprache: Öffnet ein Popup-Fenster. Klicken Sie auf eine Flagge, um die Sprache von Webserver auf die gewünschte Sprache für die aktuelle Sitzung einzustellen. • Kontakt: Öffnet ein Pop-up-Fenster mit den AEG PS-Kontaktdaten. • Abmeldung: Öffnet das Dialogfeld für die Anmeldung bzw. Abmeldung. • Sicherheitsebene: Zeigt die aktuelle Sicherheitsebene (siehe Abschnitt Sicherheitsebenen).
3.
4. Fehlerbehebung 4. Fehlerbehebung 4.1. Fehlerbehebung Beachten Sie, dass alle Arbeiten an Wechselrichtern und elektrischen Installationen nur von geschultem und autorisiertem, mit elektrischen Anlagen und Sicherheitsfragen vertrautem Personal vorgenommen werden dürfen. 4 Falls der Wechselrichter nicht die erwartete Energie liefert, arbeiten Sie die Checkliste ab, bevor Sie den Service anrufen. 1.
4. Fehlerbehebung Anmerkung: Weitere Ereignisbeschreibungen siehe Protect PV-Referenzhandbuch Downloadbereich unter www.aegps.
5. Wartung 5. Wartung 5.1. Wartung Der Wechselrichter erfordert im Normalfall keine Instandhaltung oder Kalibrierung. Stellen Sie sicher, dass der Kühlkörper an der Rückseite des Wechselrichters nicht verdeckt wird. Reinigen Sie die Kontakte des PV-Lastschalters einmal pro Jahr. Führen Sie die Reinigung durch, indem Sie den Schalter zehnmal ein- und ausschalten. Der PV-Lastschalter befindet sich unten am Wechselrichter. 5 5.1.1.
France & Africa Italy Czech Republic AEG Power Solutions ZI 10 rue Jean Perrin 37173 Chambray-lès-Tours Tel: + 332 47 80 88 96 Fax: + 332 47 80 88 38 service.fr@aegps.com Email: AEG Power Solutions Via Trento 30 20059 Vimercate – Milan Tél : +39 0 39 686 3837 Fax : +39 0 39 686 3847 service.it@aegps.com Email: AEG Power Solutions spol. s r.o. Na vlastní pude 6/1368 102 00 PRAHA 15 Hostivar Tel: + 420 602 316 314 Fax: + 420 274 773 265 Email: service.cz@aegps.