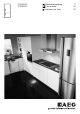
S75340KG2 S75380KG2 NL Gebruiksaanwijzing EN User manual IT Istruzioni per l’uso 2 18 33
www.aeg.com INHOUD 1. 2. 3. 4. 5. 6. 7. 8. 9. VEILIGHEIDSVOORSCHRIFTEN . . . . . . . . . . . . . . . . . . . . . . . . . . . . . . . . . . . . . . . . . . . . . . . . 3 BEDIENINGSPANEEL . . . . . . . . . . . . . . . . . . . . . . . . . . . . . . . . . . . . . . . . . . . . . . . . . . . . . . . . 5 HET EERSTE GEBRUIK . . . . . . . . . . . . . . . . . . . . . . . . . . . . . . . . . . . . . . . . . . . . . . . . . . . . . . . 7 DAGELIJKS GEBRUIK . . . . . . . . . . . . . . . . . . . . . . . . . . . . .
NEDERLANDS 1. 3 VEILIGHEIDSVOORSCHRIFTEN In het belang van uw veiligheid en om een correct gebruik te kunnen waarborgen is het van belang dat u, alvorens het apparaat te installeren en in gebruik te nemen, deze gebruiksaanwijzing, inclusief de tips en waarschuwingen, grondig doorleest. Om onnodige vergissingen en ongevallen te voorkomen is het belangrijk ervoor te zorgen dat alle mensen die het apparaat gebruiken, volledig bekend zijn met de werking ervan en de veiligheidsvoorzieningen.
www.aeg.com – de ruimte waar het apparaat zich bevindt grondig ventileren • Het is gevaarlijk om wijzigingen aan te brengen in de specificaties of dit product op enigerlei wijze te modificeren. Een beschadigd netsnoer kan kortsluiting, brand en/of een elektrische schok veroorzaken. WAARSCHUWING! Alle elektrische onderdelen (netsnoer, stekker, compressor) mogen om gevaar te voorkomen uitsluitend worden vervangen door een erkende onderhoudsdienst of gekwalificeerd onderhoudspersoneel.
NEDERLANDS • • • • • • paraat gekocht heeft. Gooi in dat geval de verpakking niet weg. Wij adviseren u om 4 uur te wachten voordat u het apparaat aansluit, dan kan de olie terugvloeien in de compressor. Rond het apparaat dient adequate luchtcirculatie te zijn, anders kan dit tot oververhitting leiden. Om voldoende ventilatie te verkrijgen de instructies met betrekking tot de installatie opvolgen.
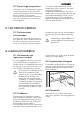
www.aeg.com 11 Temperatuurregeling vriezer, +- toets 12 Vriezertemperatuur-indicator 13 Temperatuurregeling vriezer, --toets 14 Resettoets alarm 15 Alarmlampje 2.1 Inschakelen Steek de stekker in het stopcontact. Zet de ON/OFF schakelaar op ON. Het alarmlampje knippert tot de temperatuur bereikt is. Het alarmsignaal klinkt. 4. Druk op de alarmresettoets om het alarm uit te schakelen. 1. 2. 3. De COOLMATIC functie zorgt nu voor intensieve koeling. Een temperatuur van +2°C wordt automatisch gekozen.
NEDERLANDS 2.7 Alarm hoge temperatuur In het geval van een abnormale stijging van de temperatuur in de vriezer (bijv. stroomuitval) gaat het alarmlampje knipperen en klinkt er een zoemer. Druk op de alarmresettoets om de zoemer uit te schakelen, het alarmlampje blijft knipperen. 7 De zoemer stopt automatisch als de temperatuur weer normaal is, het alarmlampje blijft knipperen. Druk op de alarmresettoets.
www.aeg.com maken, kunnen de schappen op verschillende hoogtes worden geplaatst. Om deze aanpassingen uit te voeren, gaat u als volgt te werk: 1 2 3 Als het schap horizontaal geplaatst is, mogen alleen afgesloten flessen worden neergezet. Deze flessenhouder kan worden gekanteld om al geopende flessen te bewaren. Trek hiervoor de houder omhoog zodat deze omhoog draait en op het niveau erboven kan worden geplaatst. 4.5 Groentelade De lade is geschikt voor het opbergen van fruit en groente.
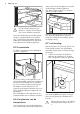
NEDERLANDS 4.8 Vriesmandjes uit de vriezer verwijderen De vriesmandjes hebben een limietstop om te voorkomen dat ze per ongeluk verschuiven of vallen. Trek de korf naar u toe om het uit de vriezer te halen, tot het niet verder kan, verwijder de korf door de voorkant naar boven te kantelen. 9 Bij het terugzetten tilt u de voorkant van de korf een beetje op en schuift u hem gekanteld in de vriezer. Zodra het mandje over de eindpunten heen is, kunt u hem terug op zijn plaats schuiven. 2 1 5.
www.aeg.com gen op willekeurig welk schap gezet worden. Fruit en groente: deze moeten zorgvuldig schoongemaakt worden en in de speciaal daarvoor bedoelde lade(n) geplaatst worden. Citroensap kan de plastic delen van de koelkast verkleuren. Daarom wordt aangeraden om citrusvruchten in aparte bakjes te bewaren. Boter en kaas: dit moet in speciale luchtdichte bakjes gelegd of in aluminiumfolie of plastic zakjes gewikkeld worden om zoveel mogelijk lucht buiten te sluiten.
NEDERLANDS • spoel ze af en maak ze grondig droog. Trek niet aan leidingen en/of kabels aan de binnenkant van de kast en verplaats of beschadig ze niet. Gebruik nooit schoonmaakmiddelen, schuurpoeders, erg geparfumeerde reinigingsproducten en waspolijstmiddelen om de binnenkant schoon te maken, aangezien deze het oppervlak beschadigen en een sterke geur achterlaten. 11 tomatisch van de verdamper van het koelvak verwijderd.
www.aeg.com Probleem Mogelijke oorzaak Oplossing Het apparaat maakt lawaai. Het apparaat is niet stevig en stabiel geplaatst. Controleer of het apparaat stabiel staat (alle vier de voetjes moeten op de vloer staan). De compressor werkt continu. De thermostaatknop staat Stel een hogere temperamisschien niet goed. tuur in. De deur is niet goed gesloten. Zie 'De deur sluiten'. De deur is te vaak geopend. Laat de deur niet langer dan nodig openstaan. De temperatuur van het product is te hoog.
NEDERLANDS Probleem Mogelijke oorzaak 13 Oplossing Er worden veel producten Bewaar minder producten tegelijk bewaard. tegelijk. De temperatuur in de koelkast is te hoog. Er is geen koude luchtcirculatie in het apparaat aanwezig. De temperatuur in de vriezer is te hoog. Producten zijn te dicht op Bewaar de producten op elkaar geplaatst. een manier die een koude luchtcirculatie mogelijk maakt. Het apparaat werkt niet. Het apparaat is uitgeschakeld. Zet het apparaat aan.
www.aeg.com 8. TECHNISCHE GEGEVENS S75340KG2 S75380KG2 Hoogte 1850 mm 2010 mm Breedte 595 mm 595 mm Diepte 658 mm 658 mm Tijdsduur 18 h 18 h Voltage 230 V 230 V Frequentie 50 Hz 50 Hz Afmeting De technische gegevens staan op het typeplaatje aan de linker binnenkant in het apparaat en op het energielabel. 9.
NEDERLANDS 15 9.3 Aansluiting op het elektriciteitsnet Zorg er vóór het aansluiten voor dat het voltage en de frequentie op het typeplatje overeenkomen met de stroomtoevoer in uw huis. Dit apparaat moet worden aangesloten op een geaard stopcontact.
www.aeg.com Om de volgende handelingen uit te voeren, raden we aan dat dit wordt gedaan met de hulp van een tweede persoon die de deuren van het apparaat stevig vasthoudt tijdens de werkzaamheden. 1. b1 Open de deur. Schroef het middelste scharnier (m2) los. Verwijder het kunststof afstandsstuk (m1). b2 b3 m1 m2 Zet het deksel (b1) terug op de andere kant. 8.
NEDERLANDS 17 17. Schroef de handgrepen (h3) los en t1 13. Bevestig de bovenste deur op het bovenste scharnier. 14. Plaats de bovenste deur weer op het middelste scharnier (m5) en kantel de beide deuren enigszins. 15. Schroef het middelste scharnier (m2) weer vast. Vergeet het kunststof afstandsstuk (m1) niet. 16. Verwijder de pennen (h1). Verwijder de afdekking (h2). bevestig deze aan de tegenovergestelde zijde. 18. Zet de afdekking (h2) terug en de pennen (h1).
www.aeg.com CONTENTS 1. 2. 3. 4. 5. 6. 7. 8. 9. SAFETY INSTRUCTIONS . . . . . . . . . . . . . . . . . . . . . . . . . . . . . . . . . . . . . . . . . . . . . . . . . . . . . CONTROL PANEL . . . . . . . . . . . . . . . . . . . . . . . . . . . . . . . . . . . . . . . . . . . . . . . . . . . . . . . . . . FIRST USE . . . . . . . . . . . . . . . . . . . . . . . . . . . . . . . . . . . . . . . . . . . . . . . . . . . . . . . . . . . . . . . . . DAILY USE . . . . . . . . . . . . . . . . . . . . . . . . . . .
ENGLISH 1. 19 SAFETY INSTRUCTIONS In the interest of your safety and to ensure the correct use, before installing and first using the appliance, read this user manual carefully, including its hints and warnings. To avoid unnecessary mistakes and accidents, it is important to ensure that all people using the appliance are thoroughly familiar with its operation and safety features.
www.aeg.com WARNING! Any electrical component (power cord, plug, compressor) must be replaced by a certified service agent or qualified service personnel to avoid hazard. 1. • • • • Power cord must not be lengthened. 2. Make sure that the power plug is not squashed or damaged by the back of the appliance. A squashed or damaged power plug may overheat and cause a fire. 3. Make sure that you can come to the mains plug of the appliance. 4. Do not pull the mains cable. 5.
ENGLISH • The appliance must not be located close to radiators or cookers. • Make sure that the mains plug is accessible after the installation of the appliance. • Connect to potable water supply only (If a water connection is foreseen). 21 ozone layer, in either its refrigerant circuit or insulation materials. The appliance shall not be discarded together with the urban refuse and rubbish.
www.aeg.com 2.2 Switching off To switch the entire appliance off: 1. Set ON/OFF switch to OFF. 2. Disconnect the mains plug from the mains socket. 2.3 Temperature regulation The set temperature of the fridge and of the freezer may be adjusted by pressing the temperature regulator button. The temperature indicators show the set temperature. For a correct storage of the food the following temperatures should be set: • +5 °C in the fridge • -18 °C in the freezer.
ENGLISH 23 3. FIRST USE 3.1 Cleaning the interior Before using the appliance for the first time, wash the interior and all internal accessories with lukewarm water and some neutral soap so as to remove the typical smell of a brand-new product, then dry thoroughly. Do not use detergents or abrasive powders, as these will damage the finish. 4. DAILY USE 4.1 Storage of frozen food 4.
www.aeg.com There is a separator inside the drawer that can be placed in different positions to allow for the subdivision best suited to personal needs. There is a grille (if foreseen) on the bottom of the drawer to separate the fruit and vegetables from any humidity that may form on the bottom surface. All parts inside the drawer can be removed for cleaning purposes 2 1 4.
ENGLISH 25 5. HELPFUL HINTS AND TIPS 5.1 Normal Operating Sounds • You may hear a faint gurgling and a bubbling sound when the refrigerant is pumped through the coils or tubing. This is correct. • When the compressor is on, the refrigerant is being pumped around and you will hear a whirring sound and a pulsating noise from the compressor. This is correct. • The thermic dilatation might cause a sudden cracking noise. It is natural, not dangerous physical phenomenon. This is correct. 5.
www.aeg.com • it is advisable to show the freezing in date on each individual pack to enable you to keep tab of the storage time. 5.
ENGLISH 27 This means that there is no buildup of frost when it is in operation, neither on the internal walls nor on the foods. The absence of frost is due to the continuous circulation of cold air inside the compartment, driven by an automatically controlled fan. 6.3 Defrosting of the freezer The freezer compartment of this model, on the other hand, is a "no frost" type. 7. WHAT TO DO IF… CAUTION! Before troubleshooting, disconnect the power supply.
www.aeg.com Problem Possible cause Solution Water flows on the rear plate of the refrigerator. During the automatic defrosting process, frost defrosts on the rear plate. This is correct. Water flows into the refrigerator. The water outlet is clogged. Clean the water outlet. Products prevent that wa- Make sure that products ter flows into the water do not touch the rear collector. plate. Water flows on the ground.
ENGLISH 29 As much as the advice does not lead to result, call the nearest brand-mark service. 7.1 Replacing the lamp 1. 2. 3. 4. 5. 6. 7. Disconnect the appliance. Push the movable part to unhook the lamp cover (1). Remove the lamp cover (2). Replace the lamp with one of the same power and specifically designed for domestic appliances only. Install the lamp cover. Connect the appliance. Open the door. Make sure that the lamp comes on. 1 2 7.2 Closing the door 1. 2. Clean the door gaskets.
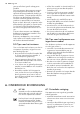
www.aeg.com Climate class Ambient temperature SN +10°C to + 32°C N +16°C to + 32°C ST +16°C to + 38°C T +16°C to + 43°C 9.2 Location 100 mm min The appliance should be installed well away from sources of heat such as radiators, boilers, direct sunlight etc. Ensure that air can circulate freely around the back of the cabinet.
ENGLISH 9.6 Removing the shelf holders m1 Your appliance is equipped with shelf retainers that make it possible to secure the shelves during transportation. To remove them proceed as follows: m5 A m3 31 m2 m6 m4 B C 1. Move the shelf holders in the direction of the arrow (A). 2. Raise the shelf from the rear and push it forward until it is freed (B). 3. Remove the retainers (C). 2. 3. 4. 5. 6. 9.
www.aeg.com 14. Re-insert the upper door on the mid- dle hinge pivot (m5) slightly tilting both doors. 15. Re-screw the middle hinge (m2). Do not forget the plastic spacer (m1). 16. Remove the cover pins (h1). Remove the cover (h2). d2 d3 d4 d6 d5 h3 h1 9. Re-insert the stoppers (d5,d6) on the other side of the doors. 10. Re-insert the lower door on the lower hinge pivot (b2). 11. Insert the middle hinge (m2) into the left drill of the lower door. 12.
ITALIANO 33 INDICE 1. 2. 3. 4. 5. 6. 7. 8. 9. ISTRUZIONI DI SICUREZZA . . . . . . . . . . . . . . . . . . . . . . . . . . . . . . . . . . . . . . . . . . . . . . . . . . . PANNELLO DEI COMANDI . . . . . . . . . . . . . . . . . . . . . . . . . . . . . . . . . . . . . . . . . . . . . . . . . . PRIMO UTILIZZO . . . . . . . . . . . . . . . . . . . . . . . . . . . . . . . . . . . . . . . . . . . . . . . . . . . . . . . . . . . UTILIZZO QUOTIDIANO . . . . . . . . . . . . . . . . . . . . . . . . . . . . . . . .
www.aeg.com 1. ISTRUZIONI DI SICUREZZA Per garantire un impiego corretto e sicuro dell'apparecchio, prima dell'installazione e del primo utilizzo leggere con attenzione il libretto istruzioni, inclusi i suggerimenti e le avvertenze. Per evitare errori e incidenti, è importante garantire che tutte le persone che utilizzano l'apparecchio ne conoscano il funzionamento e le caratteristiche di sicurezza.
ITALIANO AVVERTENZA! Tutti i componenti elettrici (cavo di alimentazione, spina, compressore) devono essere sostituiti da un tecnico certificato o da personale d'assistenza qualificato al fine di evitare di correre rischi. 1. • • • • Non collegare prolunghe al cavo di alimentazione. 2. Evitare che il lato posteriore dell'apparecchiatura possa schiacciare o danneggiare la spina, causandone il surriscaldamento con un conseguente rischio di incendio. 3.
www.aeg.com • Attorno all'apparecchio vi deve essere un'adeguata circolazione dell'aria, altrimenti si può surriscaldare. Per ottenere una ventilazione sufficiente seguire le istruzioni di installazione. • Se possibile il retro dell'apparecchio dovrebbe essere posizionato contro una parete per evitare di toccare le parti calde o di rimanervi impigliati (compressore, condensatore), evitando così possibili scottature. • L'apparecchio non deve essere posto vicino a radiatori o piani di cottura a gas.
ITALIANO 2.1 Accensione Inserire la spina nella presa di corrente. 2. Portare l'interruttore ON/OFF in posizione ON. 3. L'indicatore di allarme lampeggia finché non viene raggiunta la temperatura richiesta. Il cicalino emette un segnale acustico. 4. Per interrompere le indicazioni di allarme, premere l'apposito tasto di azzeramento. 1. 2.2 Spegnimento Per spegnere l'intero apparecchio: 1. Portare l'interruttore ON/OFF in posizione OFF. 2. Estrarre la spina dalla presa di corrente. 2.
www.aeg.com 2.7 Allarme di alta temperatura In caso di aumento anomalo della temperatura all'interno del congelatore (ad es. a causa di un'interruzione di corrente), l'indicatore di allarme inizia a lampeggiare e viene emesso un segnale acustico. Premendo il tasto di azzeramento dell'allarme è possibile interrompere il segnale acustico, mentre l'indicatore luminoso continuerà a lampeggiare.
ITALIANO 39 4.6 Posizionamento dei ripiani della porta Per facilitare l'introduzione di alimenti di diverse dimensioni, i ripiani della porta possono essere posizionati ad altezze differenti. Per regolare l'altezza dei ripiani, procedere come segue: 1 Se il ripiano è posizionato orizzontalmente, utilizzarlo solo per le bottiglie chiuse. Il ripiano può essere inclinato per consentire l'appoggio di bottiglie aperte.
www.aeg.com Accendere la ventola quando la temperatura ambiente è superiore a 25°C. 4.8 Rimozione dei cestelli dal vano congelatore I cestelli del vano congelatore sono provvisti di un fermo che ne impedisce la caduta o la rimozione accidentale. Per estrarre un cestello dal congelatore, tirarlo in avanti e, al raggiungimento del fermo, inclinare verso l'alto la parte anteriore. 2 1 Per reinserire il cestello, sollevarlo leggermente sul lato anteriore e introdurlo nel congelatore.
ITALIANO contatto. Si consiglia quindi di conservare gli agrumi in contenitori separati. Burro e formaggio: dovrebbero essere posti in contenitori ermetici speciali o avvolti in pellicole di alluminio o sacchetti di politene per escludere per quanto possibile l'aria. Bottiglie: con il tappo ben chiuso, possono essere riposte sulla mensola portabottiglie. Non conservare nel frigorifero banane, patate, cipolle o aglio se non sono confezionati. 5.
www.aeg.com Non tirare, spostare o danneggiare tubi e/o cavi all'interno dell'apparecchio. Non usare mai detergenti, polveri abrasive, prodotti per la pulizia con una forte profumazione o cere lucidanti per pulire l'interno, in quanto danneggiano la superficie e lasciano un odore forte. Pulire il condensatore (griglia nera) e il compressore sul retro dell'apparecchio con una spazzola. Questa operazione migliorerà le prestazioni dell'apparecchiatura riducendone i consumi di energia.
ITALIANO 43 Problema Causa possibile Soluzione L'apparecchiatura è rumorosa. L'apparecchiatura non è appoggiata in modo corretto. Controllare che l'apparecchiatura sia appoggiata in modo stabile (tutti i piedini devono essere a contatto con il pavimento). Il compressore rimane sempre in funzione. Il regolatore di tempera- Impostare una temperatutura potrebbe non essere ra superiore. impostato correttamente. La porta non è chiusa cor- Consultare la sezione rettamente. "Chiusura della porta".
www.aeg.com Problema Causa possibile La temperatura all'interno dell'apparecchiatura è troppo alta. La porta non è chiusa cor- Consultare la sezione rettamente. "Chiusura della porta". Soluzione La temperatura degli alimenti è troppo alta. Prima di mettere a conservare gli alimenti, lasciarli raffreddare a temperatura ambiente. Sono stati introdotti molti alimenti contemporaneamente. Introdurre gli alimenti un poco alla volta. La temperatura nel vano frigorifero è troppo alta.
ITALIANO 3. 45 Se necessario, sostituire le guarnizioni della porta difettose. Contattare il Centro di assistenza locale. 8. DATI TECNICI S75340KG2 S75380KG2 Altezza 1850 mm 2010 mm Larghezza 595 mm 595 mm Profondità Dimensioni 658 mm 658 mm Tempo di risalita 18 h 18 h Tensione 230 V 230 V Frequenza 50 Hz 50 Hz I dati tecnici sono riportati sulla targhetta del modello, applicata sul lato sinistro interno dell'apparecchiatura, e sull'etichetta dei valori energetici 9.
www.aeg.com 100 mm min 2 1 4 B 1. 2. 20 mm A 3 AVVERTENZA! Deve essere possibile scollegare l'apparecchio dalla rete elettrica; eseguire perciò l'installazione facendo sì che la spina rimanga facilmente accessibile. 9.3 Collegamento elettrico Prima di inserire la spina, verificare che la tensione e la frequenza riportate sulla targhetta corrispondano ai valori della rete elettrica domestica. L'apparecchio deve essere collegato a massa.
ITALIANO A m1 m5 B m3 C 47 m2 m6 m4 1. Spostare i fermi dei ripiani in direzione della freccia (A). 2. Sollevare il ripiano dalla parte posteriore e spingerlo in avanti fino a liberarlo (B). 3. Rimuovere i fermi (C). 2. 3. 4. 9.7 Reversibilità delle porte AVVERTENZA! Prima di eseguire le operazioni descritte, spegnere l'apparecchio ed estrarre la spina dalla presa. 5. 6.
www.aeg.com 15. Riavvitare la cerniera centrale (m2). Non dimenticare il distanziatore di plastica (m1). 16. Rimuovere i tappini di copertura (h1). Rimuovere la copertura (h2). d2 d3 d4 d6 h3 d5 h1 h2 9. Reinserire i fermi (d5,d6) sul lato opposto delle porte. 10. Reinserire la porta inferiore sul perno (b2) della cerniera inferiore. 11. Inserire la cerniera centrale (m2) nel foro sinistro della porta inferiore. 12. Svitare il perno della cerniera superiore (t1) e fissarlo sul lato opposto.
ITALIANO prodotto al punto di riciclaggio più vicino o contattare il comune di residenza.
www.aeg.
ITALIANO 51
280152284-A-342013 www.aeg.