USER GUIDE UK DE FR PMR Voxtel R200/R210/R220 V2 NL IT SW PL GR CZ
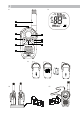
P2 P1 DCS CTCSS SC TX RX 10 VOX DCM 9 8 1 7 2 3 4 6 5 P3 P4 P5 AEG
BECAUSE WE CARE Thank you for purchasing this product. This product has been designed and assembled with utmost care for you and the environment. This is why we supply this product with a quick installation guide to reduce the number of paper (pages) and therefor save trees to be cut for making this paper. Thank you for supporting us to protect our environment. 2 GETTING TO KNOW YOUR PMR 2.
2.2 LCD screen (see P2) Meaning Channel number. Changes from 1 to 8 as selected by the user. CTCSS code. Changes from 1 to 38 as selected by the user. Displays the battery change level. Displayed when the stop watch function is activated. TX Displayed when transmitting a signal. RX Displayed when receiving a signal. DCM Displayed when the dual watch function is turned on. DCS Displayed when the Digital Code System is turned on. VOX Displayed when the VOX feature is enabled.
Belt clip latch UK 3.2 Installing the belt clip t Slide the belt clip into the slot as shown in Fig. 2. >A “click” indicates the belt clip is locked into its position. Fig. 1 3.3 Fig. 2 Installing the batteries (see P3) Caution: Observe the proper battery polarity orientation when installing batteries. Incorrect positioning can damage both the batteries and the unit. t Slide down the battery compartment cover. t Insert the rechargeable batteries by following the orientation as shown in P3.
t Plug the mains adaptor into a 220V AC, 50Hz main socket. t Place the PMR units in the charge cradle in an upright position. The charge LED indicators will light up. t It takes about 10 hours to fully recharge the batteries if they are completely run down. New batteries take up to 14 hours to fully charge. Important: t The unit must be charged using the mains adaptor provided. Using any other adaptor will result in non-compliance with EN60950-1 and will invalidate any approvals and warranty.
Battery charge at very low level. When the battery level reach it minimum level in on mode, unit will emit two beep tone and automatically turn off the power and proceeds to watch mode. 3.6 Battery life The unit has a built in power saver to make the batteries last longer. But when you are not using the units, turn them off to conserve battery power. 4 OPERATION 4.1 Transmitting range The talk range depends on the environmental and terrain.
4.3 Adjusting the speaker volume The volume level is shown by vertical bars on the LCD screen. You can change the volume while using your unit, or while the unit is idle (switched on but not in use). t Press the up button to increase or press down button to decrease the speaker volume. 4.4 Changing channels The unit has 8 available channels, to communicate with other PMR users within a range, you must all have your unit tuned to the same channel.
4.4.2 Setting the DCS advanced digital code Each channel also has 83 digital codes to let you set up group of users for more secured private communication. t Press the menu button 3 times. DCS code is blinking on the LCD screen. t Press the up or down button to select the desired DCS code. t Press the PTT button to confirm the DCS channel setting. ! Transmitting and receiving t The PMR transmission is “one way-at-a-time.” While you are speaking, you can not receive a transmission.
4.8 Setting the VOX (voice activated) sensitivity In VOX mode, the unit will transmit a signal only when it is activated by your voice or other sounds around you. The unit will transmit further for 2 seconds even if you stop talking. The level of VOX sensitivity is shown by a number on the LCD screen. At the highest level, the units will pickup softer noise (including background noise); at the lowest level, it will pick up only louder noise.
4.10 Call alert Your PMR can alert you to incoming signal by emitting an audible call tone. 4.10.1 Call-ring tone You can send a call-ring tone to other PMR users to give an alert that you want to communicate with them. t Press the call button . You will hear a ring tone for about two seconds; TX icon appears on the LCD screen. Any other units within the transmitting range and tuned to the same channel and sub-channel (if applicable) will hear the call-ring tone. 4.10.
t Press the up or down button to select the key tone on/off. t Press the PTT button to confirm your setting. 4.13 Setting the dual watch mode Your unit is capable of monitoring two channels, the current and another (dual watch) channel. If the unit detects a signal on either channel, it will stop and receive the signal. 11 times, “DCM” icon will be displayed t Press the menu button while “OF ” flashes on the LCD screen.
Stop watch function t In standby mode, press and hold the call button for 3 seconds. will appear on the LCD screen. The stop watch icons t Press the up button once to start the stop watch. to stop press again the up button . t Press the down button to reset the timer. to exit the stop watch function and t Press and hold the call button return to standby mode. 5.3 LCD screen back light Every time a button is pressed (except PTT and call LCD screen back light will illuminate for 5 seconds.
7 Safety ! Damaged antenna Do not use any PMR that has a damaged antenna. If a damaged antenna comes in contact with the skin, a minor burn may result. ! Rechargeable batteries All batteries can cause property damage and/or bodily injury such as burns if conductive material such as jewelry, keys, or beaded chains touches exposed terminals. The material may complete an electrical circuit (short circuit) and become quite hot.
NOTE: Areas with potentially explosive atmospheres are often, but not always clearly marked. They include fueling areas such as below deck on boats; fuel or chemical transfer or storage facilities; areas where the air contains chemicals or particles, such as grain, dust, or metal powders; and any other area where you would normally be advised to turn off your vehicle engine.
10 CLEANING AND CARE Do not clean any part of your unit with benzene, thinners or other solvent chemicals as this may cause permanent damage which is not covered by the guarantee. When necessary, clean it with a damp cloth. Keep your unit away from hot, humid conditions or strong sunlight, and don‘t let it get wet. 11 GUARANTEE AND SERVICE The unit is guaranteed for 24 months from the date of purchase shown on your sales receipt.
UNSER EINSATZ FÜR DIE UMWELT Vielen Dank, dass Sie sich für dieses Produkt entschieden haben. Dieses Gerät wurde mit größter Sorgfalt entwickelt und gefertigt, um Ihnen ein exzellentes Produkt zu bieten und gleichzeitig die Umwelt zu schonen. Deshalb liegt diesem Produkt eine Kurzanleitung bei, um die Papiermenge zu reduzieren. So müssen weniger Bäume für die Herstellung von Papier abgeholzt werden. Vielen Dank, dass Sie uns beim Umweltschutz unterstützen. 2 EINFÜHRUNG 2.
8 PTT PTT (push to talk)-Taste t Gedrückt halten, um senden zu können. 9 Mikrofon, Kopfhörer, Ladebuchse 10 Antenne 2.2 LCD-Anzeige (siehe P2) Bedeutung Kanalnummer. Je nach Auswahl von 1 bis 8. CTCSS-Code. Je nach Auswahl von 1 bis 38. Zeigt den Akku-Ladezustand an. Wird angezeigt, wenn die Stoppuhrfunktion aktiviert ist. TX Wird angezeigt, wenn ein Signal gesendet wird. RX Wird angezeigt, wenn ein Signal empfangen wird.
3 INSTALLATION Gürtelclipverriegelung DE 3.1 Den Gürtelclip entfernen t Ziehen Sie an der Gürtelclipverriegelung des PMR-Geräts. t Während des Ziehens an der Gürtelclipverriegelung drücken Sie gleichzeitig den Gürtelclip nach oben, siehe Abb. 1. Fig. 1 Fig. 2 3.2 Den Gürtelclip anbringen t Schieben Sie den Gürtelclip in den dafür vorgesehenen Einschub, siehe Abb. 2. >Durch ein Klicken wird angezeigt, dass der Gürtelclip in seiner Position eingerastet ist. 3.
lassen Sie sie nicht an Orten, wo sie verbrannt oder aufgestochen werden könnten. t Lassen Sie die leeren Akkus nicht in Ihren PMR-Geräten. Sie könnten dort auslaufen. 3.4 Die Akkus aufladen 3.4.1 Mit dem Duo-Ladegerät (Modell R210/R220) (siehe P4) t Stecken Sie den schmalen Stecker des Netzteils in die Stromanschlussbuchse hinten am Desktop-Ladegerät. t Stecken Sie das Netzteil in eine Netzsteckdose (220 V WS, 50 Hz). t Stellen Sie die PMR-Geräte senkrecht in die Auflade-Basisstationen.
Gerät eingeschaltet ist, werden vom Gerät zwei Pieptöne ausgegeben, bevor es sich dann automatisch ausschaltet. Hoher Akku-Ladezustand. Mittlerer Akku-Ladezustand. Niedriger Akku-Ladezustand. Bei diesem Zustand wird vom Gerät im Normalmodus alle 10 Sekunden ein Piepton ausgegeben. Wichtig: Das vollständige Laden des Geräts dauert 10-14 Stunden. Sehr niedriger Akku-Ladezustand.
Wichtige Sicherheitswarnung: t Um die Belastung durch Funkfrequenzen beim Einsatz Ihres PMRGeräts zu reduzieren, sollten Sie das Gerät mindestens 5 cm von Ihrem Gesicht entfernt halten. t Benutzen Sie Ihr Gerät niemals draußen bei Gewitter. t Benutzen Sie das Gerät nicht im Regen. t Wenn Ihr Gerät nass wird, schalten Sie sie ab und nehmen Sie die Akkus heraus. Machen Sie das Akku-Fach trocken und lassen sie es für ein paar Stunden offen.
>Die Kanäle wechseln von 1 bis 8 oder in umgekehrter Reihenfolge. t Drücken Sie die PTT-Taste, um die Einstellungen zu bestätigen. 4.4.1 Den CTCSS-Unterkanal einstellen Jeder Kanal verfügt über 38 Unterkanäle, die es Ihnen ermöglichen, eine Benutzergruppe für einen gemeinsam genutzten Kanal einzurichten, so dass die entsprechende Kommunikation für andere nicht zugänglich ist.
! Senden und Empfangen t Die PMR-Übertragung erfolgt nach dem Prinzip: „One Way at a Time“, d. h., Sie können während Sie sprechen nicht gleichzeitig auch Übertragungen empfangen. t Die PMR-Nutzung ist lizenzfrei. Identifizieren Sie sich deshalb auch immer selbst, wenn Sie denselben Kanal nutzen. 4.5 Empfang Wenn das Gerät eingeschaltet ist und nicht sendet, befindet es sich dauerhaft im Empfangsmodus.
Der Grad der VOX-Empfindlichkeit wird durch eine Zahl auf der LCDAnzeige angegeben. In der höchsten Empfindlichkeitsstufe nimmt das Gerät leise Geräusche (einschließlich Hintergrundgeräusche) auf; in der niedrigsten Stufe werden nur laute Geräusche aufgenommen. und das Symbol VOX sowie t Drücken Sie viermal die Menütaste ein blinkendes „OF” werden auf der LCD-Anzeige angezeigt. t Drücken Sie die Aufwärtstaste , um die VOX-Empfindlichkeit auf die höchste Stufe (3) zu setzen.
t Drücken Sie siebenmal die Menütaste und DCS wird dann blinkend auf der LCD-Anzeige angezeigt. Drücken Sie dann die oder Abwärtstaste , um mit dem Scannen der Aufwärtstaste DCS-Codes von 1- 83 zu beginnen. t Drücken Sie die PTT-Taste, um Ihre Einstellung zu bestätigen. 4.10 Rufalarm Ihr PMR-Gerät kann Sie durch einen akustischen Rufton auf ein ankommendes Signal aufmerksam machen. 4.10.
4.12 Den Tastenton ein- oder ausschalten Bei dieser Funktion wird vom Gerät ein Bestätigungston beim Drücken einer Taste ausgegeben. und auf der LCD-Anzeige t Drücken Sie zehnmal die Menütaste werden das Symbol „T0” und ein blinkendes „ON” angezeigt. t Drücken Sie dann die Aufwärtstaste oder Abwärtstaste , um den Tastenton ein- oder auszuschalten. t Drücken Sie die PTT-Taste, um Ihre Einstellung zu bestätigen. 4.
t Um die Tastensperrfunktion zu deaktivieren, halten Sie die Menütaste so lange gedrückt, bis das Symbol für die Tastensperre auf der LCD-Anzeige erloschen ist. Hinweis: Die PTT-Taste, Ruftaste und Ein-/Austaste bleiben funktionsfähig, selbst wenn die Tastensperrfunktion aktiviert ist. 5.2 Stoppuhrfunktion drei Sekunden lang t Halten Sie im Standby-Modus die Ruftaste gedrückt. Auf der LCD-Anzeige erscheint dann das Symbol für die Stoppuhr .
SPEZIFIKATIONEN Verfügbare Kanäle 8 Kanäle CTCSS-Unterkanal 38 für jeden Kanal Ausgangsleistung (TX) 0,5 W (Max) Reichweite Bis zu 8 km DE 6 Kanalfrequenztabelle Kanal Frequenz (MHz) Kanal Frequenz (MHz) 1 446.00625 5 446.05625 2 446.01875 6 446.06875 3 446.03125 7 446.08125 4 446.03125 8 446.09375 7 SICHERHEIT ! Defekte Antenne Benutzen Sie keine PMR-Geräte mit defekten Antennen.
Batteriepolen in Kontakt kommt. Durch das Material kann ein elektrischer Stromkreis geschlossen werden (Kurzschluss), wodurch es sehr heiß werden kann. Behandeln Sie geladene Batterien deshalb besonders vorsichtig, vor allem wenn sie sich in einer Tasche, Handtasche oder anderen Behältern zusammen mit Metallgegenständen befinden. ! Warnung für Fahrzeuge mit Airbag Platzieren Sie Ihr Gerät nicht in den Bereich über einem Airbag oder im Airbagbereich selbst. Airbags blasen sich mit großer Kraft auf.
HINWEIS: Bereiche mit potentiell explosiven Umgebungen sind oftmals, aber nicht immer eindeutig als solche gekennzeichnet. Dies gilt auch für Tankbereiche wie zum Beispiel unter Deck auf Schiffen, Orte, an denen Treibstoff oder Chemikalien umgeschlagen oder gelagert werden, Orte, an denen die Luft Chemikalien oder Partikel, wie zum Beispiel Körner, gewöhnlichen Staub oder Metallstaub enthält, sowie alle anderen Bereiche, an denen Sie normalerweise aufgefordert werden, Ihren Fahrzeugmotor auszuschalten.
10 REINIGUNG UND PFLEGE Reinigen Sie keine Teile Ihres Geräts mit Benzin, Verdünnungsmitteln oder Chemikalien auf Lösungsmittelbasis, da dies zu bleibenden Schäden führen kann, die nicht von der Garantie abgedeckt werden. Reinigen Sie das Gerät falls notwendig mit einem feuchten Tuch. Halten Sie Ihr Gerät von Hitze, Feuchtigkeit oder starker Sonneneinstrahlung fern und vermeiden Sie, dass es nass wird.
1 NOTRE ENGAGEMENT 2 DESCRIPTION DE VOTRE PMR 2.1 Vue d‘ensemble du combiné (voir P1) # Légende 1 Écran LCD t Affiche la sélection de canal actuelle et les autres symboles de la radio. 2 Touche d‘appel t Appuyez pour envoyer une tonalité aux autres unités PMR. 3 Touches vers le haut/bas t Appuyez sur ces touches pour changer de canaux et modifier le volume, ainsi que pour sélectionner les paramètres pendant la programmation.
8 PTT Touche PTT (push to talk) t Appuyez sur cette touche et maintenez-la enfoncée pour effectuer une transmission. 9 Prise microphone/écouteur/chargement 10 Antenne 2.2 Écran LCD (voir P2) Légende Numéro du canal. Change de 1 à 8 en fonction du choix réalisé par l‘utilisateur. Code CTCSS. Change de 1 à 38 en fonction du choix réalisé par l‘utilisateur. Affiche le niveau de chargement de la pile. Apparaît lorsque la fonction de contrôle de l‘arrêt est activée.
3 INSTALLATION Clapet du clip de ceinture Fig. 1 3.2 Fig. 2 Installation du clip de ceinture t Faites glisser le clip de ceinture dans le logement comme l‘indique la fig. 2. >Un clic indique que le clip de ceinture est en position. 3.3 Mise en place des piles (voir P3) Attention : Respectez l‘orientation de polarité des piles lorsque vous les mettez en place. Un positionnement incorrect peut endommager les piles et l‘unité. t Faites glisser vers le bas le couvercle du compartiment des piles.
3.4 Chargement des piles 3.4.1 Avec chargeur duo (modèle R210/R220) (voir P4) t Insérez le petit connecteur à l‘extrémité de l‘adaptateur secteur dans la prise de raccordement d‘entrée à l‘arrière du chargeur de bureau. t Branchez l‘adaptateur secteur dans une prise secteur 220 VCA, 50 Hz. t Placez les unités PMR dans le logement de chargement à la verticale. Les DEL de chargement s‘allument. t Si les piles sont totalement déchargées, il faut environ 10 heures pour les recharger entièrement.
Charge de la pile à haut niveau. Charge de la pile au niveau moyen. Charge de la pile à faible niveau. À ce niveau, l‘unité émet un bip toutes les 10 secondes en mode normal. Charge de la pile à très faible niveau. Lorsque le niveau de la pile atteint son plus bas niveau en mode ON, l‘unité émet 2 bips et arrête automatiquement l‘alimentation avant de passer en mode de contrôle. 3.
4.2 Mise sous tension/hors tension de l‘unité Pour mettre l‘unité sous tension : et maintenez-la enfoncée t Appuyez sur la touche d‘alimentation jusqu‘à ce que l‘écran LCD s‘active et indique le canal actuel. Pour mettre l‘unité hors tension : et maintenez-la enfoncée t Appuyez sur la touche d‘alimentation jusqu‘à ce que l‘écran LCD devienne blanc. >Vous pouvez entendre une totalité de confirmation à chaque fois. 4.
t Appuyez deux fois sur la touche de menu . Le numéro du souscanal CTCSS clignote sur l‘écran LCD. ou vers le bas pour t Appuyez sur la touche vers le haut sélectionner l‘un des 38 sous-canaux CTCSS. t Appuyez sur la touche PTT pour confirmer la configuration du souscanal. 4.4.2 Configuration du code numérique avancé DCS Chaque canal dispose également de 83 codes numériques pour vous permettre de configurer un groupe d‘utilisateurs pour une communication plus privée. t Appuyez 3 fois sur la touche de menu .
t Maintenez l‘unité en position verticale avec le microphone à 5 cm de la bouche. Tout en maintenant le bouton PTT enfoncé, parlez dans le microphone sur un ton de voix normal. t Relâchez la touche PTT une fois que vous avez terminé de parler. 4.7 Contrôle Vous pouvez utiliser la fonction de contrôle pour rechercher les signaux faibles sur le canal actuel. t Appuyez sur les touches de menu et vers le bas simultanément et maintenez-les enfoncées. L‘icône RX apparaît sur l‘écran LCD.
4.9 Activation du balayage automatique des canaux Le balayage des canaux recherche les signaux actifs dans une boucle infinie pour les 8 canaux, les 38 codes CTCSS et les 83 codes DCS. . L‘icône SC apparaît sur t Appuyez 5 fois sur la touche de menu l‘écran LCD. t Appuyez sur la touche vers le haut ou vers le bas pour lancer le balayage des canaux. Lorsqu‘un signal actif est détecté, le balayage des canaux observe une pause sur le canal actif. t Appuyez 6 fois sur la touche de menu .
4.11 Réglage du bip Roger Le bip Roger est un ton transmis dès que la touche PTT est relâchée. Cela alerte le destinataire du fait que vous avez volontairement mis fin à la transmission et que vous vous trouvez désormais en mode de réception. t Appuyez 9 fois sur la touche de menu . L‘icône R0 apparaît pendant que l‘icône ON clignote sur l‘écran LCD. ou vers le bas pour activer/ t Appuyez sur la touche vers le haut désactiver le bip Roger. t Appuyez sur la touche PTT pour confirmer vos réglages. 4.
FONCTIONS AUXILIAIRES 5.1 Verrouillage des touches La fonction de verrouillage des touches permet à l‘utilisateur de ou vers le bas , ainsi que la désactiver les touches vers le haut de manière à ce que les réglages du PMR ne touche de menu puissent pas être modifiés par accident. t Pour activer la fonction de verrouillage des touches, appuyez sur la touche de menu et maintenez-la enfoncée jusqu‘à ce que l‘icône apparaisse sur l‘écran LCD.
5.4 Prise microphone/écouteur/chargement L‘unité est dotée d‘un connecteur auxiliaire microphone, écouteur et chargement situé sur le dessus. Pour plus d‘informations, consultez le site www.aegtelphones.eu 6 CARACTÉRISTIQUES TECHNIQUES Canaux disponibles 8 canaux Sous-canal CTCSS 38 par canal Puissance en sortie (TX) 0,5 W (max) Portée jusqu‘à 8 km Tableau des fréquences de canaux Canal Fréquence (MHz) Canal Fréquence (MHz) 1 446.00625 5 446.05625 2 446.01875 6 446.06875 3 446.
! Piles rechargeables Toutes les piles peuvent entraîner des dommages matériels et/ou des blessures corporelles du type brûlures si du matériel conducteur, du type bijouterie, clés ou chaînes entrent en contact avec les bornes exposées. Le matériau peut former un circuit électrique (court-circuit) et devenir brûlant. Soyez prudent lorsque vous manipulez des piles chargées, en particulier lorsque vous les placez dans une poche, un sac à main ou un autre contenant comportant des objets métalliques.
REMARQUE : Les zones où règnent des atmosphères potentiellement explosives sont souvent signalées de manière claire, mais ce n‘est pas toujours le cas.
10 NETTOYAGE ET ENTRETIEN FR Vous ne devez nettoyer aucune pièce de votre unité avec du benzène, des diluants ou d‘autres produits chimiques solvants car cela risque d‘entraîner des dommages irréversibles qui ne sont pas couverts par la garantie. Au besoin, nettoyez le téléphone avec un chiffon humide. Faites en sorte que votre unité ne soit pas soumise à des conditions chaudes et humides, ni à un fort ensoleillement et évitez qu‘il ne se mouille.
1 ONZE ZORG Wij willen u bedanken voor de aankoop van dit product. Bij de ontwikkeling en montage van dit product stonden u en het milieu centraal. Daarom krijgt u bij dit product een verkorte installatiehandleiding, zodat er minder papier wordt gebruikt en er dus minder bomen moeten worden gekapt. Bedankt dat u ons steunt in onze zorg voor het milieu. 2 UW PMR 2.1 Overzicht PMR (zie P1) # Betekenis 1 Lcd-scherm t Geeft de huidige kanaalselectie en andere symbolen weer.
9 Aansluiting voor microfoon/oortjes/lader 10 Antenne 2.2 Lcd-scherm (zie P2) Betekenis Kanaalnummer. Verandert van 1 tot 8 naargelang de keuze van de gebruiker. Geeft het batterijniveau weer. Weergegeven wanneer de chronometerfunctie actief is. TX Weergegeven bij het verzenden van een signaal. RX Weergegeven bij het ontvangen van een signaal. DCM Weergegeven wanneer dual channel monitor actief is. DCS Weergegeven wanneer DCS actief is. VOX Weergegeven wanneer de VOX-functie actief is.
3 INSTALLATIE 3.1 De riemclip verwijderen t Trek het lipje van de riemclip naar voren (weg van de PMR). t Duw de riemclip omhoog terwijl u aan het lipje van de riemclip trekt, zoals geïllustreerd in Fig. 1. 3.2 De riemclip plaatsen t Schuif de riemclip in het slot zoals geïllustreerd in Fig. 2. >Een ‚klik‘ geeft aan dat de riemclip op zijn plaats zit. 3.3 Lipje van riemclip Fig. 1 Fig.
3.4 De batterijen opladen Belangrijk: t Het toestel moet worden opgeladen met de meegeleverde netadapter. Bij gebruik van een andere adapter worden de EN609501-regels overtreden en worden de goedkeuringen en garantie ongeldig. t Schakel de PMR-toestellen steeds uit tijdens het laden. Dit verkort de oplaadtijd. 3.4.2 De adapter gebruiken (model R200/R210/R220) (zie P5) t Open de afdekking van de laadcontacten bovenaan de PMR .
Batterijniveau laag. Bij dit niveau geeft het toestel in de normale modus om de 10 seconden een biepgeluid weer. Belangrijk: Laad het toestel 10 tot 14 uur op. Batterijniveau erg laag. Wanneer het batterijniveau onder de minimumdrempel zakt, laat het toestel twee bieptonen horen, wordt de stroom automatisch uitgeschakeld en gaat het toestel over naar de klokmodus. 3.6 Levensduur van de batterij Het toestel heeft een ingebouwde energiebesparingsmodus om de batterijen langer te laten meegaan.
4.2 Het toestel in-/uitschakelen Inschakelen: ingedrukt tot het lcd-scherm aan gaat en t Houd de aan-uittoets het huidige kanaal weergeeft. 4.3 Het luidsprekervolume regelen Het volume wordt aangegeven met verticale staafjes op het lcdscherm. U kunt het volume wijzigen terwijl u uw toestel gebruikt of wanneer het toestel inactief is (ingeschakeld maar niet in gebruik). t Druk op de toets omhoog om het volume te verhogen of de toets omlaag om het te verlagen. 4.
hetzelfde kanaal hebben ingesteld en die de subkanaalfunctie hebben uitgeschakeld. t Druk twee keer op de menutoets . Het nummer van het huidige CTCSS-subkanaal knippert op het lcd-scherm. t Druk op de toets voor omhoog of omlaag om een van de 38 CTCSS-subkanalen te selecteren. t Druk op de PTT-knop om de subkanaalinstelling te bevestigen. 4.4.
4.8 De VOX-gevoeligheid instellen In de VOX-modus verzendt het toestel alleen een signaal wanneer het door uw stem of andere geluiden rond u wordt geactiveerd. Wanneer u stopt met praten, blijft het toestel nog twee seconden verder uitzenden. De VOX-gevoeligheid wordt weergegeven door een cijfer op het lcdscherm. Op het hoogste niveau pikken de toestellen ook zachtere geluiden (inclusief achtergrondruis) op. Op het laagste niveau, pikt het enkel luidere geluiden op. .
t Druk vijf keer op de menutoets . Het pictogram SC verschijnt op het lcd-scherm. t Druk op de toets omhoog of omlaag om kanalen te beginnen scannen. Wanneer er een actief signaal wordt gedetecteerd, pauzeert de kanaalscan op het actieve kanaal. t Druk zes keer op de menutoets . CTCSS knippert op het lcdscherm. Druk op de toets omhoog of omlaag om de CTCSS te beginnen scannen vanaf 1-38. t Druk zeven keer op de menutoets . DCS knippert op het lcdscherm.
4.12 De toetstoon in- of uitschakelen Als deze functie is ingeschakeld, geeft het toestel steeds een bevestigingstoon wanneer men een toets indrukt. t Druk tien keer op de menutoets . Het pictogram ‚T0‘ verschijnt op het lcd-scherm en ‚ON‘ knippert. of omlaag om de toetstoon in t Druk op de toets voor omhoog of uit te schakelen. t Druk op de PTT-toets om de instelling te bevestigen. 4.13 Dual Channel Monitor Uw toestel is in staat om twee kanalen te monitoren, het huidige en een ander kanaal.
5 BIJKOMENDE FUNCTIES 5.1 Toetsvergrendeling Met de toetsvergrendeling kan de gebruiker de toets omhoog , omlaag en menu uitschakelen zodat de PMR-instellingen niet kunnen worden gewijzigd. t Om de toetsvergrendeling in te schakelen, houdt u de menutoets ingedrukt tot het pictogram toetsvergrendeling op het lcdscherm verschijnt. t Om de toetsvergrendeling uit te schakelen, houdt u de menutoets ingedrukt tot het pictogram toetsvergrendeling van het lcdscherm verdwijnt.
6 SPECIFICATIES Beschikbare kanalen Acht kanalen CTCSS-subkanaal 38 voor elk kanaal Outputvermogen (TX) 0,5 W (Max.) Bereik tot 8 km Kanaalfrequentietabel Frequentie (MHz) Kanaal Frequentie (MHz) 1 446.00625 5 446.05625 2 446.01875 6 446.06875 3 446.03125 7 446.08125 4 446.03125 8 446.09375 7 VEILIGHEID ! Beschadigde antenne Gebruik geen PMR met een beschadigde antenne. Wanneer een beschadigde antenne in contact komt met de huid, kan ze kleine brandwonden veroorzaken.
! Waarschuwing voor voertuigen met een airbag Plaats uw toestel niet op de afdekking van een airbag of in de ontplooiingszone van een airbag. Airbags worden met grote kracht ontplooid. Als er zich een toestel in de ontplooiingszone bevindt wanneer de airbag zich ontplooit, wordt het met grote kracht weggekatapulteerd en kan het de inzittenden ernstig verwonden.
8 CE-VERKLARING Dit product voldoet aan de essentiële vereisten en andere relevante voorschriften van de R&TTE-richtlijn 1999/5/EC. U vindt de conformiteitsverklaring op: www.aegtelephones.eu HET TOESTEL AFDANKEN (MILIEU) Aan het einde van de levensduur van het product mag u dit product niet weggooien met het normale huishoudafval, maar moet u het product naar een inzamelingspunt voor de recycling van elektrische en elektronische apparatuur brengen.
11 GARANTIE EN SERVICE Het toestel wordt geleverd met een garantie van 24 maanden vanaf de aankoopdatum vermeld op uw aankoopbon. Onder deze garantie vallen geen storingen of defecten als gevolg van ongevallen, verkeerd gebruik, normale slijtage, onachtzaamheid, knoeien met de apparatuur of pogingen om het toestel aan te passen of te repareren die niet door goedgekeurde servicepunten zijn uitgevoerd. Bewaar uw aankoopbon; dat is uw garantiebewijs. 11.
1 PERCHÉ CI TENIAMO 2 IMPARARE A CONOSCERE IL PMR 2.1 Panoramica del ricevitore (vedi P1) # Significato 1 Schermo LCD t Visualizza la selezione del canale in uso e altri simboli della radio. 2 Tasto di chiamata t Premere per inviare un segnale di chiamata ad altre unità PMR. 3 Tasti Su / Giù t Premere per cambiare canale, regolare il volume e selezionare le impostazioni durante la modifica. / 4 Tasto menu t Premere per passare da una modalità all‘altra.
9 Microfono/auricolare/spinotto di ricarica 10 Antenna 2.2 Schermo LCD (vedi P2) Significato Numero del canale. Cambia da 1 a 8 in base alla selezione effettuata dall‘utente. Codice CTCSS. Cambia da 1 a 38 in base alla selezione effettuata dall‘utente. Indica il livello di carica della batteria. Viene visualizzato quando la funzione del cronometro è attivata. TX Viene visualizzato durante la trasmissione di un segnale. RX Viene visualizzato durante la ricezione di un segnale.
3 3.1 INSTALLAZIONE Rimozione del fermaglio di aggancio per cintura t Spingere la chiusura del fermaglio di aggancio per cintura (allontanandola dal PMR). t Allo stesso tempo, sollevare il fermaglio come mostrato in Fig. 1. Fermaglio di aggancio per cintura 3.2 Installazione del fermaglio di aggancio per cintura t Fare scorrere il fermaglio di aggancio per cintura nell‘asola come indicato in Fig. 2. >Uno scatto indica che il fermaglio è bloccato in posizione. Fig.
3.4 Caricamento delle batterie 3.4.1 Con caricatore doppio (modello R210/R220) (vedi P4) t Inserire la spina piccola sull‘estremità dell‘adattatore di alimentazione nello spinotto di collegamento di ingresso sul retro del caricatore da tavolo. t Collegare l‘adattatore di alimentazione a una presa principale da 220 V CA, 50 Hz. t Collocare le unità PMR nel supporto di carica in posizione verticale. Gli indicatori LED di carica si accendono.
Livello massimo di carica della batteria. Livello medio di carica della batteria. Livello basso di carica della batteria. A questo livello, l‘unità emette un segnale acustico ogni 10 secondi in modalità normale. Importante: Un caricamento completo richiede 10-14 ore. 3.6 Durata della batteria L‘unità è dotata di un sistema di risparmio energetico integrato che consente di prolungare la durata delle batterie.
t Se l‘unità si bagna, spegnerla e rimuovere le batterie. Asciugare il vano batterie e non ricollocarlo per alcune ore. Non utilizzare l‘unità finché non è completamente asciutta. t Tenere l‘unità lontano dalla portata di neonati e bambini. 4.2 Accensione e spegnimento dell‘unità Per accendere l‘unità: finché lo schermo LCD t Tenere premuto il tasto di alimentazione non si accende e mostra il canale in uso. Per spegnere l‘unità: t Tenere premuto il tasto di alimentazione non appare vuoto.
4.4.1 Impostazione del sottocanale CTCSS Ciascun canale dispone di 38 sottocanali che consentono di inserire un gruppo di utenti all‘interno dello stesso canale per garantire una maggiore riservatezza delle comunicazioni. Se è stato impostato un sottocanale, è possibile comunicare soltanto con altri utenti PMR sintonizzati sullo stesso canale e sullo stesso sottocanale. Per disattivare la funzione dei sottocanali, è sufficiente impostare il sottocanale su 0 (zero).
4.5 Ricezione Quando l‘unità è accesa ma non è in fase di trasmissione, è costantemente attivata la modalità di ricezione. Quando sul canale in uso viene ricevuto un segnale, sullo schermo LCD compare l‘icona RX. 4.6 Trasmissione (invio di messaggi vocali) t Tenere premuto il tasto PTT (Push to Talk) per trasmettere la propria voce. Sullo schermo LCD compare l‘icona TX . t Tenere l‘unità in posizione verticale con il microfono a una distanza di 5 cm dalla bocca.
t Premere il tasto PTT per confermare l‘impostazione. VOX viene visualizzato in modo fisso sullo schermo LCD finché la funzione VOX rimane attivata. 4.9 Attivazione della ricerca automatica nei canali Questa funzione consente di cercare segnali attivi in una sequenza continua in tutti e 8 i canali, nei 38 codici CTCSS e negli 83 codici DCS. , sullo schermo LCD viene t Premere 5 volte il tasto menu visualizzata l‘icona SC. o Giù per avviare la ricerca nei canali.
t Premere 8 volte il tasto menu , sullo schermo LCD viene visualizzata l‘icona „CA“ mentre „01“ lampeggia. t Premere il tasto Su o Giù per selezionare il segnale di chiamata desiderato. >Quando si passa da un segnale a un altro, viene riprodotta la melodia corrispondente. t Premere il tasto PTT per confermare l‘impostazione. 4.11 Impostazione del segnale acustico roger Il segnale acustico roger è un tipo di segnale che viene trasmesso automaticamente al rilascio del tasto PTT.
t Premere il tasto Su o Giù per selezionare il codice CTCSS desiderato (1-38). per cambiare il codice DCS. t Continuare a premere il tasto menu t Premere il tasto PTT per confermare l‘impostazione. FUNZIONI AUSILIARIE 5.1 Blocco dei tasti La funzione di blocco dei tasti consente all‘utente di disabilitare il tasto e Giù e il tasto menu in modo da impedire la modifica Su accidentale delle impostazioni del PMR.
5.3 Retroilluminazione dello schermo LCD Ogni volta che si preme un tasto (tranne il tasto PTT e quello di chiamata secondi. ), la retroilluminazione dello schermo LCD si attiva per 5 5.4 Microfono/auricolare/spinotto di ricarica L‘unità è dotata di un microfono ausiliario, di un auricolare e di uno spinotto di ricarica sul lato superiore. Per ulteriori informazioni, consultare www.aegtelphones.
! Batterie ricaricabili Tutte le batterie possono causare danni a cose e/o lesioni a persone (ad esempio ustioni) in caso di contatto tra materiali conduttivi (gioielli, chiavi, catenine) e i morsetti esposti. Il materiale in questione può fungere da chiusura del circuito elettrico (cortocircuito) e raggiungere temperature molto elevate.
NOTA: Gli ambienti potenzialmente esplosivi sono spesso, ma non sempre, segnalati in modo chiaro. Tra questi: aree di rifornimento carburante (ad esempio la sottocoperta di una imbarcazione) oppure impianti di trasferimento e stoccaggio di sostanze combustibili o chimiche; ambienti contenenti prodotti chimici o particelle in sospensione nell‘aria, quali residui o polveri metalliche; qualsiasi altra zona in cui si raccomanda generalmente di spegnere il motore del proprio veicolo.
10 PULIZIA E CURA Non pulire nessuna parte dell‘unità con benzene, diluenti o altri solventi chimici per evitare di causare danni permanenti non coperti dalla garanzia. Se necessario, pulire con un panno inumidito. Tenere l‘unità lontano dal caldo e dall‘umidità o dalla luce intensa del sole; fare attenzione a non bagnarla. 11 GARANZIA E ASSISTENZA 11.1 In caso di guasto dell‘unità coperto da garanzia t Imballare tutti i componenti dell‘unità utilizzando il materiale di imballaggio originale.
1 VI BRYR OSS Tack för att du valt att köpa den här produkten. Produkten har utformats och monterats utifrån största möjliga omsorg om dig och miljön. Därför levereras produkten med en snabbinstallationsguide för att minimera antalet sidor och därmed minska den totala pappersförbrukningen och förhindra att träd skövlas i onödan. Tack för att du stödjer oss i arbetet med att skydda miljön. 2 BEKANTA DIG MED DIN PMR 2.
9 Uttag för mikrofon/hörsnäcka/laddare 10 Antenn 2.2 LCD-display (se P2) Förklaring Kanalnummer. Byter mellan 1 till 8 enligt användarens val. CTCSS-kod. Byter mellan 1 till 38 enligt användarens val. Visar batterinivån. TX Visas när en signal sänds. RX Visas när en signal tas emot. DCM Visas när funktionen för dubbel bevakning är aktiv. DCS Visas när DCS-funktionen (Digital Code System) är aktiv. VOX Visas när VOX-funktionen är aktiv. SC Visas när PMR-enheten söker av alla kanaler.
3 INSTALLATION 3.1 Ta bort bältesklips t Dra ut bältesklipsspärren framåt (från PMR-enheten). t När bältesklipsspärren är utdragen trycker du upp bältesklipset som visas i bild 1. Så här sätter du fast bältesklipset t Skjut in bältesklipset i skåran som visas i bild 2. >Ett klick indikerar att bältesklipset sitter i position. Bältesklips 3.2 3.3 Fig. 1 1 Bild Fig.22 Bild Så här sätter du i batterierna (se P3) Varning! Sätt i batterierna enligt polaritetsmarkeringen på batterifacket.
3.4 Ladda batterierna 3.4.1 Med duo-laddare (modell R210/R220) (se P4) t Sätt i den lilla anslutningen i änden på nätadaptern i nätanslutningen baktill på bordsladdaren. t Sätt i nätadaptern i en väggkontakt (220 V/50 Hz). t Placera PMR-enheten i laddningsvaggan i en upprätt position. Laddningsindikatordioderna tänds. t Det tar ungefär 10 timmar att ladda enheten om batterierna är fullständigt urladdade. Nya batterier kan ta upp till 14 timmar att ladda. 3.4.
Batterladdning låg. På den här nivån ger enheten ifrån sig ett pip var 10:e sekund i normalläge. Viktigt! Ladda enheten i 10-14 timmar. Väldigt låg batterinivå. När batterierna håller på att nå sin miniminivå piper enheten två gånger och stängs sedan automatiskt av och övergår till bevakningsläge. 3.6 Batterilivslängd Enheten har en inbyggd strömsparare som gör att batterierna räcker längre. Men du ska stänga av enheterna när de inte används för att spara batterikraft. 4 DRIFT 4.
Stänga av: tills LCD-skärmen släcks. t Tryck och håll ned strömbrytaren >En bekräftelseton hörs varje gång. 4.3 Så här justerar du högtalarvolymen Volymnivån visas med vertikala staplar på LCD-skärmen. Du han ändra volymnivå när du använder enheten eller i viloläge (påslagen men används inte). för att öka eller nedknappen för att t Tryck på uppknappen minska högtalarvolymen. Obs! I avsnittet „Kanalfrekvenstabell“ i den här handboken finns mer information om frekvenser. 4.4.
t Tryck på PTT-knappen för att bekräfta underkanalsinställningen. 4.4.2 Så här ställer du in DCS, avancerad digital kod Varje kanal har dessutom 83 digitala koder som gör att grupper av användare kan kommunicera säkrare. t Tryck på menyknappen 3 gånger. DCS-koden blinkar på LCDskärmen. t Tryck på uppknappen eller nedknappen för att välja önskad DCS-kod. t Tryck på PTT-knappen för att bekräfta DCS-kanalinställningen. ! Sända och ta emot t PMR-överföringar är envägskommunikation.
4.8 Ställa in VOX-känslighet (röstaktivering) I VOX-läget skickar enheten en signal endast om den aktiveras av din röst eller andra ljud runt omkring dig. Enheten fortsätter att sända under 2 sekunder även om du slutar att tala. VOX-känsligheten visas med ett nummer på LCD-skärmen. På den högsta nivån kommer enheten att plocka upp mjukare ljud (inklusive bakgrundsljud), på den lägsta nivån plockar den endast upp högre ljud. 4 gånger.
4.10 Ringsignal Din PMR-enhet kan göra dig uppmärksam på inkommande samtal med en ringsignal. 4.10.1 Anropssignal Du kan skicka en anropssignal till andra PMR-användare för att påkalla deras uppmärksamhet. t Tryck på anropsknappen . En ringsignal hörs under två sekunder. Ikonen TX visas på LCDskärmen. Övriga enheter inom räckvidd och som är inställda på samma kanal och underkanal (om tillämpligt) sänder ringsignalen. 4.10.2 Välja en ringsignal Du kan välja mellan 15 olika ringsignaler. 8 gånger.
t Tryck på uppknappen eller nedknappen för att aktivera/ inaktivera knappljud. t Tryck på PTT-knappen för att bekräfta inställningen. 4.13 Ställ in dubbelt bevakningsläge Enheten kan bevaka två kanaler, den aktuella och en annan kanal (dubbel bevakning). Om enheten känner av en signal på någon av kanalerna, stoppar den och tar emot signalen. 11 gånger. Ikonen „DCM“ visas och „OF“ t Tryck på menyknappen blinkar på LCD-skärmen.
5.2 Tidtagarur t Tryck och håll ned anropsknappen i 3 sekunder i vänteläge. visas på LCD-skärmen. Tidtagarurikonen t Tryck på uppknappen en gång för att starta tidtagaruret. Du stoppar genom att trycka på uppknappen igen . t Tryck på nedknappen för att återställa tidtagaruret. t Tryck och håll ned anropsknappen för avsluta tidtagarursfunktionen och återgå till vänteläge. 5.
SÄKERHET ! Skadad antenn Använd inte PMR-enheten om antennen är skadad. Om en skadad antenn kommer i kontakt med hud kan lindrigare brännskador uppstå. ! Uppladdningsbara batterier Alla batterier kan orsaka egendomsskador och/eller kroppsskador som brännskador om ledande material som smycken, nycklar eller länkade kedjor kommer i kontakt med exponerade anslutningar. Materialet kan skapa en kortslutning och bli ganska varmt.
Obs! Explosiva miljöer är ofta, men inte alltid, klart och tydligt uppmärkta. Detta gäller tankningsområden, till exempel nedre däck på en båt, lagringsområden för bränsle och kemiprodukter, områden där luften innehåller kemikalier eller partiklar, till exempel spannmål, damm eller metallpuder och andra områden där du normalt uppmanas att stänga av motorn.
11 GARANTI OCH SERVICE Enhetens garanti gäller i 24 månader från det inköpsdatum som finns angivet på inköpskvittot. Denna garanti omfattar inte skador som orsakats på grund av olycka, felaktig användning, slitage, otillåten modifiering av utrustningen, eller försök till justering eller reparation på annat sätt än genom godkända ombud. Spara kvittot eftersom det är ditt garantibevis. 11.1 När enheten omfattas av garantin t Packa ihop enhetens alla delar i originalförpackningen.
1 BO NIE JEST NAM WSZYSTKO JEDNO ']LčNXMHP\ ]D ]DNXS QDV]HJR SURGXNWX =DSURMHNWRZDQR JR L ]PRQWRZDQR ] WURVNĈ R NOLHQWD L ĤURGRZLVNR QDWXUDOQH : ]ZLĈ]NX ] W\P GR SURGXNWX GRãĈF]DP\ LQVWUXNFMč V]\ENLHM LQVWDODFML DE\ ]PQLHMV]\þ OLF]Eč VWURQ ³ D W\P VDP\P LORĤþ Xİ\WHJR SDSLHUX ³ L ]DSRELHF Z\FLčFLX GU]HZ SRWU]HEQ\FK GR Z\SURGXNRZDQLD GRNXPHQWDFML ']LčNXMHP\ ]D ZVSDUFLH Z QDV]\FK VWDUDQLDFK R RFKURQč ĤURGRZLVND 2 32=1$- 6:2-( 85=ć'=(1,( 305 2.
9 *QLD]GR ãDGRZDQLD PLNURIRQX VãXFKDZHN 10 $QWHQD 2.2 (NUDQ /&' SDWU] 3 =QDF]HQLH 1XPHU NDQDãX :VND]XMH QXPHU NDQDãX Xİ\WNRZQLND RG GR Z\EUDQ\ SU]H] .
,167$/$&-$ 3.1 =GHMPRZDQLH NOLSVD GR SDVND 3RFLĈJQLM NOLSV GR SDVND GR SU]RGX =DWU]DVN NOLSVD GR SDVND Z NLHUXQNX RG XU]ĈG]HQLD 305 :\FLĈJDMĈF ]DWU]DVN NOLSVD Z\SFKQLM NOLSV Z JyUč MDN SRND]DQR QD U\V 3.2 DNãDGDQLH NOLSVD GR = SDVND :VXę NOLSV GR RWZRUX MDN SRND]DQR QD U\V > .OLNQLčFLH R]QDF]D SUDZLGãRZH ]DPRFRZDQLH NOLSVD 3.3 Fig. 1 5\V Fig.
1LH QDOHİ\ SR]RVWDZLDþ ]Xİ\W\FK EDWHULL Z XU]ĈG]HQLDFK 305 0RİH WR GRSURZDG]Lþ GR LFK Z\ODQLD VLč 3.4 âDGRZDQLH EDWHULL 3.4.
8U]ĈG]HQLH Z\NU\ZD SR]LRP\ QDãDGRZDQLD EDWHULL :\VRNL SR]LRP QDãDGRZDQLD EDWHULL ģUHGQL SR]LRP QDãDGRZDQLD EDWHULL 1LVNL SR]LRP QDãDGRZDQLD EDWHULL 8U]ĈG]HQLH HPLWXMH V\JQDã GĮZLčNRZ\ FR VHNXQG Z WU\ELH QRUPDOQ\P :DİQH 8U]ĈG]HQLH QDOHİ\ ãDGRZDþ SU]H] ² JRG]LQ %DUG]R QLVNL SR]LRP QDãDGRZDQLD EDWHULL -HĤOL XU]ĈG]HQLH MHVW ZãĈF]RQH L ]RVWDQLH RVLĈJQLčW\ PLQLPDOQ\ SR]LRP QDãDGRZDQLD EDWHULL ]RVWDQLH Z\HPLWRZDQ\ V\JQDã GĮZLčNRZ\ D XU]ĈG]HQLH ]RVWDQLH
1LJG\ QLH QDOHİ\ Xİ\ZDþ XU]ĈG]HQLD QD ]HZQĈWU] SRGF]DV EXU]\ 1LH QDOHİ\ Xİ\ZDþ XU]ĈG]HQLD SRGF]DV GHV]F]X : SU]\SDGNX ]DPRF]HQLD XU]ĈG]HQLD QDOHİ\ MH Z\ãĈF]\þ L Z\MĈþ ] QLHJR EDWHULH 1DOHİ\ RVXV]\þ NRPRUč EDWHULL L SR]RVWDZLþ SRNU\Zč ]GMčWĈ QD NLOND JRG]LQ 1LH QDOHİ\ Xİ\ZDþ XU]ĈG]HQLD GR F]DVX MHJR FDãNRZLWHJR Z\VFKQLčFLD 1DOHİ\ SU]HFKRZ\ZDþ XU]ĈG]HQLH SR]D ]DVLčJLHP G]LHFL 4.
1DFLĤQLM SU]\FLVN VWU]DãNL Z JyUč OXE SU]\FLVN VWU]DãNL Z Gyã DE\ Z\EUDþ NDQDã > =RVWDQLH XVWDZLRQ\ NDQDã RG GR 1DFLĤQLM SU]\FLVN 377 DE\ SRWZLHUG]Lþ XVWDZLHQLH NDQDãX 8ZDJD 6]F]HJyãRZĈ OLVWč F]čVWRWOLZRĤFL ]DZLHUD WDEHOD F]čVWRWOLZRĤFL NDQDãyZ Z W\P SRGUčF]QLNX 4.4.1 8VWDZLDQLH SRGNDQDãX &7&66 .
! 1DGDZDQLH L RGELHUDQLH V\JQDãX 8U]ĈG]HQLD 305 REVãXJXMĈ MHGQRNLHUXQNRZĈ WUDQVPLVMč V\JQDãX 2]QDF]D WR İH RVRED QDGDMĈFD V\JQDã QLH PRİH MHGQRF]HĤQLH RGELHUDþ V\JQDãX 305 MHVW SDVPHP RWZDUW\P 1DOHİ\ ]DZV]H SU]HGVWDZLþ VLč SRGF]DV QDGDZDQLD QD W\P VDP\P NDQDOH 4.
3R]LRP F]XãRĤFL IXQNFML 92; MHVW ZVND]\ZDQ\ SU]H] OLF]Eč QD HNUDQLH /&' 1D QDMZ\İV]\P SR]LRPLH XU]ĈG]HQLH EčG]LH Z\NU\ZDþ FLFKV]\ GĮZLčN ãĈF]QLH ] RGJãRVDPL ] WãD 1D QDMQLİV]\P SR]LRPLH XU]ĈG]HQLH EčG]LH Z\NU\ZDþ W\ONR JãRĤQLHMV]\ GĮZLčN 1DFLĤQLM UD]\ SU]\FLVN PHQX 1D HNUDQLH /&' ]RVWDQLH Z\ĤZLHWORQD LNRQD VOX L ]DF]QLH PLJDþ QDSLV Å2)µ 1DFLĤQLM SU]\FLVN VWU]DãNL Z JyUč DE\ XVWDZLþ PDNV\PDOQ\ SR]LRP F]XãRĤFL IXQNFML 92; PDNV\PDOQ\ SR]LRP
4.10 3RZLDGRPLHQLH R SRãĈF]HQLX 8U]ĈG]HQLH 305 PRİH SRZLDGDPLDþ R V\JQDOH SU]\FKRG]ĈF\P ]D SRPRFĈ V\JQDãX GĮZLčNRZHJR 4.10.
1DFLĤQLM UD]\ SU]\FLVN PHQX 1D HNUDQLH /&' ]RVWDQLH Z\ĤZLHWORQD LNRQD Å7 µ RUD] ]DF]QLH PLJDþ LNRQD Å21µ 1DFLĤQLM SU]\FLVN VWU]DãNL Z JyUč OXE SU]\FLVN VWU]DãNL Z Gyã DE\ ZãĈF]\þ OXE Z\ãĈF]\þ GĮZLčN SU]\FLVNyZ 1DFLĤQLM SU]\FLVN 377 DE\ SRWZLHUG]Lþ XVWDZLHQLH 4.
8ZDJD :ãĈF]HQLH EORNDG\ SU]\FLVNyZ QLH SRZRGXMH ]DEORNRZDQLD SU]\FLVNX 377 SU]\FLVNX SRãĈF]HQLD L SU]\FLVNX ]DVLODQLD 5.
7DEHOD F]čVWRWOLZRĤFL NDQDãyZ .DQDã &]čVWRWOLZRĤþ 0+] .DQDã &]čVWRWOLZRĤþ 0+] 1 446,00625 5 2 446,01875 6 3 446,03125 7 4 446,03125 8 %(=3,(&=(Ę67:2 ! 8V]NRG]RQD DQWHQD 1LH QDOHİ\ Xİ\ZDþ XU]ĈG]HQLD 305 ] XV]NRG]RQĈ DQWHQĈ .
! 0LHMVFD ]DJURİRQH Z\EXFKHP 1DOHİ\ Z\ãĈF]\þ XU]ĈG]HQLH Z PLHMVFDFK ]DJURİRQ\FK Z\EXFKHP FK\ED İH GDQH XU]ĈG]HQLH MHVW GRSXV]F]RQH GR Xİ\FLD Z WHJR W\SX PLHMVFDFK QD SU]\NãDG MHVW ]DWZLHUG]RQH SU]H] DJHQFMč )DFWRU\ 0XWXDO ,VNU]HQLH Z WDNLFK PLHMVFDFK PRİH VSRZRGRZDþ Z\EXFK OXE SRİDU FR JUR]L REUDİHQLDPL D QDZHW ĤPLHUFLĈ ! %DWHULH 1LH QDOHİ\ Z\PLHQLDþ DQL ãDGRZDþ EDWHULL Z PLHMVFDFK ]DJURİRQ\FK Z\EXFKHP 3RGF]DV ZNãDGDQLD OXE Z\MPRZDQLD EDWHULL PRİH Z\VWĈSLþ LVNU]H
87
11 *:$5$1&-$ , 6(5:,6 8U]ĈG]HQLH MHVW REMčWH JZDUDQFMĈ SU]H] RNUHV PLHVLčF\ RG GDW\ ]DNXSX ZLGQLHMĈFHM QD GRZRG]LH ]DNXSX *ZDUDQFMD QLH REHMPXMH XVWHUHN SRZVWDã\FK Z Z\QLNX Z\SDGNX QLHSUDZLGãRZHJR Xİ\WNRZDQLD QRUPDOQHJR ]Xİ\FLD ]DQLHGEDQLD PDQLSXORZDQLD SU]\ VSU]čFLH DQL SUyE\ UHJXODFML OXE QDSUDZ\ FK\ED İH ]RVWDãD RQD Z\NRQDQD SU]H] XSRZDİQLRQ\FK VHUZLVDQWyZ =DFKRZDM GRNXPHQW ]DNXSX SRQLHZDİ MHVW RQ Z\PDJDQ\ GR UHDOL]DFML JZDUDQFML 11.1 .
1 ƧƲƧƫƦƩ ƯƱƫƣƨƱƮƣƴƵƧ ƥƫƣ ƴƣƴ ƴǂǓ džǖǘǂǒNJǔǕǐǞǍdž DŽNJǂ ǕLjǎ ǂDŽǐǒƽ ǂǖǕǐǞ Ǖǐǖ ǑǒǐǛǝǎǕǐǓ Ƶǐ ǑǒǐǛǝǎ ǂǖǕǝ ƾǘdžNJ ǔǘdžDžNJǂǔǕdžǀ NjǂNJ NjǂǕǂǔNjdžǖǂǔǕdžǀ Ǎdž ǕLj ǍƾDŽNJǔǕLj DžǖǎǂǕƿ ǗǒǐǎǕǀDžǂ DŽNJǂ džǔƽǓ NjǂNJ Ǖǐ ǑdžǒNJǃƽnjnjǐǎ ƣǖǕǝǓ džǀǎǂNJ ǐ njǝDŽǐǓ Ǒǐǖ ǑǂǒƾǘǐǖǍdž Ǖǐ ǑǒǐǛǝǎ ǂǖǕǝ ǍǂLJǀ Ǎdž ƾǎǂǎ ǐDžLjDŽǝ DŽǒƿDŽǐǒLjǓ džDŽNjǂǕƽǔǕǂǔLjǓ ǑǒǐNjdžNJǍƾǎǐǖ ǎǂ ǍdžNJǟǔǐǖǍdž ǕLjǎ ǑǐǔǝǕLjǕǂ Ǖǐǖ ǂǑǂNJǕǐǞǍdžǎǐǖ ǘǂǒǕNJǐǞ ǕǖǑǚǍƾǎǚǎ ǔdžnjǀDžǚǎ NjǂNJ ǔǖǎdžǑǟǓ ǎǂ DžNJǂǔǟǔǐǖǍdž Ǖǂ DžƾǎDžǒǂ Ǒǐǖ ljǂ NjǝǃǐǎǕǂǎ DŽNJǂ ǕLjǎ NjǂǕǂǔNjdžǖƿ Ǖǐǖ džǎ njǝDŽǚ ǘǂǒǕNJǐǞ ƴǂǓ
7 ƬǐǖǍǑǀ njdžNJǕǐǖǒDŽǀǂǓ ƲǂǕƿǔǕdž Ǖǐ DŽNJǂ ǎǂ džǎdžǒDŽǐǑǐNJƿǔdžǕdž ƿ ǎǂ ǂǑdžǎdžǒDŽǐǑǐNJƿǔdžǕdž ǕLj ǍǐǎƽDžǂ 8 ƬǐǖǍǑǀ 377 3XVK 7R 7DON ƲǂǕƿǔǕdž Ǖǐ NjǂNJ NjǒǂǕƿǔǕdž Ǖǐ ǑǂǕLjǍƾǎǐ DŽNJǂ ǎǂ džNjǑƾǍǙdžǕdž 377 9 ƶǑǐDžǐǘƿ ǔǞǎDždžǔLjǓ ǍNJNjǒǐǗǟǎǐǖ ǂNjǐǖǔǕNJNjǐǞ ǕǒǐǗǐDžǐǕNJNjǐǞ 10 Ƭdžǒǂǀǂ 2.
SC ƧǍǗǂǎǀLJdžǕǂNJ ǝǕǂǎ Lj ǍǐǎƽDžǂ 305 ǔǂǒǟǎdžNJ ǝnjǂ Ǖǂ NjǂǎƽnjNJǂ ƧǍǗǂǎǀLJdžǕǂNJ ǝǕǂǎ džǎdžǒDŽǐǑǐNJƿǔdžǕdž ǕLj njdžNJǕǐǖǒDŽǀǂ NjnjdžNJDžǟǍǂǕǐǓ ǑnjƿNjǕǒǚǎ ƶǑǐDžLjnjǟǎdžNJ ǕLjǎ Ǖǒƾǘǐǖǔǂ ǔǕƽljǍLj ƾǎǕǂǔLjǓ Ǖǐǖ ƿǘǐǖ ǔǕǐ ǍdžDŽƽǗǚǎǐ ƴǞǒǕLjǓ NjnjNJǑ LJǟǎLjǓ ƧƥƬƣƵƣƴƵƣƴƩ 3.1 ƣǗǂǀǒdžǔLj Ǖǐǖ NjnjNJǑ LJǟǎLjǓ ƵǒǂǃƿǏǕdž Ǖǐ ǔǞǒǕLj Ǖǐǖ NjnjNJǑ LJǟǎLjǓ Ǖǐǖ 305 ǑǒǐǓ Ǖǂ ƾǏǚ ƬǂljǟǓ ǕǒǂǃƽǕdž Ǖǐ ǔǞǒǕLj Ǖǐǖ NjnjNJǑ LJǟǎLjǓ ǚljƿǔǕdž Ǖǐ NjnjNJǑ LJǟǎLjǓ ǑǒǐǓ Ǖǂ džǑƽǎǚ ǝǑǚǓ ǂǑdžNJNjǐǎǀLJdžǕǂNJ ǔǕLjǎ ƧNJNj ƧNJNj ƧNJNj 3.
ƴLjǍǂǎǕNJNjǝ ƮdžnjdžǕƿǔǕdž ǕNJǓ ǑǂǒǂNjƽǕǚ ǑǒǐdžNJDžǐǑǐNJƿǔdžNJǓ ǂǔǗǂnjdžǀǂǓ ǑǒǐǕǐǞ ǗǐǒǕǀǔdžǕdž ǕNJǓ ǍǑǂǕǂǒǀdžǓ ƮLjǎ džǑNJǘdžNJǒƿǔdžǕdž ǎǂ džǑǂǎǂǗǐǒǕǀǔdžǕdž ǍǑǂǕǂǒǀdžǓ ǍǀǂǓ ǘǒƿǔdžǚǓ ƤdžǃǂNJǚljdžǀǕdž ǝǕNJ Ǖǐ NjǂǑƽNjNJ Ǖǐǖ ǘǟǒǐǖ Ǖǚǎ ǍǑǂǕǂǒNJǟǎ džǀǎǂNJ Njǂnjƽ ǂǔǗǂnjNJǔǍƾǎǐ ǔǕLj ljƾǔLj Ǖǐǖ ǝǕǂǎ ǗǐǒǕǀLJdžǕdž ǕNJǓ ǍǑǂǕǂǒǀdžǓ ƣǑǐǒǒǀǑǕdžǕdž ǕNJǓ ƽǘǒLjǔǕdžǓ ǍǑǂǕǂǒǀdžǓ Ǎdž ǂǔǗǂnjƿ NjǂNJ ǗNJnjNJNjǝ ǑǒǐǓ Ǖǐ ǑdžǒNJǃƽnjnjǐǎ ǕǒǝǑǐ ƴdž NjǂǍǀǂ ǑdžǒǀǑǕǚǔLj ǍLjǎ džǑNJǘdžNJǒƿǔdžǕdž ǎǂ ǕNJǓ ǒǀǏdžǕdž ǔǕLj ǗǚǕNJƽ ƿ ǎǂ ǕNJǓ ǕǒǖǑƿǔdžǕdž ƮLjǎ ǂǗƿǎdžǕdž ǕNJǓ džNjǗǝǒǕNJǔǕdžǓ ǍǑǂǕǂǒǀdžǓ Ǎƾǔǂ ǔǕNJǓ ǍǐǎƽDž
3.4.2 ƸǒƿǔLj Ǖǐǖ ǕǒǐǗǐDžǐǕNJNjǐǞ ǍǐǎǕƾnjǐ 5 5 5 ǃnj 3 ƴLjNjǟǔǕdž Ǖǐ NjǂǑƽNjNJ ǕLjǓ ǖǑǐDžǐǘƿǓ ǔǞǎDždžǔLjǓ ǕǒǐǗǐDžǐǕNJNjǐǞ Lj ǐǑǐǀǂ ǃǒǀǔNjdžǕǂNJ ǔǕǐ džǑƽǎǚ ǍƾǒǐǓ ǕLjǓ ǍǐǎƽDžǂǓ 305 ƴǖǎDžƾǔǕdž Ǖǐ NjǖnjNJǎDžǒNJNjǝ ǃǞǔǍǂ Ǖǐǖ ǕǒǐǗǐDžǐǕNJNjǐǞ 9 '& P$ ǔǕLjǎ ǖǑǐDžǐǘƿ ǔǞǎDždžǔLjǓ ǕǒǐǗǐDžǐǕNJNjǐǞ ƤƽnjǕdž Ǖǐ ǕǒǐǗǐDžǐǕNJNjǝ ǔdž ǑǒǀLJǂ 9 $& +] 3.
3.
ƥNJǂ ǎǂ ǂǑdžǎdžǒDŽǐǑǐNJƿǔdžǕdž ǕLj ǍǐǎƽDžǂ ƲǂǕƿǔǕdž NjǂNJ NjǒǂǕƿǔǕdž ǑǂǕLjǍƾǎǐ Ǖǐ NjǐǖǍǑǀ njdžNJǕǐǖǒDŽǀǂǓ ǝǕǐǖ ǔǃƿǔdžNJ Lj ǐljǝǎLj /&' ǍƾǘǒNJǓ > Ƭƽljdž Ǘǐǒƽ ljǂ ǂNjǐǞǕdž ƾǎǂǎ ƿǘǐ džǑNJǃdžǃǂǀǚǔLjǓ 4.
ǍǑǐǒdžǀǕdž ǎǂ džǑNJNjǐNJǎǚǎdžǀǕdž Ǎǝǎǐǎ Ǎdž ƽnjnjǐǖǓ ǘǒƿǔǕdžǓ ǍǐǎƽDžǚǎ 305 Ǒǐǖ džǀǎǂNJ ǔǖǎǕǐǎNJǔǍƾǎǐNJ ǔǕǐ ǀDžNJǐ NjǂǎƽnjNJ NjǂNJ ǖǑǐNjǂǎƽnjNJ ƥNJǂ ǎǂ ǂǑdžǎdžǒDŽǐǑǐNJƿǔdžǕdž ǕLj njdžNJǕǐǖǒDŽǀǂ ǖǑǐNjǂǎǂnjNJǐǞ ǂǑnjǟǓ ǒǖljǍǀǔǕdž Ǖǐ ǖǑǐNjǂǎƽnjNJ ǔǕǐ ǍLjDžƾǎ ƵǝǕdž ljǂ ǍǑǐǒdžǀǕdž ǎǂ džǑNJNjǐNJǎǚǎƿǔdžǕdž Ǎdž ǐǑǐNJǐǎDžƿǑǐǕdž ǘǒƿǔǕLj ǍǐǎƽDžǂǓ 305 Ǒǐǖ džǀǎǂNJ ǔǖǎǕǐǎNJǔǍƾǎǐǓ ǔǕǐ ǀDžNJǐ NjǂǎƽnjNJ NjǂNJ ƾǘdžNJ ǂǑdžǎdžǒDŽǐǑǐNJƿǔdžNJ ǕLj njdžNJǕǐǖǒDŽǀǂ ǖǑǐNjǂǎǂnjNJǐǞ ƲǂǕƿǔǕdž Ǖǐ NjǐǖǍǑǀ ǍdžǎǐǞ DžǞǐ ǗǐǒƾǓ ƵǝǕdž ǐ ǂǒNJljǍǝǓ Ǖǐǖ ǕǒƾǘǐǎǕǐǓ ǖǑǐNjǂǎǂnjNJǐǞ &7&66 ljǂ
4.5 ƭƿǙLj Ʃ ǍǐǎƽDžǂ ǃǒǀǔNjdžǕǂNJ ǔǖǎdžǘǟǓ ǔdž ǕǒǝǑǐ njdžNJǕǐǖǒDŽǀǂǓ njƿǙLjǓ ǝǕǂǎ džǀǎǂNJ džǎdžǒDŽǐǑǐNJLjǍƾǎLj NjǂNJ Dždžǎ džNjǑƾǍǑdžNJ ƮǝnjNJǓ njLjǗljdžǀ ƾǎǂ ǔƿǍǂ ǔǕǐ Ǖǒƾǘǐǎ NjǂǎƽnjNJ ǔǕLjǎ ǐljǝǎLj /&' ljǂ džǍǗǂǎNJǔǕdžǀ Ǖǐ džNJNjǐǎǀDžNJǐ RX 4.
ƲǂǕƿǔǕdž Ǖǐ NjǐǖǍǑǀ ǍdžǎǐǞ ǗǐǒƾǓ ƵǝǕdž ǔǕLjǎ ǐljǝǎLj /&' ljǂ džǍǗǂǎNJǔǕdžǀ Ǖǐ džNJNjǐǎǀDžNJǐ VOX NjǂNJ Lj ƾǎDždžNJǏLj ´2)µ ljǂ ǂǒǘǀǔdžNJ ǎǂ ǂǎǂǃǐǔǃƿǎdžNJ ƲǂǕƿǔǕdž Ǖǐ NjǐǖǍǑǀ ÅdžǑƽǎǚ´ DŽNJǂ ǎǂ ǒǖljǍǀǔdžǕdž ǕLjǎ džǖǂNJǔljLjǔǀǂ ǕLjǓ njdžNJǕǐǖǒDŽǀǂǓ 92; ǍƾǘǒNJ Ǖǐ ǍƾDŽNJǔǕǐ džǑǀǑdžDžǐ DžLjnj Ǖǐ ƥNJǂ ǎǂ ǂǑdžǎdžǒDŽǐǑǐNJƿǔdžǕdž ǕLj njdžNJǕǐǖǒDŽǀǂ 92; ǑǂǕƿǔǕdž Ǖǐ NjǐǖǍǑǀ ÅNjƽǕǚ´ ǍƾǘǒNJǓ ǝǕǐǖ ǔǕLjǎ ǐljǝǎLj /&' džǍǗǂǎNJǔǕdžǀ Lj ƾǎDždžNJǏLj ´2)µ ƲǂǕƿǔǕdž Ǖǐ NjǐǖǍǑǀ 377 DŽNJǂ ǎǂ džǑNJǃdžǃǂNJǟǔdžǕdž ǕLj ǒǞljǍNJǔLj ƵǝǕdž Lj ƾǎDždžNJǏLj VOX ljǂ džǍǗǂǎǀLJdžǕǂNJ ǔǕǂljdžǒƽ ǔǕLjǎ ǐljǝǎLj
4.10 ƧNJDžǐǑǐǀLjǔLj NjnjƿǔLjǓ Ʃ ǍǐǎƽDžǂ 305 ǍǑǐǒdžǀ ǎǂ ǔǂǓ džNJDžǐǑǐNJdžǀ DŽNJǂ Ǖǖǘǝǎ džNJǔdžǒǘǝǍdžǎǐ ǔƿǍǂ ǑǂǒƽDŽǐǎǕǂǓ ƾǎǂǎ ƿǘǐ NjnjƿǔLjǓ 4.10.
4.12 ƧǎdžǒDŽǐǑǐǀLjǔLj ƿ ǂǑdžǎdžǒDŽǐǑǐǀLjǔLj Ǖǐǖ ƿǘǐǖ ǑnjƿNjǕǒǚǎ Ʈdž ǕLj njdžNJǕǐǖǒDŽǀǂ ǂǖǕƿ Njƽljdž Ǘǐǒƽ Ǒǐǖ ǑǂǕƽǕdž ƾǎǂ NjǐǖǍǑǀ Lj ǍǐǎƽDžǂ ljǂ ǑǂǒƽDŽdžNJ ƾǎǂǎ ƿǘǐ džǑNJǃdžǃǂǀǚǔLjǓ ƲǂǕƿǔǕdž Ǖǐ NjǐǖǍǑǀ ǍdžǎǐǞ ǗǐǒƾǓ ƵǝǕdž ǔǕLjǎ ǐljǝǎLj /&' ljǂ džǍǗǂǎNJǔǕdžǀ Ǖǐ džNJNjǐǎǀDžNJǐ ´7 µ džǎǟ Ǖǐ džNJNjǐǎǀDžNJǐ ´21µ ljǂ ǂǒǘǀǔdžNJ ǎǂ ǂǎǂǃǐǔǃƿǎdžNJ ƲǂǕƿǔǕdž Ǖǐ NjǐǖǍǑǀ ÅdžǑƽǎǚ´ ƿ Ǖǐ NjǐǖǍǑǀ ÅNjƽǕǚ´ DŽNJǂ ǎǂ džǎdžǒDŽǐǑǐNJƿǔdžǕdž ƿ ǎǂ ǂǑdžǎdžǒDŽǐǑǐNJƿǔdžǕdž Ǖǐǎ ƿǘǐ ǑnjƿNjǕǒǚǎ ƲǂǕƿǔǕdž Ǖǐ NjǐǖǍǑǀ 377 DŽNJǂ džǑNJǃdžǃǂǀǚǔLj ǕLjǓ ǒǞljǍNJǔLjǓ 4.
ƥNJǂ ǎǂ džǎdžǒDŽǐǑǐNJƿǔdžǕdž ǕLj njdžNJǕǐǖǒDŽǀǂ NjnjdžNJDžǟǍǂǕǐǓ ǑnjƿNjǕǒǚǎ ǑǂǕƿǔǕdž NjǂNJ NjǒǂǕƿǔǕdž ǑǂǕLjǍƾǎǐ Ǖǐ NjǐǖǍǑǀ ǍdžǎǐǞ ǍƾǘǒNJǓ džǍǗǂǎNJǔǕdžǀ ǔǕLjǎ ǝǕǐǖ Ǖǐ džNJNjǐǎǀDžNJǐ NjnjdžNJDžǟǍǂǕǐǓ ǑnjƿNjǕǒǚǎ ǐljǝǎLj /&' ƥNJǂ ǎǂ ǂǑdžǎdžǒDŽǐǑǐNJƿǔdžǕdž ǕLj njdžNJǕǐǖǒDŽǀǂ NjnjdžNJDžǟǍǂǕǐǓ ǑnjƿNjǕǒǚǎ ǑǂǕƿǔǕdž NjǂNJ NjǒǂǕƿǔǕdž ǑǂǕLjǍƾǎǐ Ǖǐ NjǐǖǍǑǀ ǍdžǎǐǞ ǍƾǘǒNJǓ džǏǂǗǂǎNJǔǕdžǀ ǂǑǝ ǝǕǐǖ Ǖǐ džNJNjǐǎǀDžNJǐ NjnjdžNJDžǟǍǂǕǐǓ ǑnjƿNjǕǒǚǎ ǕLjǎ ǐljǝǎLj /&' ƴLjǍdžǀǚǔLj Ƶǂ NjǐǖǍǑNJƽ 377 NjnjƿǔLjǓ NjǂNJ njdžNJǕǐǖǒDŽǀǂǓ ljǂ džǏǂNjǐnjǐǖljǐǞǎ ǎǂ njdžNJǕǐǖǒDŽǐǞǎ ǂNjǝǍLj NjǂNJ Ǎdž ǕLj njdž
ƲƳƱƦƫƣƥƳƣƷƧƴ ƦNJǂljƾǔNJǍǂ NjǂǎƽnjNJǂ NjǂǎƽnjNJǂ ƶǑǐNjǂǎƽnjNJǂ &7&66 DŽNJǂ Njƽljdž NjǂǎƽnjNJ ƫǔǘǞǓ džNjǑǐǍǑƿǓ 7; : ǍƾDŽ ƧǍǃƾnjdžNJǂ ǍƾǘǒNJ ǘnjǍ ƲǀǎǂNjǂǓ ǔǖǘǎǐǕƿǕǚǎ NjǂǎǂnjNJǟǎ ƬǂǎƽnjNJ ƴǖǘǎǝǕLjǕǂ 0+] ƬǂǎƽnjNJ ƴǖǘǎǝǕLjǕǂ 0+] 1 446,00625 5 2 446,01875 6 3 446,03125 7 4 446,03125 8 ƣƴƷƣƭƧƫƣ ! ƬǂǕdžǔǕǒǂǍǍƾǎLj Njdžǒǂǀǂ ƮLjǎ ǘǒLjǔNJǍǐǑǐNJdžǀǕdž ǕLj ǍǐǎƽDžǂ 305 džƽǎ Lj Njdžǒǂǀǂ ǕLjǓ ƾǘdžNJ ǖǑǐǔǕdžǀ LJLjǍNJƽ Ƨƽǎ Lj NjǂǕdžǔǕǒǂǍǍƾǎLj Njdžǒǂǀǂ ƾǒljdžNJ ǔdž džǑǂǗƿ Ǎdž Ǖǐ DžƾǒǍǂ ǔǂǓ ǍǑǐǒ
! ƲǒǐdžNJDžǐǑǐǀLjǔLj DŽNJǂ ǐǘƿǍǂǕǂ Ǎdž ǂdžǒǝǔǂNjǐǖǓ ƮLjǎ ǕǐǑǐljdžǕdžǀǕdž ǕLj ǍǐǎƽDžǂ Ǒƽǎǚ ǂǑǝ ǂdžǒǝǔǂNjǐǖǓ ƿ ǔǕǐ ǘǟǒǐ Ǒǐǖ ljǂ NjǂǕǂnjƽǃdžNJ ƾǎǂǓ ǂdžǒǝǔǂNjǐǓ ǝǕǂǎ ǗǐǖǔNjǟǔdžNJ ƱNJ ǂdžǒǝǔǂNjǐNJ ǗǐǖǔNjǟǎǐǖǎ Ǎdž ǍdžDŽƽnjLj DžǞǎǂǍLj Ƨƽǎ ǍNJǂ ǍǐǎƽDžǂ ǃǒdžljdžǀ ǔǕǐ ǘǟǒǐ ǗǐǖǔNjǟǍǂǕǐǓ džǎǝǓ ǂdžǒǝǔǂNjǐǖ NjǂNJ ǐ ǂdžǒǝǔǂNjǐǓ ǗǐǖǔNjǟǔdžNJ Lj ǍǐǎƽDžǂ ǍǑǐǒdžǀ ǎǂ džNjǕǐǏdžǖljdžǀ Ǎdž ǍdžDŽƽnjLj DžǞǎǂǍLj NjǂNJ ǎǂ ǑǒǐNjǂnjƾǔdžNJ ǔǐǃǂǒǝ ǕǒǂǖǍǂǕNJǔǍǝ ǔdž džǑNJǃƽǕdžǓ Ǖǐǖ ǐǘƿǍǂǕǐǓ ! ƦǖǎLjǕNJNjǟǓ džNjǒLjNjǕNJNjƾǓ ǂǕǍǝǔǗǂNJǒdžǓ ƪƾǔǕdž ǕLj ǍǐǎƽDžǂ džNjǕǝǓ njdžNJǕǐǖǒDŽǀǂǓ ǝǕǂǎ ǃǒǀ
džDŽNjǂǕǂǔǕƽǔdžNJǓ ǍdžǕǂǗǐǒƽǓ ƿ ǂǑǐljƿNjdžǖǔLjǓ NjǂǖǔǀǍǚǎ ƿ ǘLjǍNJNjǟǎ ǘǟǒǐNJ ǔǕǐǖǓ ǐǑǐǀǐǖǓ ǐ ǂƾǒǂǓ ǑdžǒNJƾǘdžNJ ǘLjǍNJNjƽ ƿ ǍNJNjǒǐǔǚǍǂǕǀDžNJǂ ǝǑǚǓ Ǒ ǘ ǔNjǝǎLj ƿ NjǐǎNJǐǒǕǐǑǐNJLjǍƾǎǂ DžLjǍLjǕǒNJǂNjƽ ǍƾǕǂnjnjǂ NjǂNJ Njƽljdž ƽnjnjǐǓ ǘǟǒǐǓ ǝǑǐǖ NjǂǎǐǎNJNjƽ ljǂ ǔǂǓ LJLjǕǐǞǔǂǎ ǎǂ ǔǃƿǔdžǕdž ǕLj ǍLjǘǂǎƿ Ǖǐǖ ǂǖǕǐNjNJǎƿǕǐǖ ǔǂǓ ƦƩƭƺƴƩ &( Ƶǐ ǑǒǐǛǝǎ ǂǖǕǝ ǔǖǍǍǐǒǗǐǞǕǂNJ Ǎdž ǕNJǓ ǐǖǔNJǟDždžNJǓ ǂǑǂNJǕƿǔdžNJǓ NjǂNJ ǕNJǓ njǐNJǑƾǓ ǔǘdžǕNJNjƾǓ DžNJǂǕƽǏdžNJǓ ǕLjǓ ƧǖǒǚǑǂǛNjƿǓ ƱDžLjDŽǀǂǓ ƧƬ Ǒdžǒǀ ǕdžǒǍǂǕNJNjǐǞ ǒǂDžNJǐǗǚǎNJNjǐǞ NjǂNJ ǕLjnjdžǑNJNjǐNJǎǚǎNJǂNjǐǞ džǏǐǑnjNJǔǍǐǞ 5 77( ƮǑǐǒdžǀǕdž ǎǂ
ƬƣƪƣƳƫƴƮƱƴ Ƭƣƫ ƷƳƱƯƵƫƦƣ ƮLjǎ NjǂljǂǒǀǔdžǕdž ǐǑǐNJǐDžƿǑǐǕdž ǍƾǒǐǓ ǕLjǓ ǍǐǎƽDžǂǓ Ǎdž ǃdžǎLJǝnjNJǐ DžNJǂnjǖǕNJNjƽ ƿ ƽnjnjǐǖǓ ǐǒDŽǂǎNJNjǐǞǓ DžNJǂnjǞǕdžǓ DžNJǝǕNJ NjƽǕNJ ǕƾǕǐNJǐ ǍǑǐǒdžǀ ǎǂ ǑǒǐNjǂnjƾǔdžNJ ǍǝǎNJǍLj LJLjǍNJƽ Lj ǐǑǐǀǂ Dždžǎ NjǂnjǞǑǕdžǕǂNJ ǂǑǝ ǕLjǎ džDŽDŽǞLjǔLj Ƨƽǎ ǘǒdžNJǂǔǕdžǀ NjǂljǂǒǀǔǕdž ǕLjǎ Ǎdž ƾǎǂ džnjǂǗǒƽ ǃǒdžDŽǍƾǎǐ Ǒǂǎǀ ƦNJǂǕLjǒdžǀǕdž ǕLj ǍǐǎƽDžǂ ǍǂNjǒNJƽ ǂǑǝ ǔǖǎljƿNjdžǓ ǑǐnjǞ ǖǙLjnjƿǓ ljdžǒǍǐNjǒǂǔǀǂǓ ǖDŽǒǂǔǀǂǓ ƿ ƽǍdžǔLjǓ LjnjNJǂNjƿǓ ǂNjǕNJǎǐǃǐnjǀǂǓ NjǂNJ ǍLjǎ ǕLjǎ ǂǗƿǎdžǕdž ǎǂ ǃǒǂǘdžǀ 11 ƧƥƥƶƩƴƩ Ƭƣƫ ƴƧƳƤƫƴ ƣǖǕƿ Lj ǍǐǎƽDžǂ ǑǂǒƾǘdžǕǂNJ Ǎdž džDŽDŽǞLjǔ
1 1$ ÿ(0 1É0 =É/(æÌ 'ďNXMHPH YiP ]D ]DNRXSHQt WRKRWR YìURENX 7RWR ]DĢt]HQt E\OR QDYUçHQR D Y\UREHQR V PD[LPiOQt SpĀt R YiV L çLYRWQt SURVWĢHGt 9ìUREHN GRGiYiPH VH VWUXĀQìP QiYRGHP N SRXçLWt QHERĨ VH VQDçtPH VQtçLW VSRWĢHEX SDStUX SRĀHW VWUDQ D XFKUiQLW WDN VWURP\ NWHUp E\ SUR YìUREX YďWåtKR PQRçVWYt SDStUX E\OR QXWQp SRUD]LW 'ďNXMHPH YiP ]D SRGSRUX SĢL RFKUDQď çLYRWQtKR SURVWĢHGt 2 6(=1É0(1Ì 6 9<6Ì/$ÿ.28 305 2.
9 9VWXS PLNURIRQX VOXFKiWHN QDEtMHQt 10 $QWpQD 2.2 /&' GLVSOHM YL] REU 9ì]QDP ÿtVOR NDQiOX 8çLYDWHO PĪçH SĢHFKi]HW PH]L NDQiO\ Dç .
,167$/$&( .OLS QD RSDVHN 3.1 'HPRQWiç NOLSX QD RSDVHN 9\WiKQďWH NOLS QD RSDVHN VPďUHP YSĢHG RG Y\VtODĀN\ %ďKHP Y\WDKRYiQt ]iSDGN\ ]DWODĀWH QD NOLS MDN XND]XMH REUi]HN 3.2 0RQWiç NOLSX QD RSDVHN 2EU 2EU 9VXěWH NOLS GR YìĢH]X MDN XND]XMH REUi]HN > Å.OLNQXWt´ LQGLNXMH çH MH NOLS VSUiYQď XPtVWďQ D ]DMLåWďQ Fig. 1 3.3 Fig.
3.4 1DEtMHQt EDWHULt 3.4.
1t]Ni ~URYHě QDELWt EDWHULH 1D WpWR ~URYQL Y\Gi ]DĢt]HQt Y QRUPiOQtP UHçLPX ]YXNRYì VLJQiO Y GpOFH VHNXQG 'ĪOHçLWp =DĢt]HQt QDEtMHMWH SR GREX ² KRGLQ 9HOPL Qt]Ni ~URYHě QDELWt EDWHULH -DNPLOH ]DĢt]HQt GRViKQH PLQLPiOQt ~URYQď QDELWt EDWHULt Y\Gi GYD ]YXNRYp VLJQiO\ DXWRPDWLFN\ VH Y\SQH D SRNUDĀXMH Y UHçLPX VOHGRYiQt 3.
4.2 =DSQXWt Y\SQXWt Y\VtODĀN\ 3UR ]DSQXWt 6WLVNQďWH D SĢLGUçWH WODĀtWNR Y\StQDĀH ]REUD]t DNWXiOQt NDQiO 'LVSOHM VH ]DSQH D 3UR Y\SQXWt GRNXG GLVSOHM 6WLVNQďWH D SĢLGUçWH WODĀtWNR Y\StQDĀH QH]KDVQH > 3ĢL NDçGpP ]DSQXWt D Y\SQXWt ]D]Qt SRWYU]RYDFt ]YXNRYì VLJQiO 4.
3UR Y\SQXWt IXQNFH SRGNDQiOX QDVWDYWH SRGNDQiO QD KRGQRWX QXOD 1\Qt O]H NRPXQLNRYDW V GDOåtPL XçLYDWHOL Y\VtODĀHN QDODGďQìFK QD VWHMQpP NDQiOX MHMLFKç IXQNFH SRGNDQiOX MH Y\SQXWi 'YDNUiW VWLVNQďWH WODĀtWNR PHQX 1D GLVSOHML ]DĀQH EOLNDW ĀtVOR DNWXiOQtKR SRGNDQiOX &7&66 6WLVNQďWH VPďURYp WODĀtWNR ÅY]KĪUX´ QHER ÅGROĪ´ D Y\EHUWH MHGHQ ] SRGNDQiOĪ &7&66 3UR SRWYU]HQt QDVWDYHQt SRGNDQiOX VWLVNQďWH WODĀtWNR 337 4.4.
-DNPLOH SĢHVWDQHWH POXYLW XYROQďWH WODĀtWNR 337 4.7 6OHGRYiQt 3UR NRQWUROX VODEìFK VLJQiOĪ QD DNWXiOQtP NDQiOX O]H Y\XçtW IXQNFL VOHGRYiQt D VPďURYp 6RXĀDVQď VWLVNQďWH D SĢLGUçWH WODĀtWNR PHQX WODĀtWNR ÅGROĪ´ 1D GLVSOHML VH ]REUD]t LNRQD RX 9DåH ]DĢt]HQt ]DFK\Wt VLJQiO\ QD DNWXiOQtP NDQiOX YĀHWQď åXPĪ Y SR]DGt 6WLVNQďWH WODĀtWNR PHQX D XNRQĀHWH VOHGRYiQt NDQiOX 4.
6WLVNQďWH VPďURYp WODĀtWNR ÅY]KĪUX´ QHER ÅGROĪ´ D ]DKDMWH SURKOHGiYiQt NDQiOĪ 9 SĢtSDGď GHWHNFH DNWLYQtKR VLJQiOX VH SURKOHGiYiQt ]DVWDYt QD DNWLYQtP NDQiOX QD GLVSOHML VH UR]EOLNi äHVWNUiW VWLVNQďWH WODĀtWNR PHQX LQGLNDFH &7&66 6WLVNQďWH VPďURYp WODĀtWNR ÅY]KĪUX´ QHER ÅGROĪ´ D ]DKDMWH SURKOHGiYiQt &7&66 RG GR 6HGPNUiW VWLVNQďWH WODĀtWNR PHQX QD GLVSOHML VH UR]EOLNi LQGLNDFH '&6 6WLVNQďWH VPďURYp WODĀtWNR ÅY]KĪUX´ QHER ÅGROĪ´ D ]DKDMWH SU
4.11 1DVWDYHQt VLJQiOX SĢtMPX 6LJQiO SĢtMPX MH WyQ NWHUì MH DXWRPDWLFN\ RGHVOiQ SR XYROQďQt WODĀtWND 337 -HKR ~ĀHOHP MH LQIRUPRYDW GUXKRX VWUDQX R WRP çH MVWH ~P\VOQď XNRQĀLOL SĢHQRV D SĢHåOL MVWH GR UHçLPX SĢtMPX 'HYďWNUiW VWLVNQďWH WODĀtWNR PHQX GLVSOHM ]REUD]t LNRQX Å5 µ D VRXĀDVQď EOLNDMtFt LNRQX Å21µ 6WLVNQďWH VPďURYp WODĀtWNR ÅY]KĪUX´ QHER ÅGROĪ´ D ]YROWH ]DSQXWt Y\SQXWt ]YXNRYp VLJQDOL]DFH SĢtMPX 3UR SRWYU]HQt QDVWDYHQt VWLVNQďWH WODĀtWNR 337 4.
3202&1e )81.&( 5.
63(&,),.$&( 'RVWXSQp NDQiO\ NDQiOĪ 3RGNDQiO\ &7&66 SUR NDçGì NDQiO 9ìNRQ 7; : 0D[ 'RVDK Dç NP 7DEXOND IUHNYHQFt MHGQRWOLYìFK NDQiOĪ .DQiO )UHNYHQFH 0+] .DQiO )UHNYHQFH 0+] 1 446.00625 5 2 446.01875 6 3 446.03125 7 4 446.
! 9DURYiQt SODWQp SUR YR]LGOD Y\EDYHQi DLUEDJ\ =DĢt]HQt QHSRNOiGHMWH GR REODVWL QDG DLUEDJHP QHER GR MHKR DNWLYQt ]yQ\ $LUEDJ\ VH U\FKOH QDIXNXMt 9 SĢtSDGď XPtVWďQt ]DĢt]HQt GR DNWLYQt ]yQ\ DLUEDJX D MHKR QDIRXNQXWt PĪçH EìW ]DĢt]HQt RGPUåWďQR YHONRX VLORX D PĪçH ]SĪVRELW ]UDQďQt RVRE YH YR]LGOH ! 3URVWĢHGt VH ]YìåHQìP QHEH]SHĀtP YìEXFKX 3RNXG YVWXSXMHWH GR REODVWL VH ]YìåHQìP QHEH]SHĀtP YìEXFKX ]DĢt]HQt YçG\ Y\SQďWH QHSODWt SUR ]DĢt]HQt VSHFLiOQď XUĀHQi N SR
352+/Éä(1Ì 2 6+2'Ď 7HQWR YìUREHN Y\KRYXMH ]iNODGQtP SRçDGDYNĪP D GDOåtP SĢtVOXåQìP XVWDQRYHQtP VPďUQLFH 577( (6 3URKOiåHQt R VKRGď QDOH]QHWH QD VWUiQNiFK ZZZ DHJWHOHSKRQHV HX /,.9,'$&( =$ġÌ=(1Ì ä(751É .
11 =É58.$ $ 6(59,6 =iUXND QD SĢtVWURM SODWt SR GREX PďVtFĪ RG GDWD MHKR ]DNRXSHQt XYHGHQpKR QD ~ĀWHQFH 7DWR ]iUXND VH QHWìNi SRåNR]HQt QHER YDG Y]QLNOìFK Y GĪVOHGNX QHKRG\ ]QHXçLWt RSRWĢHEHQt Y]QLNOpKR EďçQìP SRXçtYiQtP QHVSUiYQp PDQLSXODFH V SĢtVWURMHP QHER MDNìFKNROL SRNXVĪ R QDVWDYHQt QHER RSUDY\ SĢtVWURMH MLQìFK QHç SURYHGHQìFK DXWRUL]RYDQìPL ]iVWXSFL 3RNODGQt GRNODG R ]DNRXSHQt SĢtVWURMH SHĀOLYď XVFKRYHMWH ]iUXNX O]H XSODWQLW SRX]H QD MHKR ]iNODGď 11.
© 2012 Binatone Electronics International Limited All rights reserved Subject to avaibility. Rights of modification reserved. AEG is a registered trademark used under license from AB Electrolux (publ) www.aegtelephones.