
User's Manual


Smart Strip Gen5
http://aeot.ec/spprt/strip
View the expanded manual:
Electric power strip is widely used in our everyday
lives, normal power strips have a shortage of
consume some more extra energy, with the
development of technology, and as time going
these strips are gradually out of style, become
unable to meet peoples' requirement any more.
Aeon Labs developed a specific strip--Smart Strip,
w h i c h c o u l d b e p r o g r a m m e d , s c h e d u l e d ,
controlled and communicated with controllers
from anywhere in the world.
Aeotec by Aeon Labs Smart Strip
Familiarise yourself with your Smart Strip
Products that are Z-Wave certified can be
used and communicate with other Z-Wave
certified devices.
Quick Start
The following instructions describe how to install
Smart Strip to Z-Wave network with Aeotec's Z-Stick
or Minimote controllers. If using other products as
main Z-Wave controller, please refer to relevant unit
of its manuals that for how to adding new devices to
your z-wave network.
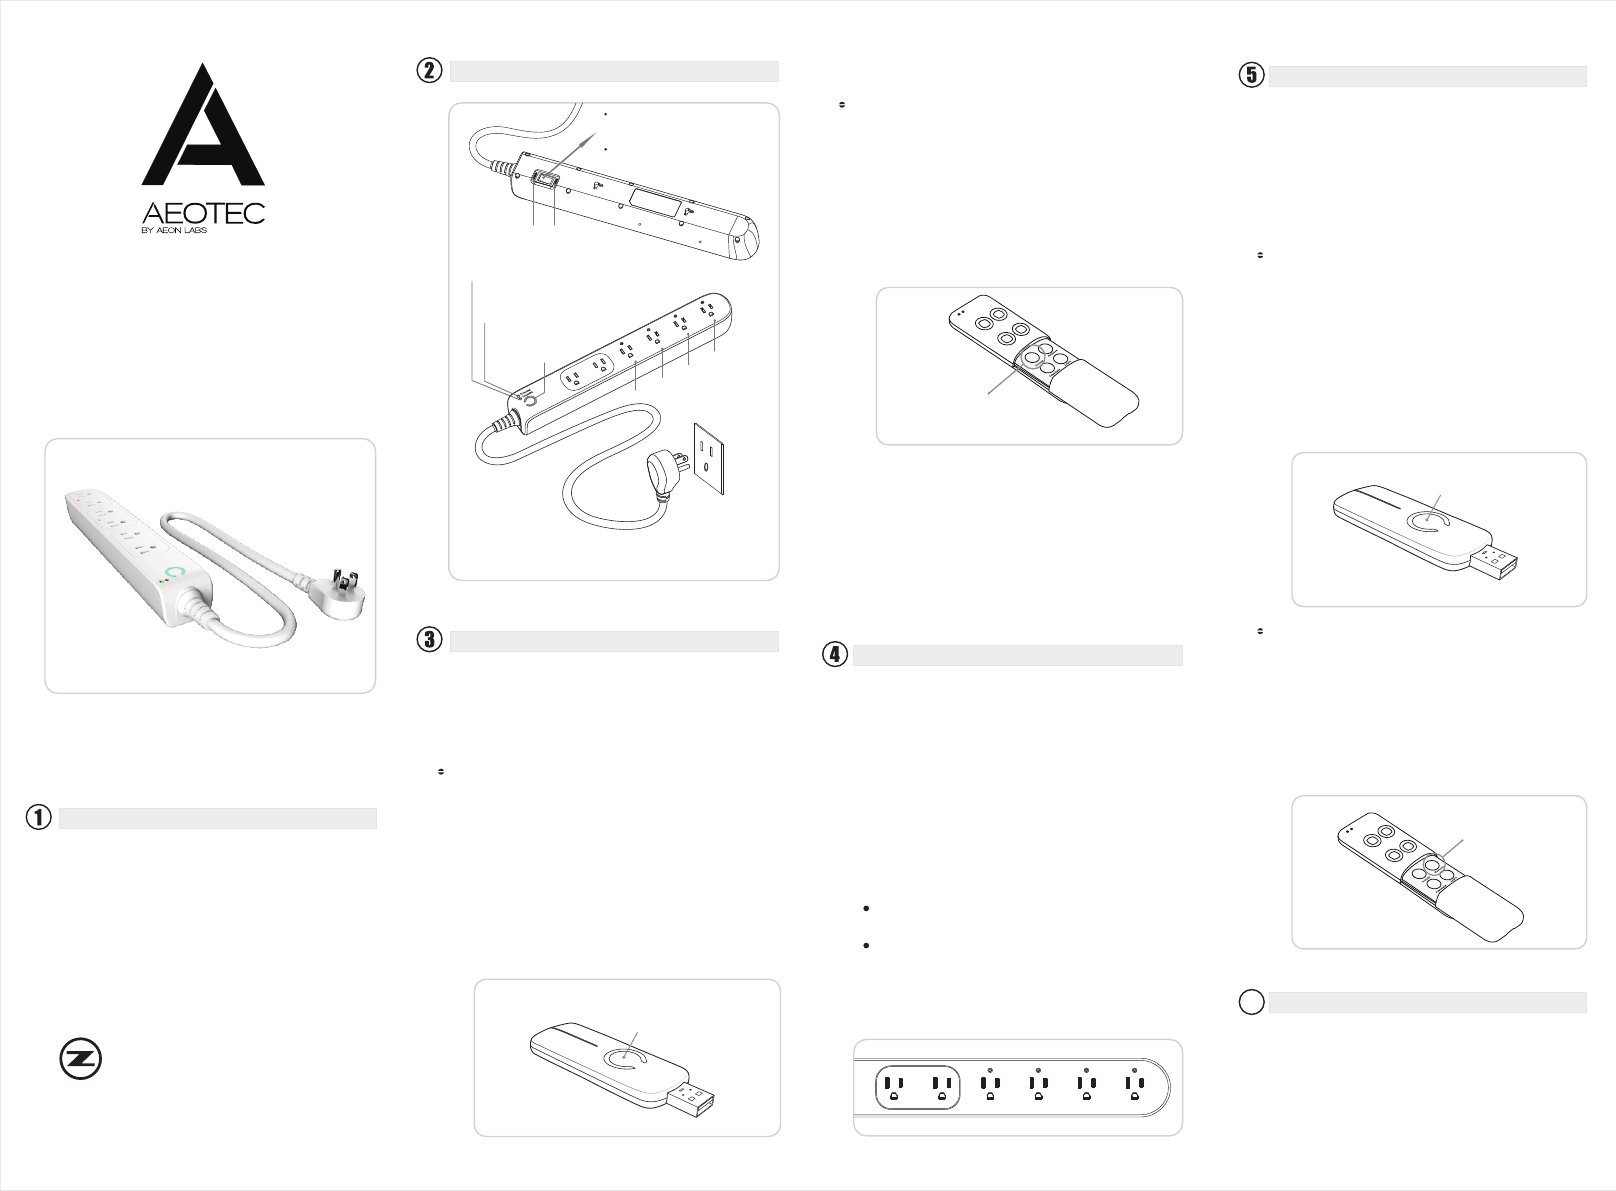
Action Button
Action Button
If you’re using a Z-Stick:
Its main light will begin to blink.
If your Z-Stick is plugged into a gateway or a
computer, unplug it.
Bring your Z-Stick near the Smart Strip.
Press the Action Button on the Z-Stick.
Press the Z-Wave Button on the Smart Strip.
If th e Smart Stri p has been succe s sfully
included to your network, its light will no longer
blink, otherwise as unsuccessful, and the light
will continue to blink.
Press the Action Button on the Z-Stick to take it
out of installation mode.
1 .
2 .
3 .
4 .
5 .
6 .
7 .
If you’re using a Minimote:
Its main light will begin to blink.
Bring Minimote near the Smart Strip.
Press the Include button on the Minimote.
Press the Z-Wave Button on the Smart Strip.
If the Smart Strip has been successfully included
to the Z-Wave network, its light will no longer
blink. Otherwise should be unsuccessful the light
will blink continuously.
Press any button on Minimote to get it out of
installation mode.
1 .
2 .
3 .
4 .
5 .
6 .
Include
The Smart Strip can be removed from Z-Wave
network at any time. You'll need to use a Z-Wave
network's main controller to do this. The following
instructions describe how to do this using Aeotec's
Z-Stick and Minimote controllers. If you are using
other products as main Z-Wave controller, please
refer to the part of their respective manuals that
tells you how to remove devices from Z-Wave
network.
Advanced Functions
Monitoring your energy usage
The Smart Strip could report the energy use of
whatever it is plugged, to the associated Z-Wave
gateway or controller within a Z-Wave network. the
switch can report wattage value or kilowatt-hour
(kWh) value.
With the main controller supports, the energy
c o n s u m p t i o n w i l l b e d i s p l a y e d w i t h i n i t s
corresponding interface. Please refer to the manual
of your main controller for more detailed information
and instructions on monitoring, accessing and
interpreting the data collected by the Smart Strip.
If you’re using a Z-Stick:
If your Z-Stick is plugged into a gateway or a
computer, unplug it.
Bring Z-Stick near the Smart Strip.
Press the Action Button on your Z-Stick.
Press the Z-Wave Button on your Smart Strip.
If the Smart Strip has been successfully
removed from Z-Wave network, its light will
blink, otherwise the removal was unsuccessful
its light will not blink.
Press the Action Button on the Z-Stick to take it
out of removal mode.
1 .
2 .
3 .
4 .
5 .
6 .
If you’re using a Minimote:
Bring the Minimote near the Smart Strip.
Press the Remove Button on the Minimote.
Press the Z-Wave Button on the Smart Strip.
If the Smart Strip has been successfully
removed from network, its light will blink.
Otherwise the removal was unsuccessful and
its light will not blink.
Press any button on your Minimote to take it
out of removal mode.
1 .
2 .
3 .
4 .
5 .
Remove
Now that the Smart Strip is up and running, you are
able to control the strip with the Minimote(Remoter)
or other compatible controllers in the Z-Wave
network.
You can also press the Z-Wave Button at the Smart
Strip to turn the power on and off. To control other Z-
Wave devices, please refer to the relevant part of
their respective manuals.
Removing your Strip from a Z-Wave network
Swit chabl e 1
Switchable 1
Swit chabl e 2
Swit chabl e 3
Swit chabl e 4
Switchable 2
Switchable 3
Switchable 4
Protected:
OFF
RESET
When either single socket or the total
current exceed 10A,the load over current
protection switch will automatically cut off
the load.
When resuming, need manually press the
Over Current Protection Switch down to
“RESET” position.
Can measure the six sockets power capacity
separately and each power consumption.
C a n m e a s u r e t o t a l p o w e r c a p a c i t y a n d
consumption of six sockets.
Keep on, present Lighting protection
function normally.
Keep off, present the lighting
protection invalid.
Grounded:
Keep on, grounding normally
Keep off, grounding
abnormally
Action Button
Act ion But ton: Tap(short pressing), for include / exclude
z-wave network. Hold for 20s, excluded and reset to
factory default.
Totally 6 sockets, two of them on open all time, the
other 4 sockets can be controlled separately.
Switchable 1 Switchable 2
Switchable 3
Switchable 4
6
Technical Specifications
Model number: ZW069-A02,ZW072-A02
Input: 125VAC 60Hz
Output: 125VAC Max:15A
Operating temperature: 0℃ to 40℃
Relative humidity: 8~80%.
Operating distance: Up to 100 feet / 30 meters
indoors and 300 feet / 100 meters outdoors