
User Manual


50289-BDA
USE OR DISCLOSURE OF DATA CONTAINED ON THIS PAGE IS SUBJECT TO THE
RESTRICTION ON THE TITLE PAGE OF THIS MANUAL
7
Table of Figures
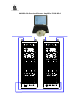
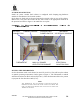
Figure 1. Thermostat & Electrical Power InFigure 1. Thermostat & Electrical Power In
stallationstallation ......................................................1010
Figure 2. External RF Cabling InstallationFigure 2. External RF Cabling Installation
........................................................................ 1111
Figure 3. Equipment Cabinet Configuration Figure 3. Equipment Cabinet Configuration
as Shippedas Shipped ......................................................1212
Figure 4. Battery Charger ModuleFigure 4. Battery Charger Module ................1313
Figure 5. Power ConnectionsFigure 5. Power Connections on the Rear of on the Rear of
the Power Supply and Charger Module the Power Supply and Charger Module ( (
as viewed from the toas viewed from the top)p) .......................... 1515
Figure 6. Power & Signal Connections on thFigure 6. Power & Signal Connections on th
e Rear of the Power Amplifiere Rear of the Power Amplifier .............. 1616
Figure 7. IF Channel Module Jumper LocationFigure 7. IF Channel Module Jumper Location
........................................................................ 1717
Figure 8. Semi-Rigid Cables for ConnecFigure 8. Semi-Rigid Cables for Connectingting
IF Channel Modules & 8-Way Splitter IF Channel Modules & 8-Way Splitter .. 1919
Figure 9. Arrangement of Internal RF CabliFigure 9. Arrangement of Internal RF Cabli
ngng ...................................................................... 2020
Figure 10. Semi-Rigid Cables Connecting IF Figure 10. Semi-Rigid Cables Connecting IF
Channel Modules & Power AmplifierChannel Modules & Power Amplifier ........2121
Figure 11. Semi-Rigid Cable for ConnectingFigure 11. Semi-Rigid Cable for Connecting
the Duplexer to the 8-Way Splitter the Duplexer to the 8-Way Splitter .... 2222
Figure 12. Semi-Rigid Cable Connecting theFigure 12. Semi-Rigid Cable Connecting the
Power Amplifier to the Cabinet-Mounted Power Amplifier to the Cabinet-Mounted
Feed-Thru Connector Feed-Thru Connector .................................. 2323
FiguFigure 13. Battery Cabling Installationre 13. Battery Cabling Installation .. 2424
Figure 14. Main Power Switches for Power SFigure 14. Main Power Switches for Power S
upplies and Battery Status Panelupplies and Battery Status Panel ..........2626
Figure 15. Normal LED Illuminations after PFigure 15. Normal LED Illuminations after P
ower Up ower Up ..........................................................2626
Figure 16. Channel Module LED Indicator IllFigure 16. Channel Module LED Indicator Ill
umination Patternsumination Patterns ......................................2828
Figure 17. Normal Channel ID Numbering SchFigure 17. Normal Channel ID Numbering Sch
emeeme .................................................................... 3030
Figure 18. Overall System Figure 18. Overall System .......................... 3434
Figure 19. SysteFigure 19. System Outlinem Outline ............................ 3535
Figure 20. Power Distribution Unit OutlineFigure 20. Power Distribution Unit Outline
........................................................................ 4040
Figure 21. Power Distribution High BandFigure 21. Power Distribution High Band .. 4141
Figure 22. Power Distribution Low BandFigure 22. Power Distribution Low Band .... 4242
Figure 23. 800MHz-Linc Main screenFigure 23. 800MHz-Linc Main screen ................ 4444
Figure 24. 800 MHz-Linc Main Screen with ConFigure 24. 800 MHz-Linc Main Screen with Con
nection Error windownection Error window ................................ 4545
Figure 25. Set Time Out windowFigure 25. Set Time Out window.................... 4646
Figure 26. Set ModFigure 26. Set Mode windowe window............................ 4747
Figure 27. Exit confirmation windowFigure 27. Exit confirmation window .......... 4848
Figure 28. 800 MHz-Linc about windowFigure 28. 800 MHz-Linc about window .......... 4949
Figure 29. 800MHz-Linc Main ScreenFigure 29. 800MHz-Linc Main Screen .............. 5050
Figure Figure 30. Set RSSI Attack window30. Set RSSI Attack window .............. 5151
Figure 31. Set Attenuation windowFigure 31. Set Attenuation window.............. 5252
Figure 32. Set Frequency windowFigure 32. Set Frequency window .................. 5353