
Operator`s manual

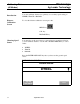

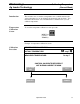

Calibrating Distance
PFadvantage
(All Modes)
Ag Leader Technology
September 2003
3-4
Step Action
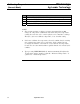
1 Use the UP or DOWN ARROW keys to set the actual distance to
the known length of the travel path.
NOTE: The actual distance line must be selected (rectangular box
surrounds line) before you can set the actual distance. Press the
key to the right of the actual distance line to select it if it is not
already selected.
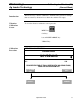
2 Position the vehicle at the beginning of the travel path. Pick a spot
on the vehicle and align it with the mark at the beginning of the
travel path. Press the START TRAVEL key.
3 Drive the length of the path stopping at the end marker and press
the STOP TRAVEL key.
4 Press the PERFORM CAL key to calibrate the distance. Press the
ACCEPT key to accept the calibration.
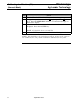
5 Press the CLEAR DISTANCE key and repeat steps 2-4 and drive
the travel path again to double check the accuracy of the distance
calibration.
6 Press the EXIT key twice after you have finished calibrating
distance.
NOTE:
• Upon pressing PERFORM CAL, the monitor automatically adjusts the
“pulses / 100 ft” number so that the “Measured Distance” is equal to
the “Actual Distance”.
• You can manually change the “pulses / 100 ft” number. Select “pulses /
100 ft” by pressing the key to the right of the line. Then use the UP or
DOWN ARROW keys to set the number. Do not change this number
after calibrating.
* * *