Dual Fuel Range Users Guide & Installation Instructions This book contains many important safety messages. Always read and obey all safety messages. Installer:Leave these instructions with the appliance U104613-03 www.aga-ranges.
WARNING If the information in this manual is not followed exactly, a fire or explosion may result causing property damage, personal injury or death. Do not store or use gasoline or other flammable vapors and liquids in the vicinity of this or any other appliance. WHAT TO DO IF YOU SMELL GAS Do not try to light any appliance. Do not touch any electrical switch Do not use any phone in your building. Immediately call your gas supplier from a neighbor’s phone. Follow the gas supplier’s instructions.
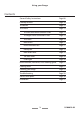
Using your Range Contents General Safety Instructions Page 08 Cooktop Burners Page 10 The Broiler Page 12 The Ovens Page 13 The Left Hand Multi-function Oven Page 13 The Right Hand Convection Oven Page 13 The Clock Page 14 Both ovens Page 17 Multi-function oven Page 17 Handyrack Page 19 Main oven racks Page 19 Tall oven racks Page 20 Oven light Page 20 Multi-function (Left hand) Oven cooking guide Page 21 Cooking chart Page 21 Cleaning your range Page 23 Troubleshooting Pag
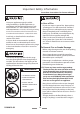
Read all instructions before using this appliance. Important Safety Information Save these instructions for future reference. Have your appliance properly installed and grounded by a qualified technician in accordance with the National Electrical Code ANSI/NFPA No. 70—latest edition, and local code requirements. In Canada, electrical grounding In Case of Fire Do not use water on grease fires. Never pick up a flaming pan. Turn the controls off.
Read all instructions before using this appliance. Important Safety Information Save these instructions for future reference. should be limited to infrequently used items which can be safely stored in an area subjected to heat from a range. Temperatures may be unsafe for some items, such as volatile liquids, cleaners or aerosol sprays. Do Not Leave Children Alone Babies, toddlers and young children should not be allowed near the range at any time.
Read all instructions before using this appliance. Important Safety Information Save these instructions for future reference. Flammable material could be ignited if brought in contact with a burner flame or hot surface and may cause severe burns. To avoid risk of electrical shock, personal injury, or death, make sure your range has been properly grounded and always disconnect it from main power supply before servicing.
Read all instructions before using this appliance. Important Safety Information Save these instructions for future reference. Important: Never keep pet birds in the kitchen or in rooms where the fumes from the kitchen could reach. Birds have a very sensitive respiratory system. Fumes released due to overheated cooking oil, fat, margarine and overheated non-stick cookware may be harmful. Important - Save the installation instructions for the local electrical inspector's use.
Read all instructions before using this appliance. Important Safety Information Save these instructions for future reference. General Safety Instructions Never heat unopened food containers. Pressure build up may make container burst and cause injury. This appliance must be installed by a competent person in accordance with the installation instructions.
Read all instructions before using this appliance. Important Safety Information Save these instructions for future reference. In the interests of hygiene and safety the range should be kept clean at all times as a build up in fats and other food stuff could result in a fire. Take care that no water seeps into the appliance Make sure that your kitchen is well ventilated at all times. Use extractor fans or hoods when fitted. Always keep combustible wall coverings or curtains etc.
Using your Range Cooktop Burners The drawing by each knob indicates which burner that knob controls. Each burner has a special safety device that stops the flow of gas if the flame goes out. Push in and turn a knob to the ( ) lighting position. Simmering aids, such as asbestos or mesh mats, are NOT recommended. They will reduce burner performance and could damage the grates. Keep holding the knob pressed in to let the gas through to the burner for few seconds. The igniter should spark and light the gas.
Using your Range 3. Turn burner control knob to OFF position when finished. You can remove the burner cap and head for cleaning, see page 24. You should wipe the enamel top surface of the range around the cooktop burners as soon as possible after spills occur. Note: Use of aluminum pans may cause metallic marking of the grates. This does not affect the durability of the enamel and may be cleaned off with a metal polish.
Using your Range The Broiler CAUTION: Accessible parts may be hot when the broiler is in use. Young children should be kept away. Before using the broiler for the first time, make sure that all packaging materials have been removed and then to dispel manufacturing odours, turn on the broiler and run for 30 minutes with the broiler pan in position, pushed fully back, and the broiler door open.
Using your Range The Ovens During use the appliance becomes hot. Care should be taken to avoid touching the heating elements inside the oven. The clock must be set to the time of day before the ovens will work. See ‘The Clock’ section for instructions on setting the time of day. The Left Hand Multi-function Oven The Right Hand Tall Oven The left hand oven is a Multi-function oven.
Using your Range The Clock To time something that’s cooking (minute minder) Setting the time of day Turn the Setting knob to the right to the ( ) minute minder setting - it should click into position. Use the adjustment knob to set the time you need. Setting knob You can turn the knob back to the ( ) manual setting to keep an eye on the time of day or leave it in the ( ) minute minder position as the time ticks down.
Using your Range To start and stop the oven automatically (delayed baking) When your cooking is finished the beeper sounds. Turn the Setting knob to the vertical ( ) to return to manual cooking. Before you set the clock, you must have two numbers clearly in mind. If you are out, don’t worry about the beeper going off, it stops after a while. When you return, turn the Setting knob to the vertical ( ) to return to manual cooking. Turn the thermostat to the off position.
Using your Range To turn off the key lock To avoid curdling, cream should be added to dishes just before serving. Turn and hold the Setting knob to the clock symbol ( ) for about 8 seconds. ‘Of’ will appear on the display. Fresh vegetables, which may discolor during a delay period, should be coated in melted fat or immersed in a water and lemon juice solution. Fruit pies, custard tarts or similar wet mixtures on top of uncooked pastry are only satisfactory if there is a short delay period.
Using your Range Both ovens Multi-function oven Before using for the first time, heat the ovens to 400°F for 30 minutes to expel manufacturing odors. The left hand oven of your range is Multi-function. It has many varied uses. We suggest you keep a careful eye on your cooking until you are familiar with each function. Remember - not all functions will be suitable for all food types. The wire racks should always be pushed firmly to the back of the oven.
Using your Range Convection oven Conventional oven (top and base heat) This function operates the fan and the heating element around it. An even heat is produced throughout the oven, allowing you to cook large amounts quickly. Fan oven cooking is particularly suitable for multirack cooking and is a good ‘all-round’ function. It may be necessary to reduce the temperature by approximately 20°F for recipes previously cooked in a conventional oven.
Using your Range Handyrack Main Oven racks The maximum weight than can be held by the Handyrack is 12lb (5.5kg). It should only be used with the supplied meat tin, which is designed to fit the Handyrack. Any other vessel could be unstable. the rack guard should be at the back pointing upwards As well as the flat racks some models are supplied with drop racks The drop racks increases the possibilities for oven rack spacing. The Handyrack fits on the oven door.
Using your Range To refit the rack, line up the rack with a groove in the oven side and push the rack back until the ends hit the rack stop. Lift up the front so the rack ends clear the rack stops, and then lower the front so that the rack is level and push it fully back. ‘Troubleshooting’ section for details on how to change an oven light bulb. Tall oven racks The tall oven is supplied with four normal cooking racks and a plate warming rack.
Using your Range Multi-function (Left hand) Oven cooking guide Remember - not all functions will be suitable for all food types. The oven control settings and cooking times given are intended to be used only as a guide. Individual tastes may require the temperature to be altered to provide a preferred result. Food is cooked at a lower temperature in a convection oven than in a conventional oven. When using recipes, reduce the temperature by 20°F and the cooking time by 5-10 minutes.
Using your Range Cooking chart Conventional Oven Food Convection Oven Approximate Cooking Time Temp Rack Position Temp 375°F 3 350°F Fillets 15-20mins. 375°F 3 350°F Whole 10mins.per lb + 10mins. 375°F 3 350°F Steaks according to thickness. 325°F 2-3 300°F 20-25mins. per lb + 20-25mins. 400°F 2-3 375°F 15-20mins. per lb + 15-20mins. 325°F 2-3 300°F 30-35mins. per lb + 30-35mins. 400°F 2-3 375°F 20-25mins. per lb + 20-25mins. 325°F 2-3 350°F 30-35mins.
Using your Range Cleaning your range Cooktop burners Essential information Some models have a separate trim ring, which fits on the burner head. Before thorough cleaning isolate the electricity supply. Remember to switch on the electricity The burner heads and caps can be removed for cleaning. Make sure they are absolutely dry before replacing. supply before use. Never use paint solvents, caustic cleaners, biological powders, bleach, chlorine based bleach cleaners, coarse abrasives or salt.
Using your Range the white ignition electrode and place the inner burner on the large base ring. A electrode notch B ignition electrode Now fit the two trim rings, making sure that they are sitting down properly. Broiler Control Panel and Doors The control panel and control knobs should only be cleaned with a soft cloth wrung out in clean hot soapy water - but take care that no surplus water seeps into the appliance. Wipe with a clean dampened cloth then polish with a dry cloth.
Using your Range For safety, push the side rails back into the broiler chamber. Cleaning the Broiler Before you remove any of the broiler parts for cleaning make sure that they are cool. The side rails can be removed to make cleaning the broiler The broiler pan and grid should be washed in hot soapy water. After cooking meats or any foods that soil, leave to soak for a few minutes in the sink immediately after use. Stubborn particles may be removed from the grid by using a nylon brush.
Using your Range Open the oven door slightly and use the key to The Tall Oven remove the front panel fixing screws from the door sides (two each side). To clean the oven sides slide out the racks, unhook the supports from the oven sides and lift out. Carefully lift off the outer door panel. The inside face of the glass panels can now be cleaned - take care not to disturb or wet the door insulation. Please note that the door is triple glazed but the inner two panels are fixed.
Using your Range Cleaning chart All Parts listed here can be cleaned using hot soapy water (dishwashing liquid detergent) and a soft cloth. For more difficult cleaning, follow the appropriate instruction. Check cleaner manufacturers guidelines for compatibility with the material of your range. Part Finish How to clean Burner Grates & Burner Caps Porcelain Enamel Mildly abrasive cleaner such as Bon –Ami® or Soft Scrub® Dishwasher.
Using your Range Troubleshooting Steam is coming from the oven When cooking foods with a high water content (e.g. oven fries) there may be some steam visible at the rear grille. Take care when opening the oven door, as there may be a momentary puff of steam when the oven door is opened. Stand well back and allow any steam to disperse. The oven fan is noisy The note of the oven fan may change as the oven heats up - this is perfectly normal.
Using your Range blocked by debris? Is the burner trim correctly located? Are the burner caps correctly located? See the section entitled ‘Cleaning’ Is the key symbol ( ) showing in the display? See the Clock section of the instructions for more information on the key lock feature of the clock. If using the Multi-function oven have you set a cooking function? Remember that each cooktop burner has a special safety device that stops the flow of gas if the flame goes out.
Using your Range Service and spares Please complete the appliance details below and keep them safe for future reference - this information will enable us to accurately identify your particular appliance and help us to help you. Filling this in now will save you time and inconvenience if you later have a problem with your appliance. It may also be of benefit to keep your purchase receipt with this leaflet. You may be required to produce the receipt to validate a warranty field visit. Technical Services Dept.
Read all instructions before installing or using this appliance. Installation Instructions Save these instructions for future reference. Installation This book contains many important safety messages. Always read and obey all safety messages.
WARNING If the information in this manual is not followed exactly, a fire or explosion may result causing property damage, personal injury or death. Do not store or use gasoline or other flammable vapors and liquids in the vicinity of this or any other appliance. WHAT TO DO IF YOU SMELL GAS Do not try to light any appliance. Do not touch any electrical switch Do not use any phone in your building. Immediately call your gas supplier from a neighbor’s phone. Follow the gas supplier’s instructions.
Installation Regulations Page 34 If you smell gas Page 34 Tools Page 34 Materials Page 34 Installation Safety Instructions Page 35 Dimensions and clearances Page 36 Location guidelines Page 36 Moving the Range Page 37 Checking the parts Page 38 Leveling the Range Page 39 Anti-Tip Device Page 39 Gas Connection Page 39 Electrical Connection Page 41 Assemble the range Page 44 Range operational checks Page 46 How To Remove the Range for Servicing Page 48 Conversion to another gas
Read all instructions before installing or using this appliance. Installation Instructions Save these instructions for future reference. Regulations Tools Installation of this range must conform with local codes, or in the absence of local codes, with the National Fuel Gas Code, ANSI Z223.1/NFPA.54, latest edition. In Canada, installation must conform with the current Natural Gas Installation Code, CAN/CGAB149.1 or the current Propane Installation Code, CAN/CGA-B149.
Read all instructions before installing or using this appliance. Installation Instructions Save these instructions for future reference. Installation Safety Instructions Caution Items of interest to children should not be stored above a range - children climbing on the range to reach items could be seriously injured. Warning! Improper installation, adjustment, alteration, service or maintenance can cause injury or property damage. Refer to this manual.
Read all instructions before installing or using this appliance. Installation Instructions Save these instructions for future reference. Dimensions and clearances Provide adequate clearances between the range and adjacent combustible surfaces. These dimensions must be met for safe use of your range. The location of the electrical outlet and pipe opening (see Gas Pipe and Electric Outlet Locations) may be adjusted to meet specific requirements.
Read all instructions before installing or using this appliance. Installation Instructions Save these instructions for future reference. fresh air for combustion and ventilation are not obstructed by carpeting or woodwork. Your range is heavy and can settle into soft floor coverings such as cushioned vinyl or carpeting. Use care when moving the range on this type of flooring. It is recommended that the following simple and inexpensive instructions be followed to protect your floor.
Read all instructions before installing or using this appliance. Installation Instructions Save these instructions for future reference. Checking the parts Check that the range has the following parts. 3 grates Broiler pan and trivet Leveling tool Handyrack Meat tin 3 Main oven racks Tall oven racks & rack supports Splashback & Plinth Conversion kit from Natural gas to LP gas Rear spacer Carefully push the range backwards off the pack base. Remove the pack base tray.
Read all instructions before installing or using this appliance. Installation Instructions Save these instructions for future reference. Leveling the Range Place the range in its intended position taking care not to twist it within the gap between the kitchen units as damage may occur to the range or the units. Install the oven shelves in the oven. Check for levelness by placing a spirit level or a cup, partially filled with water, on one of the oven grids.
Read all instructions before installing or using this appliance. Installation Instructions Save these instructions for future reference. When checking for proper operation of the regulator, the inlet pressure must be at least 1'' greater than the operating (manifold) pressure as given above. range knows where and how to shut off the gas supply to the range. B If the hot plate grids are fitted, remove them.
Read all instructions before installing or using this appliance. Installation Instructions Save these instructions for future reference. F Connect flexible metal appliance connector to the adapter on the range. Position range to permit connection at the shut-off valve. G When all connections have been made, make sure all range controls are in the off position and turn on the main gas supply valve. Use a liquid leak detector at all joints and connections to check for leaks in the system.
Read all instructions before installing or using this appliance. Installation Instructions Save these instructions for future reference. 4-Wire Conduit Installation Disconnect the supplied power cord from the terminal block and ground post. Keep the terminal block parts; you will need them. Remove the strain relief clamp from the power cord and remove the power cord and strain relief clamp from the mounting bracket.
Read all instructions before installing or using this appliance. Installation Instructions Save these instructions for future reference. Secure the squeeze connector in place in the bracket by tightening the squeeze connector screws. Refit the electrical connection cover. Fitting a 3-Wire Power Cord Disconnect the supplied power cord from the terminal block and ground post. Keep the terminal block parts; you will need them.
Read all instructions before installing or using this appliance. Installation Instructions Save these instructions for future reference. Seal the Openings Seal any openings in the wall behind the range and in the floor under the range when hookups are completed. When all Connections are Completed MAKE SURE THE FLOW OF COMBUSTION AND VENTILATION AIR TO THE RANGE IS UNOBSTRUCTED. Fit a squeeze connector (not supplied with the range), to your conduit.
Read all instructions before installing or using this appliance. Installation Instructions Save these instructions for future reference. Fitting the enamel rear spacer Remove the two fixing screws (3mm hexagonal socket head) and nuts that pass through the top of the rear flue grille. Rear spacer. Fix the splash to the flue grille with the two screws from below and then fit the two end caps.
Read all instructions before installing or using this appliance. Installation Instructions Save these instructions for future reference. Assemble the Grates Retighten the hinge screws. Effect of hinge adjustment – exaggerated for clarity Centre line of hinge pin Oven door omitted for clarity Each grate is different. Make sure that the grates are in the correct position and sitting down.
Read all instructions before installing or using this appliance. Installation Instructions Save these instructions for future reference. Customer care Oven Light Please complete your details in the inside cover of this Guide. Then replace this Installation Guide back in the Customer Care Pack in the correct position. Please inform the user how to operate the range and hand over the Customer Care Pack. Press the Main oven light switch and check that the light is working. Note.
SERVICING - WARNING Disconnect from electricity and gas before servicing. Check appliance is safe when you have finished. How To Remove the Range for Servicing Reverse procedure to reinstall. If gas line has been disconnected, check for gas leaks after reconnection. NOTE: A qualified person should disconnect and reconnect the gas supply.
SERVICING - WARNING Disconnect from electricity and gas before servicing. Check appliance is safe when you have finished. Conversion to another gas This appliance is supplied set for Natural gas. A conversion kit for Propane gas is supplied with the range. If the appliance is to be converted this must be done before installation. The conversion must be performed by a qualified LP gas installer.
SERVICING - WARNING Disconnect from electricity and gas before servicing. Check appliance is safe when you have finished. making sure that the bayonet pins are securely located. set for Natural gas set for Propane gas The regulator may be one of two types. Type 1 Unscrew the hexagonal nut in the front of the regulator. The regulator nut has a plastic snap in converter device on the underside, to convert the regulator snap the device out of the nut and refit the other way up.
Ignition spark generator Left hand bottom element Left hand fan element Left hand top inner element Left hand top outer element Left hand oven switch block Neon indicator light Oven fan motor Oven light switch Left hand oven thermostat Right hand oven thermostat Oven light bulb Right hand oven element ISG LBE LFE LTI LTO LOS NLI OFM OLS OTL OTR OVL ROE Thermal cut out Ignition switches IGS TCO Cooling fan motor CFM Timer clock Broiler controller BTC TCK Broiler switch
Caution: Label all wires prior to disconnection when servicing controls. Wiring errors can cause improper and dangerous operation. Verify proper operation after servicing. Schematic diagram of the Range Read all instructions before installing or using this appliance. Installation Instructions Save these instructions for future reference.
Read all instructions before installing or using this appliance. Installation Instructions Save these instructions for future reference. Technical Data This range is supplied set for Natural gas. A conversion kit from NG to LP gas is included. INSTALLER: Please leave these instructions with the User. DATA BADGE LOCATION: Under the Main oven.
Read all instructions before installing or using this appliance. Installation Instructions Save these instructions for future reference.
U104613-03
Aga Ranges 110 Woodcrest Road Cherry Hill, NJ 08003 USA Technical Support: 800 633 9200 Email support@aga-ranges.com www.aga-ranges.