
User Manual
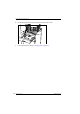
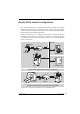
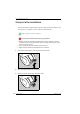
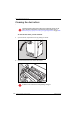
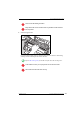
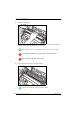
Table Of Contents
- Table of contents
- About this manual
- Introducing the Drystar 5500
- Basic operation (operator mode)
- Advanced operation (Key-operator mode)
- Overview of Key-operator functions
- Stopping the printing process
- Viewing printer information
- Changing the configuration settings
- Printing images
- Saving the configuration settings
- Restoring the configuration settings
- Performing the calibration procedures
- Installation
- Quality control for general radiography applications (DT 2 B & DT 2 C)
- Quality control for mammography application (DT 2 Mammo) (optional)
- Controlling the Drystar 5500 via a remote PC (with browser)
- System description
- Preventive maintenance and replacements
- Troubleshooting
- Equipment information sheet
- Drystar media density response data
- Quality Control Charts
- Remarks for HF-emission and immunity
- Remarks for HF-emission and immunity
- This device is intended for operation in the electromagnetic environment given below. The user of the device should ensure that it is used in such an environment.
- This device is intended for operation in the electromagnetic environment given below. The user of the device should ensure that it is used in such an environment.
- This device is intended for operation in the electromagnetic environment given below. The user of the device should ensure that it is used in such an environment.
- This device is intended for operation in an electromagnetic environment in which the radiated high frequency disturbance variabl...
- Remarks for HF-emission and immunity
- Index

187
2900H EN 20071108 Preventive maintenance and replacements
DRYSTAR 5500/5503 REFERENCE MANUAL
Cleaning the exterior
1 Switch off the Drystar 5500 by following the procedure as described in
‘Switching off the Drystar 5500’ on page 36.
2 Remove the power plug from the socket.
3 Remove the network cable.
4 Wipe the exterior of the printer with a clean, soft, damp cloth.
Use a mild soap or detergent if required but never use an ammonia-based cleaner. Be
careful not to get any liquid in the power cord port.
5 Plug in the printer and switch it on by following the procedure as described in
‘Switching on the Drystar 5500’ on page 34.