
User Manual

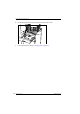
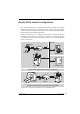
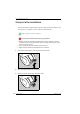
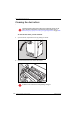
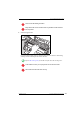
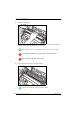
Table Of Contents
- Table of contents
- About this manual
- Introducing the Drystar 5500
- Basic operation (operator mode)
- Advanced operation (Key-operator mode)
- Overview of Key-operator functions
- Stopping the printing process
- Viewing printer information
- Changing the configuration settings
- Printing images
- Saving the configuration settings
- Restoring the configuration settings
- Performing the calibration procedures
- Installation
- Quality control for general radiography applications (DT 2 B & DT 2 C)
- Quality control for mammography application (DT 2 Mammo) (optional)
- Controlling the Drystar 5500 via a remote PC (with browser)
- System description
- Preventive maintenance and replacements
- Troubleshooting
- Equipment information sheet
- Drystar media density response data
- Quality Control Charts
- Remarks for HF-emission and immunity
- Remarks for HF-emission and immunity
- This device is intended for operation in the electromagnetic environment given below. The user of the device should ensure that it is used in such an environment.
- This device is intended for operation in the electromagnetic environment given below. The user of the device should ensure that it is used in such an environment.
- This device is intended for operation in the electromagnetic environment given below. The user of the device should ensure that it is used in such an environment.
- This device is intended for operation in an electromagnetic environment in which the radiated high frequency disturbance variabl...
- Remarks for HF-emission and immunity
- Index

188
2900H EN 20071108Preventive maintenance and replacements
DRYSTAR 5500/5503 REFERENCE MANUAL
Cleaning the dust rollers
To clean the dust rollers, proceed as follows:
1 Open the drum compartment door by pulling its handle.
2 Open the sheet metal cover of the dust rollers.
Cleaning the dust rollers must be done when white lines appear on the
prints. For more information on maintaining image quality, refer to
‘Maintaining image quality and resolving Image quality problems’ on page 220.
Grab the cover at left side to avoid pinching of fingers.